Film cameras
Kodak No. 3A Series II User manual
User manual for Kodak No. 3A Series II. 36 pages in English. Read the original PDF, download or print a copy without registration.
36 pagesEnglish5.3 MB PDF
Loading your manual…Open PDF directly
Document details
- Brand
- Kodak
- Model / document
- Kodak No. 3A Series II
- Document type
- User manual
- Language
- English
- Pages
- 36
- File size
- 5.3 MB
- Category
- Film cameras
- Document date
- Not specified in catalog
Search available document text
Find a term, then jump to its page in the original PDF. Image-only pages may not be searchable; check the PDF for exact wording and diagrams.
Page 1 · Read text
www.butkus.us


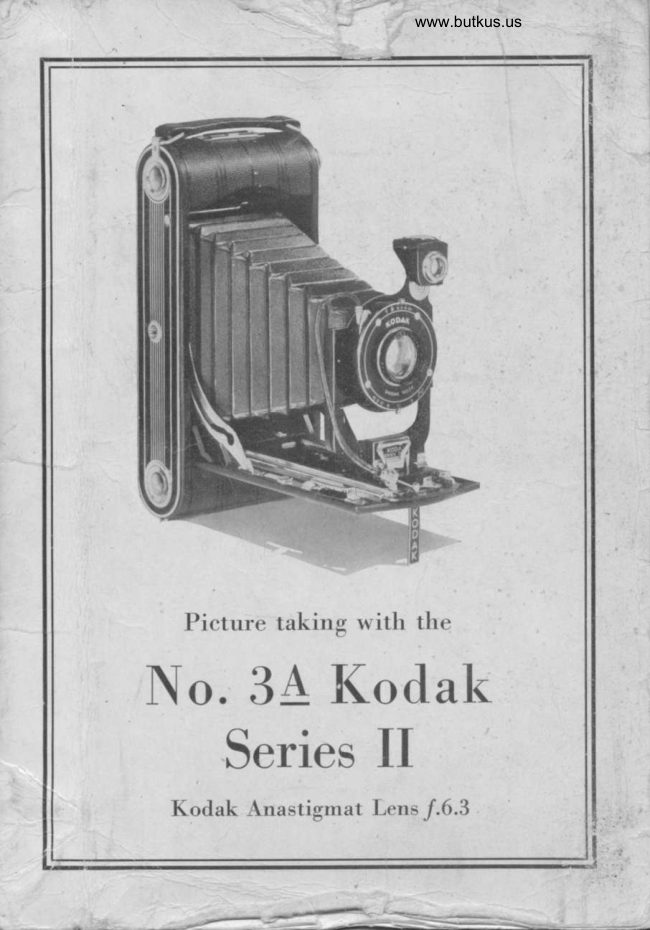
   Picture takine with the
No. 34 Kodak
    Series II
  Kodak Anastigmat Lens /.6.3

-----:f---=-- =-
View original page 1Page 2 · Read text
..               F--I'{,

     The Kodak Anastigmat Lens
           on this Kodak
                       ;'
is as fine an anastigmat lens as scientific re-
search and modern machinery have been able

  1 It was designecl for use in this particular
    Kodak by experts in optical mathematies.
  2 It is made up of tu'o kinds of Jena glass,
    barium cro\\'n and flint-each of the high-
     est quality obtairrable.
  3 It \^'as fashioned by skilled lens-makers
    on machines that grind and polish to with-
     in 1-50000 of an inch of perfection.
  4 It has passed rigid eraminations and
     optical tests required to meet the Kodak
    standard of quality.
  5 ft was earefully fitted and mounted in its
     shutter by erperts so that it will function
    at its best.
 By using your Kodak aeeording to the
instructions in this manual, you will make
consistently fine pictures.
    EASTMAN KODAK COMPANY,
                       RocsBsrER, N. Y.


                                                                                                                                                       ,1
                                              I
View original page 2Page 5 · Read text
n                                                 www.butkus.us


                  IMPORTANT
      pEFORE loading your Kodak with film. and be_
          I-D fore taking any pictures with it, read ihese in_
                                                            learn           structions carefully. - Take especiai care to        how to operate the shutter.
                                     be very careful to           , While loading. and unloading,               the protecliv-e papgr wound tightly around the          [9ep           $lm- tg prevent light stliking it. TEe Kodak can be
         loaded or unloailed in davtignt. This ,t ouia- U"
         done in a subdued light , not ln direct sunlighi.

                     To Loao
           Use film number V 122, SS 122, F 122 or 122 for
         the No. 3A Kodak Series.II.
          Push the button of the lock under the carrying
          handle in the direction of the arrow           inE           back.                           ""a "p.""
                               Draw out the spool
                                        pins, in the end op-
                                  posite the carrying
                                   handle and inserl ttre
                                                  roll of film into the re-
                                      cess. Make sure that
                                  the word "TOP," on
                                the paper is on the
                        same side &s the
                                    winding key, see illus-
                                         trations on page 4.
                                    Push back the spool
                                         pins, so that they en-
                                    ter the holes in the
                                    ends of the spool.
View original page 5Page 7 · Read text
-7
                                         www.butkus.us

                            No. 3A Itodak Series II-5

  Close the back,
pressing it so that
the spring lock
snaps into place,
securely fastening
the back.
  Push the round
slide that covers
the red window on
the back of the
Kodak in the direc-
tion of the arrow.
  Press in and turn
the winding kuy,
watching the red
window. After a few turns, a warning hand will
             appear; then turn slowly until the fig-
             ure I is in the center of the window.
             Push back the slide over the red
           window. This slide prevents fogging
          Super Sensitive Panchromatic and
           Panatomic Film, and makes it un-
             necessary to use the adhesive fabric
included-    with each roll of these films.


  The film is now in position for the first exposure.After each@lexposure be sure to wind the film, bring-
ing the next number into position. This pre-vents
.naking two pictures on the same section of film.
View original page 7Page 9 · Read text
www.butkus.us

                             No. 3A Kodak Series IIl
  When the lens standard is drawn out as far as it
 will_come,-thg indicator will be at the o (Infinity)
 mark on the focusing scale.
  To adjust the focus for subjects al distances
 nearer than infinity, press down and move forward
 the focusing lever, until the indicator over the focus-
ing scale is exactly at the line marked with the
fgtte corresponding nearest to the distance in feet,
between the camera and Lhe principal objecl to be
photographed.
  The distance between the subject and Kodak can
be estimated without measurin[, when the subject
isbeyond f,fteen feet; for instance, if the focus is sei at
25 feet (the usual distance for ordinary street
scenes) the sharpest part of the picture will be the
objects at that distance from the camera. but
everything from about 20 to about 35 feet will be
in good focus.
  For                street pictures the focus may be kept       -generalat 25 feet, but where the principal objecl is nearer
or farther away, the focus s'hould be changed ac-
cordingly
  For distant views set the focus at o (Infinity).
Everything beyond 118 feet is in focus when the
Kodak is set at o, and stop /.6.3 is used. Nothing
nearer than six feet can be focused without using
a Kodak Portrait Attachment, see pages 25 and 26,
or a small stop opening, see table on page 12.
View original page 9Page 10 · Read text
S-Picture taking with the

            Tsn SnumBn


      A-Speed fndicator   C-Exposure_Lever
       B--Stop Opening Pointer D-Cable Release
          Instantaneous Exposures
  Move indicator A to L0, 25,50, or 100 (see Ex-
posure Guide on back cover or table on pages g
and 10). Exposures of llI0 second should not
be made with the Kodak held in the hands; use a
tripod or other firm support.
  Move pointer B to the correct stop opening. See
Exposure Guide on back cover or table on pages 9
and 10.
  Press lever C or the cable release D. This makes
the erposure.
            Time Exposures                                      ((T."  Move indicator A to the letter
  N{ove pointer B to f .6.3,8, 11, 16, 22, 32 or 45,
accorcling to the time of exposure and nature of
View original page 10Page 11 · Read text
www.butkus.us
                                        No. 3A Kodak Series II-9

           the subject. See tables on pages 9, 10, 23 and 27.
            Press lever C or cable release D. This opens Lhe
            shutter. Time the exposure by a watch. Again press
            lever C or cable release D. This closes the shutter.
            For short time exposures from one-half second to
           ten seconds, "Rulb" Exposures are recommended.
                    "Bulb" Exposures
          Move indicator A to the letter '(8."
          Move pointer B to f.6.3,8, 11, 16,22,32 or 45.
          See tables on pages 9, 10, 23 and 27.
             Press lever C or cable release D to open the
           shutter which will remain open as long as lever C
           or cable release D is held down.
          Time and "Bulb" Erposures rnlrst neaer be made
           with the Kodak held in the hands.
          Important: Ir{euer oi,I the shutter. In case of
           accident, return the camera to your dealer or to
          us for repairs.
                     Srop OppwrNcs
          The stop openings regulate the amount of light
           passing through the lens. The openings are en-
          larged or reduced by moving the pointer B, see
H         page 8.
           /.6.3-For rapidly moving objects in bright sun-
              light, use speed 100. Iror exposures on cloudy days
         and during rain in the middle of the day, use speed
          25. For portraits and groups in the open shade, use
           speed 25, see page 25.
            Importanl.' When using stop /.6.3 and the dis-
          tance between the subject and camera is ten feet
           or less, the distance must be accurately measured
            as the depth of focus is limited, see table on page 12.
View original page 11Page 12 · Read text
1O-Picture taking with the
  /.8-For  instantaneous exposures on slightly cloudy or hazy days, use speed 25. For scenes on
 narrow and slightly shaded streets, use speed 25.
 For moving objects in very bright sunlight, use
 speed 100.
  /.11-For all ordinary outdoor pictures, sueh asnearby landscapes showing little or no sky, groups
and street scenes, when the subject is in bright sun-
 light, use speed 25.
  /.16-For open views, when the sunlight on the
 subject is unusually strong and there are no heavy
shadows, such as views at the seashore and on the
water, use speed 50; for ordinary landscapes, in
bright sunlight, with clear sky overhead, use speed
25; also for fnterior Time Exposures, the time for
which is given in the table on page 23.
   f 22-For instantaneous exposures of extremely
distant landscapes, marines, snow scenes without
prominent dark objects in the foreground, and
clouds only, in bright sunlight, use speed 25; for
ordinary landscapes, street scenes or nearby sub-
jects when they are in brilliant sunlight, use speed
10; also for Time Exposures.
  J.32 and /.45-For Time Exposures Outdoors
on cloudy days, see table on page 27. For Interior
Time Exposures, see page 23. l{euer for instanta-
neous erposuTes.
  Failure will result, if stop f .32 or /.45 is used for
instantaneous  erp o 81rr e s.
  The smaller the stop opening the greater the
depth of focus or range of sharpness, see pages
11 and 12.
  All exposures given for outdoor subjects are for -the hours from one hour after sunrise until one


                                                                                                                    ',tFd


                                                                                                                                                                      :
View original page 12Page 17 · Read text
www.butkus.us
                           No. 3A Kodak Series II-15


 To make a horizontal Picture,
turn the finder and hold the Kodak
as shown above. OnlY what is
seen in that part of the finder shown
as white in the diagram, at the
right, will appear in the Picture.
  MerrNc INsteNrANBous ExposuRos oR
               SNepsHors
  When ordinary instantaneous exposures or- snaq-
shots are made, ihe subject should be in the broad,
oDen sunlieht, but the camera must not. The sun
sfiould be lehind your back or over the shoulder'
 If it shines directly into the lens it will blur and fog
the picture.
                                                  are  Special instructions for making portraits
 given on pages 24 to 26.
       HolP THE KoDAK LEVEL
  The Kodak must be held level. If all the subject
 cannot be included in the finder without tiltin-g the letts upwards, move backwards until it is all in-
 cluded with the carnera held leueL See illustration,
 page 17.
View original page 17Page 18 · Read text
16-Picture ttkins u'ith t,hc


                                                                       I


  When ma,king instantaneous exposures or snap- -shots with any Kodak, hold it fifmly against the
body, and when pressing the push-pin orlhe expo-
sure lever, hold the breath for the instant. If the
Kodak is moved during the exposure, the picture
will be blurred.
View original page 18Page 19 · Read text
www.butkus.us
                                         No. 3A liodak Series II-17


I
T


                            Effect produ,ced by tiltiryl the Kodak.
                  If                   subject is below the normal height, like a                     -th.e           small ihild or a dog, the Kodak should be held down
           level with the center of the subject.
                            After an exposure has been
                     made, press in and turn the
                           winding key slowly, a few times,
                                until No. 2 (or the next number)
                                           is in the center of the red window.
                  Closrxc rHE KoDAK
          To ckrse the Kod?k, first move the focusing lever
         back as far as it will go. Unlock the lens standard
         by pushing down on the handle at the bottom of the
          standard and slide it back as far as it will go. Place
          the eable release around the shutte., presJdown the
         bed braces on each side of the standard, and raise
          the bed as shown at top of page 18.
View original page 19Page 20 · Read text
l8-Picture taking with the


  The finder must be in the position for making a
vertical picture, and the lens standard pushed
back as far as it will go. Do not make too sharp
a bend in the cable release, or it may kink.
          RBuovrNG THE Frlu
  After the last section of film has been exposed,
turn the winding key until the end of the paper
passes the red window.


                                                                                                                                                                                                                           I

                                                                                                                          I

                                                                                                                                                                   I


  In a subdued light open the back as shown on
page 3, and holding the paper taut, turn the key
View original page 20Page 21 · Read text
www.butkus.us
                                     No. 3A I{odak Series II-19

          until all the paper is on the roll, see illustration at
        bottom of page-l8. If the sticker folds under the
            roll, turn the winding key to bring it up.


I


        Draw out the spool pin and winding key and
        remove the roll of hlm, by taking hold of the pro-
          tective paper and the sticker, preventing the paper
        from loosening.
          Fold under about half-an-inch of the protective
        paper and fasten it with the sticker.
         "Cinch" Marks: After removing the film from        the Kodak, do not wind it tightly -with a twisting         motion, or'the film might be scratched.
        Wran up the exposed film. It is now ready for
        develoiment. This may-be d-one by ?. photo fin-
          isher, br by yourself. Our Service Department
           *itt be glad ti, send you, upon request, complete
          instructions for developing and printing.
ra          Itnoortanf.' Film should be developed as soon
         as poisible after exposure. The quality of the image
         on'all sensitized products is retained by prompt
        development after exposure.
         Take out the empty spool, first drawing out the
         spool irins which hold it in Place.
View original page 21Page 22 · Read text
20-Picture taking u'ith the


   Slip the empty spool into place at the winding
end of the 'camera, with the slotted end of the
sp<-rol next to the winding key. Draw out the key
to allow the spool to drop into place, and fit the
web on the key into the slot in the end of spool,
see illustration above. Push the spool pin into the
hole in the opposite end of the spool. The camera
 is now ready for reloading.
   It is a good plan to reload the Kodak as soon as
an exposed film has been removed, to be ready for
 the next pictures. For the best results, load with
 I(odak Film.
       TruB ExposuREs-INDooRs
   For Time Exposures and for all exposures longer
 than Il25 second, always place the Kodak on
 some firm support, like a tripod, Optipod, table or
 chair; neuer hold it in the hands. The Kodak has
 two tripod sockets for use with a tripod, an Opti-
View original page 22Page 23 · Read text
--                                              www.butkus.us
                                     No. 3A Kodak Series II-21

          pod. or a. Kodapod. The screws in the tripod sockets
         can'be removea and replaced with a thin coin.


           Place the Kodak so that the finder will include
         the view desired; then focus the camera.
                             This diagram shows
                                 three positions for the
                             Kodak. It should not be
                                     pointed directly at a win-
                                                   -.:::a    dow, as the glare of light
                                           will blur the picture. If                   n   *5     all the windows cannot
                        be avoided, draw the
            Diagram showing positions    shades of those within
                    for Kodak.           range of the lens.
View original page 23Page 24 · Read text
2Z-Pictnre taking with the
  For a vertical picture, raise the name-plate ll,
page 2, on the bed, and place the Kodak on a table
or chair. See illustration on page 21. Do not place
the Kodak more than two or three inches from
the edge of the table or chair.


  To make a horizontal picture with the Kodak on
a table, turn the supporC 12, page-the ?, 9n the edge ofthe bed of the camera, turn      finder, and place
the Kodak as shown above.
                                                    as  Adjust the shutter for a Time Exposure,
described on page 8.
   All being ready, press the push-pin of the cable
release, ot.-ptes. ihe exposure lever carefully' once
to open, time the exposure by a-watch, and again
pru.t the push-pin or exposure lever to close the
shutter.
  After making a time exposure, turn the winding
                                                 redkey until the next number appears in, the
window. If no more time exposures are to be made,
View original page 24Page 25 · Read text
www.butkus.us
                              \o. 3A Kodak Series II-23

        Exposure Table for Interiors
  The following table gives suitable exposures under
varying conditions of light when using stop /.16,
which gives the best average results for interiors:
                     Bnrcnr   Hrzv   Cr,ouoy  Cr,ouoy
                    SuN    Sun    IJnrcnr    Dur,r,
White walls and more
  than one windou'
White walls and onlv                                                 1 min.  one window.
Medium colored walls
  and furnishings and
  more than one win-
  dow.
Medium colored walls
  and furnishings and                           2 mins.
  only one window.
Dark colored walls
  and furnishings and
  more than one win-
  dow.
Dark eolored walls                               1 min.   2 mins.  5 mins.  and furnishings and
  only one window.             20 secs.  40 secs.  20 secs.
               stop /.6.3 give one-sixth;         rylrh
                     ((                  ('                     '(  f .Il       one-half   ;               '  ((             ((                     '(  f .22     twice;             tt                     '(  f .32 "   four times;           ((    ((       ((                                f .45     eight times      .   the exposures given in the table.
  The smaller the stop opening the greater the
clepth of focus, see pages 11 and 12.
View original page 25Page 26 · Read text
24-Picture taking with the

adjust the shutter for an instantaneous exposure,
see page 8.
  The exposures given on page 23 are for rooms
where windows get the direct light from the sky,
and for the hours from three hours after sunrise,
until three hours before sunset. If earlier or later,
the exposures must be longer.
       To MerE A PoRTRAIT
  The subject should be seated in a chair partly
facing the light with the body turned slightly away
from, and the face turned towards the Kodak which
should be a little higher than an ordinary table. The
subject should look at an object level with the lens
or directly at the lens. Compose the picture in the
finder. For a three-quarter figure the Kodak should
be about eight feet from the subject;and for a full-
length figure, about ten feet. The background
should form a contrast with the subject; a light
background usually gives a better effect than a
dark one.
  More pleasing results are obtained if the baek-
ground and surrounding objects are not quite so
                  sharp and clear as the face.
                 This effect is obtained by
        SUBJECT        using the largest stop opening,
                     /.6.3. When using stop /.6.3                   for portraiture, the distance
                 3  between the subject and the
                      lens must be carefully rneas-
                  ured, see Depth of Focus                                                               ooz;   Table on page 12.
                 To get a good light on the
                      face, fclllow the arrangement      -f,
                  shown in the diagram. A re-
View original page 26Page 27 · Read text
www.butkus.us

                             No. 3A Kodak Series II-25

 flector helps to get detail in the shaded part of the
 face. A white towel or table-cloth held by an
 assistant or thrown over a screen or other high
 piece of furniture will make a suitable reflector; it
 should be at an angle and in the position indicated
 in the diagram.
    If the above suggestion for lighting is followed,
 an exposure of about one second with stop /.11 will
 be sufficient on a bright day.
        Making Portraits Outdoors
  When making portraits outdoors, with the sun
shining brightly, the subject should be in the
shadow of a building or a large tree, but with clear
and unobstructed sky overhead, use stop /.6.3 and
 1i25 second. By following this rule unpleasant and
distorting shadows on the face will be avoided.
The best results are obtained with the subject fairly
close to the camera and the camera focused accord-
ingly. When using stop /.6.3 and the distance
between the subject and Kodak is ten feet or less,
measure the distance carefully, see table on page 12.
       Kodak Portrait Attachment
  The Kodak Portrait Attachment is used for
making head and shoulder portraits. It can also be
used for photographing flowers and similar subjects.
   Place the Attachment over the lens and compose
the picture in the finder. Turn the Kodak just a
little to the left, as the short distances at which the
subject must be from the lens make it necessary to
center the subject by eye instead of by the finder.
  The subject must be at one of the distances from
the Kodak, given in the table on page 26. Measure
the distance carefully from the lens to the face,
View original page 27Page 28 · Read text
\
            26-Picture taking with the

         and place the focusing indicator on the scale ac-
           cording to the table.
             Drsrewce Bprwoplv Sun.lnc'r  Tnp FocusrNc fruorcn-
               eNo Lpus MUsr BE         ToR MUST BE snr AT
                  2 feet 6 inches                   6 feet                                                                                      u                      ,   2 "9                    8
               3  "                        .......10             '(                  3u2..                 u               3   4                          l5      '(
               3                 u g u                 .......25      ,,                                                                                                  ,               4                            ......50     (                 u               4                   6                                co(Inf.)
          When making portraits, the most pleasing results
            are obtained with the subject three feet or three feet
            eight inches from the lens, and the focusing indi-
            cator set at 10 or 25 feet respectively. For flowers
         and similar subjects, the shorter distances will be
          more satisfactory.
          The exposure when using the Attachment is the
         same as without it.
               TJse Kod,ak Portrait Attachment I{o.7.4 with the
          No. 3A Kodak Series II.
            Kodak Diffusion Portrait Attachment
          The Kodak Diffusion Portrait Attachment is a
           supplementary lens used in the same manner'as the
            regular Kodak Portrait Attachment.  It produces a
            true, soft-focus effect.
            Use Kodak Diffusion Portrait Attachment I{o.74                          1
           with the No. 3A Kodak Series II.
               t'Ar             HouE wrrH Youn Kot.tr<" is a booklet con-
           taining many diagrams and illustrations showing  -zt;:
           various lighting effects. It gives suggestions for
          making pictures in and around the home


Lr&&        --           , 'S
View original page 28From the M. Butkus archive. Original publisher and archive notices are retained.
Check the model and edition against your equipment.
PDF verified 2026-10-10.