Film cameras
Kodak Panoram No. 3A User manual
User manual for Kodak Panoram No. 3A. 26 pages in English. Read the original PDF, download or print a copy without registration.
26 pagesEnglish1.8 MB PDF
Loading your manual…Open PDF directly
Document details
- Brand
- Kodak
- Model / document
- Kodak Panoram No. 3A
- Document type
- User manual
- Language
- English
- Pages
- 26
- File size
- 1.8 MB
- Category
- Film cameras
- Document date
- Not specified in catalog
Search available document text
Find a term, then jump to its page in the original PDF. Image-only pages may not be searchable; check the PDF for exact wording and diagrams.
Page 1 · Read text
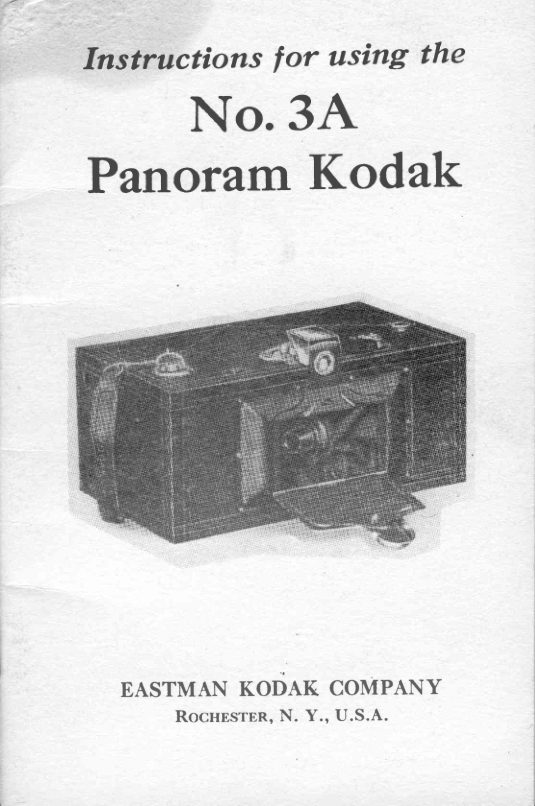
Instructions  for using the
   No.3A
Panoram Kodak


   EASTMAN KODAK COMPANY
         RocHBsrER, N. Y., U.S.A.
View original page 1Page 2 · Read text
"Kodak"
            TRADE MARK
                    1888

 EASTMAN KODAK COMPANY
        RocnBsrnn, N. Y.

          fu.Ianufacturersof
KO D A K   B R O W N I E   A N D
G R A F L E X     C A M E R A S
CINE-KODAKS KODASCOPES
KODAK FILM  VELOX  SOLIO
EASTMAN BROMIDE PAPERS

 KO D A K   F I L M   T A N K S
 EASTMAN  TESTED  CHEMICALS
 KODAK DRY MOUNTING  TISSUE
 TRIPODS  AND  OTHER  PHOTO-
      GRAPHIC MATERIALS


      Trade Marks Reg. U. S. Pat. Of .


                                                       April, 1926.
View original page 2Page 3 · Read text
;
          i         ..KODAKERY''        . :
              i  A monthty  magazine   that  teaches how  to  tnahe
              i better  pictures,  will  be senf FREE OF CHARGE  to
            i,      anyone  flho  buys one ol our amateur  catnetas Itom
              i a d.ealer in photographic   goods,  if  this blank  is filled            ;l        out and sent to us within  30 days trom  the date the
              i catnera was bought,
              i              EASTMAN KoDAK  coMPANY.
                   i
     iro r'B EesrueN                    [::ffif3ilTlnJ'"o**.
                         ii,   Acceltting   yourofrer,   please  put  tny flame  olr the  malllng,    llst
                    j /ot   " fbnakbRY        "  ( lrirh  the understandlng     that  there   ls to be
                    i no cost to me),   I having  bought  4
           lrt  i
     E i
         rr { ,i "'              """ii<ii,h';i'c;;;;;i
                 l L l
            ILo i
          r   I from.
              i     i                       (Name  of Dealer)
           ! t ,
     F ;
                    i o n . . ,
                :                             (Date Here)
                 Print  your  natne and addrets   plainly:


                   i  No'e-KODAKERY    will be sent for ono year only on thir ofier. After
                   i thrt th" aubscriptionrrrice will be sixty centgfor one year or one dollar
                   i for two years,but you are under no obligation to renew'-E'  K' Co'

             No. 36G26.
       lForm
               I
                     I;t
View original page 3Page 4 · Read text
Instructions  lor  usin!, the
    No.3A
Panoram Kodak


            Published  by
BASTMAN KODAK COMPANY
      Rocnps'rBn, N. Y., U.S.A.
View original page 4Page 5 · Read text
C O N T E N T S
Descriptionof PanoramKodak       ......   5
Loading the Kodak. . .                    6
Making the Exposures                 11
Removing the Film                            tb
Finishingthe Pictures..                        lg
View original page 5
Page 6 · Read text
Order Film bv Number
     T-\HE  No. 3A Panoram Kodak takes the same
           I   film cartridee as the No. 3A Autographic
     Kodak.
      A 122is the number of the film for the No. 3A
    Panoram Kodak-the   six-exposure spool for
      three Panoram picturest'aA4 *tlg*lift-exposure
     spool |or f.uepictures.
          All Kodak Films are distinguishedby numbers
     on the endsof the cartons.
}       This number is also on the back of the Kodak
     and on the red pa,perof the cartridge
View original page 6Page 8 · Read text
No. 3A Panoram Kodak 5
      Description of the No. 3A
        Panoram Kodak
   HE No. 3A Panoram Kodak  is a eamera of
  I   f"*  parts.  Its operation is Yery simple and
good pictures will be obtained from the begin-
ning, if the directions given in these pages are
carefully followed.
  Befoie loading with film make yourself familiar
with the camera and its parts. Go through  tfe
instructions .step by  steP, and make  all  the
movements called for.
   In Figure  I on the opposite P&ge, 4 is the lens
flap or cover; this has been drawn down to un-
cover B, the'lens and shutter which are a unit.
The lens and shutter unit  is driven by a spring
which  is "set"  by moving the tension lever C
from one side to the other. The finder D with  its
hood raised, shows part  of the view as  it  will
appear, within  the  limits  set by the lines EE,
wtiich indicate the scope of the view.
  Pressure on one'of the shutter release buttons
FF releasesthe spring, causing the lens and shut-
ter to revolve in the opening and expose the film
which extends across the back of the camera in a
semi-circle from G to H. G is one of the spool
pins on which the spools revolve (there are two
bn the under side of ihe camera). H is the wind-
ing key, which draws a new section of film into
poiition  for an exposure, and winds the exposed
htm on  to  the empty  reel.  The  indicator    I
pointing to either "F"  or "S" changes the speed
 ilt tne shutter, making a fast or slow movement
as needed
View original page 8Page 9 · Read text
J is a TJevel  for. lev_ellilg the camera, verti-
  eally and horizontally. Xti  i." concealedsprings
  for openine the baek and ;;;;.    i;;h;;iryi"s  handle.
     In the back gf th-e eamera there is a srnall red  window through             "Tripodwhich  th.            of the firm can be seen.         ,o-.[uT,"u-berro, r,hai;;   ;;" cameraon a tripod in the horizontat
  positionsare provided.            ""a "L?trror
   Having gon_eover the cameraand observedthe movementsof its various parts, read the dil.- tions for loadils, gxpqsing-;;j   ;;I;"a,"gl'""A
 without any fi-lin in^ tho zuntlrr, make all ttre movementscated for. In this way the.L *il"t"
  little, possibility_of spoiii"g      filh"tfidh      ;" unintentionalexposure.   "rv

        Loading the Kodak
 TgB    No. BA palroram Kodak, like all other
   I  Kodaks,.u"  t uioil;   u"?,rrrroadedin dav-
 lie.h!. Thes'e operation.-;hild-                    Til;;^     -  fftusubdued light, not  in  direJ  sunlighf.   iii.
camerausesthe regular BA Kodak FR;;; N;.^ i 122-,the six- and i"en_exposu.",poo6- ilr^;h;"v'^rv\and five Panoramexposure.,urp.'.ti".fy.'
    l. To open the Kodak unhook the carrying
h.andleand press the ;;;r;;i;;   spnnss KK  atthe rear..upper corners of th;  ;IJ;;l"ni*.t1i;
p.a,ge7, allowing the back to drop ctownand theurrusrclesto srving out, as in Fig. IU;  pag;^-.w.s


                                                                                   . , -   ,   . i ' ! ,
View original page 9Page 10 · Read text
No. 3A Panoram Kodak 7


                                 Fig. II.

  At each end of the I(odak is a recessfor the
film spools. In  the recess near the  carrying
handle is an empty spool. This servesas the reel
onto which the film is wound after exposure. The
full spool is to be placed in the opposite end of
the camera


                                         I'-ig. I I I.
View original page 10Page 11 · Read text
8 Pictrrre trrkine with ttre

    2. Stanrl the earnera on the ca,rrying hanclle
 end and clraw out the spool pins nearc,stih* other.
 end, &s far as therywill ccrme,l,'ig. I V.


   ll,aise the top e1d a,nrl the safertyJrlate under    anrl insert the filrrri!,                      .gg!14$c,  ris'-ii'io*.     9.I3e sut'ethat the word "'IOP"'prindd    ,,.r ifr.  r.etl
paper rs next to the winding'intok.y  side of the
camera. Push the- spool pins      plur. and see
that the spool revolvbs frebly.
   3. Remove the band that binds the filrrr and
lead the red paper over the  rolior, ;k"rg   th;
semi-circular guide strips, over the .uri.r    the
      eld, and thread it into the to"l)itp.ri'g"t9t!9.
in the slit of the empty reel, Fig. vI,  pug.-io.
View original page 11Page 12 · Read text
No. 3A Panoram Kodak  9


          F-rg. V.


  From the time the band on the fresh roll  of
film is broken, until the eamera is closed,keep the
red paper wou,nd tightly on the roll.   If   it should
loosen, light will get in and fog or ruin the film.
   4. Turn the winding key once or twice-just
enough to bind the paper on the spool. The
paper should now be in the position shown in
Fig. VI, page 10. Be sure that the film follows the
View original page 12Page 13 · Read text
lO I'ictrrre trrkirrgu'itlr tlrc


           l"is. \  I.

cY'c,ularguide stt'i1tsalrd rs ?rof at'otutrltlr(, ot(txirle
of the thiclt corrlet.1toxt.s.
  5- close the e'ds anrl back antl r.ellla(:.thccarrying hanrlle.
  6. After cl'sing the car.or.Atu.'  the r'irrrlirrg
k.y  about  fifteeri tirnes, or. until-- tl;;  ri[u,..   Iappears in           the rerl rvinrlow i'  the' lrack irf the           'I'hecarnera.       filnr is now  r.olr(l\'l''l.the  fir.stpreture.
View original page 13Page 14 · Read text
\o.  iJ.\ I'rrtr<)r'runIiorlrrk  I I

           Nlaking the Exposures
       T1IlI,l    l'anonlln  Iioclak as the  rril.lrrcirnlllit's, is
              I   for  rvitle out-cloor vicrvs rvith ttrc sulrject ut
      least  ttrerttrl .fed  .l't'tttttthe cu ntaret  unrl  is  for'
       ittstatrtattt'ous expo,{ul'econly.         'fhe            sun rrrrrst llt' behinrl the  lracli ol' o\'('l' the                        'l'his       sltoulclcr'.           is  lr)orr) iurperutive   rvith  the
      Panorarrl  liorluli  thlrn  rvith ordinal'y  ea,rnol'rLs,as
      thc  letts tII()v('lrretrt rrrakes shurling  of  thc  k'ns
       Irlnrost irnpossilllt, ancl prevents  the  taking  of
      llictures torvar'rlsthe light.
             l.  I)r'o1lthc lerrs covor' or' fl"p untl laist' the
     hood of the finrlcr to a right angle.
        2. "Set" thc shuttc'r'lry nroving the'tension
     lever'11,Fig. I, page-[, frorrrone sicleof thr. sklt irr


I
View original page 14Page 15 · Read text
12 Pieture taking  with  the

which it travels,                  !o the other (Fig. VII, page 11.)
Be sure to move it all the waa-until     it clictci.
  The shutter is always_"set," ready for an expos-
ure, when the lens and the tension lever are on the
same side of the finder.
  Be careful not to touch the release lever on the
opRo-siteside until ready to make an exposure, or
the shutter will be released.
View original page 15
Page 16 · Read text
No.   jl'\  I':lnorrrttt  liorl:tk   1:l

                                                           'Io\'-shapctl  lint's on the top  of the canlera.     see
this vielv in the  finrlt'r the camertr, will have to be
turnecl  caref trlly   f t'ont  sitle to  sicle, wittrin  the
limits set bv the \'-shapetl lines.
   3.  All lreing reacly for the exposul'e:
                Hrrltl the  lioclak  steatful,
                llolcl   it  lert'l.
ancl press the  shttttt't'  t'elease lluttorr--the   one
fartltest   f t'otn the  tt'ttsion lever.   7' h is  tttuA'esth e
exI)0sure.


                               Fie. lX.
   Inrnrecliatelyl,fter an exposure, wind another
section of filrn into position by turning the wind-                          'nuntbe?'ing key until the ne'xt odd       appears in the
red window-  alrout six turns.
  Repeat these operatiotts for each exposure.
Remember always to turn the winding key until
an odcln"urnlterappears in the window.
View original page 16Page 17 · Read text
14 Pieture takine with the

   The letters F and S indicate the speed of the
 shutter and the indicator should be moved trf ,,p-',
 or "S" for a fast or slow exposure.as,"qrrGd.
   Use the "S" or slow expoiure for  all b.airrarr.
 or average subjects.
   Use the "F"  or fast exposure for views at the
 seashore,on t_!re,.water,and for very distant views
 when the sunlight is unusually bri[ht.
         Panoram  Group  pictures
   The No. 3A Panoram Kodak is unequalled for
 photographing                     out-door groups. The angie              J?.gg
 of view is so wide that a great-number of neofile
 can be inciuded without standing one in frbnt'of
 another.
  The subjects should be in a semi-eircle, each
 one the same distance from the camera, and this
 distance must never be less than twenty feet.
   A. quick- and easy.way to get the group in true
 semi-circular form                         tg swrfg a piece of  stri.rg                                    i.
not less than twenty  feet, from u pug near thl
camera, or           -held by an assistant, and fne up the
BJoup on the arc described by the free end.  If
the group is unusually large the subjects can be
arranged two, three or four deep. The tallest in
the rear and the shortest in  tlie  front  rank  to
avoid covering any faces.
  Avoid horizontal lines in either the foreground
or the background.                     away from a slraight                    $u.p
board fenee or  a  clap-boardbd house.  Srl'ch
backgroun4s are undesirable with any camera
and  especially so  rvith  the Panoram Kodak.
T1eeq,_shrubbery,or an open space are the most
suitable.
View original page 17Page 18 · Read text
No. ;lA panoram  Iiodak  lE
                  Vertical  Panoram  pictures
 iJ,         FoI              subjects  that  have more  height  than             .                    -
       breadth, such as a high waterfall, a iavine  ort#
       n?-{rgw gorge, or a high mountain, the Iiodakw
         will have to be operated in a vertical position.
      Stand the camera at eye level, on a tiipod^of  orw    other firm support, and adjust the hood    the
       finder to an angle of 4b degrees (where  it  will
       cateh), and look into the mirror in the hood of
       the.finder,_-wherean inverted view of part of the&       subject will'be seen,
k        With  the camera in this position the usidth of
       the picture will be shown, while the height and
        {gqth_ryill be indicated by the V-shaped lines
       (EB,.FiS.  1, page 4).   .q. littte experirhent and
       practice will yield some interesting- and pleasing
       results.
           Removing the Film
      \I/HEN     changing the film in the Panoram
      V y  Kodak  keep out  of the  direct  sunlight.-
     The change should be made in subdued light.
                l.  After the last exposure has been made (No.
      5 on a six-exposure roll and No. g on a ten-
      exposure roll)  give the winding key about  six
      turns or until the end of the red paper passesthe
     window.
          2. Open the back and sides of the Kodak. see
      Figs. II and III, page 7.
         3. Hold the paper taut and turn the windinE
     key until  all the red paper is on the reel and  i
    gummed sticker appears. Hold the end of the
      paper and the sticker together to prevent the


                                                                                                                                                                                                                                                                                                                                                                      , , f -: : -r.,{a'_                  -.    iir:' - t         ' ;   r  -   ,:
View original page 18Page 19 · Read text
Pieture

 paper from looseni.g.   If the sticker folds under
 thg r9!1, turn the winding key to bring  it up.
   4. Draw out                   spogl pin and winding key to                 lhu release the                and lift out the roll of exposed             lpoo_l,
 film, as in Fig. X.


          Fig. X.        "
  5. Fold under about half-an-inch of the end
of the red paper, to make subsequentbreaking of
the seal easy, and fasten with the sticker.
View original page 19Page 20 · Read text
l{o.  3.\  l)iux)t':lr)r liorhrk  l7

   6. Wrap up the exposed filn  irnrnerliatt'ly t<r
protect it florn light ancl dust. The filnr is now
ready for developing and printing.
   7. Renrove the enrpty spool, first drawing out
the spool pins, and put  it  in the recess in the
other end of the carnera.  Fit  the web on the
winding key into the slotted end of the spool, and
the spool pin into the other end.
  The l(odak  is now reacly for reloading.
  Importanf,.'   l,'ilnt should be developerl as soon
as possible after exposure, as the quality  of  all
sensitized products is retained by,prornpt  devel-
oprnent after exposure.

  rr thenr,"                           , trinewhentaken from the";;c;:;l',#::-:ocatnera, there is an inclirration
to take the cartridge in the hand and wind   it
as closely as possible, "cinching"  it tightly with                     'fherea twisting nrotion.          is nothing rlrore likely
to injure the negatives than this tight drawing of
the  filnr, as  it  rubs the  surface, making  fine
parallel  scratches, rutttting  lengthwise  of  the
filrn, which, in sontecases,will ruin f l1p111rgatives.
Do not "cirlch" the curtridge. It  sirrrply rreedsto
be wound tightly  errough to keep tlte retl paper
within the flarrgesof the spool.
      Keep Dust Out  of the Camera
    It  is advisable to wipe out the inside of catuera
occasionally with a slightly darnp cloth, espe-
cially  if the carnel'a has not l)ee'nusetl for sottte
time.


                                                                                                       -. r. ...i-:-:--'.  .,.,:-,
View original page 20Page 21 · Read text
r
        Finishing the pictures
 tl-I{E|,F)             are two  distinct steps in the making
  +,      of photographs-the   pictur-e taking and the prcture         Jtnzshing. To free our instruction  books
 Irom unnecessary detail,q, which might be con-
 fusing, we furnish with  th'e camera ttie directions
 for picture taking only.
   These instruetions are ample for the handling
 of the camera under  practically   ali  ;";aiii;;.
 Similarly, those who'wish   to  do  their own
 developing and  printing.  will  find            -  luit
 rnstructrons &ccompanying  the  Kodak"q"uiiy Film
 Tanks (for developing in aaytight).
      develop film (No . A  lZ2) used in the No. ^ ^To
JA Panoram Kodak,  obtain a Brh_inch Kodak
 Film Tank.
     If           tray  or dark-room method  of develop-     ,the
ment  is preferred, the following  articles  wiil be
needed:
     I Kodak  Safelight I4-p    (electric),
  4 No. 3A Pano!?mDev-eloping                                            -    Trdys, BrfxL2,
     I Eight-ounce Graduate,
     I Stirring Rod,
  1 Package Eastman SpecialDeveloper powders,
  I-PackSSe Kodak Acid Fixing powder,
  Vgfox Paper, size Zr/xLl,
     I Four-ounce Bottle Nepera Solution, for de-
      veloping Velox,
  1 No. 3A Panoram Kodak  printing  Frame,
      3L/2x12.
              with our plan and purpose to pro- .In.keeping
vide the users of our cameras with         helil in
                                    "vety
View original page 21From the M. Butkus archive. Original publisher and archive notices are retained.
Check the model and edition against your equipment.
PDF verified 2026-10-10.