Film cameras
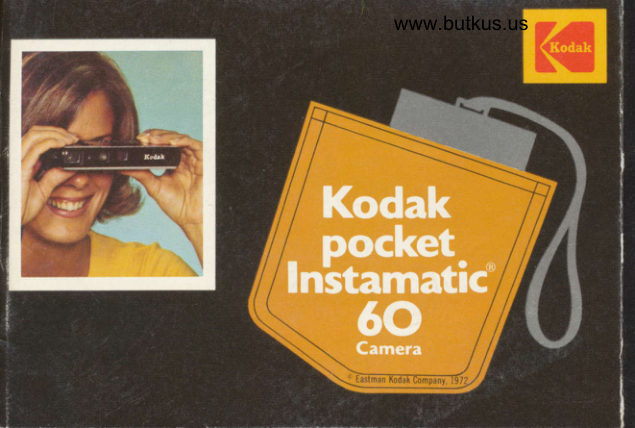
Kodak Pocket Instamatic 60 User manual
User manual for Kodak Pocket Instamatic 60. 34 pages in English. Read the original PDF, download or print a copy without registration.
34 pagesEnglish4.6 MB PDF
Loading your manual…Open PDF directly
Document details
- Brand
- Kodak
- Model / document
- Kodak Pocket Instamatic 60
- Document type
- User manual
- Language
- English
- Pages
- 34
- File size
- 4.6 MB
- Category
- Film cameras
- Document date
- Not specified in catalog
Search available document text
Find a term, then jump to its page in the original PDF. Image-only pages may not be searchable; check the PDF for exact wording and diagrams.
Page 2 · Read text
Congratulations! You've just joined millions of Kodak camera owners who
have fun taking pictures. At Kodak, we know how important your pictures
are to you. To help make them the best possible pictures, we hope that
you'll read this manual thoroughly.
  With your new camera, you enter the exciting world of existing-light
photography. In any light, the electronic shutter automatically times each
exposure. When taking pictures in low-light levels, an amber light will ap-
pear in the viewfinder as you press the shutter release. This indicates an
exposure too long for you to hold the camera in your hand. For these expo-
sures, follow the instructions on pages 9-12 and you can take pictures like
this without flash:
  Chances are you've never used a      THIS           NOT THIS
camera with an electronic shutter
before, so be sure to follow the in-
structions carefully. If you don't,
your pictures will be blurred.
   If you feel that you need help or advice on using your camera, please
write to our staff of photographic experts at Eastman Kodak Company,
Photo Information, Dept. 841, 343 State Street, Rochester, New York
14650. (Should your camera ever require service, the warranty and instruc-
tions for obtaining service are printed at the back of this manual.)
View original page 2
Page 3 · Read text
Fold out this page for rcfercnce                  www.butkus.usCABLE.RELEASE
asyou read the manual.


                   WRIST STRAP                                  LEl{S    ITIAGICUBE SOCKET
                                                    ELECTR]C EYE


                                TRIPIOD SOCKET


 Optional case (page22l


                                                                         FlLr| ADVANCE Equipment subiect to minor aPpearance changes
View original page 3Page 5 · Read text
to use Aour eo.fiaero, sitnplg do this . . .


                                                       FILM ADVANCE


   Insert film cartridge to load     Push FrLM ADvANCE repeated-
camera (page 4). (Note EXPo-   ly until first exposure locks in
suRE-coN TROL BATTERY-battery-    place (page 5). You may need to
check instructions on page 21.)   press the sHUTTER nEr-pnsn be-
Close back cover.                    fore you can advance the film.
View original page 5Page 6 · Read text
'-j.,^  , r(  iv>    ?-7 o  ''!''i'.www.butkus.us3


            FOCUS SLIDE


3 Set camera-to-subject distance   era steady; slowly depress shutter
(page 7).                           release-if amber indicator light
                                appears in finder, place canxera
 I Aim through eye-level view-  on firnt sltpport (page 12) or in-
finder for bright, clear image of   sert magicube. Smoothly depress
your subject (page 6). Hold cam-   shutter release to take picture.
                                   read on for important instructions
NEVER F(IRCE ANY CAMERA OPERATION;  CHECK INSTRUCTIONS F(lR (IPERATI(}N.
View original page 6Page 9 · Read text
lolrding eo,m,erlr-


   www.butkus.us


               LATCH                     2 After removing the 110 car-     /                                        tridge from its box and protective
I Open the hinged back cover   wrapping, insert the cartridge in-
by depressing the lercs and low-    to the camera as shown. Close the
ering the cover.                   cover by pressing it against the
                              camera body until it locks. (The
                                    film name and number of expo-
                                  sures appear in the wntnow in
                                    the cover.)
View original page 9Page 10 · Read text
www.butkus.us

                                                        wtNDow


         FILM

                                 ber that you see serves as an ex-
3 Push the FILM ADvANcE re-   posure counter.
peatedly with your right thumb                             wrist stro;puntil the advance locks-about 8                   A removable wRrsr srRAP, pro-full strokes. (You may need to                              vided for your carrying conve-press the shutter release before
you can advance the film.) You   nience, is furnished with the cam-
will see arrows in the window as    era. Attach the strap to the wRrsr-
you advance the film. The num-   srRAP cLrP. (Keep the wrist strap
                                 behind the front edge of the cam-IMFORTANT: Always operate the film
advance until it locks, or you cannot    era, especially when you take ver-
depress the shutter release.               tical pictures.)
View original page 10Page 11 · Read text
and extended exposures may ap-
oiewtinder                  pear in the viewfinder as you
                                     press the shutter release.
A bright, eye-level, optical view-
finder provides an easy-to-view                   VIEIVFINDER
image of your subject. The image
seenwithin the ruvrNous FRAME
will appear in your picture. (For       f,*-^"rr
better centering of your subject !::?BULBat distances closer ihan 6 flet,                   r*"J\l
position your subject slightly to                 L-Jthe left of center in the viewfinder
for horizontal pictures, or slightly          FusH oR nME
above the center for vertical pic-
tures if you hold the camera as
shown on page I 1.)
  Warning lights for used bulbs
View original page 11Page 12 · Read text
www.butkus.us
                                    tance. There are two ways of fo-
tostsing eannero.              cusing your camera-rangefinder
                                  focusing and scale focusing. For
For the sharpest pictures, you   close-up pictures (especially with
will need to set (focus) the camera   flash or in low-light levels), you
lens for the camera-to-subject  dis-   must focus the camera carefully.
                              Rongefinder focusing-Look at
            FOCUS SLIDE            your subject through the view-
                                       finder. In the center of the finder
                            you will see a circular area with
                              two images of your subject. Move
                                   the rocus sLrDE until the two im-
                              OUT OF FOCUS    CORRECT


                                                                                                                Digitally signed by Mike Butkus
                                                                                    DN: cn=Mike Butkus, o=Butkus camera manuals,
                                                                                                         email=mike@butkus.org,                                                                                                              c=US           Mike Butkus  ou=butkus.org,Date: 2021.04.12                                                                                                                   21:07:22 -04'00'  HH
View original page 12Page 13 · Read text
ages coincide; you have set the
lens correctly for that distance.   shutter release
Scqle focusing-Estimate the cam-
era-to-subject distance; then move  To prevent accidentally releasing
the Focus sLIDE until the red   the shutter and losing an expo-
                                                    RELEASEpointer is opposite the estimated   sure, lock the ssurrER
distance. (You can use either the   of your camera by pushing lightly
footage scale or the metric scale.)   against the side of the release to
                                        slide it toward the camera name.
                   A cABLE-RELEASE socKET is
d,ouble-eg.eosrrre              provided for smoothly releasing
preoetn,tion                       the shutter when the camera is on
                               a firm support for long exposures
You never lose a picture by dou-   (page 12). The mark Go-) along-
ble exposing a frame. After tak-   side the shutter release and above
ing a picture, you must operate   the viewfinder indicates the film
the film advance until it locks, or   plane within the camera.
you cannot take another picture.
View original page 13Page 14 · Read text
www.butkus.us
 autotno,tieo,llg tirned, exposures  . . . in ang light

Your camera's electronic shutter   or 2) place the camera on a tripod
and lens opening are set auto-   or other firm support for a long
matically by the light existing in   exposure (page 11).
a scene. The shutter speed ranges    While taking pictures, don't
from | 1250 second to 5 seconds  cover the ELEcrRrc EYE, and
or longer. The camera's amber   don't point the camera directly
indicator light (rresH on rrvn)   toward the sun or other unusually
comes on ds you press the shutter   bright light source. Otherwise,
release when the exposure will be   exposures will be incorrect.
                           (the light    When taking pictures outdoorslonger than I l30 second
remains on during exposure).   in bright sunlight, the shutter
When the indicator light comes   speed will usually be fast enough
on, you have a choice-1) insert a   to stop motion (for example, peo-
magicube (page 14) and take a   ple walking or children playing).
flash picture (from 4 to 30 feet),   The bright sunlight will also cause
View original page 14Page 15 · Read text
the automatic exPosure control to
    set the lens to a small oPening.    tll,lsing the picture
   The small opening Produces a
    large range of sharPness in Your   o Unlock the shutter release.
     pictures.                                o Set the focus slide for the cor-
                                    rect camera-to-subject distance.
       Store your camera and film awaY    o Bring the rear opening of the
      from heat and direct sunlight-     viewfinder close enough to Your               the glove comPartment,               in       never                                      to see all four sides of the                              shelf, or in    eye               rear-window     on         the       any other "hot sPot" in a car.       LUMrNous FRAME in the finder.
                               Then frame your subject (within
                                        the luminous frame) the waY You
    NOTE: The color films listed on page 3   want it to appear in Your Picture.
                                                                                       1 10-fi1m     are intended primarily for daylight or  With the rectangular
      blue-flash illumination. Pictures taken   format, compose Your Pictures                                    orange;                    light may appear     by        tungsten                                             or vertically                                           ap'   either horizontally                                light may     pictures           by fluorescent
     pear green.                    by holding the camera as shown
10
View original page 15Page 16 · Read text
www.butkus.us
here (keep both hands and the
wrist strap behind the front edge
of the camera).
o Hold the camera steady and
partially depress the shutter re-
Iease (the indicator light may
come on momentarily as the elec-
tric eye adjusts for the lighting
condition). Il the amber indicator
light does not come on and re-
main on, gently s-q-u-e-e-e-z-e the   For                     For
shutter release to take the picture.    Horizontal                 Veftical
Don't jerk the catnera by punch-    Pictures                  Pictures
ing the shutter release or your
pictures will be blurred. (To hold   your body, and momentarily hold
the camera extra steady, stand   your breath while you take the
still, keep your elbows close to    picture.)
                                                                             11
View original page 16Page 17 · Read text
IMPORTANT: If the amber indica-                }"-                                          tor light (nlesu oR TIME) comes
                           on and remains oo, Place Your
                                 camera on a triPod, a solid flat \B                                          sllpport such as a table or wall
                 (-                  (keep the camera near the edge
                               so the support won't apPear in
                              your picture), or the oPtional
                             Koonr Compact Camera Stand,
                               Model 2 (with cable release)' In-
                                                    stall a cable release in the cABLE-
                                 RELEASE SOCKET. T\CN hOId thc
                                    cantera lirrnlY on its srtPPort;
                                           press and hold the cable release
        www.butkus.us                           (or shtttter release) until the indi-
                                        cutor ligltt goes out. AnY cqmero
                     Camera              ComPact        Kooax    The                                      Stand,   or subiect movement during exPo-                                     provides                   cable release),         2 (with     Model      firm support and adjusts to any position'   sure will couse blurred Piclures.
T2
View original page 17Page 18 · Read text
www.butkus.us
o Push the film advance with
your right thumb until it locks
(lVz strokes). To be ready for the
next picture, hold the camera at
eye level while you advance the
film.
             FILM ADVANCE


                                'F                       (
                                      Your pictures will be more interest-
                                           ing if you include close-ups of peo-
                                                  ple. Move in as close as 3 feet.-r--
  IMPORTANT: Do not hold your    -K'h   finger on the shutter release while
  you advance the film.
                                                                     13
View original page 18Page 19 · Read text
IMPORTANT SUPPLEMENT tO
             Your Instruction Manual
A separate BATTERY-CHECK BUTTON has been added to your KODAK
Pocket INSTAMATIC@ 50 or 60 Camera. Follow these instructions for
checking the battery rather than those given in your instruction manual.
    Depress the green BATTERY-CHECK BUTTON, located near the
FILM ADVANCE on the underside of the camera. lf the battery is good,
the green light next to the button will glow. lf the battery is weak, dead,
or not installed in the camera, the light will not glow. (Sometimes this
green light may glow while you are taking flash pictures. This does
not mean that the battery is good-you must use the green button to
check the battery.) To become familiar with the battery-check feature,
test your camera battery now, and again periodically.

Consumer Markets Dlvision              Rochester, New York 14650

 Pt. No.633191
394-1-73-AEX                                                               Printed in U.S.A.
                KODAK and INSTAMATIC are trademarks.
View original page 19Page 21 · Read text
30ft     flcrsh pictures                         4tt
   Your camera features easy, rapid                -
     flash picture-taking with the self-
   powered magicube. As you ad-                                                   J
    vance the film, the cube rotates
                                                                                                     Under-    counterclockwise to bring one of                  fl5:"?'                                               Overexposure ;,.;"'      its four bulbs into firing position.             (too light)                  (tooexposuredark)                                                                          t-jorii,..      For the most pleasing vertical-
    format flash pictures, hold the   with all the films listed on page 3.
    camera as shown on page 1 1. This                                     CIhe camera battery-see page 20
     positions the magicube above the        be good to set the correct         'l                               -must    camera lens to help prevent un-   shutter speed for flash pictures.)    usual shadows in flash pictures.                                                                          I                                     IMPORTANT: Be sure to use only the     When you make flash pictures,                                             self-powered magicube. You will dam-   the camera-to-subject  distance   age your canrera if you try to use bat-
       trtttst he between 4 and 30 feet    tery-powered flashcu bes.t4
View original page 21Page 22 · Read text
www.butkus.us
                     2 Set focus slide-The camera-
                                         to-subject distance must be set
                                        correctly for proper flash expo-
                                            sure. If you are closer than 4 feet,
                              your subject will appear very
                                              light (overexposed) in the picture;
                                           farther than 30 feet, your subject
                                               will appear dark in the picture. If
                                  you do not set the focus slide cor-
                                            rectly, your pictures will not be
     I   lnsert mogicube-Insert a cube   sharp or correctly exposed.
     into the socket on top of the cam-
il   era; then press down on the cube  3 Toke the picture-Bring the
     until it snapJocks in place. (If a   rear opening of the viewfinder
I   used bulb faces forward, rotate   close enough to your eye to see all
    the cube until a fresh bulb faces   four sides of the luminous frame
    forward.) To remove a cube, sim-   in the finder. Then frame your
    ply lift it oft the camera.             subject the way you want it to ap-
                                                                     15
View original page 22Page 23 · Read text
a used    pear in your picture. Hold the   Used-Bulb Worning-When
   camera steady and gentlY   bulb faces forward, a red tNotce-
     s-q-u-e-e-e-z-e the shutter release   roR LIcHT will appear in the view-
                                                  press the shutter     to flash the bulb and take the Pic-   finder 6 you
    ture (the red INotcnroR LIGHT-   release. To observe this signal, it
   usED BULB-will appear in the   is very important that You Press
     finder as the bulb flashes). Then   the shutter release verY slowlY.
    advance the film to the next ex-
    posure (the magicube will rotate
    automatically to bring another                     VIEWFINDER
    bulb into firing position).
    NOTE: Disregard the amber indicator
      light when taking flash pictures. With
    a magicube in the socket, the shutter       USEDBULE    speed is set automatically for flash
    and no extended exposures will occur.             i-*l                    L-J

                                                              FLASH OR TIME
I6
View original page 23Page 24 · Read text
www.butkus.us
 Fill-ln Flqsh-When you take pic-
 tures outdoors, shadows may ap-
 pear on the faces of your subjects
in some lighting conditions. To
help lighten these shadows, place
a magicube on the camera, set the
focus slide (4 to 30 feet), and then
take the picture.
NOTE: Under some circumstances,
your subjects' eyes may appear red in
flash pictures. To minimize this effect,
turn up the room lights and insert the
optional Koonx Magicube Extender   The optional Kooax Magicube Extender
(see page 22) into the cube socket.     raises the cube to minimize ..red-eye.,'
This raises the cube to minimize the
red reflections, and also produces
pleasing shadow effects in your flash
pictures.


                                                                     L7
View original page 24Page 25 · Read text
unload,ing eo;mera.               tiln  p,rocessing
   When you have taken the last  For best 'results, have your ex-
     picture, operate the film advance   posed film processed as soon as
    (about 6 full strokes) until diag-   possible. Have your photo dealer
     onal lines or black paper appears   arrange for processing (by Kodak
     in the camera window. You will   or other laboratory) or purchase
     feel a stiff resistance on the ad-   the appropriate Kooer Prepaid
    vance-Do Not Force the Advqnce   Processing Mailer from your
   Any Forlher. Open the camera    dealer (see chart on page 3).
    cover and remove the cartridge.     Standard color prints from
   Do Not Open the Cortridge or  KooecoroR II Film are 3Yz x
    Your Pictures Will Be Ruined.       41/z inches, with the frame num-
                                  ber and processing date on the
                                            print. Kodak Processing Labora-
                                          tories will return Konecoron II
                                      Negatives (strips of 4) with an at-18
View original page 25From the M. Butkus archive. Original publisher and archive notices are retained.
Check the model and edition against your equipment.
PDF verified 2026-10-10.