Film cameras
Kodak Pocket Junior 1 and 1A - single page scan, greyscale User manual
User manual for Kodak Pocket Junior 1 and 1A - single page scan, greyscale. 39 pages in English. Read the original PDF, download or print a copy without registration.
39 pagesEnglish5.4 MB PDF

Loading your manual…Open PDF directly
Document details
- Brand
- Kodak
- Model / document
- Kodak Pocket Junior 1 and 1A - single page scan, greyscale
- Document type
- User manual
- Language
- English
- Pages
- 39
- File size
- 5.4 MB
- Category
- Film cameras
- Document date
- Not specified in catalog
Search available document text
Find a term, then jump to its page in the original PDF. Image-only pages may not be searchable; check the PDF for exact wording and diagrams.
Page 1 · Read text
www.butkus.us

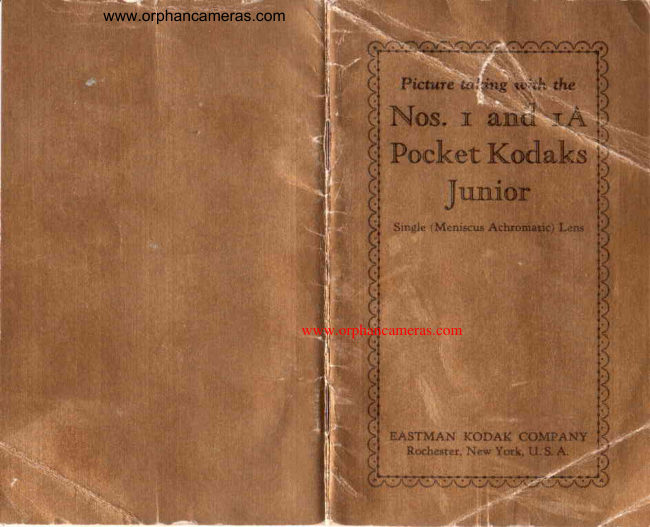
  picttne 16,kh,a witht the
Nos. n annd NA
Focket Kod aks
     jlu:aion

 Single (l{eniscus Achromatic) Lens


EASTMAN KODAK COMFANY
   Rochester. New Y<irk" U. S. A.
View original page 1Page 2 · Read text
/     SERVICE
  DEPARTMENT

    Aoorrloxer. AssrsrANctr FoR
   MnrrNc BBrrBn Prcrunns

   f\LTHOUGH we give in this manual   ,{ \  the essential directions for using
   the camera it accompanies, there are *   amateurs who wish for further knowl-
   edge of photography.
  .  The Service Department is at their
    service, your service.
    Do not hesitate to call on us for in-
   formation on any photographic subject.
  We are at your seruice, urite to us-
    .   there is no charge, no.obligation.

            Address all Communications
       SBRl,tcB Drpa*r*BNr
  Eesruax Kooer CoupANY    '
        RocnpsrER. N. Y.
View original page 2Page 4 · Read text
Venmo @mike-butkus-camera  Ph. 2083
PayPal Name  Lynn@butkus.org      www.PayPal.me/lynnbutkus
View original page 4
Page 5 · Read text
- -a/
     Picture taking with the
  Nos. 1 and 1,{
Pocket Kodaks
           ToUnlor         J

           Single Lens
,         (Meniscus Achromatlc)


            Publishedby
 EASTMAN KODAK COMPANY
    Rocnnsrnn, N.Y., U. S. A.
View original page 5Page 6 · Read text
www.butkus.usr'


            THB Ceupne


 Mike Butkus         Digitally                                                        DN:org,Date:cn=Mikeemail=mike@butkus.org,2023.10.15signedButkus,by21:10:40Mikeo=ButkusButkus-04'00'c=UScamera manuals, ou=butkus.


         1. Sliding Lock    5. enq Opening
        2. Spring                                   {inde.r              Lock for   P'             ^                                 Z.        Front           Standard for,rlakiog                                   Vertical pictures-        B. Bed
        4.     shutter      3: $:ir$.sorckets
       A-Speed Indicator . C-E"posure Lever
        B-Dial for Stop Openings             ,/
View original page 6Page 7 · Read text
IMPORTANT
      I) EFORE taking any pictures with      l-t your Kodak, an.a                            Fqlbru fouai"glT     with film, read^'and f"ll;;  t"#er.-        irr_     structions carefully. Take  especiatf   care to learn how to ;p;r;iu the      shutter.
      While loading. and unloading, be    very careful to-.keep tfro prolective
    paper wound tightly urourrd the film    lg prevent hgEt it.it i,ij^"it." The
    So4p\ can be"loudil^;r^i.,to?aua in     daylight._ This ,h;ld iu*^iJfi! in u    subdued lighr, not in di.;; J,i"figfrt.
    ,,.Caution: prolonged exposure to
                                fn?                                        Iorr"r_     ,tl.:llng ot thesun lightcamera-igr,i'.Ju.lto fade. Do                                not     alcoholic solvents to clean tfrl ?oauf.use    or carrying case.
      To Loao
     Use film number:
    120 for No. 1 Kodak.
    116 for No. tA Kodak.

                             3
View original page 7Page 8 · Read text
www.butkus.us
Picture takinE with the


                         Slide over the   I
                         lock.


  Take the front
of the camera       j
by the edges andlift the end on              d !                      rwhich the lock is ,f    ;
fastened, then{1   t
draw out and re-                     $,.,.4$move that part ..entirely.
                   -     M"'
                        ,
View original page 8Page 9 · Read text
Nos. I and 1A Pocket Kodaks Junior
      Draw out the winding key as far as        it will come, and remove fhe empty
       spool.
I


                               www.butkus.us

      Remove the band from around the
      spoo-l of film. Holding the film se-
      curely, unfold and thread the tapered
     end of the protective paper intb the
      Longer.ope.ning of the empty spool, as
                   it will go.- One end bt-eadfr spool      {ar qs      is slotted, ald th_e protective paper
    must be so threaded that these slbts
      are on opposite edges of the protective
     paper, see illustration at top-of page 6.
       Give the empty spool three or four
      turns, enough to bind the paper on the
       reel.          The-paper must diaw straight                   ..    and the full spool must not loosen.
View original page 9Page 10 · Read text
www.butkus.us
 Picture takins with the


            56,              '      L                     -<  Place\,.?the spools into the film
pockets, keeping the protective paper
taut. The slotted end of the empty
spool must be placed next to the wind-
ing key. The word "TOP" printed on
the protective paper must be towards
the winding key.


      ,#
 \."'
   !
  Press in and turn the winding key
until it fits into the slotted end of the
empty spool. The paper must draw
from the under side of the full spool.
                           6
View original page 10Page 11 · Read text
Nos. 1 and 1A Pocket Kodaks Junior


          *_ry'-w
  Replace the front, first inserting the
en_q opposite the lock; the edge of the
 roll holder must fit into the gioove on
this end of the front. Press the end on
which the lock is attached into place
and push over the lock, fastening it
securely.


  Press@@in and turn the winding key,
watching the red window. Afteia few.
turns, a warning hand will appear,
then turn slowly until the figure-f is iri
the center of the window.
View original page 11Page 12 · Read text
www.butkus.us
 Picture taking with the
  Tbe film is now in position for the
 first exposure. After each exposure be
 sure to wind the film, bringing the next
 number into position. This-prevents
 making two pictures on the same sec-
 tion of film.
      OpBNrNc rHE FRoNT
                     Press the
                   spring lock
                  with  the
                thumb,  to
                       open the front
                             of the Kodak,
               and draw
                   down the bed
                           until it locks.
                 This auto-
                   matically
                        bringsthelens
and shutter into position.
  The Nos. 1
and 1A Pocket
Kodaks Junior
are fixed focus
models, and
therefore need
no further ad-
justments for
focusing.
View original page 12Page 13 · Read text
Nos. 1 and 1A Pocket Kodaks Junior
        THB Snurton
      .A


                              www.butkus.us


  A-Indicator for Instantaneous or Time
        Exposures
  B-Dial for Stop Openings
  C*Exposure Lever
    Instantaneous Exposures
              .,Snapshots"
  Move indicator A to the letter ,,I.,'
  Revolve the dial B by the milled
      to bring the cprrectitop opening9q9.,
into position (see Exposure Guide oi
inside back cover or table on pages
11 and 12).
View original page 13Page 14 · Read text
www.butkus.us
 Picture taking with the
  The numbers of the stop openings
 will appe.al in g, srnaU circulrar openirig
 on one side of the shutter, and they
 are changgd by revolving the dial on            .a
 the edge of the shutter near the finder.
 on the No. 1 Pocket Kodak Junior.
 The numbers appear at the bottom
 of the shutter at the letter B. see
 i_llustration on page g, on the No. tA
 Pocket Kodak Junlor.
  To make the exposure, move the
 lever C once either up or down. push
 it until it clicks. Move the lever
 slowly so as not to jar the Kodak.
       Time Exposures
  Move indicator A to the letter ,,T.,,
   Revolve the dial B until No. 1, 2. B
   4 r! i! position. See tables on pages91 LI, 12,24,25,28 and 29. presi the
exposure lever C until it clicks. This
opens the shutter, which now stays
     Time the exposure by a watch.9pen.
Pressthe exposure l-ever in ttie opposite
direction. This closes the shutier.
  Time Erposures must neuer be mad,e
with the Kodalt, held in the hands.
  Important: Neuer o,il the shutter.
fn case of accident, return the Kodak
to your dealer or to us for repairs.
                          10
View original page 14Page 15 · Read text
Nos. 1 and 1A Pocket Kodaks Junior
             Srop OpnNncs
      The stop openings regulate the
      amount of light passing through the
  +      lens.,' The openings are changed by
        revolving the milled dial B, see page 9.
                       i     The largest stop opening is No. l,
       each succeeding stop opening admits  {       approximately half the light of the.
       preceding opening.
      No. l-For  all ordinarg outdoor
        pictures, such as nearby landscapes
       showing little or no sky, groups and
        street scenes, when the subject is in
       bright sunlight with the shutter ad-
       justed for instantaneous exposures.
      For Interior Time Exposures see table
      on pages 24 and25.
       No. 2-For open views, when the
       sunlight on the subject is unusually
        strong and there are no heavy shadows,
       such as views at the seashore, and on
       the water, with the shutter adjusted
       for an instantaneous exposure. For
        Interior Time Exposures, the time for
       which is given in the table on page 25.
        No. 3-For instantaneous exposures
       of extremely distant. landscapes, ma-
       nnes, snow scenes with no prominent
      dark objects in the foreground, and
                                    l1

---i-                        .         l
View original page 15Page 16 · Read text
www.butkus.us
 Picture taking with the
 glouds only, in bright sunlight. For
 Interior Time Exposures, sed table on
 pages 24 and 25, and for Time Ex-
 po-sures Outdoors on cloudy days, see
 table on pages 28 and 29.
  No. 4-For Interior Time Expos-
 ures, also for Time Exposures Out-
 d^oors on_cloudy days, see pages 24,25,
28 and 29. Itleuer for inst'antaneous
 efrposures.
  The smaller the stop opening the
 s.harpgr-the nearby objects will be, see
 the tables on page 13.-
   All the exposures given for outdoor
subjects are for the hours from two
and a half hours after sunrise until two
and a half hours before sunset. If
earlier or later the exposures must be
longer. For subjects in the shadow.
y".de.r porches or under trees, the
lighting         conditions vary so greatly             -that no definite directionj can be-given;
experience only can teach the correct
exposure to give.
                                                                                               It     NBanNBss oF SuerBct                                                         I
  T9 get everything sharp and dis-..trnct in your pictures, the camera
must not be nearer than a certain
                          t2
View original page 16Page 18 · Read text
www.butkus.us
  Picture taking with the
   The circles on page 13 are the same
 size as the stop openings of the shut-
 ters used on the Nos. 1 and lA pocket
 Kodaks Junior. Thev clearly show
 the relative sizes of th"e variois stop^ openings and how their areas differ.
      N9l

                              Ns4
  The above diagram shows ttre rela-
 tive lengths of exposure required with
 the different stop openings.
         Tnn FTNoBR
  The finder shows what will appear
 in the picture, but on a much reduced
 scale.


  Look into the finder from directly
over the center of it and include what
        by turning to the right oril"yu"tu{,lelt, see illustration on page 16..-
View original page 18Page 19 · Read text
Nos. 1 and iA Pocket Kodaks Junior
  To make a vertical
picture, hold the
Kodak as shown on
 page 14. Only what is
seen in that part of
the finder shown as
white in the diagram,
will appear in the pictu re.  m


          To make a hori-
              zontal picture, turn
             the finder and hold
             the Kodak as shown
            above. Only what is
             seen in that part of
            the finder shown as
               white in the diagram,
will    appear in the picture.ffi
 MarrNc INsraNtANEous Expo-
     SURES OR SNAPSHOTS
 When ordinary instantaneous ex-
po,sures or snapshots are made, the
subject should be in the broad, open
                          15
View original page 19Page 20 · Read text
www.butkus.us
 Picture taking with the


                                                  t  When making instantaneous expo-
puTe.s or snapshots with any Kodak,
hold it        firmly against the- body a;        -IMhenshown.        pressing the exposure
lever, hold the breath for the instant.
If the Kodak is moved during the ex-
posure, the picture will be blurred.
                          16
View original page 20Page 21 · Read text
Nos. I and 1A Pocket Kodaks Junior
        sunlight, but the camera must not.
      The sun should be behind your back
   I      or over the shoulder. If it shines di-
  1\       rectly into the lens it will blur and fog
  u        the picture.
           Special instructions for making por-I       traits are given on pages 24, 26 and 22.
         Holn rHE KoDAK LEVEL


il


             Efect produced by tilting the Kodak.
                                    t7
View original page 21Page 22 · Read text
www.butkus.us
Picture taking with the
  The Kodak must be held level. If
all the subject cannot be included in
the finder without tilting the lens
upwards, move backwards until it is
all included with the camera helil, leuel.
   If the subject is below the normal
height, like a small child or a dog, the
Kodak should be held down level with
the center of the subject.
                   After an exposure
                has been made. turn
                 th e winding key
                  slowly, a few times,
                  until No. 2 (or the
             next number) is rn
the center of the red window.
      Cr,osrNc rHE KoDAK


  Close the Kodak by pressing the
bed braces at each side of the front
                        l8
View original page 22Related documents and language editions
From the M. Butkus archive. Original publisher and archive notices are retained.
Check the model and edition against your equipment.
PDF verified 2026-10-10.