Film cameras
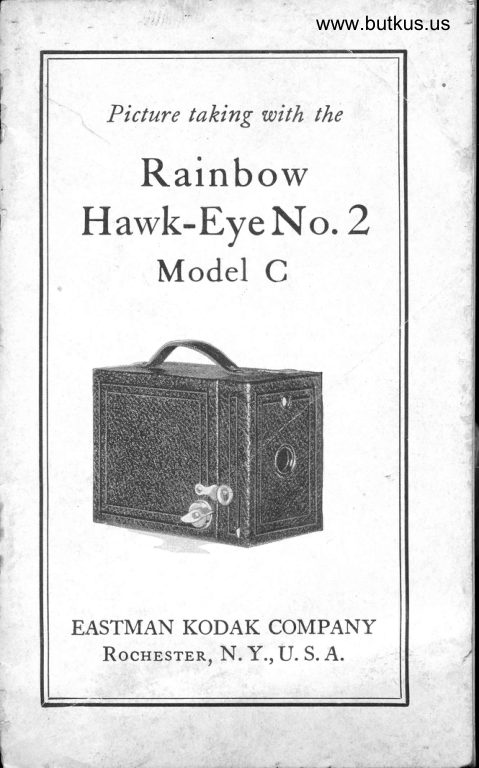
Kodak Rainbow Hawk-Eye No. 2 Model C User manual
User manual for Kodak Rainbow Hawk-Eye No. 2 Model C. 24 pages in English. Read the original PDF, download or print a copy without registration.
24 pagesEnglish4.1 MB PDF
Loading your manual…Open PDF directly
Document details
- Brand
- Kodak
- Model / document
- Kodak Rainbow Hawk-Eye No. 2 Model C
- Document type
- User manual
- Language
- English
- Pages
- 24
- File size
- 4.1 MB
- Category
- Film cameras
- Document date
- Not specified in catalog
Search available document text
Find a term, then jump to its page in the original PDF. Image-only pages may not be searchable; check the PDF for exact wording and diagrams.
Page 1 · Read text
r-
                               www.butkus.us
I

          Picture taking with tlre
      Rainbow
   Hawk-EyeNo.2
        Model C


     EASTMAN KODAK COMPANY
          RocuEsre n, N. Y., U. S. A.
View original page 1Page 2 · Read text
T
                                                                                                  I    SERVI CE
 DEPARTMENT

    Aoortromar, AssrsrANcE FoR
    MnrrNc BBrrBn PrcrunBs
                    +
 A LTHOUGH we give in this man-I  \ ual the essential directions for
using the camera it accompanies, there
are amateurs who wish for further
knowledge of photography.
  The Service Department is at their
service, Aour serviee.
  Do not hesitate to call on us for infor'-
mation on any photographic subject.
 We are at gour seruice, write to us-
    there is no charge, no obligation.

            Address all Communications
      -Spnvrce DBpenTMENT                                                                      ,i

                                                                                                                                                                                                                                                                                    J
 EASTMAN KODAK COMPANY
           Rocuusrpn, N. Y.
View original page 2Page 3 · Read text
v
                            www.butkus.us
     ',KODAKERY" I  i A monthly magazine that teaches ihow to make better pictures, will be
      i, sent FREE OF CHARGE to anyonewho
    i obtains one ol these anttateur camer(N,
  iil this blank is filled out and sent to ius within 30 days from the date the    i catnera was obtained.
          EASTMAN KODAK COMPANY.
 iTO THE EASTMAN KODAK COMPANY,
              ROCHESTER, NEW YORK:
    Accepting your ofrer, please put my rurme
  on the nailinE list for "KODAKBRY" (srittt   the understanding that there is to be no cost   to me), I having obtained aUTtr
tdI
Llro
tr
ldF
     Print Ttour name and address plainly:


   NoIr-KODAKERY  will be sent for six months
   on this ofrer. A Dost card will be enclosed with the
    fifth eopy, if thiipost card ie filled out and returned
   to us it will entitle you to an additional six moutbs,
   free of charge. After that the subsoription  price will
   be sixty cents for one year or one dollar for two yeara,
   but you are under no obligation to renew.-E. K. Co.

   Form No.513.30-R.
View original page 3Page 4 · Read text
I
        Picture tahing wit/z the
      Rainbow
   Hawk-Eye No. 2
        Model C


                           '  Published by
   EASTMAN KODAK COMPANY
           Roclpsren, N.Y., U. S. A.
View original page 4Page 5 · Read text
www.butkus.us


          TnB Cennpne


                                                                                                                                                         I
Mike Butkus DigitallyDN:ou=Butkus.org,email=mike@butkus.org,Date:cn=Mike2026.04.20signedButkus,by21:40:17Mikeo, Butkusc=US-04'00'


  AA-Catches for lock- C-Winding Key
          ing camera  D-Lens Opening
    B-Exposure Lever  E-Finder
View original page 5Page 6 · Read text
Venmo @mike-butkus-camera  Ph. 2083
PayPal Name  Lynn@butkus.org      www.PayPal.me/lynnbutkus
View original page 6
Page 7 · Read text
IMPORTANT
  DEFORE taking any pictures with   LD your camera, and before loading
     it with film, read these instructions
     carefully.
      TVhile loading and unloading, be
   very careful to keep the protective
   paper wound tightly around the film
   to prevent light striking it.  The
   camera can be loaded or unloaded in
    daylight. This should be done in a
    subdued light, notin direct sunlight.
      To Loeo
     Use film number 120
    for the Rainbow Hawk-
   Eye No. 2, Model C.


                  oo'1''
{   $\d{\  -"t               theDrawwindingout
                         key as far as
                                        it will come,
                      turning it
                                 slightly.
View original page 7Page 8 · Read text
www.butkus.us
  Push over the two catches AA, see
illustration on page 2.
  Remove the roll holder F.


  There is an empty spool in the re-
cess on the winding side of the roll
holder; this is to be used as the reel.
  The winding side may always be
distinguished by the round opening in
the roll holder, directly behind the
exposure lever^
View original page 8
Page 9 · Read text
Insert the spool of film in the recess
 opposite the winding side, drawing out
 one of the spring grips just enough to
permit the spool to drop into place.
Fit the spool pins into the holes at
each end of the spool.
  Important.' The word ((TOP"
which is printed on the protective
paper near the top of the spool must
be next to the side of the roll holder,
which has the round opening through
which the key is inserted in the reel.
If the spool of film is inserted the wrong
way the protective paper will come be-
tween the lens and the film and no
pictures could be made.


                                                                                                             !,:tl.l]]irr*
  Remove the band that holds the
end of the protective paper, and pass
View original page 9Page 10 · Read text
www.butkus.us
the pape r oaer the rollers and aeross the
opening in the back of the roll holder.
  Thread the paper through the
longer opening of the slit in the reel
as far as'it w'ill go. Give the spool twoor three forward turns to make the           "[*
paper hold securely on the spool.


  Be sure that the paper is started
straight. Do not unroll too much pro-
tective paper or the film will be fogged                                    Iand ruined.
   Insert the roll holder in the outside
box, so that the slotted end of the
spool comes next to the winding key
in the outside box.
   Fasten the roll holder to the outside
box with the two catches AA, see
 illustration on page 2.

                           6
View original page 10Page 11 · Read text
Press in and at
                      the same time
                            turn the winding
                          keyuntiltheweb
 f                             at the lower end
rt                       of the key fits
                           into the slot in
                           the spool end.
                        Turn the key
                   and watch the
                    red window.
       After a few turns, a warning hand will
      appear; then turn slowly until the
             1 is                   in                   the                         center of                               the window.


I       figure@@Press                                            slightiy,                        key                the                   winding              in
     when turning it.
       The film is now in position'for the
         first picture. After each exposure be
      sure to wind the film, bringing the
      next number into position. This pre-
      vents making two pictures on the
      same section of film.
View original page 11Page 12 · Read text
www.butkus.us
  MAKING THB BXPOSURBS
         "Snapshots"
/.f1HE Rainbow Hawk-Eye No. 2,
 I  Model C, is a fixed-focus camera,       $
therefore, subjects that are about eight          I
feet and farther from the camera will                            i
be sharp, and even those as near as                             .
six feet, while not as sharp, will be
sharp enough for all ordinary purposes.
Do not have the subjects closer to the
camera than about six feet, without
using a .Kodak Portrait Attachment,
see page 12.

    www.butkus.us


                                                                 I
                                                        I
  The shutter of the camera is re-
Ieased by pushing the exposure lever B
 (see illustration above) from one end
of slot to the other with the thumb.
Push the lever slowly, in one direction
                         8
View original page 12Page 13 · Read text
no    only, and os far as it uill go. If
    "click" is heard no exposure is made.
    ,Do not jerk the lever as any move-
   ment of the camera, at the instant of
    exposure, will blur the picture. '   When making snapshots, the sub-
    ject should be in the broad, open sun-
    Iight, but the camera must not. The
   sun should be behind your back or
   over the shoulder. If  it shines di-
    rectly into the lens it rvill blur and fog
   the picture.


                                                    ""'';4dd.;     riJ
     Point the .u-.:ra at the subject to
   be photographed and looking into the,    finder from directly over the center of
    it, include what you want and com-
   pose the picture by turning to the
   right or left, see page 10.
     Only what is seen in the finder will
   show in the picture.
View original page 13Page 14 · Read text
www.butkus.us


           www.butkus.us
  'When       making snapshots, hold the
camera firmly against the body. When
pushing the exposure lever, hold the
breath for the instant. If the camera
is moved during the exposure, the
picture will be blurred.


                           10
View original page 14Page 15 · Read text
MlrrNc rHE BxposunB
  Hold the camera steady and level, as
shown in the illustration on page 10,
and push the exposure lever once, as far
as it will go. This maltes the eaposure.
  Important: The exposure lever
must be pushed slowly to avoid jarring
the camera. If the camera is not held
steadily the picture will be blurred.
  All exposures must be made out-
doors with the subjects in bright sun-
light, and during the hours from two
and a half hours after sunrise until
two and a half hours before sunset.
     Holo CevrBne Lnvpr,
  The camera must be held level. If
all of the subject cannot be included
in the finder without tilting the cam-
era upwards, move backwards until
it is all inclu ded wi,th the camera held
leuel. See illustration on page 12.
   If the subject is below the normal
height, like a small child or a dog, the
camera should be held down level with
the center of the subject.
View original page 15Page 16 · Read text
www.butkus.us


     Efect produced by tilting the camera.
 Kooer PonrnalT ATTACHMENT
  The Kodak Portrait Attachment
makes head and shoulder portraits. It
can also be used for photographing
flowers and similar subjects.
  Place the Attachment in the lens
opening and compose the picture in
the finder. The subject must be eractly
31le feet from the lens; measure the
distance carefully from the lens to the
face.
  Use Kodak Portrait Attachment No.1
with the Rainbow Hawk-Eye No. 2,
Model C.

                        72
View original page 16Page 17 · Read text
Koner DmrusroN PonTRArr
            ArrecnMENT
      The Kodak Diffusion Portrait At-
     tachment is a supplementary lens
     used in the same manner as the reg-
      ular Kodak Portrait Attachment. By
      using this Attachment, portraits are
     made more artistic, due to the soften-
      ing effect of diffusion.
        [Ise Kodak Di,ffusion Portrait At-
     tachment No. 1 with the Rainbow
     Hawk-Eye No. 2, Model C.
      TunN e NBw SBcrroN or FrLM
             INTO POSTTTON
                          Press in the wind-
                      ing key slightly and
                     turn it slowly until
                 No. 2, or the next
 i                     number, isinthe cen-
     i                           terof theredwindow.
     The warning hand appears onlyt     before section No. 1
      Turn the next section of film into
      position immediately after making
     each exposure; this prevents making
    two pictures on the same section of
       film.

                                   13
View original page 17Page 18 · Read text
www.butkus.us
      RBvrovrNG THE Fnvr
   After all the exposures have been
made, turn the winding key until the
 end of the protective paper passes the
window. The film is now ready for
removal from the camera.


  In a subdued light, open the camera
and remove the roll holder as shown
on pages 3 and 4. Hold the ends of the
protective paper and the sticker to-
gether to prevent paper from loosen-
ing. If the sticker has been wound
under the roll, revolve the spool to
bring it up. Draw out the spring grip
just enough to release the spool and
lift out the roll of exposed film, as
shown in the illustration above.
                           l4
View original page 18Page 19 · Read text
Fold under about half-an-inch of
      the protective paper, and fasten it
       with the sticker.
        "Cinchtt Marks: After removing     the film from, the camera, do not
      wind it tightly with a twisting motion,
       or the fiIm might be scratched.
         'Wrap             up the exposed film. It is now
      ready for development. This may be
      done by a photo finisher, or by your-
       self. If the latter is desired, you may
       write to our Service Department, men-
       tioning the size of the pictures made
      with your camera, and we will send
     you a list of the necessary materials
      which can be purchased from a Kodak
       dealer.
       Important: Film should be devel-
     oped as soon as possible after expo-
      sure. The quality of the image on all
                                 byt     sensitized products is retained      prompt, development after exposure.
       Remove the empty spool and place
         it in the re,ce$s on the winding side ofI      the roll hofder. The slotted enld of the
      spool must, show through the round
      opening in the roll holder.
          It is a good plan to reload the
     camera as soon as an exposed film has
                                 15
View original page 19Page 20 · Read text
www.butkus.us
been removed,
next pictures. Load the camera with
Kodak Film.
      Cenn, oF THE Ceunnl
  Caution' Prolonged exposure to
direct sunlight might cause the colored
covering of the camera to fade. Do
not, use alcoholic solvents for cleaning
this camera.
  Keep Dust Out of the Camera
  Wipe the inside of the camera and
roll holder occasionally, with a slightly
damp cloth, especially if the camera
has not been used for some time.
 EASTMAN KODAK COMPANY,
                Rocnesrnn, N. Y.
View original page 20From the M. Butkus archive. Original publisher and archive notices are retained.
Check the model and edition against your equipment.
PDF verified 2026-10-10.