Film cameras
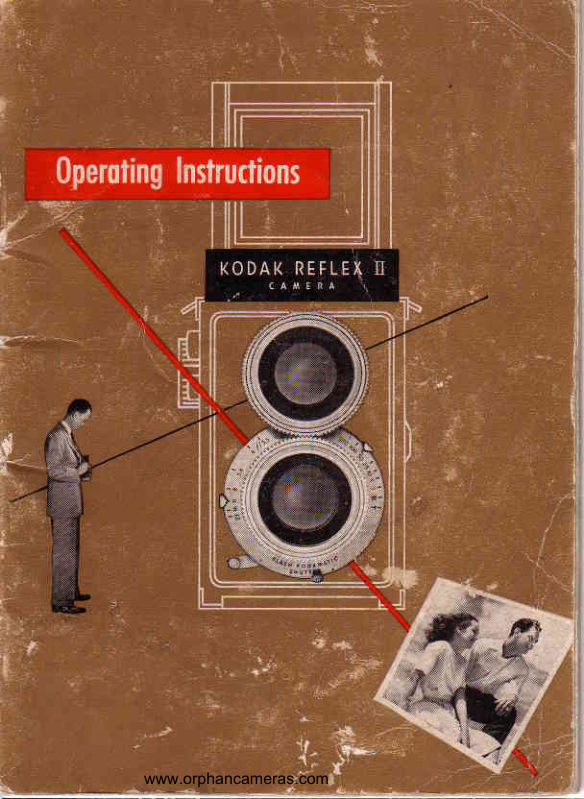
Kodak REFLEX II User manual
User manual for Kodak REFLEX II. 22 pages in English. Read the original PDF, download or print a copy without registration.
22 pagesEnglish2.7 MB PDF
Loading your manual…Open PDF directly
Document details
- Brand
- Kodak
- Model / document
- Kodak REFLEX II
- Document type
- User manual
- Language
- English
- Pages
- 22
- File size
- 2.7 MB
- Category
- Film cameras
- Document date
- Not specified in catalog
Search available document text
Find a term, then jump to its page in the original PDF. Image-only pages may not be searchable; check the PDF for exact wording and diagrams.
Page 3 · Read text
I N T R O D U C T I O N
Better pictures are easicr r,vith this distinguished trvin-
lens reflex camera. Its extra-bright ground-glassfinder,
a result of the built-in Kodak  Ektalite Field Lens, lo-
cated underneath and in contact with the ground glass.
makes it easy to compose and focus your pictures . - - its
fast-shooting,flash-s,vnchronizedshutter gets that action
shot " . . its 4-element .//3.5 Anastar lensesassure neg-
atives of superb definition.
  Your  photofinisher makes oversized prints from the
2lx2r/a-inch  negativesat a cost little more than that
of contact prints,
View original page 3
Page 4 · Read text
(onlan/r                                   /a//a /
                                I!:_1*r
                                               Shutter_Speed                            7
                                             Lens Opening                                                           I
o Picture taking with the l(odak l(eflex  lI uamera
is easy.But if you would like to make sure of getting          Focus                                                                                         l 0
good  results everv  time,  right  from  the  start,                                                 Films                                                                 t 2spend a few minutes getting acquainted with your
camera before you load  it with  film.                          t.**                                                                    t 4
o Then before your vacation or any important
event, why not make some trial  shots just to be                eidure                    20sure that you understand your camera and know             I:lilg ll:
that your equipment is operating properly. Your             Doylight ExposureTqble                22
dealer will be glad to check your results and offer
tips to improve your technique so that you won't            Flosh                             23
          "importantmiss that              shot."                                                        .                                                        =-t.                          25o Your Kodak Reflex  II Camera comes to you               lt":t
complete in its attractive leather field case. To re-           Flood ExposureToble                  26
*orri  the case,lift the glove fastenerswhich hold the
front, then unscrew the Iarge knurled nut on the           Flood                              27
bottom of the case.In order that camera Parts may
be pointed out more clearly, most of the illustra-           Suggestions                        30
tions which follow show the camera removed from               ,_
its case.                                           Accessories                         34

T. M. REG.  U. S. PAT.  OFF.                                                                                         3

 www.orphancameras.com
View original page 4Page 5 · Read text
pictures of sports, you will want to
                                                             use the camera at eye level. To do
                                                                                      this,  first open  the hood;  then             Ji, finla,r
                       Probably the  first thing  you'll              swing the magnifier up out of the
                      want  to do  is open the finder            way and push in the center part of
                     hood  and  look  through  the               the front panel. Now the front and
                            finder.  Just  press the HooD             back panels of the hood form an
                   LATcH and the panels of the             open-frame direct view finder.
                     hood will  spring into position.            When you use the camera at eye
                  When the camera is not in use,                 level, you can hold   it  either as
                         the panels are easily folded up,            shown in the lower illustration, or
first the sides, then the back and front.                                                         if you want the taking lens to be
  To bring the image int6 focus, turn the focusing ring                       still higher, you can hold  it upside
on either of the twin lensesuntil the subject seen in the             down.  In  either  case, hold  the
finder is sharp. A flick of your thumb brings the uecNr-                carrrera so that the front and rear
rrBn into place over the center.of the image; with  it you              frames are superimposed. This will
can focus critically on the finest detail.                               center the eye correctly  in  the
 . The camera should usually be held so that  it is cradled                 finder.
in the left hand as shown in the illustrations. Besides             To take pictures over the heads
supporting the camera, focusing, cocking and tripping              eof a crowd, use the reflex finder
                                                                  .andthe shutter can all be accomplished with the left hand.                   hold the camera upside down.
                                                                                        "fastThis one-handed operation is a feature of the camera                For       shooting,?' the camera
which leaves the other hand free, for example, to hold           may be held as in the illustrations,
an extension flash.                                                    but with  the fingers of the right
  For most pictures you will want to use the reflex finder             hand grasping the winding knob,
because it  is so easy to compose your  picture on the              ready  to, advance the  film. The
ground glass, including just what you want on the nega-                    first finger  will be in  position to
tive. But sometimes, for example when you're taking              press up the releaseknob.
4
View original page 5Page 7 · Read text
The openingislargest when the pointer isatl3.5.  From
B  ,.r", opENrNG                                              Jl4 to J122, each smaller opening (larger number) admits
                                                                            half as much light as the preceding opening. Thus, if the    The size of the opening in                                                                      correct exposureis 1/50 secondatlf/l 1, then the exposure
     the lens through which the
                                                                              forl8  should be 1/100 second,and for f 116,1125second.      Iight passesis controlled by                                                         The exposure for the average outdoor subject, when
     setting  the LENs opENrNc                                                                    the sun is shining, isJl17 and 1/50 second with Kodak
    PoTNTER s.  This   reeulat                                                                  Plus-X Panchromatic  or Verichrome  Film. Remember
     the amount  of  light  whi                                                                               this basic exposure-many  of your pictures will  fit this
       will  reach the fiIm  at an                                                                           situation. See pages 18 and 19.
     given sh
View original page 7Page 8 · Read text
DEPTHOF FIETD

                                                               Depth of field is the distance from the nearest to the
                                                                              farthest point that is in sharp focus when you're taking a
                                                                               picture. The  depth-of-field scale will  help you figure
                                                                    thesedistances.The scale is used like this:
                                                               The figures correspondingto the lensopeningson each side
                                                                                             of the INDEx MARK are used with  the DISTANcEscALE as a
                  FOCUS                                       depth-of-field  scale to  tell the nearest and  farthest  dis-
                       The adjustmentof the lens              tances which  will be in sharp focus.
                                         for  the distance between   it                 Focus the lens.
                              and the subject is controlled                Then  opposite  the  figures corresponding  to the lens
                                by turning  the rocusrNc RrNc               opening used, read on the distance scale the nearest and
                                           c. Turn  the  ring  until  the                  farthest distances that  will be in sharp focus.
    image of the strbject in the finder is sharp. The irnage                The  smaller   th'e opening,   the  greater  the  range  of
    formed on the film will automatically be in perfect focus.              sharpness in the negative. For example,   if the camera  is
    To make sure that you've focused the camera correctly,               focused  for  10 feet and J13.5  is used, everything  from
     bring the magnifier into place over the center of the               about  9 feet to 11 feet will  be sharp'  AtJll'1,  however,
     finder image. Always use the magnifier  fbr extremely                everything  from  aboutTrf    feet to 15 feet will be sharp.         il
l0    critical work.


         lf you ore using the direct view finder, estimote the
    comero-to-subiectdistonce os closely os possible ond
     turn the FINDERFOCUSINGRINGuntil this distonce is ot
     the index mork. In some coses you moy be oble to
    pre-focus on the ground gloss ond then use the eye-
     level finder to cotch the oction ot the proper instont.


          www.orphancameras.com
View original page 8Page 9 · Read text
made. 12 exposures.E620. It  is not processedby theWe    7,h,9/a//J7trsa? Eastman Kodak Company  but by  the photographer
                                                                        with  the special chemicals supplied in convenient kits.
                                                        See your dealer for more information.
The type of film  to use will depend on the kinds of        KODAK SUPER.XXPANCHROMATICFIIM
subjects you intend to photograph, the light conditions                                                          Because of its very high speed, particularly under arti-
under which you  will  work, and,  in many cases, the                                                                                             ficial  light,  this film  is the Iogical choice for making
particular  effect you may desire. The various types of                                                               snapshotswith flood lamps. Indoors or out, it's the film
Kodak Films describedon thesepagescover any picture-                                                                               to use when the light-is poor or you need a high shutter
taking situation you will encounter.                                                           speed to stop fast action. Fully  panchromatic. 72 ex-
KODAK VERICHROMEFIIM                                  posures.XX620.
An  all-purpose film,  suitable for general outdoor use.                                          KODACOTOR  FIIM
High  in speed, it has excellent latitude to help you get a
                                                            Here is an easy-to-usefilm that produces color negativesgood negative even if you misjudge the exposure slightlv.
                                                       when developed. It  is available in Daylight Type  forOrthochromatic  sensitivity makes this  film  especially
                                                                 outdoors-and  Type A  for indoors with  flash or floodsuitable for flash pictures of near-by people. 12 exposures.
v620.                                                                               light. Blue flash lamps can be used with Daylight Type
                                                                                      film, either as the main light source, or to fill in shadows.
KODAK PIUS-XPANCHROMATICFILM                       Processing'to a color negative is included  in the film
Combined high speed and fine grain make PIus-X ideal                                                                              ,,price. 12 exposures.C620.
for general outdoor work and for well-lighted indoor
                                              'XOOACOTOR PRINTS AND ENTARGEMENTSsubjects. The low graininess permits considerable en-
Iargement, and balanced panchromatic sensitivity assures                       If you want  inexpensive full-color  prints  or enlarge-
good rendering of colors in tones of black and white. 12             ments for your photo album, wallet, or to frame for that
exposures.PX620.                                                         favorite spot on the mantel, Kodacolor is the film for you.
                                                                           After your filrrr-_has been bxposed,simply return  it to your
KODAK EKTACHROMEFIIM                                                                     dealer and he  will  send  it  to Kodak  for processing.
This film produces full-color transparencies for project-                                                                Kodacolor  Prints and Enlargements are made from
ing and viewing, or you can have Kodachrome 3X Prints                                                                  these negatives-and  at a low cost.
 t 2
                                                                                                                                                                                                                                                                                                                        l 3
View original page 9Page 10 · Read text
UsE ONE OF THEKODAK 620 ROIL FILMS/,nu/nvold Ylo/no/nv             Poges  l2  ond  1 3  will help you decide which one.


                             "0"
       Look   to  see  if       appears  in  the  ExposuRE                  Insert  the  roll  of  film  in  the recess at  the lower
      couNTER window.   If any figure but zero is visible,                   front  of the camera. The  spool must be inserted so
       push up the nBrBesE KNoB and hold   it rvhile you                   that when  the  protective  paper  is drawn   off, the                                                              "0"
        turn the couNTER KNoB counterclockwise  until                     colored  side of the paper  will  be turned  toward
         just  appears  in  the ExposuRE couNTER. When               you and the black side toward  the lens.         "0"            appears, the camera  is ready  to be loaded.


                                                                       Break  the  seal on  the  roll  of  film  and  pass the
       To  open  the back  of the camera,  push  the two                                                                        paper  oaer the top  of  the two  rollers. Thread  the
        knurled buttons at the top of the back toward each                                                                  end into the longer slot in the empty take-up spool
        other and swing the back out.                                                                      as far as it will  so.                                                                                                     l 5


        N EVER LOAD OR U N LOAD      I N B R I G H TD I R E C TL I G H T
       www.orphancameras.com
View original page 10Page 11 · Read text
..f-'    Turn the winding knob once or twice to bind the                After each picture, press up the RELEAsErNos Dzl                                                                                                         fr
      paper on the spool, making sure it is started straight.             do not hold it; then turn  the winding knob until            \*l
     Then close the back by pushing it in until the latch                           it locks. The new'exposure number  will show in
      buttons snap outward. Set the dial on the winding               the exposure counter. Form the habit of rvinding
     knob to show the kind of film  in the camera.                    the film ahead after each exposure so that a new
                                                                      section of film will be in place.
i#,!ti/   Todrawwindbackthethefirstslidesectionwhich ofcoversfilm theinto redplace,lvindowfirst           Whenpress thethe releasetwelfthknobexposureand  turnhas thebeenwindingmade,      {,},t
     on the back of the camera. Thg  letter C on the             knob until the end of the protective paper passes
       slide is visible in the window when the slide is              the window.
      closed. This  is a spring slide and must be held                                                                                                                                         '"         "],t
                                                                                                                             1'      while the winding knob is turned. Turn the knob                                                                                                                                                                    ,"                                                                                                                                                                                                                       i ..4         |  .i +.+
        until  a smali hand  or  arrow  appears in  the                          $il "'"iats'f;;                                                                     #t,"
      red window; then continue winding slowly until
      the figure                  "1"  just enters the window.                              In subdued light, open the back
  '"  '':i                                                                           of the camera. To remove the
  ,i'.    Turn  the couNTER KNoB until    it  locks. The             exposed roll, press the end of              "1"       figure      will then appear in the ExposuREcouN-               the spool opposite the winding
       rnn.  It  will not again be necessaryto uncover the             knob outward toward the side
      red window for exposure number reference.                      of the camera. Fold the end of                                                                         -'Jhe
                                                                            protective paper under and
                                                                      fasten it with the sticker.
                                                      Remove the empty spool and place it in the winding
                                                         end of the camera. Turn  the winding knob until the
                                                              key engagesthe slot in the end of the spool; then reload
                                                                      the camera with a new roll of film.

                                                                  IMPORTANT: After removing the film, do nol wind  it righrly with o
                                                                                            twisting motion os lhis moy scrotch the film.
                                                                                                                            1 7
View original page 11Page 12 · Read text
of the four bosic groups described below. The expo-
                                                                 sures given ore for Kodok Plus-X Ponchromoticor W,eorforunasla//J uso?                                                                Verichrome Film under bright sun conditions;informo-
     Here is o question you'll osk. yourself every time you                                                                                tion on the exposures for other light conditionsis given
     toke o picture. The onswer is mode eosy by the foct                                                                                       in convenientform in the toble on poge 22 ond on the
      thot most common subiects con be clossified into one         t      Snopshot ond Flosh Kodoguide.
                                                                                                  I
                                                                                                                                     tIv


                                                                                                                                                                                 rtII
                                                                                                                                                                                                                                                     l
BrilliontSubiect             Bright Subiect                 Averoge Subiect            Shqded Subiect
Beoch, morine, ond  snow scenesi     Neor-by  people  in morine, beoch,            Neor-by  people,  gordens, houses,     People, gordens, ond olher subiects,
distont londscopes ond  mountoins      or snow scenes; scenics with fore-            ond  scenes, nof  in shode. Use this        in open shode (lighted by open sky
without prominenl obiects in the fore-      ground  obiects.  \Mith  bright  sun              clossificolion if in doubt. With  bright       -not   under  trees, porch  roof,  elc.).
ground. With  bright sun ond Plus-X     ond Kodok Plus-X Ponchromotic or            sun ond Kodok Plus-X Ponchromofic      Wirh  brighl sun ond Kodok  Plus-X
or Verichrome Film, the exposure  is:      Verichrome Film, the exposure is:                 or Verichrome Film, lhe.exposure  is:       or Verichrome Film, the exposure is:
    | /so                       f /22       1/so         f / r 6                   | lso        f/rr              | /so       f/8


            www.orphancameras.com
View original page 12Page 15 · Read text
FTASHTABI.E                                                                                                                                                                                  J
                                                             These exposureguide numbers apply with lamps in a 4-
                                                                                     to 5-inch satin-finished reflector such as that of the Kodak                            I
                                                                       Flasholder Model B. With  other reflectors, check the
                                                                manual packed with the flasholder.

         All  circuit contacts must be clean and bright.  If the                EXPOSURE GUIDE NUMBERS: Divide lhe number by the
     lamp base is tarnished, rub  it on a rough surface.                                dislonce  in feet from lomp  lo subiect to find f-number
     With SM or 5F flosh lcmps (Closs F):                          Lomp     I  SM or SF          No.5 or No. 25
             I.  Insert the flash lamp in the reflector.
         2. Cock the shutter in the usual manner.                                     Shutter     II Open*ond    r / r o o Openxond        I /50       l / r 0 0  r /300
         3. Release the shutter. Do not usethe S2nchroni<erLeaer.                 Speed      I speeds         speeds
     With No. 5.or No. 25 flosh lomps (Clqss M):                                              to   I /50         to 1125
              l.  Insert the flash lamp in the reflector.                                Verichrome  |   60      5 5            l  l 0     90     8 0    50
         2. Cock the shutter in the usual manner.                            Pfus-X        |   75     65    r40          l  l 0    1 0 0    65
         3. Push the SvNcnRoNrzERLBwn  toward the shutter              S u p e r - X X I     l l 0     95   200       r 6 0    1 4 0    90
            lever as far as it  will go. The synchronizer lever                   Kodocolor,
                                                                      Type A    |   50     4 5      r 0 0     8 0     75          cannot be moved before the shutter is cocked.
        4. Releasethe shutter.                                                         *Shulter set of "B" or "T."
       Complete exposure information  is given  in  the  in-                                                                           CAUTION:  Since lomps moy  shotter when floshed, the use
      structions packed with  the Kodak  Flasholder and the                        of o lronsporent  protective screen, such os the Kodok 2-Woy
      table on page 25.                                                                Floshguord, over  the  refleclor  is recommended. Do not flosh
                                                                                                 the lomps in on explosive olmosphere.
     Coulion: Do not inserl o flosh lomp in the reflector  if
                           "T"     the shutter is set for     ond the shutter blodes ore
     open. The lomp  will flosh on contoct ond o serious
24   burn moy result.


                   lf you prefer, your shutter con be odiusted with the Kodotron
         ond similor lomps for speedlomp photogrophy insteod of
           lhe setting for Closs F lomps. This odiustment will be mode
          by Eostmon Kodok Co. ot o nominol chorge.
View original page 15Page 17 · Read text
,.; /ii. i   r:                                           "'
 i'[,il'i,rlt"liit,lr  ,i...t.',,,!t;iii,l! ;,;;' ,,1'                        longerA nightexposurescene likethantheanypictureof the belowmeasuredrequiresintervalsa muchpro-
                                                                    vided on the shutter. For short time exposures,set the
Don't lay your camera asidejust becausethe light is not               shutter speedpointer at "B"; then pressthe shutter lever
strong enough for snapshots.With longer exposures,you            down and hold it. The shutter will remain open as long
can make many excellent pictures inside or  in deep             as the lever is held down. For exposures longer than
shade in the daytime, or of such subjectsas floodlighted             10 seconds,set the pointer at "T";  then press the shut-
 buildings or fires at night. Be sureto place tlu cameraon a                  ter lever down and immediately releaseit. The shutter
 firm supportsuchas a tripodJor exposureslongerthan / 125second.                 will remain open until the lever is again pressed.


A shot iike this is easily made near a window. Place a                                                                     Street scenesat night require a  little care to prevent
large n'hite card, tablecloth, or photographic blotter                                                                     streaks in the picture from moving bright  lights. Close
n'here it u'ill reflect lieht from the window to the shadow                                                                    the shutter or put your hand momentarily in front of the
side of the subject.                                                                    lens when an automobile approaches.

l 6
View original page 17Page 18 · Read text
Cropping
                                                        With the Kodak ReflexII Camera,you don't haveto stop
                                                                and decide whether  you're  going  to malp  a horizontal
                                                                               picture  or a vertical  one.  It's easy to compose pleasing
                                                                             pictures in the square format.  Later, when you're making
                                                                      enlargements, you may feel that the subject would appear
                                                                                      to better advantage  in a print  of different  proportions.
                                              , 1 . ;I  .  . .  , ,                                When  this happens, you'll
                                                                            find  the square negacives
                                                                          ideally suited to  cropping
                                                                              just as you want them, either
Tell q Story                                                                  vertically   or  horizontally.
                                                       And most photofinishers willThe best pictures are those which tell a simple story and
                                                    make cnlargementsfrom thetell  it at a glance. This is true whether you are making
                                                                         particular area of the nega-pictures of people or capturing the beauty of a landscape
                                                                              tive you select.scene, and  it  is this quality which makes pictures of
general appeal.
  Pictures of children, for example, are usually better if
they show the child doing something, not just looking
toward the camera. With grown-ups as well, ttre inclusion
of some accessoryto engage the subject's interest is very
often a help in getting a natural, unposed look.
   You'll treasure pictures of day-to-day activities around
the home, perhaps including some entirely unposed ones.
But whatever the subject, a moment spent in expressing
an idea will repay you many times in satisfaction with
your finished prints.
30                                                                                                                            3 l


       www.orphancameras.com
View original page 18Page 19 · Read text
Action Pictures
                                                             lVhen you photograph a moving subject,the total amount
                                                                              of light required is the same as that for a stationary sub-
                                                                                 ject, but you can make sharp pictures by combining a
                                                                    high shutter speed with a correspondingly larger lens
                                                                opening. Whenever possible,use 1/300 second;the Snap-
                                                                    shot and Flash Kodaguide will tell you in a moment what
                                                                      the lens opening should be. Children and pets should
                                                               always be classified as moving subjects.
                                                                                 In various sports and games, the subjects periodically
                                                                slow up, or stop momentarily  in poditions that suggest
                                                                        action. If you releasethe shutter at the right instant,,$ouSide ond Bock Lighting
                                                            can capture a world of implied action in your pictures.
Side-lighted pictures, in which the light comes from the
side of the scene, frequently have an illusion of depth            Look Beyond the Subiect
which is very difficult to obtain in a front-lighted picture.                                                         The full-size finder of your Kodak Reflex  II  Camera
  Back-lighted scenes, too, are often more interesting                                                       makes it easy to compose each picture to best advantage
than pictures taken .of the same subject with  the light                                                           and choosean angle of view which eliminates distractingbehind you. Back lighting  outlines foreground objects,                                                               elements in the background. For example, you can seeat
adding life and brilliance to them.                                                              a glance a tree which might appear in the print  to be
  With  either side or back lighting,  it  is important  to                                                             growing out of the subject's head. You can see, too,
shield the camera lens.from direct light. Keep the lens in                                                              prominent horizontal or vertical lines, such as clapboards
shade, or use the Kodak Lens Hood of the Kodak Com-                                                          on the side of a house, which might detract from the
bination Lens Attachments; see page 34.                                                                            principal point of interest in the finished picture.
  The exposure for a back-lighted subject must be in-                                                              Whatever the background, make sure that  it is a set-
creased to secure detail in the shadows. {Jse the next                                                                               ting or frame for your picture, not an intruding element
larger lens opening or the next slower shutter speed.                                                                                 in the composition.Look beyond the subject;your camera
                                                            most certainly will.
3 2                                                                                                            3 3
View original page 19Page 21 · Read text
screw  fits directly  into  the tripod  socket in  the base of                button  on  the  back  quickly  releases the  burned-out
your  camera. The  use of the Kodak  Turn-Tilt   Tripod                 lamps. A  decal  on  the  reflector  gives instant  exposure
Head  is recommended  for maximum   facility  in changing                 information.  The  Kodak   Flasholder  Extension  Unit
the position  of the camera on the tripod.                                N{odel B is also available  for  multiple-flash   work.
Kodok  828  Adapter,     If  you  want   to  use Kodak   828           The Kodok Master Photogvide is a
black-and-white  or color films with your Kodak  Reflex  II                sturdy, pocket-size edition contain-
Camera, ask your dealer to show you this kit.  It includes                   i.g   picture-taking  information  for
a vie'rv finder mask, film mask, two 828 spool adapters.                      still  pictures with  black-and-white
and  an  828  film  spool. Both  Kodachrome   Film  and             and color films.  It has 32 pages of
Kodacolor   Film  are available  in the 828 size.                       easv-to-use dial  computers, tables,
                                                         and brief text. Index tabs lead youThe Kodok B-C Flosh-
pack oflers a battery-                                                  directlv to such subjectsas exposure,
                                                                                        filters, Jighting, and many others.condenser  method    of
flashing  lamps.   It  pro-                                      The Kodqk Ektalux Flasholder is brilliantly adapted for
vides more than enough                                                             all types of flash picture-taking. It's  ideal for your
energv for accurate syn-                                            Reflex II Camera. The built-in B-C (battery-condenser)
chronization  and  de-                                             s)'stemassuresdependableflashing.The magnesium con-
pendable  lamp   firins.                                                 struction of the pistol-grip handle makes it  light and
In  addition,  you'll  be                                             durable. The Ektalux uses both midget and medium-
able  to  use  the same                                      o  baselamps. Two-way focus of the midget lamps provides
battery  for one year  or                                                   {   uniform and concentrated lighting. The  reflector is re-
more. Ask  your  dealer                                       movable for easy packing. In addition, as many as six                                                                                                                                                  i
 to shorr' 1-ou the unit.                                             extensionunits can be used. Accessoriesthat greatly ex-                                                                    &,The Kodok Flosh,older                                    pand the versatility of your flash work are also available.
ModelB  is a  highlv
effi cien t, ligh tweight yet
rugged   accessory   for
                                              EASTMAN KODAK COMPANY  o  Rochester 4, N. Y.flash  rvork. An  e.iector

3 6
                                                                                                   PRTNTED t"  t"t           srArEs oF AMERT.A

                                                                                                                                                                                                                                           -:l-l]t"
View original page 21Page 22 · Read text
DETAI lS-fodck   Reflex.llComero
 FILM
Nacetrve  Stzn-2t7/   x 2t1 inches.
Frr.M Srze-Kodak    620; 12 exposures for black-and-white
  and color films.
I.ENSES
Kopa.r ANeSran -  B}rnm J | 3.5 Lumeni<ed twin lenses.
LBNs OprrqrNcs-click stops,/13.5,4,5.6, B, 11, X6,22.
CovrnrNerroN Lews'drrecnurNrs-Series      VI-1$-inch
  Kodak  Adapter  Ring.
SHUITER
Fresn Koneuerrc-gear-train      retard, cocking type.
Setnos-l   /2, 1.I 5, 1 fi A, 1 I 25, 1 I 50, 1 fl A0, t | 300, "T," and "8."
(ssB45B*sirrgle   levet to cock and release.
Fresn-Adjustable     for Class F and Class M  lamps  (used
  with Kodak Flasholder).
FOCUSTNGAND YrgtYnVG
F6susrNc ScneBN-ground   glass plus Kodak  Ektalite  Field
  .[.ens fonunsurpassed image brilliance; image 2]6  x2]6.
M;\cwrnrnn-.:-built  into hood; pagnifies about 4 times'
Focu}lxc  ScRrn-on   top of viewiig-lens  mount'; shows both
  distance and depth of field,
FocusrNc ReNcB -3tl    feet to infinity.
Eve-Lrver  F,rNoBn-hood  can be converted to direct, frame
   finder.
FILTTOPERAIION
Frru AnvaNcc-with    automatic  film  stop; exposure num-
  bers in.counter actuated by metering device.
coNsrRUcnoN
Boov-die-cast   aluminum  alloy.
SBnra., Nur'rge,n-in   rim. around  tripod  'soc!et. Keep  a
  record of this number  with your personal papers.


     www.orphancameras.com
View original page 22From the M. Butkus archive. Original publisher and archive notices are retained.
Check the model and edition against your equipment.
PDF verified 2026-10-10.