Film cameras
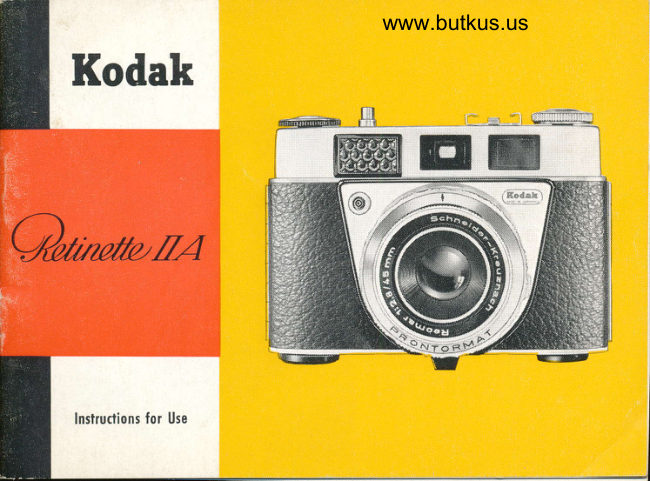
Kodak Retinette IIA User manual
User manual for Kodak Retinette IIA. 24 pages in English. Read the original PDF, download or print a copy without registration.
24 pagesEnglish6.3 MB PDF
Loading your manual…Open PDF directly
Document details
- Brand
- Kodak
- Model / document
- Kodak Retinette IIA
- Document type
- User manual
- Language
- English
- Pages
- 24
- File size
- 6.3 MB
- Category
- Film cameras
- Document date
- Not specified in catalog
Search available document text
Find a term, then jump to its page in the original PDF. Image-only pages may not be searchable; check the PDF for exact wording and diagrams.
Page 4 · Read text
www.butkus.us


This is AII
You have to do to shoot
with the
RETI N ETTE ll A camera:

Ser lhe distonce
Set the pointer in the finder
to fhe index
Releqse
View original page 4
Page 5 · Read text
Sefting the Film Speed


The exposure depends on the speed of the film in your
comero. The instruction leoflet enclosed with every film
gives you doto for the oppropriote ASA or DIN figure
thol you hove to set on the Prontormot Speciol shutter.
To do ihis, press in the setting lever (o), ond push it
olong until the triongulor I  index points fo the re-
quired ASA or DIN figure. (The DIN rotings opply
moinly to Germon films.)
View original page 5
Page 6 · Read text
www.butkus.us
Setting the Distance


Turn ihe focusing ring (see illustrotion) until the diomond
I index mork points to the required distonce figure on
the distonce scole.
The lens of your comero reproduces shorply not only
the subiect ot the distonce ot which it is qctuolly focused,
but olso o certoin zone in front ond behind. This zone is
known os the depth of field. With your RETINETTE  ll A
it is reolly eosy to reod off fhis depth ot o glonce for
ony shot. As you rotote the shutter ring, you see of the
View original page 6
Page 7 · Read text
some time the two red pointers of the outomotic depth
of field indicotor moving olong the distonce scole. These
pointers indicote the zone of shorpness for your picture.
The lwo red figures  ('10 ond 35) on the distonce scole ore
useful zone focus settings. For neor subiects, set the
distonce to the red figure 10; for more distont subiects
set it to the red figure 35. The position of the depth of
field indicotor olwoys shows you the shorp zone ovoil-
oble for your prefocused shot.
View original page 7Page 8 · Read text
www.butkus.us
Pictures Outdoors


The shutter ring of your RETINETTE  ll A corries two
setting ronges, for outdoor ond for flosh exposures. The
outdoor ronge is morked by o smoll sun, the flosh ronge
by o flosh bulb. Turn the shufter ring until the symbol of
the sun is opposife the block dot (b). lf you now look
through fhe finder you will see o bright triongulor A
index mork of the centre of the lower edge of the finder
frome.
View original page 8
Page 9 · Read text
In oddition you will notice o mov-
                      ing block pointer on the lower
                        bright frome line (illustrotion  1).
                                          medium          lllustr.  I          Pointing the comero to
                       bright subiects you rotoie the
                        shutter ring until this Pointer  is
                       exoctly oligned with the bright
                a mork (illustroiion 2). This seis
                   the correct exposure for Your
                           picture. In extreme light condiiions
                    the triongulor a. mqrk in the
                         finder moy be obscured when you
         lllustr.2                          turn the shulter ring (illusirotion  3).
                          This meons thot you connot moke
                   on exposure with ihe light ovoil-
                                    Digitally signed by mike butkus   oble.
                              cn=mike butkus,mike              DN:o=orphancameras,                                            ou=29,
                             email=mike@butkus.org, c=US
                               Date: 2019.09.24 14:39:32butkus            -04'00'

                              8
         lllustr.3
View original page 9Page 10 · Read text
www.butkus.us
Holding and Viewing


Hold your RETINETTE in both honds ond look
through the finder eyepiece. As you con see in
the illustrotions, you con hold the comero either
horizontolly or verticolly. In either cose, keep
your fingers cleor of the honeycomb cell win_
dow of the exposure meter. Grip the shutter
ring with the other hond. Afier o few ottempts
you will soon find o reolly sfeody hold for your
RETINETTE.
View original page 10
Page 11 · Read text
Tensioning and Releasing


Pull out the ropid winding lever (c) os for os
it will go. This single movement tensions the
shutter, odvonces the film in the comero (poge l2)
by one frome, ond olso odvonces the film
counter (poge l4).

The ropid winding lever outomoticolly shoots
bock into its originol position. lf it should not
fly bock, you did not pull it out fully. When
you hove your subiect nicely fromed in the
lorge-size viewfinder, fully press down the re-
leose button (d). Fully pull out the ropid win-
ding lever ogoin ofter every shot.
10.
View original page 11
Page 13 · Read text
(Do it in the shode)lnserting the Film
 '1.   Press the opening button (e)in the bose of the comero'
  The comero bock will sPring open.
2. Fully pull out the rewind knob (f).
3. Turn the built-in toke-up spool (g) bV its serroted
   flonge until one of the sliis points upwords. Push the
   trimmed end of the film inio this slit, so os to onchor
  o perforotion hole in the little hook of the slit.
4. Drow the film ocross the film trock, ond insert the
   cossette in the cossette chomber. The teeth of the film
   tronsport sprocket (h) must properly engoge both per-
   forotion rows of the film.
5. Now push bock the rewind knob (f), ond turn it ot the
  some time in the direction of the orrow until you feel
  o slight resistonce. Thoi tensions the film.
6. Finolly close the comero bock, moking sure thot the
   cotch engoges oudibly.


12
View original page 13
Page 15 · Read text
Setting the Film Gounter and
Film Indicator
Turn the block milled ring (i) of the film counler in the
direction of ihe orrow until the diomond-shoped $ mork
(k) between the Nos. I ond 36 is opposite ihe triongulor
f, mork  (l). With o 20-exposure cossetfe set the counier
to the diomond $ mork ot No. 23. Now tension the
shutter, releose, iension ogoin, releose, ond tension once
more. At the some iime the rewind knob must rotote
ogoinst the orrow, showing thot the film is odvoncing
properly. lf the rewind knob does not rotote, tension fhe
film ogoin (poge 12). The I  mork is now opposiie No.36
or 20 respectively. The film counter olwoys indicotes the
number of shots still ovoiloble.
To set the film indicotor (bottom illustrotion), hold the
rewind knob ond turn the inner serroted ring until the
block dot is opposite the speed roting of the film in
the comero.


14
View original page 15
Page 18 · Read text
www.butkus.us
Flash Shots
Turn the milled shutter ring until the flosh ronge ond
the operture required ore opposite ihe block dot (b).In
the flosh ronge the shutter is olwoys set to 1/:o ss66ncl.
This is suitoble for synchronizing elecfronic flosh units
ond oll closs X flosh bulbs.
Push your flosh gun, for instonce the KODABLITZ,  into
the occessory shoe of your comero, ond plug the flosh
coble into the flosh socket (b). You ore reody to shoot.
You con work out the operiure required from the guide
number given on the flosh bulb pocking or in the
instructions for the vorious electronic flosh units. Use
ihe following rule:
Guide number divided by the distqnce = dperture.
              Guide number 72
                                                                   f/B                ----- gTeei-     = oPerture
View original page 18Page 19 · Read text
Time Exposures


                     For time exposures mount the comero on o tripod by
                   meons of the tripod bush in the comero bose. Expose
                      with o coble releose - which screws into the threod of
                     the releqse buiton - to ovoid comero shoke.
                      Turn the shuiter ring until the letter "B" is opposite the
                    block dot (b). This is the time exposure setting: the
                      shutter now remoins open os long os you keep the
                     buiton depressed. With time exposures the lens is
                   olwoys set Io f122.
                 The right-hond figure 22 is used for time exposures,
                     the left-hond Il22 setting for flosh shots. The coupled
                    exposure control of your RETINETTE   ll A connot be
                     used with time exposures.


l8
View original page 19Page 20 · Read text
www.butkus.us
      Glose-up Parallax


          At distonces belowS feet o so-colled porollox
          error oppeors. ln other words, the field of
         view outlined by the brilliont frome in the
          finder no longer corresponds exocily io the
\        view recorded on the film. To compensote
         for this porollox ot o subiect distonce of
           3feet, imogine o line between the fwo morks
        on the frome (dotted on the illusiroiion) os
         the upper limit of the field of view. Ai dis-
         tonces greoter thon 3 feet, this line grodu-
           olly moves upwords, until of 8 feei it coin-
          cides with the upper edge of the finder frome.
View original page 20Page 22 · Read text
www.butkus.us

Example


You wont to use on F lll yellor,v-green  filter for o shot on
block-ond-white film" You hqve sei the filrn soeed to
64ASA. In the toble opposiie you will see thqt with the
yellow-green (F lll)  f ilter the  f ilm speed seiting must be
reduced by 3 divisions - in other words to 32 ASA (illus-
sirofion left).
lf you work ogoin without the filter, or chonge  it, re-
member to re-set the film speed roting occordingly.


                                                                                21
View original page 22Page 23 · Read text
Deliberate Double ExPosures
The releose lock of the RETINETTE llA prevents occidentol double exposure.
To moke o deliberote double exposure for speciol effects, depress the revers-
ing button (poge 15) ofter the first of the two exposures, keeping  it down ond
oi the some time pull out the ropid winding lever os for os it will go' The film
then remoins in position for o second exposure on the some frome. The film
counter, however, odvonces by one frome'


Gare of the Gamera
Protect your lens ond the finder window ogoinst iniury ond finger morks'
 For cleoning, use o soft soble brush or o soft rog. Use the brush from lime
 to time olso for dusting the film trock ond cossette chomber.


 22
View original page 23
Page 24 · Read text
www.butkus.us

Glose-ups

 In the neor ronge below the 3-feet limif you
 enter on immense world in minioture. The close-
 up rongefinder for 45 mm lenses, used with ihe
N l, N ll, ond N lll close-up lenses covers o
 neor ronge from 39 to 11,h inches (97 to 29 cm).


The Lens Hood

Use the lens hood for oll your shots. lt screens
off stroy light ond olso proiecis the lens ogoinst
roin or snow. lt should in foct be o port of your
stondord outfit.


                                                       23
View original page 24From the M. Butkus archive. Original publisher and archive notices are retained.
Check the model and edition against your equipment.
PDF verified 2026-10-10.