Film cameras
Kodak S100EF User manual
User manual for Kodak S100EF. 15 pages in English. Read the original PDF, download or print a copy without registration.
15 pagesEnglish1.6 MB PDF
Loading your manual…Open PDF directly
Document details
- Brand
- Kodak
- Model / document
- Kodak S100EF
- Document type
- User manual
- Language
- English
- Pages
- 15
- File size
- 1.6 MB
- Category
- Film cameras
- Document date
- Not specified in catalog
Search available document text
Find a term, then jump to its page in the original PDF. Image-only pages may not be searchable; check the PDF for exact wording and diagrams.
Page 1 · Read text
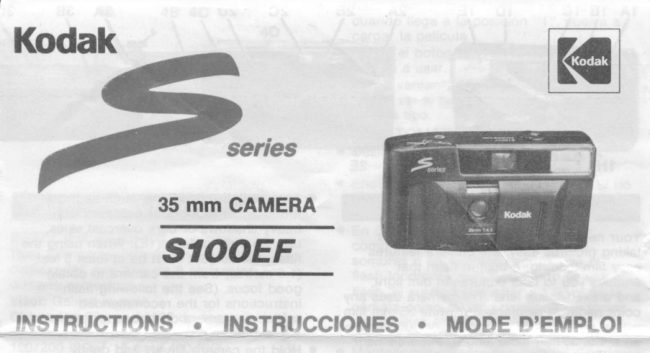
Kodak?                ,a"

              35 mm CAMERA
       srooEF
lNSTRUgTloNS .  INSTRITCCIONES . MODE 7"r'EUDLOI
View original page 1Page 2 · Read text
@Eastman Kodak Company, 1987

SPECIFICATIONS                      Focus Range: 4 feet to infinity
Type: Compact fixed-focus 35 mm camera     Film Loading: Easy loading
Lens: 35 mm  f /4.5 3-element glass lens with   Film Advance: Manual thumb-wheel
protective lens cover                          Flash Unit Electronic flash with 7-second
Viewf inder: Reverse-G  al ilean                    recycle
Shutter Speed: Fixed 1/100 second.         Power Source: 2 AA-size alkaline batteries
Aperture:   f /4.5 tor flash; f/8 for ISO           Dimensions: Approximately 5 x 2.7 x 1.7 in.
100/200;   f /11 tor tSO 400                     (128 x 70 x 45 mm)
Speed Range: Manual setting foi ISO 100,     Weight: 10 ounces (280 grams) with film and
200, and 400                                     battery

FULL ONE-YEAR WARRANTY          Kodak makes no other express warranty lor
                                                         this product.THIS WARRANTY APPLIES ONLY TO
CAMERAS PURCHASED IN THE UNITED      Repair and the option of replacement or
STATES AND CANADA.                        refund, in the event'that Kodak is unable to
                                                    repair the camera, are Kodak's onlyWarranty Time Period                                                 obligations. Kodak will not be responsible
This 35 mm KooRx Camera is warranted by     lor any consequential or incidental damages
Kodak to function properly for one year from   resulting trom the sate or use ol thisthe date of purchase. This vuarranty covers                                        camera, regardless ol the cause of such
the purchaser of this camera and anyone     damages.else who owns it during the warranty period.                                       Your Rights under State LawWarranty Goverage                                  Some states do not allow the exclusion orlf this camera does not function properly                                                     limitation of incidental or consequential
within the warranty period, upon submission   damages, so the above limitation or
of dated.proof of purchase, Kodak will repair  exclusion may not apply to you. This
it without charge. lf Kodak is unable to        warranty gives you specific legal rights, and
repair  it, the option of replacement or refund  you may also have other rights which varyof the purchase price will be available.                                          from state to state.
How to Obtain Service        www.butkus.us
View original page 2Page 3 · Read text
|]uilr sjtale [o slale.
 How to Obtain Service                                             Supplemental Canadian Provisions:
 For assistance in using the camera, contact                                                      In addition to the provisions of the U.S.
 a dealer in Kodak products. For service on     warranty, the following provisions will apply:  this camera, return it through a dealer in                                                  Proof of purchase for these purposes
 Kodak products, send direct to Kodak at the   constitutes the original sales slip or cash
 address below or call (800) 237-5398 (in the   register tape. lt is suggested that your proof United States only) for the location of an                                                 of purchase be retained in your camera case authorized warranty service facility nearest                                                    at all times to ensure warranty service.
 you. Enclosing a note with the camera        The provisions of this additional written
 giving details of the problem and your         warranty are in addition to, and not a
 complete name and address will help Kodak    modification of, or subtraction from, the  return the camera promptly.                                                  statutory warranties and other rights and
       Eastman Kodak Company             remedies in any app_licable legislation and toHr-    Central Equipment Serviie Center      the extent that these provisions purport to
       800 Lee Road, Door C                   disclaim, exclude or limit any such statutory
        Rochester, NY 14650                    warranties and other rights and remedies,
  In Canada send to:                        such provisions shall be deemed to be
       Kodak Equipment Service Centre      amended to the extent necessary to comply
       3500 Eglinton Avenue, W.                therewith.
        Toronto, Ontario M6M 1V3             Outside the United States and Canada
      CANADA                                  In countries other than the United States
 Limitations                             and Canada, the terms of this warranty may
 This warranty does not cover circumstances   be ditferent. Unless a specific Kodak
 beyond Kodak's control, nor problems         warranty is communicated to the purchaser
 caused by failure to follow the care and        in writing by a Kodak company, ho warranty
 operating instructions in the manual.           or liability exists beyond any minimum
                                            requirements lmposed by law, even though Warranty service will not be provided                                                  defect, damage, or loss may be by without dated proof of purchase.                                            negligence or other act.


 R. No. 633877                                                                                          Printed in Taiwan
View original page 3Page 6 · Read text
r For low-light conditions, such as those
                                                found either indoors or outdoors with
  ' Your new 35 mm KoDAK Camera makes           heavy shadows or dark overcast skies,                                                use the built-in flash (1E). When using the  taking pictures easy; the camera features                                                                flash, the subject must be at least 5 feet  easy         film            loading,                                tlash                                         that                a built-rn
                       pictures         you  enables                                                    light,              (1 .5 metres) from lhe camera to obtain                to take                                    in dim                                           good focus. (See the following flash  and a fixed-focus lens. The camera uses any                                                        instructions for the recommended   color negative or black-and-white 35 mm lilm
  with      a speed                     100,200,                of ISO                                 or 400. lt has                                                                                                            !F!    ,-                                                     subject-to-camera  distances for optimum                                                             film exposure.)                                                                          '        mm                    focal  an   f ,'4.5,35                           lengtn, three-element  glass lens, and a shutter speed of          o Hold the camera steady and gently
  1/100 sec.                                      depress the shutter release (1A) to take
                                                   the picture.
  BATTERIES                                         . Wind the film advance wheel (2D) until  it   . The camera uses 2 AA-size, alkaline                                                         stops. Your camera is ready to take the     batteries such as KooAK SUPRALTFETM                                                  next picture.     Batteries. Make sure that you use only                                                   For flash pictures, turn on the flash by      alkalr .e batteries.                                  .
  o To insert the batteries in the battery               sliding the flash switch (1C) towards the                                                            flash. You can take the picture when the    compartment,  slide the battery                                                        flash ready light (28) glows.    compartment door (3C) toward the outside
     of the camera. Insert the batteries with the    When using ISO 100 film, keep your                                                      between                                                     subject                                                               5-13 feet (1.5-4.0 metres)                                  positions shown                            in the   + and            -  terminals                                                from                                                          camera.                                                        the    by                              battery       the symbols                on the
    compartment  door.                     When using ISO 200 film, keep your
  o Slide the battery compartment door              subject between 5-16 feet (1.5-5.0 metres)
     closed; it shorrld click shut.                   from the camera.
  NECKSTRAP                         When using ISO 400 film, keep your
   . Attach the neckstrap to your camera by,         sublect between 5-18feet (1.5-5.5 metres)
      first, passing the small loop ol the strap        from the camera.    behind the neckstrap post (3A). Then,      o To conserve battery life, turn off the flash
    pass the larger loop ol the strap through       by sliding the flash switch away from the
    the smaller loop and draw it tight.                 flash. Closing the lens cover will also turn                                                                off the flash and will protect the lens
  LOADING                              when you are not taking pictures.
  o Always load and unload www.butkus.usyour film in                           lllll    .rAFrtlta
View original page 6Page 7 · Read text
. Always load and unload your film in                 wrr9rr yuu  drE  rrur  rdnilrY  PrvtulE!.
  subdued light to minimize fogging.        UNLOADING
o Open the back door by sliding the back     o After taking the last picture, you must
  door latch (2A) towards the top of the           rewind the film into the film magazine
  camera. Unfold the film rewind crank (1 D)       before unloading the film from the camera
  and lift up on its'handle. Insert the film         or you will fog the film. To rewind the film,
  magazine into the film chamber (4A) so         depress the rewind button (38), unfold the
   that the longer part of its center spindle is      rewind crank (1D), and turn it in the
  towards the bottom of the camera. Push         direction of the arrow. Be sure to turn the
  the rewind crank back into place, rotating       crank slowly and smoothly to avoid static
    it slightly if necessary, so that its shaft             electricity. When the film is fully rewound
  engages the top part of the spindle.               into the magazine, you will notice the
   Refold the crank handle.                      crank turns easier.
.  Pull out only enough film to align the end   o Open the back door by sliding the back
   of the film with the yellow film guide mark      door latch (2A) towards the top of the
   (4D). Make sure the film cartridge lip           camera. Then  lift up on the film rewind
  faces the take-up spool (4C) and the film       crank and remove the film magazine.
   perforations engage the lower sprocket      NOTE: Upon opening the back door, the
  teeth (48). Then close the door.              exposure counter will reset to "S" (start)
o Slide the lens cover (1F) open to unlock        position.
  the shutter release (1 A). Then, depress     CAMERA CARE
  the shutter release and wind the film       o Protect the camera from dust. hoi-srlre
  advance wheel (2D) repeatedly until the        and excessive heat.  exposure counter (1B) shows "1." To                                                Close the lens cover whenever yor! are   verify proper film loading, turn the film         .
  rewind crank one turn in the direction of        not taking pictures in order to protect the
  the arrow or until it is tightly wound.             lens ('1H) and to keep  it clean.  When you advance the film for the next        .   lf the lens appears dirty, breathe on  it to
   picture, the film rewind crank should           form a nrist and wipe the surface gently
   rotate. lf it does not rotate, reload the film.       with a soft lintless cloth or lens cleaning
. Set the film speed switch (1G) for the ISO        tissue. Do not apply pressure or you will
  speed of the lilm you are using.                 scratch the lens. Never wipe a dry lens.                                                        . Remove batteries when storing camera foro The lilm window (2E) shows if film is in                                         an extended period.  the camera and the type of film.                                      NOTE: Do not use solvents or solutions not
PICTURE.TAKING                         designed for cleaning camera lenses. Do not
o Slide the lens cover open (1F). Opening      use chemically treated tissues intended lor
  the cover also unlocks the shutter release.    cleaning eyeglasses. Do not use harsh or. Frame your subject in the viewfinder (2C).     abrasive cleaners on the camera body.
    lf you do not use the built-in flash, your      GAUTION: To prevent possible damage, do
  subject can be as close as 4 feet             not attempt to disassemble or repair the
   (1.2 metres) to the camera and still be in     camera or flash unit yoursel{
  good focus.
View original page 7Page 8 · Read text
hace avanzar la pelfcula. Si no gira?                  4B 4C                                           cuando llega a la posicion "1", vuelva a
  \                               o cargarAjuste ella botonpelfcula.(1G) en la sensibilidad ISO
                                           que va a usar.
      t*                               o Por la ventanilla de la pelfcula (2E) se
                                             puede ver si hay pelicula en la c6mara y
ret                                        de qu6 tipo.
                            COMO TOMAR FOTOGRAFIAS
                                 o Deslice la cubierta protectora (1F). Al
                                                      abrirse se destraba el disparador.
                                   o Encuadre el motivo en el visor (2C). Si no
                                               usa el flash, el motivo se puede encontrar
                                           a 1,2O m del objetivo y estar enfocado.
                                 o En condiciones de poca iluminaci6n,  ESPECIFICACIONES                                       como en interiores o exteriores con
  Tlpo: Compacta, 35 mm, enfoque  fijo.            sombras o en nublado oscuro, use el
  Objetivo: 35 mm,  f /4, de 3 elementos con           flash incorporado (1E). Cuando se usa el
  cubierta protectora.                                       flash, el sujeto debe estar a 1,50 m de la
  Visor: Galileo inverso.                          c6mara como mfnimo para que las tomas
  Obturador: Fijo en 1/100 de segundo.             salgan bien enfocadas. (Vea las
  Apertura:  f / 4,5 para flash;  t/ 1O para               instru€ei ones paraa€ks#el itash+--'                             -G-  lOO/2OO ISO; f/15 para 400 lSO.                                  o Mantenga la c6mara con firmeza y oprima
  Sensibilidad: Ajuste manual para 100, 200, y        el disparador (1A) para tomar la foto.
  400 rso.                           o Haga girar la rueda de avance (2D) hasta
  Enfoque: de 1,20 m a infinito.                  que se pare. La c6mara est6 lista para la
  Carga de pelicula: F6cil                          proxima toma.
  Avance de la pelicula: Manual             o Para tomas con flash, deslice el boton del
  Flash: Electronico con reciclaje de                  flash (1C) hacia el flash. Se puede tomar
  7 segundos                                               la foto cuando se enciende la sefral del
  Fuente de energia: 2 pilas alcalinas AA             flash (2B).
  Dimensiones: 128 x 7Q x 45 mm                Cuando use pelicula de 100 lSO,
  Peso: 280 gramos con pelfcula y pilas            mantenga el motivo a una distancia entre
 Con su nueva C6mara Koonx de 35 mm es         1,50 y 4 metros de la c6mara.
  muy fAcil tomar fotografias. No necesita         Cuando use pelicula de 200 lSO,
  enfoque, se carga facilmente y su flash           mantenga el motivo a una distancia entre
  incorporado le permite tomar fotograffas en         1,50 y 5 metros de la c6mara.
  condiciones de poca iluminacion. Acepta        Cuando use pelfcula de 400 lSO,
  pelicula negativa de color o de blanco y          mantenga el motivo a una distancia entre
  negro de 35 mm de 100, 200 6 400 ISO en          1,50 y 5,50 metros de la camara.
  rollos de 12, 24 6 36 exposiciones. Tiene un   o Para conservar la vida 0til de la pila,
  obletivo de t/4,5 con una longitud focal de         desactive el flash cuando no se usa. Al
  35 mm, un objetivo de tres elementos y una        cerrar la cubierta protectora tambi6n se
  velocidad de obturaci6n de 1/100 de               desactiva el flash y se protege el objetivo
  segundo.                                   cuando no se usa la cAmara.
  PILAS                           COMO DESCARGAR LA PELICULA O La chmara usa daf,llihs alcdlnas,AA-www.butkus.us
View original page 8Page 9 · Read text
segundo.                                   cuando no se usa la cAmara.
PILAS                           COMO DESCARGAR LA PELICULAo La camara usa dos pilas alcalinas AA.                                o Despues de sacar la 0ltima foto, debe  Cerci6rese de usar pilas alcalinas                                                 rebobinar la pelfcula en su magasin antes
  solamente.                               de descargar la c6mara o se velaria la
o Para colocar las pilas, deslice la tapa del          pelfcula. Para rebobinar la pellcula,
  compartimiento (3C) hacia el exterior de        oprima el boton de rebobinado (38),
   la c6mara. Coloque las pilas en los             saque la palanca del rebobinador (1D) y  canales con los slmbolos "+" y "-"  en         h6gala girar en la direccion de la flecha
   la posici6n correspondiente.                        lenta y uniformemente para evitar
o Cierre la tapa y cerciorese de que quede        problemas de electricidad est6tica.
  bien cerrada.                              Cuando est6 por terminar el rebobinado,
                                                    notar6 que resulta m6s f6cil hacer girar elCORREA
o Para adosar la correa, haga pasar el lazo        rebobinador.  pequefro por detr6s del poste (3A). Luego,   o Abra la tapa de la c6mara, tire de la
  pase el lazo m6s grande por el m6s             palanca del rebobinador hacia arriba y
  pequefro v tire hasta que quede apretado.         retire la pelfcula.
                                      NOTA: Cuando abra la tapa de la c6mara, elCOMO CARGAR LA PELICULA
. Cargue y descargue la c6mara en luz         contador de exposiciones volver6
  tenue para reducir el efecto de velo que    COMO CUIDAR LA CAMARA
   la luz puede tener sobre la pelicula        o Proteja la c6mara del polvo, de la
  cuando est6 fuera de la cAmara.              humedad y del calor excesivos.
.  Deslice el cerrojo (2A) hacia la parte       o La cubierta se debe mantener cerrada
  superior de la c6mara. Tire de la lengUeta      cuando no se sacan fotos para proteger
  del rebobinador (1D) hacia arriba. Inserte          el objetivo (1H) y para mantenerlo limpio.
   la pelfcula en su compartimiento (4A) con    o Si el objetivo est6 sucio, eche aliento
   la parte m6s larga del eje hacia abajo.          sobre su superficie y lfmpielo con una tela
  Vuelva el rebobinador a su posici6n            suave que no suelte pelusa o con papel
   original, haci6ndolo girar si fuera               para limpiar objetivos. No haga presion o
   necesario, para que coincida ccn el eje          raspar6 el objetivo. Nunca limpie un
  del rollo de pelfcula.                              objetivo completamente seco.
o Saque suficiente pelfcula para que pueda    o Saque las pilas si no va a usar la c6mara
   insertarla en la bobina receptora (4C);          por un tiempo.
  cerciorese de que la pelfcula quede plana    NOTA: No use solventes ni otras soluciones,
  sobre la rueda dentada (48). La pelfcula      excepto los especialmente fabricados para
  no debe pasar la linea amarilla (4D).            objetivos fotogr6ficos. Tampoco use papeles
  Cierre la tapa de la camara.                    tratados quimicamente para la limpieza de
o Deslice la cubierta del objetivo (1F) para       gafas. No use limpiadores abrasivos sobre el
  destrabar el disparador (1A). Entonces        cuerpo de la c6mara.
  oprima el disparador y haga girar la rueda    ADVERTENCIA: Para evitar posibles dafros,
  de avance de la pelicula (2D) hasta que      no trate de desarmar ni reparar la c6mara o
   aparezca el n0mero "1" en la ventanilla         el flash"
   del contador de exposiciones (1B). El
  rebobinador debe girar cada vez que
View original page 9Page 10 · Read text
. Une fen6tre (2E) permet de savoir d tout
                                          moment si un film est charge dans
                                                              I'appareil et, le cas 6ch6ant, de quel type
  SPECIFICATIONS                         de pellicule il s'agit.
  Type: Appareil 35 mm compact d mise au     PRISE DE VUES
   point fixe                           o Ouvrez re couvre-objectif  (1F); en
   Objectif: 35 mm  f / 4,5 3 6l€ments de verre         ouvrant-ce dernier. vous d6verrouillez en
  avec couvert pour protection               m6me temps le d6clencheur de
   Viseur: Type Galil6e                                    I'obturateur.
   Vitesse d'obturation: fixe 1/100 seconde     o Cadrez le sujet dans le viseur (2C). Si
   Ouverture de diaphragme:  f /4,5 pour flash;       vous n'utilisez pas le flash incorpor6, vous
   f/10 pour ISO 1OO/2OO; f 115 pour ISO 400       pouvez vous approcher jusqu'i 1,2 mdtres  Mise au point de 4 pieds i  l'infini             du sujet et conserver une excellente mise
  Chargement du film: simple                   au point.
  Avance du film: manuelle en actionnant la    o Dans des conditions de faible luminosit6   molette                                                  (scdnes int6rieures, contrejour, ciel
   Flash: Flash 6lectronique avec temps de          nuageux), utilisez le flash incorporE (1E).   recharge de 7 secondes                                                 Lorsque vous employez ce dernier, le
   Alimentation: 2 piles alcalines AA                    sujet doit se trouver i 1,5 mdtres au
   Dimensions: environ 5 x 2,7 x 1,7 po             moins de I'appareil pour garantir une
   (128 x 70 x 45 mm)                          bonne mise au point. (Pour les distances'- Poids: 10 onces (280 grammes) film et piles      recommand6es entre appareii et sujet,
   inclus.                                             reportez-vous ci-dessous aux instructions
                                                             relatives au flash.)
  Les nouveaux appareils KoDAK 35 mm sont    o Pour photographier, appuyez sur le   trds faciles d utiliser: le chargement du film                                                   d6clencheur de I'obturateur (1A) sans   est simple, il n'y a pas de mise au point i        bouger I'appareil.   effectuer et I'appareil comporte un flash                                 o Pour armer I'appareil pour la photo   6lectronique incorpor6 permettant de
   photographier dans toutes conditions de           suivante, tournez d fond la molette
   luminosit6. li utilise tout film negative             d'avance (2D).                                 o Pour les photos au flash, poussez le   couleur et negative noir et blanc 35 mm de
   100, 2OO, ou 400 lSO, de 12,20,24 ou 36        commutateur du flash (1C) vers I'ext6rieur.
   poses. Son objectif 35 mm compos6 de trois     Vous pouvez prendre la photo dds que
  6l6ments a.une ouverture de t/4,5 et sa            I'indicateur lumineux (28) s'allume. Pour
   vitesse d'obturation est de 1/100 sec.                le film ISO 100, la port6e du flash va de                                                      1,5 a 4,0 mdtres, elle va de 1,5 a 5,0  PILES                                                 mdtres pour le film ISO 200 et de 1,5 i   .  L'appareil utilise deux piles alcalines de         5,5 mdtres pour le film ISO 400.
      calibre AA. Veillez i  n'utiliser que des          . Pour prolonger la dur6e d'utilisation des-    piles alcalines.                                          piles, remettez le flash hors fonction
  o Pour charger les piles, faites coulisser le        (repoussez son commutateur). La
     couvercle du compartiment piles (3C) vers       fermeture du couvre-objectif entraine la
      I'ext6rieur de I'appareil. Ins6rez les piles;       mise hors fonction du flash et protdge
     placez les bornes + et - conform6ment          I'objectif lorsque I'appareil n'est pas
                                                                       utilis6.*    couvercleaux symbolesdu compartiment.apparaissant sur le
  o Refermez le compartiment piles; un d6clic   RETRAIT DU FILM    maroue la fermeture.                 o AprEs la derniEre prise de vue,  il faut
                                                  rembobiner le film dans la cartouche  COURROIE                 www.butkus.us                  ^  ^^l         :la     la    -ari-a'          D^..-      ^Ja^^r ^             l^
View original page 10Page 11 · Read text
.i-:   :'yrf ruutes appaldtssa]tl Sur te                  __UtiliSe.
   couvercle du compartiment.
o Refermez le compartiment piles; un d6clic   RETRAIT DU FILM  marque la fermeture.                 o Aprds la dernidre prise de vue,  il faut
                                                rembobiner le film dans la cartouchecouRRotE                                                 avant de le retirer. Pour effectuer leo Pour fixer la courroie, passez la petite         rembobinage appuyez sur le bouton de
  boucle derridre le point de fixation (3A).        rembobinage (38), sortez la manivelle (1D)
  Passez ensuite la grande boucle dans la         et tournez-la dans le sens de la fldche.
   petite et serrez                             Tournez lentement et sans d-coups pour
CHARGEMENT                                     6viter I'accumulation  d'6lectricit6 statique.
. Pour 6viter de voiler la pellicule, chargez      Vous noterez que la manivelle tourne
   et retirez toujours le film en lumidre          beaucoup plus facilement lorsque le
   tamis6e.                                    rembobinage est termin6.
o Pour ouvrir I'appareil, poussez le loquet    o Pour ouvrir le dos de I'appareil, tirez le
  de fermeture (2A) vers le haut. Sortez la        verrou de fermeture (2A) vers le haut.
   manivelle de rembobinage (1D) et              Soulevez la manivelle de rembobinage  et
   soulevez-la. Ins6rez le film dans I'appareil        retirez la cartouche de film.
   (4A); la partie saillante de I'axe central      REMARQUE: Dds I'ouverture du dos de
   doit 6tre dirig6e vers le bas. Repoussez la     I'appareil, le compteur de prises de vues
   manivelle; si n6cessaire, tournez-la             revient d la position de d6part ("S").
  lEgdrement pour la r6introduire dans I'axe.   SOINS A NPPONTER A L'APPAREIL
   Repliez-la.                                            .  Protegez-le de la poussidre, de I'humidit6o Tirez le film de la cartouche afin de placer       et de la chaleur.
   le d6but de l'amorce sur I'enrouleur ( C).   o Pour prot6ger I'objectif (1H) et 6viter de le  Assurez-vous que le film repose bien i             salir, refermez le couvre-objectif lorsque   plat contre I'entraineur ( B). Le film ne                                           vous n'utilisez pas I'appareil.   doit pas d6passer le repdre de                                                          . Pour nettoyer I'objectif, soufflez pour  positionnement jaune (4D). Refermez le                                                  cr6er une bu6e sur ce dernier et  dos de I'appareil.                                                  au moyen                                                                          doux                                                                                  chiffon                                                                  d'un. Pour d6verrouiller le d6clencheur de            essuyez-le                                                                        papier                                         non pelucheux                                                                          de                                                     ou d'un   I'obturateur (1A), ouvrez le couvre-objectif                                                 nettoyage de surface optique. Pour ne pas   (1F). Appuyez sur le ddclencheur de                                                     rayer I'objectif, n'appuyez pas trop fort.   I'obturateur et tournez la molette d'avance                                      Ne nettoyez jamais un objectif i sec.  du film (2D); rep6tez plusieurs fois jusqu'i
  ce que le compteur de prises de vues      REMARQUE: N'utilisez aucun solvant ou
  (18) indique "1". La manivelle de             solution non destin6s au nettoyage de                                              surface optique. N'utilisez pas de papier i  rembobinage doit tourner lors de chaque                                                   traitement chimique servant i nettoyer les  avance du film. Si la manivelle n'a pas                                                       lunettes. Ne nettoyez pas le boitier de  commenc6  i tourner lorsque le compteur   atteint la position "1", recommencez  la         I'appareil au moyen de produits abrasifs.
  proc6dure de chargement.                ATTENTION: Ne tentez jamais de d6monter
o R6glez la barrette de sensibilit6 du film      ouflash.de r6parer vous-m6me I'appareil ou le  (1G) sur la position ad6quate.
View original page 11Page 12 · Read text
Merci de faire un don de 2,50 € pour soutenir ce site via E-bay ... www.PayPal.me/butkusView original page 12
Page 13 · Read text
i TROUBLESHOOTING                                                              4..,,
  What happened                Probable qause                      Solution
    Pictures too dark               Not enough light io take the      Use flash
                                           picture
                                      Flash not ready                  Wait for ready light
                                           Incorrect film speed setting      Use correct setting
                                       Subject too far from camera when See flash range recommendations
                                         taking flash pictures
    Pictures too light                   Incorrect film speed setting      Use correct setting
                                       Subject loo close to camera when See flash range recommendations
                                         taking flash pictures
                               Camera pointed directly at bright  Don't point camera directly at sun
                                     light.                             or other bright light
    Subject partially or fully obscured Hands, camera case, or strap     Keep hands, case, and stray away
                                         obstructing lens                  from lens
   Camera will not operate        Lens cover closed               Open lens cover
                                       Film not advanced                     Fully wind film advance wheel
   Foggy or blotchy pictures         Dirty or smudged lens             Clean lens; see CAMERA CARE
    Blank roll of film                   Film never advanced during      Load film properly; see LOADING
                                      carnera loading
    Flash ready light fails to glow     Flash not turned on               Turn on flash
    within 30 seconds                 Batteries weak or dead   "        Replace with 2 fresh alkaline
                                                                                         batteries
                                          Batteries improperly inserted in      lnsert batteries as shown on
                        camera                            battery compartment cover
                                Kodak and Supralife are trademarks.
                                   www.butkus.us
View original page 13Page 14 · Read text
l\OqaK ano uuprailTe are lraoemarKs.

PROBLEMAS Y SOLUCIONES
Problemt                    Causa probable                    Correcci6n
 Fotos muy oscuras            No habia luz suficiente para tomar Use flash
                                            la foto
                               La unidad de flash no estaba lista  Espere que s€ encienda la sefral
                                      Sensibilidad mal ajustada       Use el ajuste correcto
                                      El motivo muy lejos de la c6mara Vea las recomendaciones para
                                  para lotos con flash                  flash
 Fotos muy claras                 Sensibilidad mal ajustada       Use el ajuste correcto
                                      El motivo muy cerca de la cAmara Vea las recomendaciones para
                                  para fotos con flash                  flash
                               C6mara dirigida a una luz brillante No dirija la cAmara al sol o a una
                                                                                  tuz brillante
 Fotos parcialmente o totalmente La mano, el estuche o la correa  Curde de no tapar el objetivo *_* oscuras                       tapan el objetivo
 La c6mara no funciona        La cubierta est6 cerrada          Deslice la cubierta
                               La pelicula no avanza             Enrolle la pelicula completamente
 Fotos manchadas                   Objetivos sucios                    Limpie el objetivo
 Rollo sin fotos                La pelicula no avanz6 al cargarla Cargue le pelicula; vea como
                                                                           cargarla
 La senar no se enciende                                           :ii:: i:?:ilfi::,""       3ili"x?:f":::.iln:',:,'n""                                                                            ponerlas
                               Kodak es una marca de f6brica.
View original page 14Page 15 · Read text
MEsuREs A pneNDRE EN cAs D'tNctDENTslncldent                     Cause probable                      Solutlon
 lmage trop fonc6e               Luminosit6 insuffisant             Utilisez le flash
                                   Flash non pr6t                   Attendez le signal lumineux
                                Reglage incorrect de la vitesse   R6glez correctement
                                     Sujet trop 6loign6 pour une photo Voir les recommandations sur la
                               au flash                           portee du flash
 lmage trop claire                 R6glage incorrect de la vitesse   Reglez correctement
                                     Sujet trop prds pour une photo au  Voir les recommandations sur la
                                           flash                                port6e du flash
                                     Appareil dirig6 vers une source   Ne jamais digirer I'appareil vers le
                                  lumineuse intense                    soleil ou toute autre source                                                                      i
                                                                   lumineuse intense
 Sujet partiellement ou             Main, 6tui de I'appareil ou           Veillez i pas obstruer le champ de
 entidrement voil6                  courroie plac6s devant le champ  I'objectit
                            de I'objectif
 L'appareil ne fonctionne pas     Le couvre-objectif est ferm6      Ouvrez le couvre-objectif
                              Vous n'avez pas avanc6         Tournez d fond la molette
                                            le film                           d'avance du film
 Photos floues                        Objectif sale                       Reportez-vous i "Soins  i apporter
                                                                                                             i  I'appareil"
 Le film se r6vdle vierge aprds         ll n'a jamais avanc6 dans I'appareil Veillez i charger les films
d6veloppement                                                   correctement, reportez-
                                                                vous d "Chargement"
 L'indicateur de mise en fonction Les piles sont taibles ou us6es    Remplacez-les
 du flash ne s'allume pas aprEs   Les piles sont mal introduites dans Introduisez-les conform6ment aux
 30 secondes                I'appareil                          indications apparaissant sur le
                                                                       couvercle du compartiment piles
                               Kodak est une marque d6pos6e.

                               www.butkus.us
View original page 15From the M. Butkus archive. Original publisher and archive notices are retained.
Check the model and edition against your equipment.
PDF verified 2026-10-10.