Film cameras
Kodak S300MD User manual
User manual for Kodak S300MD. 12 pages in English. Read the original PDF, download or print a copy without registration.
12 pagesEnglish2.9 MB PDF
Loading your manual…Open PDF directly
Document details
- Brand
- Kodak
- Model / document
- Kodak S300MD
- Document type
- User manual
- Language
- English
- Pages
- 12
- File size
- 2.9 MB
- Category
- Film cameras
- Document date
- Not specified in catalog
Search available document text
Find a term, then jump to its page in the original PDF. Image-only pages may not be searchable; check the PDF for exact wording and diagrams.
Page 1 · Read text
www.butkus.us
 Kodak


                  series
               rm Ctm€ra
        s300MD

             Need help wlth your camera? Call Kodak loll tree
                                                            p.m.                                                       9:00                                           8:00 a.m. lo                          States only) from.                (United                                                                              * +                                                                         -al                                                                                      -r (80o'-2fit:24'tt'-                                       througrfnfti.y                     zonefiffidy'F----t"ste*tirne


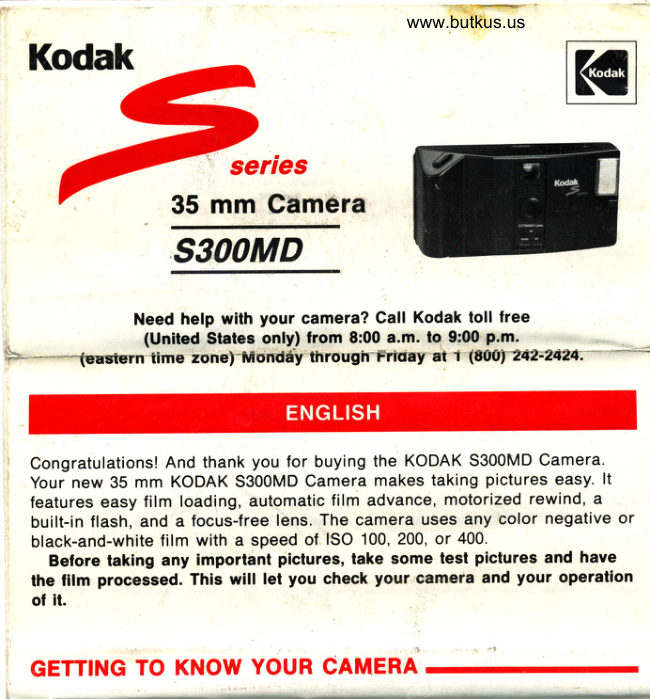
   Congratulations! And thank you for buying the KODAK S300MD Camera.
   Your new 35 mm KODAK S300MD Camera makes taking pictures easy. lt
   features easy film loading, automatic film advance, motorized rewind, a
    built-in flash, and a focusJree lens. The camera uses any color negative or
   black-and-white film with a speed of ISO 100, 200' or 400.
     Belore taklng any imporlant pictures, take some test Pictures and have
   the film processed. This will let you check your catnera and your oPeration
    ol it.

  GETTING TO KNOW YOUR CAMERA
View original page 1Page 3 · Read text
1. FILM-REWIND SWITCH. Slide tc rewind film.www.butkus.us                                          rl
 2. SHUTTER BUTTON. Press gently to take picture.                                                                                                                    iI

                                                                                                                                                                                                                                                                                                                                                                                                    l 3. VIEWFINDER. Look through to see scene.                                                                                                                                                                                                                                                               tlI 4. LIGHT SENSOR. Automatically measures light in scene to determine
    exposure.
 5. LENS. All-glass and focus-free to provide sharp pictUies.
 6. FILM-SPEED SWITCH. Set to match the speed of film you use.
  7. PICTURE COUNTER. Tells number of pictures you have taken.
 8. FLASH-READY LIGHT. Indicates flash is charged and ready to take a
    picture.
 9. LENS-COVER SWITCH. Slide to cover or uncover lens and to turn
   camera on.
10. FLASH SWITCH. Turns built-in flash on.
11. STRAP POST. Holds camera strap.
12. FLASH-WARNING LIGHT. Glows when flash is needed.
13. SPROCKET TEETH. Moves filrn through camera.
14. FILM CHAMBER. Holds film container.
15. FILM-DOOR LATCH. Slide to open film door.
16. TAKE-UP SPOOL. Holds exposed film.
17. FILM WINDOW. Shows if film is in camera and type of film.
18. FILM-LOAD MARK. Guide mark for easy film loading.
19. BATTERY-DOOR LATCH. Slide to open battery compartment door.
Specifications                         ,!nF,                                                              ffirType: Compact 35 mm camera
Lens: 35 mm focus-free.   f 14.5. 3-element glass lens with protective lens
  cover
Shutter Speed: Fixed 1/100 sec
Aperture:  f /4.5 tor flash;  f 19 tor ISO 100/200; f 112.6 for ISO 400
Film-Speed Range: Manual setting for ISO 100/200 and 400
Focus Range: 4 ft (1.2 m) to infinity
Flash Recycle Time: Approximately 7 secs with fresh batteries
Power Source: 2 AA-size alkaline batteries
Dimensions: Approximately 5.3 x 2.8 x 1.8 in. (136 x 71 x 46 mm)
Weight: 7 oz {200 g) with film and battery
                rr
OEastman Kodak Gompany, 1989

                                                                          4-89-KDX
Pt No. 633975               Kodak is a trademarf              Printed in U.S.A.
View original page 3Page 4 · Read text
Venmo @mike-butkus-camera  Ph. 2083
PayPal Name  Lynn@butkus.org      www.PayPal.me/lynnbutkus
View original page 4
Page 5 · Read text
LOADING THE
BATTERIES


LOADING THE FILM


Open the lens cover. Advance the film to ,,1" on the
picture counter.


Set the film-speed switch.
View original page 5
Page 6 · Read text
TAKif'dG ,.;;. JHil      www.butkus.us
Frame your subject in the viewfinder.


Gently press the shutter button to take the picture.  ll
the flash-warning light comes on, turn on the flash.


UNLOADING THE FILM
After you take your last picture, rewind the film.


                   r)
                     IYJ                    IE

Unload the camera.
View original page 6Page 7 · Read text
1 LOADING THE BATTERIEs
1. The camera uses 2 AA-size alkaline batteries. such as KODAK Batteries.
  CAUTION: Use only alkaline batteries.
2. Slide the battery-door latch (19)
   in the direction of the arrow.
  Load the batteries with the *
  and -  terminals in the
   positions shown in the battery
  compartment.
3. Close the battery door;  it should
   click shut.
4. Replace both batteries with
   fresh alkaline batteries when
  the flash takes up to 30 seconds to charge, when the film will not
   advaric-e,--or when the camera motor stows down. tf you-wontitg-usingr  -
   the camera lor a long time, remove the batteries.

2 lonorNc THE FILM
1. lf in sunlight, turn your back to the sun and
  load the film in the shade of your body.
2. Open the film door by sliding the film-door
   latch (15) down.
3. Insert the film in the film chamber (14) as
  shown.
4. Pull out only enough lilm to place the end
   ot the film at the film-load mark (18). Make
  sure lhe sprocket teeth (13) show through the holes on the side of the
   film. Close the door. lt should click shut.

                                        (.
View original page 7Page 8 · Read text
5. Slide the lens-cover switch (9) to                                           www.butkus.us
  open the lens cover and to turn the
  camera on. Press the shutter button
  3 times so the picture counter moves
   to "1". lf the picture counter moyes,
  the film is properly loaded. lf it does
   not move, open the film door and
   reload the film. (Because of limited
  space on the picture counter, dashes stand for frames 2 and 3. Beginning
   at frame 4, only even numbers show. Odd numbers are dashes.)
  CAUTION: DO NOT push the film-rewind switch (1) during thercrdrr,e
  procedure, because it will rev,ind the tilm back into the film container.
6. Set the film-speed switch (6) all the way to
  the left for ISO 100/200 film or all the way
   to the right for ISO 400 film.
7. The film window (17) shows  if film is in the
  camera and the type of film.


3 TAKTNG PrcruRES
1. Slide the lens-cover switch to
  completely uncover the lens.
2. Frame your subject within the
  viewfinder (3). For a sharp picture,
  stand at least 4 ft (1.2 m)  f rom
  your subject.

3. Hold the camera steady and gently
  press the shutter button to take the
   picture. Do not block the lens or
   flash. lf the flash-warning  light (12)
  glows when you press the shutter
   button, flash is needed (see Taking
  Flash Pictures).
View original page 8
Page 9 · Read text
4. The film will automatically advance so you can take your next picture.
Taking Flash Pictures
1. In dim light, such as indoors or outdoors in heavy shade or on dark
   overcast days, use the built-in flash.
 2. To find out if you need flash, partially press the shutter button. lf the
   flash-warning light next to the viewfinder glows, you need flash.
 3. Slide the flash switch (10) to tuin on the
   flash. You can take the picture when the
   flash-ready light (8) blinks.


4. Keep the subject within the
   distance range for the speed            rso               Flash-to-
   of the film in your camera.           Film Speed     Subject Distance
                                           100        5-13 ft (1.5-4.0 m)
                                        200        5-18 ft (1.5-5.0 m)
                                           400        5-25 ft (1.5-7.6 m)

NOTE: To prevent battery drain, turn otf the flash when you are not usinq  it.
View original page 9Page 10 · Read text
www.butkus.us
Flash Tips
 In color pictures taken with a flash, people's eyes sometimes appear red.
To prevent this, turn on room lights and have the subject face the lights.
  stand at an angle to shiny objects like windows or mirrors, otherwise
 light from the flash can reflect from the shiny surfaces and produce a
bright spot in your photograph.
4 UNLoADING THE FILM
The film will no longer advance when it is at the end of the roll. you can
tell you are at the end by checking that the picture counter has reached at
least 12, 24, or 36 (depending upon the length of the film you are using).
You may obtain a few extra pictures. You must rewind the film before
unloading  it from the camera or you will ruin  it.
1. To rewind the film, slide
   the film-rewind switch (1)
   in the direction of the
   arrow. The film will now
   rewind. When the picture
  counter (7) shows "S",
   turn the rewind switch otf.
2. Open the film door.
  Remove the film.
View original page 10
Page 11 · Read text
ATTACHING THE CAMERA STRAP
H:?,Xff":J:"Jil:T,:"        K   Kpost(11); pull thelong             +           .aMloop through the short                   lf-       Z-          | t:--.--loop then pull it tisht                     '7                                                                                                       II   l-L                   ],l> L                                      'te           'W
CARING FOR YOUR CAMERA
1. Protect the camera from dust, moisture, and excessive heat.
  GAUTION: Do not use solvents or harsh or abrasive cleaners on the camera body.
2. Close the lens cover whenever you are not taking pictures to protect the lens (5) and to
  keep it clean.
3. lf the lens appears dirty, breathe on it to form a mist and wipe the surface gently with a
   soft lintless cloth or lens cleaning tissue. Do not apply pressure or you will scratch the
   lens. Never wipe a dry lens.
  CAUTION: Do not use solvents or solutions not designed for cleaning camera lenses.
  Do not use chemlcally lreated tissues intended lor cleaning eyeglasses.
4. Remove the batteries when storing the camera for an extended period.
  CAUTION: To prevent possible damage, do not attempt to disassemble or repair the
  camera o$lash unit yourself.
View original page 11
Page 12 · Read text
?t                                             www.butkus.us   Troubleshooting
   What happened     Probable cause                  Solutlon
   Camera will not       Lens cover closed        Open lens cover
  operate                             Batteries exhausted or      See LoADING THE BATTERIES
                           improperly loaded
                           Film needs to be rewound See UNLOADTNG THE FILM
                           and/or removed
   Foggy or blotchy      Dirty or smudged lens       Clean lens; see GARING FOR
   pictures                              YOUR CAMERA
    Pictures too dark      Not enough light to take a    Use flash
                                picture
                          Flash not ready                Wait for flash-ready light
                             Subject too far              See flash-range recommendations
                              Incorrect film-speed setting  Use correct setting
    Pictures too light      Subject too close            See   f lash-range recommendations
                            ,   Gamera pointed directly at    Don't point camera directly at sun
                               bright light                    or other bright lightr*               t                             Incorrect film-speed setting  Use correct setting
    Partial picture or no   Objects covering lens or     Keep hands, strap, or other
I  picture            flash                  "    objects away from lens and flash
   Blank roll of film       Film never advanced during Load film properly; see LOADING
                       camera loading          THE FILM
   Flash-ready light      Flash not turned on          Turn on flash
    fails to glow within                                                       Replace                                                                      with 2 fresh AA-size;  30-- seconds-                     Batteries weak or dead       alkaline                                                                        batteriesII
                             Batteries improperly loaded Load batteries as shown on
                                 in camera                 battery-compartment door
   Rewind motor       Rewind switch on             Turn rewind switch off
   continues to run
View original page 12From the M. Butkus archive. Original publisher and archive notices are retained.
Check the model and edition against your equipment.
PDF verified 2026-10-10.