Film cameras
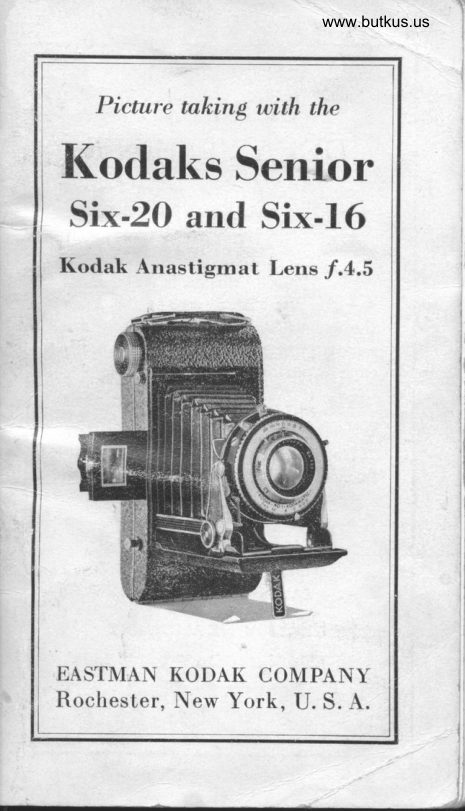
Kodak Senior Six-20 Six-16 User manual
User manual for Kodak Senior Six-20 Six-16. 45 pages in English. Read the original PDF, download or print a copy without registration.
45 pagesEnglish4.8 MB PDF
Loading your manual…Open PDF directly
Document details
- Brand
- Kodak
- Model / document
- Kodak Senior Six-20 Six-16
- Document type
- User manual
- Language
- English
- Pages
- 45
- File size
- 4.8 MB
- Category
- Film cameras
- Document date
- Not specified in catalog
Search available document text
Find a term, then jump to its page in the original PDF. Image-only pages may not be searchable; check the PDF for exact wording and diagrams.
Page 2 · Read text
StrRVICE
 DEPARTMENT

  Aonrrrouel, AssrsrANcE FoR
 Merrxc Bnrrpn Prcrunps
 A LTHOUGH we give in this manual
.Cl' ths essential directions for using
the camera it accompanies, there are
amateurs who wish for further knowl-
edge of photography.
  The Service Department is at their
service, Eour service.
  Do not hesitate to call on us for in-
formation on any photographic subject.
lVe are at your seruice, write to us-
    there is no charge, no obligation.

        Address all Communications
     Snnvrcn DEPARTMENT
Ea,sruRN Konar CoupANY
      RocnrsrnR. N. Y.
View original page 2Page 3 · Read text
www.butkus.us
    Picture talcing with the
Kodaks Senior
Six-20 and Six-16
  Kodak Anastigmat Lens 1.4.5


            Published by
EASTMAN KODAK COMPANY
    RocnnsrnR, N. Y., U. S. A.
View original page 3Page 4 · Read text
Venmo @mike-butkus-camera  Ph. 2083
PayPal Name  Lynn@butkus.org      www.PayPal.me/lynnbutkus
View original page 4
Page 5 · Read text
www.butkus.us


                                                             Digitally signed by Mike Butkus
                                              DN: cn=Mike Butkus, o=Butkus camera manuals,
                                                   ou=butkus.org, email=mike@butkus.org, c=USMike Butkus    Date: 2024.01.25 20:14:43 -05'00'

   1. Lock for Back      7. Lens
   2. Button for         8. Optical Direct View
        Opening Front        Finder
   3. Bed               9. Tripod Socket
   4. Vertical Support        Screws
   5. Horizontal        10. Release for
        Support               Closing Front
   6. Shutter           11. Winding Knob
        A-Collar for Regulating Speed
       P-ltop Opening Pointei        u-Jrxposure Lever
       D-Exiosure Button
         E-'Setting Lever
View original page 5Page 6 · Read text
IMPORTANT
pEFORE loading your Kodak with
 I-D film,      before taking any pic-         -andtures with it, read these instru-ctibns
 carefully. Take especial care to learn
 hoy_-tg- op-erat_e the shutter, see page 9.
  While loading and unloading; be
very careful to keep the proteitive
paper wound tightly around the film
to prevent light striking  it. The Kodak
can be loaded or unloaded in daylight.
This should be done in a subdued li[ht,
not in direct sunlight
         To Lolo
        Use film number:
 V 620, XX 620 or FX 620 for the
Kodak Senior Six-20.
 V 616, XX 616 or FX 616 for the
Kodak Senior Six-16.


                   Push the but-
                 ton of the lock
              towards the
                     arrow.


   www.butkus.us
View original page 6Page 7 · Read text
www.butkus.us
Picture taking with the
#H\=r/           Open the. back.


                           Lift up the
                    spool holder
                    in the recess
                      adjoining the
                   hinge of the
                      back and place
                        the roll of film
in it, springing out the flanges until the
pins engage the holes in the spool.
The film must be placed in the camera
so that when the paper is unwound,
Lhe black side of the paper is toward
the lens.
View original page 7Page 8 · Read text
Kodaks Senior Six-20 and Six-16
   t

         (

  Remove the paper band and pass the
 protective                  ouer the two rollers,          _paperand thread it through the longer slii
in the empty reel, ai far as it ilttt go.


  Turn the winding knob once or twice
to bind the paper on the reel, and be
sure that the paper is started itraight.
View original page 8Page 9 · Read text
www.butkus.us
       Picture taking with the
        Close the back, pressing it so that
     the spring lock snaps into place, se-
      curely fastening the back.
             Push back the slide that
              covers the red window on
               the back of the Kodak. This
              slide prevents fogging the
                  film.
             Turn the winding knob,
             watching the red window.
      After a few turns, a warning hand will
     appear; then turn slowly until the
      figure I is in the center of the window.


       Push the slide over the red window.
    The window should be uncovered only
    when winding the film.
      The film is now in position for the
       first exposure. After each exposure be
     sure to wind the film, bringing the
     next number into position. This pre-
    vents making two pictures on the
    same section of film.

t
View original page 9Page 10 · Read text
Kodaks Senior Six-20 and Six-16
      OpnNrNG THE FnoNr
                    Press the
                        button 2,page
                             2, to open the
                     front; then
               draw down
                      the bed until
                                     it locks. This
                 brings the
                            lens and shut-
                          ter into posi-
                             tion. W
    To Focus rHE Kooar
  The various distances at which the
Kodak- may be focused are engraved
on the beveled edge of the lens mount.
  The scale of the Kodak Senior Six-20
is marked for 3._514, b, O, 8, 10, t5,25
and 50 feet, and INF..(infiirity). tfre
scale on the Kodak Senior Sii-tO is
marked 4, 5, 6, 8, 10, 15,' 25 and b0feet, and INF. (infinitv).
  To bring the'Kodak'to the correct
focus revolve the lens mount by turn-r_ng it to the right or left untit the
flSure_ Tepres_enting the distance fromtle subject to lens is at the focus pointer
F, see diagram on page 8.
View original page 10Page 11 · Read text
www.butkus.us
 Picture taking with the
  When facing the Kodak, turn the
 lens mount to the right for distant
 graduations on the scale, and turn to
 the left when focusing on near-by or
 close subjects.


  The distance between the subject
 and Kodak can be estimated without
 measuring, when the subject is beyond
- fi,fteen feet; for instance, if the focus is
 set at 25 feet (the usual distance for
 ordinary street scenes) the sharpest
 part of the picture will be the objects
 at that distance from the camera, but
 everything from about 13 feet to in-
 finity will be in good focus with the
 Kodak Senior Six-20; and with the
View original page 11
Page 12 · Read text
Kodaks Senior Six-20 and Six-16
 Kodak Senior Six-10 everything from
 about 15 feet to TS feet will be-sharp,
 if stop /.11 is used.
  For ordinary street pietures the
 focus may be kept at2lfeet, but where
 the principal object is nearer or farther
 away,- the focus should be changed
 accordingly.
  For distant views turn the lensmount until INF. (infinity) comes
 under the focus pointer.
        Tnn Snurrnn


  The Kodamatic Shutter is marked
1o,1                                                                     I l2E,                   of L lI0,   ^mglilS exposures1159, 1/100 and 11200 second, as weli
as Time and "Bulb" Exposures.
View original page 12Page 13 · Read text
www.butkus.us
Picture taking with the
  Revolve the knurled collar A on the
front of the shutter until the white line
G is at the figure representing the time
of exposure desired.
  The shutter must be set for all expo-
sures by pressing the lever E towards
the top of the shutter. The exposure is
made by pressing the button D on the
side of the Kodak. The exposure can
also be made by pressing the lever C.
The use of button D is recommended
for snapshots, as it assures a steadier
holding of the camera.

      THp Snr,n-TTMER
  There is a self-acting release built
into the shutter, for the convenience
of those who wish to be included in the
picture.
  To use the "Self-Timer," place the
camera on a tripod or some other firm
support, and compose the picture with
the finder. Push the setting lever E,
as far as it will go, then push the lever
H to the limit of motion, in the direc-
tion of the arrows in the diagram- on
page 9. Push the exposure lever C or
the exposure button D. Get into the
                           10
View original page 13Page 14 · Read text
Kodaks Senior Six-20 and Six-16
 picture. After about ten seconds the
 exposure will be made.
  Do not use the self-actinq release for
 either Time or "Bulb" Exfosures.
   Trvrp AND ,,BuLB" ExposuRps
  To make a Time Exposure the white                             ,,T" line G must be at the letter                                    en-
 graved on the shutter, and the settins
 lever E pushed as far as it will go. Th;
exposure lever C or exposure button D
Tust be pressed twic-e, once to open^the shutter, and again io close it.
  For "Bulb" Exposures the white                                   (.B,'line G must be at the letter                                      en-
graved on the shutter, and the setting
lever E pushed as far as it will go. ThE
exposure lever C or exposure button D
must be pressed down; the shutter
remains open as long as the lever C or
button D is held down.
  Automatic exposures of lll0 second
must not be made with the camera
held in the hands. The Kodak has two
tripod soc\ets for use with a tripod,
an Optipod or a Kodapod.
  Importont: Neaer oil the shutter.
In case of aecident, return the camera
to your dealer or to us for repairs.
                            1l
View original page 14Page 15 · Read text
www.butkus.us
 Picture taking with the
       Srop OpBNrNcs
  The stop openings regulate the
amount of light passing through the
lens. The openings are enlarged or
reduced by moving the pointer B, see
illustration, page 9.
   f .4.5-For exposures of moving ob-
jects on gray days, use 1/100 second;
for portraits indoors, see page 32, use
1/10 second, when the light is very
bright. For outdoor subjects on
cloudy days and during rain in the
middle of the day, use U50 second.
For exposures early or late on clear
days (one hour after sunrise or one
hour before sunset) use 1/50 second, if
on a cloudy duy, use 1/25 second.
  Important: When using f.4.5 or
1.5.6, and the distance between sub-
ject and camera is ten feet or less, the
distanee must be accurately measured
as the range of sharpness is limited,
see table on page 16 or 17.
  .;f.5.6-For portraiture, see'pages32 and 33. For exposures of rapidly
moving objects in sunlight use U200
second. For cloudy days and during
rain in the middle of the day, use 1/25
                           t2
View original page 15Page 16 · Read text
Kodaks Senior Six-20 and Six-l6
 second. For exposures early or late
 on a clear day (one hour after sunrise
 or one hour before sunset) use U25 second, if on a cloudy dry, use l/10
 second. For portraits and groups in
 the open shade, use 1/2b second-, see
 page 33.
   _     For instantaneous exposures on
 slightly"f._8_ cloudy or hazy days, use 1/2b
second. For scenes on narrow and
 slightly shaded streets, use l/25 second.
    moving objects in very-For                                               - bright sun-light, use 1/100 second.
  fJl-For  all ordinary outdoor pic-
tures, such as nearby landscapes shbw-
ing little or no sky groups and street
scer-les, when the subject is in bright
sunlight, use ll25 second.
  /.16-For open views, when the
sunlight on- the subject is unusually
strong and there are no heavy shadowq
such as views at the seashore and on
the water, use U50 second; for ordi-n?r.y landscapes, in bright sunlight,
with clear sky overhead, use IIZS
second;_also for Interior Time Expo-
su_r_es, the time for which is given in
table on page 30.

                          13
View original page 16Page 17 · Read text
www.butkus.us
Picture taking with the
  f.22-For instanta,neous exposuresof extremely distant landscapes, ma-
rines, snow scenes without prominent
dark objects in the foreground, and
clouds only, in bright sunlight, use
Il25 seeond; also for Time Exposures.
 t.32-For Time Exposures Out-doors on cloudy days, see table on
page 36. For Interior Time Expo-
sures, see page 31. Do not use for in-
stantaneous erposures unless using
Kodak Super-XX Panchromatic Film.
   All the exposures given in this table
are for Kodak Verichrome or Pana-
tomic-X Film. With Kodak Super-XX
Panchromatic Film give one-quarter
the exposure recommended, that is,
use a shutter speed four times as fast as
the one given, or use the second small-
er stop opening with the same speed.
  The smaller the stop opening the
greater is the range of sharpness, see
pages 15, 16 and 17.
   AII exposures given for outdoor sub-
jects are for hours from one hour after
sunrise until one hour before sunset.
  For a subject in the shade, under
the roof of a porch or under a tree,
when the light is poor, a time exposure
                            t4
View original page 17Page 18 · Read text
Kodaks Senior Six-20 and Six-16
 should be made, when using Kodak
Verichrome or Panatomic-X Film,
with Super-XX Film snapshots can
be made.
       DBprH oF FrELD
  Depth of field is the distance from
the nearest to the farthest objects that
will appear sharp in the negative or
print. It depends upon the distance
between the subject and lens, the focal
length of the lens, and the size of the
stop opening used. The smaller the
opening the greater the depth of field.
See the tables on pages 16 and 17 for
therangeof sharpness ordepth of field
of the Kodaks Senior Six-20 and Six-16.
                   .f.,' SYSTEM      TnB
 A lens is said to work at a certain
"speed;" this means that the lens will
give a sharp image from corner to
corner of the film with an opening a
certain proportion of its focal length.
The focal length of a lens is the dis-
tance between the lens and the film
when the Kodak is focused for INF.
(infinity). It should be borne clearly
in mind that this "speed" depends nol
                           l5
View original page 18Page 21 · Read text
www.butkus.us
 Pieture taking with the
 upon the size of the opening, but upon
 the size of the opening in proportion
 to the focal length of the lens. The lens
 that will give sharp images with the
 Iargest opening is said to have the
 greatest "speed.tt
   The proportional size or "value" of
 the stop opening is designated by the
  'f." number and is the quotient ob-
, tained by dividing the focal length of
 the lens by the diameter of the stop
 opening.

         Kodak Senior Six-20

                        fa
                  f,,4.3
                                                    f, tlO                            f. t6
               f.5.6                                                      f. ?2
                             t.3?                             -\_-/oooo
                     COPYRIGHT  tO22OBY EASTMAN KODAK Cq
                             l8
View original page 21Page 23 · Read text
www.butkus.us
Picture taking with the
  Making a Hofizontal Picture


     Hold camera firmlg against the face.
  When making instantaneous expo-
sures or snapshots with the Kodak
Senior, hold it firmly against your face
and press the exposure button as
shown in these two illustrations. When
pressing the exposure button, hold the
breath for the instant. If the Kodak
is moved during the exposure, the
picture will be blurred.
                         20


                                                                        c.-
View original page 23Page 24 · Read text
Kodaks Senior Six-20 and Six-16
    Making a Vertical Picture


                         www.butkus.us
     Hold camera fi,rmly against the face.
Tnn OprrceI, DTRECT VrEw FrNoBn
  The camera is equipped with an
optical        4irect view finder 8, page 2,
attached to the side of the Kod-ak. To
u.se this finder, raise the front frame by
the button and both parts of the finder
will spring into position. Hold the
camera with the sight or rear frame
                           2l
View original page 24From the M. Butkus archive. Original publisher and archive notices are retained.
Check the model and edition against your equipment.
PDF verified 2026-10-10.