Film cameras
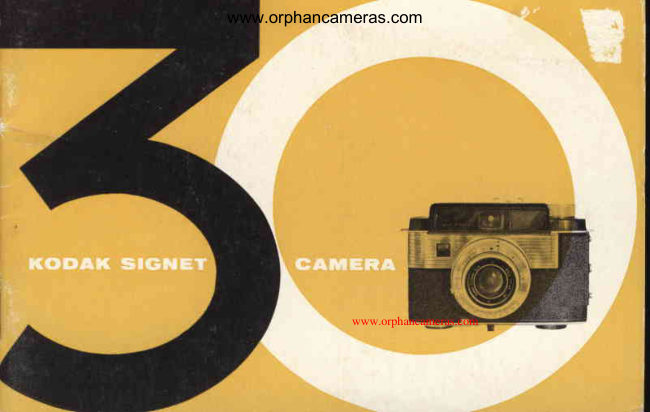
Kodak Signet 30 User manual
User manual for Kodak Signet 30. 33 pages in English. Read the original PDF, download or print a copy without registration.
33 pagesEnglish1.9 MB PDF
Loading your manual…Open PDF directly
Document details
- Brand
- Kodak
- Model / document
- Kodak Signet 30
- Document type
- User manual
- Language
- English
- Pages
- 33
- File size
- 1.9 MB
- Category
- Film cameras
- Document date
- Not specified in catalog
Search available document text
Find a term, then jump to its page in the original PDF. Image-only pages may not be searchable; check the PDF for exact wording and diagrams.
Page 4 · Read text
www.orphancameras.com

You can be proud that you're now the
owner of one of Kodak's  finest cam-
eras. Your new Kodak Signet 30 Cam-
era will give excellent results -   if you
will spend a few minutes getting ac-
quainted with   it. As  you're  reading           KOOAT(                  GAt|ERA
these instructions, keep  the camera
handy; then practice each operation as
it appears in the manual.
  Before making any important  pic-
tures - a trip or some special event -                                   contents
shoot a magazine of  film, including a                           Loading6
few  flash pictures. Should you  then                          Unloading9
have any questions,your Kodak dealer                       KodakFilm 10
will be glad to help you.                                 ExposureSettings 12
                                                         DistanceSettings i o  For  those who  are  familiar  with                                                   UsingtheViewfinder18
cameras  the  quick  operating  steps                     Takingthe Picture 20
found on the next four pages may be                        FlashPictures22
sufficient to use the camera.                                   PhotoAids 29

T. M. Reg. U. S" Pot. Ofr.
View original page 4Page 9 · Read text
www.orphancameras.com

locks -  this takes several full strokes of the lever. The
first frame of  film  will then be in position and the
EXposuREcouNTER will be automatically set at 1. The
counter will move a mark each time the film  is ad-
vanced trp to exposure "36."  It will show the number
of exposures made.

Note:
Neither the exposurecounter nor the shutter releasewill
operate unless film for exposure "L"  is in position.
View original page 9
Page 10 · Read text
www.orphancameras.com


U N L O A D I N G - N e v e r                   i n  b r i g h t ,   d i r e c t      t i g h t
After the last exposure, and before the back is opened,
it is necessaryto rewind the film into the ma guiine.
  Hold the camera in the left hand with the rewind
knob toward you and the lens up. pull  the rewind
knob out  until you  feel resistance (about y4 inch).     www.orphancameras.com
Push the REwTND RELEASEin the direction  of  the
arrow and hold the releasewhile turning the rewind
knob clockwise, in the direction of the arrow, until
the film is completely rewound into the maga-
zine. The film  is completely rewound when
you feel a lessening of tension on the rewind
knob.
  Open the camera back; this automatically
returns the exposure counter to E (empty).
Raise the rewind knob fully and remove the
film magazine.
View original page 10
Page 11 · Read text
www.orphancameras.com

                         Supplied with your camera, are 8 exposure value cards
                         (one for each of the 8 Kodak  color and black-and-
                           white 35mm films). One side of the card shows expo-
                          sures for the five most cornmon outdoor  lighting con-
                               ditions; the other side gives the exposures for  flash
                            shots, using }d-2 or No. 5 or 25 flash bulbs. Slip the
                          proper exposure card, for the film you are using, into
                           the holding frame on the back of the camera. The re-   EXPOSURE
                         cess is deep enough to hold two cards, if desired.    SETTTNGS                        The cards also show what kind of film you have in
                           the camera. The number in the upper right corner of
                           the card (10 for Kodachrome Film for Daylight) is the
                        exposure index.
                             Select the proper exposure from the card.
                     On the face of the sHUTTERspEED RING there is a
                          scale of red exposure values from 5 to 17.
                           Normally  this ring is linked with the IE,NSonENING


L2
View original page 11Page 12 · Read text
www.orphancameras.com


         Transfer the exposure value
       number obtained from the
,*       shutterexposurespeedvaluering.card to the


              black-and-whitefilms include a
            even under adverse conditions.
            number higher than indicated_
                film and Bright Sun. With color
             exposurevalue numbers given

                                         L3
View original page 12Page 13 · Read text
www.orphancameras.com

                   RrNG.To line up the red dot index with the exposure value num-         ?I
                        ber, depress the lens opening ring sufficiently to disengage it
                     from the shutter speed ring; rotate the lens opening ring until
                       the red dot index lines up with the proper exposure value; then          1
                             let  it snap back into position.  If you cannot move the index to
                       the desired exposure because it reaches the limit  of  its travel,
                        turn the shutter speed ring sufficiently to allow lining up the
                      index with the selected exposure value. You can set the index
                   between numbers. The camera is now set for proper exposure.
                       Picture Tcking. Before making pictures, a little more must be
                     learned about your camera -  lens opening and shutter speed.
                  When the exposure value has been set, shutter speed and lens
                    opening are automatically linked together. Thus a change in
                   one means that a simultaneous,compensating change is made
                           in the other. For example: with an exposure value of 12 the
                  camera is set for a lens opening of ll8  and a shutter speed'!'of
                     1/60 second (a good setting for outdoor pictures). Supposethis          ,*
                             'i3Donot make intermediateshutter speedsettings.                                                                                                                                                                                                            l
                                                                                                                                                                                                                                                                                              l


                                                                                                                                                                                                                                                                                                                                                      1f,4
View original page 13Page 14 · Read text
www.orphancameras.com

 combination  is not suitable for your subject because you need
 a faster speed, such as 11250 second, to stop action. In that
 case turn the shutter speed ring until the index is at 250. This
leaves the exposure value 12 but automatically adjusts the lens
opening to  f l4 and thus compensates for the faster speed.
  on  the other hand,  if you intend to take a picture which
requires good depth of  field, needing a lens opening such as
 f l16, r9t{e  the speed ring until the index on the lens opening
is at 16. This changes the speed to  rll5  second. All exposures
1/15 second and slower, including ,,B,,, demand that the cam_
era be on a firm support, for there is risk of camera movement
at slow shutter speeds.
    If you want  to set the exposure without  reference to the
exposure values, be sure to set the shutter speed first and the
lens opening afterwards. If you reverse the piocedure, changes
in th.e            speed will also change th.  r..rr opening, duJto      _shutter
the linkage between lens opening und shutter rp""d rings.
View original page 14Page 15 · Read text
www.orphancameras.com

                           For  quick  distance  settings  line  up  the  diamond-
                       shaped O index under'the  appropriate subject zorre,
                           closE-ups, cRoups, and sceNns, with the triangular A
                             index. Zone focusing can be used only at lens openings                                                   1I                        between f I 5.6 and f l8 and smaller.
                             For careful distance settings-when  using lens open-
                            ings larger than f 15.6-  for pictures of nearby objects
    DISTANCE                -for   flash pictures, estimate carefully  or measure the
    SETTINGS              film-to-subject  distance and  line up the appropriate
                          footage number with the triangular index.

                                                       I
                                                        SCENES                                             I


                                                                                       www.orphancameras.comr6
View original page 15Page 17 · Read text
www.orphancameras.com


                   When taking pictures, hold the camera close to your
                        eye so that you can see the complete luminous view-
                          frame. What  is seen within the frame  will be in the
                            picture.
                          Note the two parallax pointers, one on each side
                         near the top  of the view-frame. The 5 F  near the
   USING  THE          upper left corner of the view-frame, when the camera
   VIE\^/FINDER               is held horizontally, indicates the upper edge of the
                             picture when the subject is 5 feet from  the camera.
                      The  {   3, on the right side, indicates the upper edge
                               of the picture when the subject is 3 feet from the cam-
                            era. The part thus eliminated at the top of the frame
                                    is added to the bottom of the frame.
                         The illustrations at the right show two ways of hold-
                             ing the camera. Use any method you prefer as long as
                           the camera is held steady.


1 8
View original page 17Page 19 · Read text
www.orphancameras.com


                                             I.  Set the red index dot to the exposure value number
                          obtained from the exposure value card.
                                2. Turn  the shutter speed ring  to the desired speed
                             setting or lens opening. For average snapshots set the
                            shutter speed at "60"  (l/60  sec.).
     TAKING                3. Set the distance.
  THE PICTURE             4. Select the view  in the viewfinder.
                               5. Hold the camera steady; then press the shutter re-
                           lease lever  all the way down with a slow, squeezing
                               action.  If the film has not been advanced to the next
                          frame and the word wIND appears in the viewfinder,
                              or  if the film leader has not been wound  off fully, you
                         cannot press the release lever.
                         To advance the film, with the right thumb swing out


20
View original page 19Page 20 · Read text
www.orphancameras.com


the rapid wind  lever one full  stroke or several short
ones until  it locks; then let the lever return to its orig-
inal position. Now you can press the shutter release
lever.
   After you have taken the last picture, the rapid wind
lever locks. The film must be rewound into the masa-
zine before opening the camera. To do this, push
the rewind release in the direction of the arrow
and hold the releasewhile turnins the rewind
knob clockwise, in the direction of the
arrow, until the film is completely
rewound into the mas.azine.


                                                     ;,..                                !;#,
View original page 20Page 21 · Read text
www.orphancameras.com

                           Flash pictures, in black-and-white  or color, are easy to
                      make with your camera. The built-in  synchronization
                                of your Kodak  Synchro 250 Shutter permits the use
                               of  flash, including  electronic flash. Flash bulbs are
                                 fired when the camera shutter  is released. Flash ex-
                         posure data is on one side of the exposure value cards.
                                Synchronization      FLASH
     PICTURES           The Kodak Synchro 250 Shutter synchronizes No. 5,
                       No. 25, and M-2 bulbs at speed 30 (1130 second).
                             Electronic  flash (zero-time delay) synchronizes at  all
                        speeds.
                        The Signet 30 was designed to use flasholders with
                            Kodalite   fittings  such as the  Kodalite  Super-M  40
                          Flasholder and the Kodak Rotary Flasholder, Model
                               1. These flasholders do not require the use of a bracket
                               to attach the flasholder to the camera. Instructions  for
                          using the flasholders are packed with them.

22
View original page 21Page 22 · Read text
www.orphancameras.com


Making  Flash  Pictures
 l. Kodolite Sup€r-M 4O Flosholder
Insert the No. 5 or 25 or l|d-z flash bulbs into the
socket.

Kodok  Rotory  Flosholder,  Model    I
Insert the M-2 flash bulbs into the plastic disc.               Note:
2. set the index on the shutterspeedring to 30 (L 130            tDoh e nots o cinsertk e t uan tbulbi l   t hine
second).A No. 5 or 25 bulb has a flash duration of        flasholdernected to hasthebeencamera.con-

                                                          23
View original page 22Page 23 · Read text
www.orphancameras.com

                         approximately 1/50 second; an M-2 bulb has a flash
                          duration  of approximately  1/100  second, thus pro-
                           viding effective stopping of subject movement  if most
                              of the exposure light is provided by the flash.
                              3. Estimate carefully the distance in feet you are from
                          the subject and set the lens accordingly.
                              4.  Obtaining Exposure From Exposure Value Card
                                 o.  Slip the proper exposure card into the holding
                             frame, with the Flash Setting side out.
                                 b. Determine the exposure value from the distance                                                                                                                                  ;                                   in feet to the subject and the type flash bulb used.
                                   c. Transfer the exposure value to the shutter speed
                              ring being sure the speed is 1/30 sec.
                              5. Hold the camera steady; then press the release lever
                                    all the way down with a slow squeezing action.


24
View original page 23Page 24 · Read text
www.orphancameras.com


Kodok  Generotor   Flosholder,  Type    t
This  small, compact, pocket-sized flasholder makes
its own power-it  does not require batteries. A three-
quarter spin of the generator handwheel charges the
capacitor with ample power to fire the flash bulb. The
flasholder accepts M-2, No. 5 or No. 25 bulbs. A  di-
rect-reading flash calculator, used instead of the ex-
posure value cards, is located on the back of the flash-
older and shows both "f" and exposure value numbers.

Kodok  Pocket  Flosholder,  lype   B-I
Similar in appearance to the Kodak Generator Flash-
older, accepting the same size flash bulbs, and having
the same handy flash calculator, this unit  is powered
by either two Penlite batteries or by a Kodalite Midget
B-c Flashpack which uses a 15-volt photoflash bat-
tery.
View original page 24
Page 25 · Read text
www.orphancameras.com


                     Some of the best pictures are made after the sun sets.
                                                If you have color film in the camera, use flash. With a
                         magazine  of  super-fast Kodak  Tri-X  Film,  and the                                                            t                                                    f /2.9lens  on your camera, you can make pictures in
                              well-lighted  rooms. Load  the camera with  Kodak
    PIGTURES             Tri-X  Film, and set the exposure value at 8 (shutter at
   A R O U N D  T H E         30 and lens opening at f 12.8).
     GLOGK            When the light  is too dim to take a picture at 4 (V+
                            second), then make a long exposure by using the "8"
                              shutter setting. At  this setting, the shutter stays open
                          as long as the shutter release is held down. For long
                          exposures, use a Kodak Metal Cable Release No. 5 in
                            the socket on the shutter housing. Place the camera
                         on a firm support such as the edge of a table, or use a
                       Kodak Flexiclamp.


26
View original page 25Page 26 · Read text
www.orphancameras.com    Reflectionsf rom  wet
    pavementsor water are
    spectacularat night.


                                                                                                                                                                                                                                                                     q*
    Familiarscenesaround
    the homeadda realhigh-
     lightto youralbum.


    Silhouettescan be strik-
    ing when a  little fore-
    thoughtgoes into their
    composition.


   A shotlike this makesa
    n i c e C h r i s t m a sc a r d
   scene.
View original page 26Page 27 · Read text
www.orphancameras.com

                         o Your Kodak Signet 30 Camera is a fine, ruggedly
                                    built, precision instrument. So protect  it from dust and
                                     dirt and avoid rough handling. IJse a rubber syringe to
                         blow out any dust that may accumulate inside the cam-
                             era. If any of the lenses need cleaning, first brush or
                         blow away any grit or dust. Wipe the surface gently
                            with Kodak Lens Cleaning Paper.  If necessary, use
    GARE  OF          Kodak Lens Cleaner.
   THE  GAMERA           o The tinted appearance of the lens is due to Lumen-
                              izing ..   . a special hard coating applied to all air-glass
                           surfaces. This  increases light  transmission and de-
                          creases internal  reflections, thus improving  the  bril-
                            liance of black-and-white pictures and the color purity
                               of color films.
                         o Do not attemptto makeany repairsor removeany partsfrom
                           the shutter,lens,or camera.Neveroil the shutteror any parts
                              of the camera.lf you find that the camerarequiresservice,re-
                            turn it to yourphotodealerwhowill haverepairsmadelocally,or
                       sendit to Kodak.
28
View original page 27Page 28 · Read text
www.orphancameras.com

                     KodakSignet30                 Filters
                          FieldCase               TheKodakSignet30 Cameraaccepts
                        This de luxe, top-grain     Series5 KodakFiltersandCombina-
                         leather case combines     tion Lens Attachmentsdirectly.
                          practicalprotectionwith     KodakFilter Kit, No. 10444.For
                      drop-awayfront conveni-    C0L0RFILMS,the kit containsa
                       ence. Openingson the      KodakSkylightFilter(No.1N to add
                        side of the casepermit     warmthto oicturestaken in the
 PHOTO  AIDS          attachingthe flasholder    openshadeor on overcastdays.A
                         with the camerain the     KodakDaylightFilter(No.85C)is in-
                       case. Strap inside top      cludedfor convertingindoorTypeF
                       holds exposure value      color films for outdooruse. For
                       cards.                BLACK-AND-WHITEFILMS,the  kit
                                                 containsa PictorialYellowFilterfor
                                              accentingclouds.
You'll have a  lot more
fun with your Signet 30
Camera, when you use
some of  the  products
picturedin this section.


                                                           29
View original page 28Page 29 · Read text
www.orphancameras.com

  Kodak300Projector                          KodaslideSignet500 Projector,Model2
   Choiceof two models.Here'sthe newest            500-wattlampfor brilliantpictures-
   in projectors.Theprojectorcomescom-            permitsviewingevenin a lightedroom.
   pletein a self-carryingcase,hasfinger-           Choiceof the easy-to-operateKodak
   tip knobcontrolsfor focusand eleva-           ReadymaticChanger or  Automatic
   tion,andweighsonly9 lbs.Thechanger           Changer.See this projectorat your
  acceptsup to 36 cardboardmounts.A             photodealer.
   short,high efficiency,300-wattprojec-
   tion lampgivesbrilliantpictures.


30
View original page 29
From the M. Butkus archive. Original publisher and archive notices are retained.
Check the model and edition against your equipment.
PDF verified 2026-10-10.