Film cameras
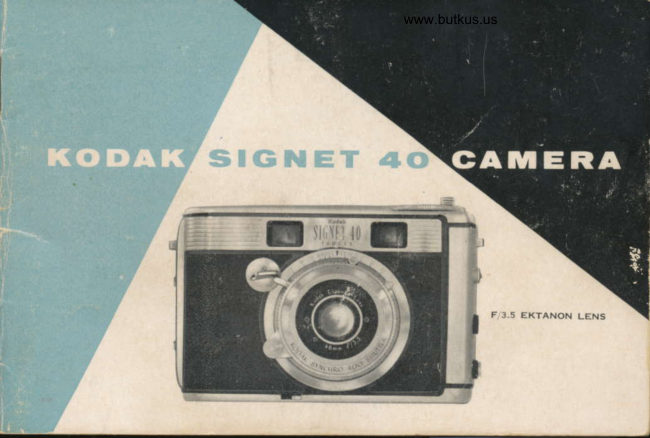
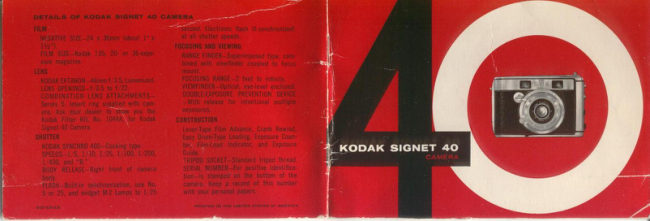
Kodak Signet 40 User manual
User manual for Kodak Signet 40. 37 pages in English. Read the original PDF, download or print a copy without registration.
37 pagesEnglish4.2 MB PDF
Loading your manual…Open PDF directly
Document details
- Brand
- Kodak
- Model / document
- Kodak Signet 40
- Document type
- User manual
- Language
- English
- Pages
- 37
- File size
- 4.2 MB
- Category
- Film cameras
- Document date
- Not specified in catalog
Search available document text
Find a term, then jump to its page in the original PDF. Image-only pages may not be searchable; check the PDF for exact wording and diagrams.
Page 2 · Read text
CONTENTS
looding                       2
Unlooding                 5
Kodok Fifms                 6
Setling The Shutter.A,nd lens     8
Focus                        lO
Ronge Of Shorpness                | |
Toking The Picture
Ihe Sirnplesl Settingo
Flosh Piclures                 16
Porlro lenses                 21
Core Of The Cqmerq         25
Picture Toking Around The Clock 26
Photo Aids                    28
Delqils                     32
View original page 2
Page 3 · Read text
www.butkus.us


o You can be proud that you're now the owner of one of
Kodak's finest cameras. Your new Kodak Signet 40 Camera
                                  spend a few minuteswill give excellent results -  if you will
getting acquainted with it. As you're reading these instruc-
tions, keep the camera handy; then practice each operation
as it appears in the manual.
  Before making any important pictures-a trip or some
special event-shoot a magazine of film, including a few flash
pictures. This gives you practice and provides a check on
your equipment. Should you have additional questions,
your Kodak dealer will be glad to give you a helping hand.

                     EASTMAN    KODAK   COMPANY


T.M. Reg. U.S. Pat. Of.
View original page 3Page 4 · Read text
Never lood or unlood in bright, direct lighl.
                                    I  Open the back by pressing the r.ercn in
                             the direction of the arrow.
                  2 Push out the nnvrND KNoB with vour
                          thumb. Drop the ftlm magazine in the r"""r,
                          next to the knob. See picture. Push in the
                         rewind knob and turn it until it engages the
                           magazine.
                  3  Move the prr-vr ADVANCE LEvER until the
                        wide slot in the take-up drum is up.REWIND KNOB                                 Note: In cose you con nol move lhe film odvonce lever,
                                     turn lhe SPROCKET loword the loke-up drum.
                  4  Drop the end of the fflm into the slot in
                              the take-up drum. Hold down the edge of the
                        magazine and move the film advance lever
                                  until the slack is out of the film.

                           2
View original page 4Page 5 · Read text
www.butkus.us

5  Close the back. I\{ake sure it snaps in
place. Move the film aclvance lever until it
locks.
6 To rendy the film for the first exposure:
   o. Push ancl hold the narvrNo nnr-nesr (on
the bottom edge of the back of the camera)
while the film advernce lever is moved one
stroke. Let the release go and move the film
aclvance lever until it locks.
  b. Push ancl hold the rewind release while
moving the film advance lever one stroke.
                                                                                                                                                                      ..#Let the release go and again wind until it                                                                   .'r
                                                           FILM ADVANCE TEVERlocks.
   c. Aclvance the film for the third time until
the film advance lever locks. The first frame
is norv in position.
View original page 5Page 7 · Read text
www.butkus.us
                       7  Turn the nxposuRE couNrnn clial in the
                                           clirection of the arrow trntil t]re inclex mark
                                     is opposite the recl 20 for a 20-exposure
                                    rnagazine-the recl 0 for a 36-expostu-e maga-  REWIND RELEASE
                                        zine. The counter rvill move a mark for each
                                          picttrre taken. lt rcill alu;ays shora the ntnn-
                                              lrcr of e)iposures rentaining on tlrc film. The
                                   exposure counter rvill not rvork unless there
                                              is film in the camera.
                       8  Rotate the rrrnr-rypE rNDrcAron to bring
                                      the name of the film opposite the index mark.
                                           Nole: To odvonce the film if o coble releose wos used
                                          to irip ihe shulter, or if the double-exposure  releose
                                on lhe bottom front of the comero wos occidentolly
                                              lripped, do this:
                                   A. Press ond hold ihe rewind releose.
                                      B. Move film odvonce lever one slroke.
                                   C. Let go of the releose ond odvonce film until the
                                                  lever locks,
View original page 7Page 8 · Read text
www.butkus.us

UNLOADING    THE  CAMERA
Never unlood in bright, direct light.
After the 20th or 36th exposure, and before
the back is opened, it is necessary to rewind
the film into the magazine. To do this:
I  Hold the nnrvrND LEvER marked "rewind"
in the direction of the arrow.
2  Continue holding the rewind lever and
turn the rewind knob cRANK clockwise until
the film is completely rewound into the
magazine. The film is completely rewound
when you feel a lessening of tension on the
rewind crank.
3 Open the camera back; pull out the re-
wind knob; turn the camera over and let the
magazine fall into your hand.
View original page 8
Page 9 · Read text
KODAK     FI LMS               t


              Kodochrome Film-This is the favorite color fflm that is en-
                joyed by millions. The full-color transparencies can be pro-
                 jected in any of the easy-working Kodaslide Projectors.
               Kodachrome Film is available in both Daylight Type
               (K135) and Type F (K135F for use with clear wire-filled
                  flash lamps). Available in 20- and 36-exposure magazines.

              Kodok Ektochrome Film-A fast color fflm that you can process
                  yourself or have processed by your photofinisher. Like Koda-
               chrome, it's a 'lreversal" process that produces brilliant color
                 transparencies.
                Ektachrome Film is available in Daylight Type (E135)
            and Type F (Ef35F for use with clear wire-filled flash
                 lamps). Available in 20-exposure magazines.
View original page 9Page 10 · Read text
www.butkus.us

BLACK AND WHITE
Kodok Ponqtomic-X Film-Here's a new, modern fflm with
micro-ffne grain and high resolution. For those who want
super-size enlargements with crisp, brilliant tone rendering.
Available in 20- and 36-exposure magazines.
Kodok Plus-X Film-This is a moderately fast film to use for
a-verage lighting conditions. Its pan sensitivity smooths out
skin texture-ideal for most outdoor and indoor shots. Avail-
able in 20- or 36-exposure magazines.
Kodok Tri-X Film-You'll like this ultra-speed film having
medium contrast, moderate graininess and wide exposure
latitude. It's ideal for sports pictures and other snrqpshots
where adverse lighting conditions are encountereci. See
page 26. Available in 20- and 36-exposure magazines.
View original page 10
Page 11 · Read text
SETTING   THE SHUTTER   AND LENS

                       Shutter speccls ale uscd to vary the length of time tliat the
                        shutter stuys opcn u'hen the sl-rutter release lcvcr is pressed.
                       Tlre slrru'est shutter speecl is 5 (I/5 seconcl)-the fastest is  SHUTTE                    400 (I/400 seconcl). At the "B" setting, tlie shutter u'ill stay  SPEEDS                  open iIS long as the shutter release lever is hclcl clown.
                          Sllrtter spc,ccls ancl lens openings irre set to procltrcc correct
                          exPosrlre.


                 The lens opening controls the amount of light that passes

   L E N                   ll;,,"r1,i*J:?i#1"#:::r:i\:,"ff:fr,+Till*flrlll;  s  oP E N I N G s   islargestandletsinthegreatestamountof lightwhensetat
                       3.5  (f tS.S). The LENs opENrNG porNTER can be set between
                      openings. The pointer has "click stops" at each marked
                     opening and at the red dot.

                     8
View original page 11Page 12 · Read text
www.butkus.us

                                                Shulter        Shutfer
                                          Cocking      Speed
To sel lhe shuller, lurn lhe knurted speed control       Lever           Pointer
ring until lhe SHUTTER SPEED POINTER is ot the
desired setting. Do nol sel poinler belween fwo
shuller speeds. fhe shufter musl be cocked for oll
speeds ond "8." To do lhis, push down the SHUT-                                   Mike Butkus                                                                                                                                                                                                                                                                                                                                                                                     DigitallyDN:org,Date:cn=Mikeemail=mike@butkus.org,2024.12.30signedButkus,by00:16:24Mikeo, ou=Butkus.Butkus-05'00'c=USTER COCKING TEVER unlil it colches. Use o lripod
for lhe "B" selling.
  Never oil lhe shufler.
View original page 12Page 13 · Read text
You odiusl focus by moving lhe
                     focusing lever wilh your finger.
                  The rongefinder imoges ore tinl-
                  ed in conlrosling colors for eosy,
                      occurole focusing.


Siglrt tlrrorrglr tlrc cvcpicc'('in  tlrc lrrrc'k of tlrc canr('r'ir.  lrr
Itt'r't' r'orr s('(. th(. c'onrl)ill(.(l rltngcfintlcr lln(l vicu'fintlt.r'. (lorr-
c't'ntrirtc orr tlrc trirrnglt'. \Vhc'ir tlrc' cirrncra is ri()f locrrsccl,
tu'o irrurgt's o[ )'our strlrjcc't lppcilr in the triar-rglc. Whcn thc
('iilrr('l'rr is I'0c'rrs0rl, thcsc itnilgcs arc strPcrirrrposecl  t<t forn-r
ir singlc irnagc.
   Sclr.c't rr vcrtic'lrl linc or t'<lgc irr vorrr strbjcc.t antl loc,:rte
it <lirt'c'tlr. rrnrlt'r tlrc pcrk oI tlrt' trianglc.
l0
View original page 13Page 14 · Read text
7                                                      www.butkus.us
           KODAK SIGNET 40 CAMERA
      /I4ORE TNFORi4AITON  . . . on odvoncing film
     o About 3 strokes of the film advance lever are needed to advance a full
      frame of film and to lock the film advance mechanism. This supplements
                                                    6.      the instructions on page 3 - step
     PAGE 12, STEP 5 should read: Advance the film to the next frame by                                                                                                                                                                  ':....     moving the film advance lever about three strokes until it locks.

        NorlcE: The S-inch Lumaclad reflector of the Kodak Super-M 40 Flasholder
        concentrates the light in such a manner that it may act as a burning glass in
          sunliglrt. Do not learse it in sunlight uith its open side up.

       T,M. Res,. U.S. Par. Off.

         EASTMAN KODAK COMPANY     Rochester 4, N. Y.

               I  l -56-CH-EX                                                         Printed in the United Stotes of Americo
View original page 14Page 15 · Read text
7**
                                                                    l a t;--a.
RANGE     OF   SHARPNESS                          Qk.: ro 2s
                                                 9 .s.oThe subiect focused on will be shorpesl in the pic-         \.s',
ture. Other obiecis in ihe piclure oreo, however,
both in fronl of ond beyond the subiecl focused
upon, will olso oppeor io be in focus. This is known
os lhe ronge of shorpness.
  The ronge of shorpness scole is directly obove
the focusing dislonce scole (see illustrolion to the
right). On this scole you will find two sets of lens
opening numbers, one sel on eoch side of the dis-         Neorest    Focusing      Forlhesl
lonce scole poinfer. The scole is used like this: In         Dislonce    Distonce      Dislonce
the illustrotion, the comero is  f ocused ot l0    f eet,         About      l0Feet        Aboul
                                                                                                   Feefqnd the lens opening set ot  f /l  l. Opposite the red         6 Feet              I         50                                                                                         l.\ ll  on eoch side of lhe pointer. find the distonce           I->                                                          Ronge of Snorpness  .        \
on fhe focusing scole. These distonces ore the neor
ond for limits of shorp focus.
  When you focus ot l0 feet ond set fhe lens open-             Distonces ore meosured from the
ing ot  f /l  l, ihen oll obiects from obout 6 fo 5O             film plone to lhe subiect. The film
feel will be shorp.                                       plone indicotor I    on ihe top of
                                                                    lhe comero, locoles lhe film plone.
                                                           ll
View original page 15Page 16 · Read text
TAKTNG  THE  PTCTURE      I            www.butkus.us

         Load the camera-but never in bright light. Here are the steps to.follow
            for mnking pictures in bright sunlight.
              t   Set the shutter speed pointer to the red 50. Move the lens opening
           pointer to the red dot between 5.6 and B for Kodachrome Film Daylight
         Typ"   to l1 if you're using Kodak Ektachrome Film Daylight Typ".                 -
       2  Cock the shutter by pressing the cocking lever down.
       3  Focus on the subject; then compose the picture.
       4  Hold the camera steady; then press the shutter release leoer all the
        way cloun with a slow squeezing action. (The release will not operate if
          the shutter is not cocked, or if the ftlm has not been advanced to an
          unexposed frame.)
       5  Advance the film to get ready for the next picture.
          o For intentional double exposures, trip the release on the bottom front
           of the camera. You can then cock the shutter and make your second
          exposure over the first picture.

           L2
View original page 16Page 17 · Read text
The illuslrolions show ivr'o woys of  holding  fhe
comero. Use ony melhod you prcfer, os long os
thc comero is held steodv.
  When toking pictures, broce lhe comero solidly
oqoinsl your foce. Kecp your eye close io  the
fl nder so thot the reor opening lines up with  oll
four corners o{ the fronf finder frome (see below).
By keeping your eye in this posilion, you'll be oble
lo oim the comero correclly fhroughoul lhe enfire
focusing ronge.
  When shifting your viewpoint in composing lhe
piclure, move the comero ond your heod togelher.


                                                        1;j
View original page 17Page 19 · Read text
Daylight Type. For complete information, see the instruc-
tion sheets packed with the film.


Kodqchrome Fifm Doylight Type-ln bright, direct sunlight.
Set the lens opening at the red dot between 5.6 and B,
shutter speed at the red 50, and focus at the red 10. Subjects
from about 7 to 20 feet will be in sharp focus.


Kodok Ektochrome Film Doylight Type-ln  bright, direci sunlight.
Set the lens opening at the red 11, shutter speed at the red
50, and focus at the red 10. Subjects from about 6 to 50 feet
will be in sharp focus.
View original page 19
Page 20 · Read text
FLAsH PtcruREs                      www.butkus.us
                                         ".f,

                                                                                        I
     You'll want to make some fash pictures to really appreciate your Signet 40                                                                                                   I    Camera. They're as easy to make as outdoor shots-some folks think even
     easier. This is because flash is always rendy when you need it.
     The Signet 40 was designed to use the Kodalite Super-M Flasholder
     directly, and does not require the use of a bracket. Two refectors are avail-
    able for this flasholder:
    The 4-inch reflector is frir use with No. 5 ond No. 25 lomps only.
   The 3-inch reflector is designed primarily for the small M-2 lomps. How-
     ever, No. 5 and 25 lamps can also be used with this reflector.
    Synchronization
   The Kodak Synchro 400 Shutter synchronizes No. 5, No. 25, and M-2    |
    lamps at speed 25 (l/25 second). Electronic flash units (zero-time delay)   i    are synchronized by this shutter at all speeds.                                                                                                    I
    r6
View original page 20Page 21 · Read text
Power Jor the Flasholder
Batteries are not included with the
flasholder. Get two 116-volt penlite bat-
teries (each battery should test 3)6 am-
peres).
  For more dependable lamp firing, a
Kodalite Midget B-C Flashpack and
J,S-volt photoflash battery are recom-
mended. With B-C (battery-condenser)
power in your flasholder, flash failures
due to weak batteries are eliminated -batteries last longer, too.
   Note: Here ore some typicol l5-voh pholo-
    flosh botteries: Burgess Y 10, Evereody No.
   504, Olin No.0814.

                                   L7
View original page 21Page 22 · Read text
www.butkus.us

How to InstaII ihe Ballery
I  Remove the back cover by loosening the slotted screw.
2 When two l)5-volt penlite batteries are used, insert both
base doun as illustrated. Make sure the cloth pull-tab is
under the inside battery.
3 When the Kodalite Midget B-C Flashpack is used, be
sure to remove any batteries which may be in the fasholder.
Hook the end of the flashpack with the plus (*) mark into
the small hole in the upper spring in the flasholder. Push the
bottom in, until it snaps in place. Place the lS-volt battery
in the B-C flashpack. Make sure the positive (+) end of the
battery is next to the plus sign on the B-C unit.
Caution: If the bnttery is placed in the B-C unit with the
negative (-) end up, the battery will be exhausted in a
matter of minutes.
4  Replrce the cover and tighten the slotted screw.
r8
View original page 22
Page 24 · Read text
www.butkus.us


Allaching ihe Flsshold er
Attach the flasholder to the camera by placing the posts on
the side of the flasholder into the holes on the side of the
camera. Tighten the knob on the opposite side of the flash-
older handle. The camera is now ready for flash.
  The socket on the Kodtrlite Super-M Flasholder will ac-
cept the bayonet-base and M-2 lamps without the use of an
adapter. U se N o . 5 or 25 f ashlamps with tl'te 4-inch reflector.
Use M-2 flashlamps  witl"t' the 9-incl"t, reflector.
To Make o Flash Picture
                                                             aI   If the base of the flashlamp is tarnished, rub it on
rough surface. Turn the lamp until the pins on the base line
up ivith the slots in the socket; then push the lamp until it
snaps in place.
2  Set the shutter speed pointer to 25 and cock the shutter.
20
View original page 24Related documents and language editions
From the M. Butkus archive. Original publisher and archive notices are retained.
Check the model and edition against your equipment.
PDF verified 2026-10-10.