Film cameras
Kodak Six-16 Compur-Rapid Anastigmat F/4.5 User manual
User manual for Kodak Six-16 Compur-Rapid Anastigmat F/4.5. 43 pages in English. Read the original PDF, download or print a copy without registration.
43 pagesEnglish4.6 MB PDF
Loading your manual…Open PDF directly
Document details
- Brand
- Kodak
- Model / document
- Kodak Six-16 Compur-Rapid Anastigmat F/4.5
- Document type
- User manual
- Language
- English
- Pages
- 43
- File size
- 4.6 MB
- Category
- Film cameras
- Document date
- Not specified in catalog
Search available document text
Find a term, then jump to its page in the original PDF. Image-only pages may not be searchable; check the PDF for exact wording and diagrams.
Page 1 · Read text
www.butkus.us

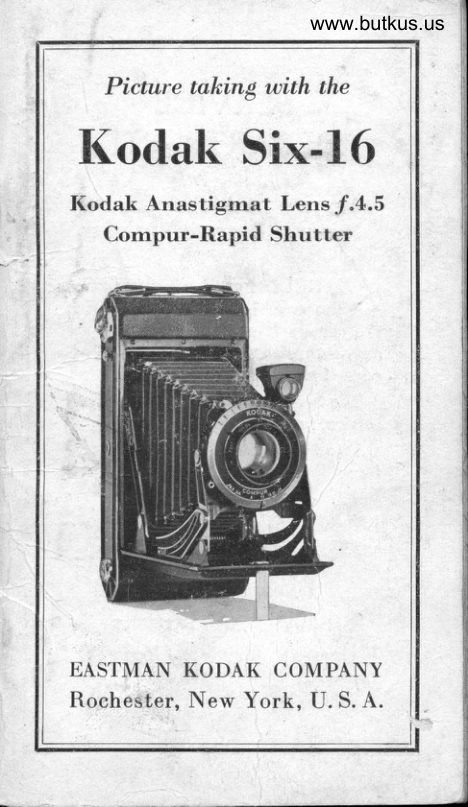
   Picture taleingbing with the
I(odak. Six-16
I(odak Anastigrnagrnat Lens.;f.4.5
   Cornpur-Rapidanid Shutter


                 h*-"

EASTMAN KO]DAK COMPANY
Rochester, Nerw York, U. S. A.
View original page 1Page 2 · Read text
SERVICE
  DEPARTMENT

  Aooruoxer, AssrsrANCE FoR
 Mer<rNc BBrrBn Prcrunes

 A LTHOUGH  rve give in this manual
fL  lhs essential directions for using
the camera it accompanies, there are
amateurs who wish for further knowl-
edge of photography.
  The Service Department is at their
service, Eour service.
  Do not hesitate to call on us for in-
formation on any photographic subiect.

We are at gour seruice, write to us-
     there is no charge, no obligation.

        Address sll Communications
    SBnvrcn DBpaRTMENT
EesruaN Konar CoupANY                                                                                                                                     .l{
      RocnBsrER, N. Y.
                                                                                                                                                            I
View original page 2Page 3 · Read text
www.butkus.us

    Picture taking with the
 Kodak Six-16
 Kodak Anastig,mat Lens j.4.5
   Compur-Rapid Shutter


           Published by
EASTMAN KODAK COMPANY
   RocnnsrnR, N. Y., U. S. A.
View original page 3Page 4 · Read text
Venmo @mike-butkus-camera  Ph. 2083
PayPal Name  Lynn@butkus.org      www.PayPal.me/lynnbutkus
View original page 4
Page 5 · Read text
THB CeunRa


Mike Butkus         Digitally                                                    DN:org,Date:cn=Mikeemail=mike@butkus.org,2023.05.26signedButkus,by17:44:58Mikeo=ButkusButkus-04'00'c=UScamera manuals, ou=butkus.

        1. Lock for Back               8. View Finder
       2. Button for                    9. Metal Frame
                                                                                                                                          {rt         Opening Front             Finder
     3. Bed                                      10. Tripod Socket     4. Vertical Support                                   Screws     5. Focusing Collar
     6. Shutter                    11. Bed Braces
     7. Lens                       t2. Winding Key
          A-Collar for Regulating Speed
         B-Stop Opening Pointer
         C-Exposure Lever
          D-Setting Lever
View original page 5Page 6 · Read text
www.butkus.us
       IMPORTANT
DEFORE loading your Kodak withI-D film, and before taking any pic-
tures with it, read these instructions
carefully. Take especial care to learn
how to operate the shutter.
  While loading and unloading, be
very careful to keep the protective
paper wound tightly around the film
to prevent light striking it.  The
Kodak can be loaded or unloaded in
daylight. This should be done in a
subdued light, not in direct sunlight.
         To Loen
        Use film number:
  V616, 55616, F616 or 616 for the
Kodak Six-16.


                   Push the but-
                 ton of the lock
                    under the carry-
                       ing handle in the
                      direction shown
                 by the arrow.
View original page 6Page 7 · Read text
Picture taking with the
  Close the back, pressing it so that
the spring lock snaps into place, se-
curely fastening the back.
            Push the round slide
             that covers the red win-
         dow on the back of the
          Kodak in the direction
              of the arrow.
  Turn the winding key, watching
the red window. After a few turns, a
warning hand will appear; then turn
slowly until the figure I is in the center
of the window.


  Push back the slide over the red@@window. This slide prevents fogging
Super Sensitive Panchromatic and
Panatomic Film, and makes it un-
necessary to use the adhesive fabric
included with each roll of these films.
  The film is now in position for the
first exposure. After each exposure
View original page 7Page 8 · Read text
www.butkus.us
                         Kodak Six-16
wind the film to the next number.
This prevents making two pictures on
the same section of film.
     OpBNtxc rHE Fnour
                    Press  t he
                  button   2,
                page 2, to
               open the
               Kodak and
               draw do wn
                       the bed until
                                   it locks. This
                        bringsthelens
                and shutter
                        into position.
                To Focus
                     The various
distances at which the Kodak mav be
focused are engraved on the bev"eled
edge of the lens mount.
  The scale is marked for 4, b, 6, 8,
L0, 12, 15, 25,50 and 100 feei.
  To bring the Kodak to the correcr
focus revolve the lens mount by turn-
1ng it to the right or left, until the
{gure_represe_nting the dislance from
the subject to lens is at the stop H-, see
diagram on page 8.
View original page 8Page 9 · Read text
Picture taking with the
  When facing the Kodak, turn the
lens mount to the right for distant
graduations on the scale, and turn to
the left when focusing on nearby or
close subjects.


  The distance between the subject
and Kodak can be estimated without
measuring, when the subject is begond
fi,fteen feet; for instance, if the focus is
set at 25 feet (the usual distance for
ordinary street scenes) the sharpest
part of the picture will be the objects
at that distance from the camera, but
everything from about 15 feet to 75
feet will be in good focus if stop /.11
is used.
  For ordinary street pictures the
focus may be kept at 25 feet, but
                         8
View original page 9Page 10 · Read text
www.butkus.us
                        Kodak Six-16
where the principal object is nearer or
farther away, the focus should be
changed accordingly.
  For distant views turn the lens
mount beyond the 100-foot mark,
bringing the stop on the lens mount
against the stop H, see illustration.
       Tnn Snurron
  The Compur-Rapid Shutter is
marked for making exposures' of 1
second and Il2, Il5, lll0, 1125, 1150,
1/100, 11200 and 11400 second, as well             t'Bulb"as Time and         Exposures.
              G


  Revolve the knurled collar A on the
front of the shutter until the figure
representing the time of exposure de-
sired is at the white pointer E.
View original page 10Page 12 · Read text
www.butkus.us
                         Kodak Six-16
then push the knob G, towards the
back of the camera, now push the set-
 ting lever D, to the end of the slot.
Push the exposure lever C or the push-
 pin if a cable release is used. Get into
the picture. After about fifteen sec-
onds the exposure will be made.
  This self-acting release cannot be
used with speed 11400 second, nor with
Time or "Bulb" Exposures.
   irrvrn AND ,,BuLB" ExposuRES
  To make a Time Exposure the letter
'(T" engraved on the shutter must be
at th-e white pointer E, and the expo-
sure lever C (or push-pin of cable re-
lease) pressed twice, once to open the
shutter, and again to close it.
  For "Bulb" Exposures the letter
"8" engraved on the shutter must be
at th_e white pointer E, and the expo-
sure lever C (or push-pin of cable re-
lease) pressed down; the shutter re-
mains open as long as the lever C or
the push-pin is held down.
  Automatic exposures of 1 second,
ll2, Ll5, or lll0 second must not be
                           l1
View original page 12Page 13 · Read text
Picture taking with the
made with the camera held in the
hands. The Kodak has two tripod
sockets for use with a tripod, an
Optipod or a Kodapod.
  Important: Neaer oil the shutter.
In case of accident, return the camera
to your dealer or to us for repairs.
  Cable Release: A cable release
(No. 5) can be used with this Kodak
if desired, but the camera should not
be closed without first removing the
cable release.
  To attach the cable release, remove
the screw from the opening F and re-
place it with the cable release. After
using the cable release, detach it and
replace the serew in the opening. The
screw may be loosened and tightened
with a coin.
       SToP OPBNINcS
  The stop openings regulate the
amount of light passing through the
lens. The openings are enlarged or
reduced by moving the pointer B, see
illustration, page 9.
                                   ob-   f .4.5-For exposures of moving
jects on gray days, use 1/100 second;

                           L2
View original page 13Page 14 · Read text
www.butkus.us
                            Kodak Six-16
    for portraits indoors, see page 34, use
    1/10 second, when the light is very
   bright. For outdoor subjects on
   cloudy days and during rain in the
   middle of the day, use Il50 second.
   For exposures early or late on clear
   days use Il50 second, if on a cloudy
    day, use 1/25 second.
     Important: When using 1.4.5 or
    f.5.6, and the distance between sub-
    ject and camera is ten feet or less, the
    distanee must be accuratelv measured
   as the depth of focus is limited, see
    table on page 16.
                                  pages    /.5.6-For portraiture, see   34 and 35. For exposures of rapidly
   moving objects in sunlight use 11200
    or 1/400 second. For cloudy days and
   during rain in the middle of the day,
   use Ll25 second. For portraits and
   groups in the open shade, use U25
    second, see page 35.
         /. 8-For instantaneous exposures on
      sli,ghtly cloudy or hazy days, use 1/25
   I   second. For scenes on narrow and
I   slightlyshaded streets, use 1/25 second.
   For moving objects in very bright sun,
    light, use 1/100 second.
                              l3
View original page 14Page 15 · Read text
Picture taking with the

                          outdoor p,tc-   "f.ll-Ior   all ord,inary tures, sgch as nearby landscapes shbw-
 ing little or no sky, groups and street
 scenesJ when the subject is in bright
 sunlight, use 1/25 second.
  /.16-For open views, when the
 sunlight on the subject is unusually
 strong and there are no heavy shadows,   I
 such as views at the seashore and on
 the water, use Il50 second; for ordi-                                            i
 n?r_y land,scapes, in bright sunlight,
 with clear sky overhead, use IIZB                           I
 second; also foi Interior Time E*b;:
 sures, the time for which is given- in
 the table on page 32.
  I.22-For instantaneous exposures
 of extremely distant landscapes, ma-
 1ines, snow scenes without prominent d-ark_ obje_cts in the foreground, and
clouds only, in bright sunlight, use
 1/25 second; also for Time Exposures.
   f .32-For Time Exposures Out-
doors on cloudy days,-see table on    Ipage 38. For Interior Time Expo-
sures, see pages 31, 32 and 83. Neuer
t or instantaneous erp o sures.               tI
                                                    is  Failure will result, if stop f.Zz
                                                                                                                                                                                                                                                                                                                                                                                                                                                                                                           Iused for instantaneous erposires.
                          l4
View original page 15Page 16 · Read text
www.butkus.us
                            Kodak Six-16
     The smaller the stop opening the
    greater the depth of fotus, see pages
    16 and 17.
       All exposures given for outdoor sub_
 t   jects are for the hours from one hour
    I   after sunrise until one hour before
     I    sunset, when using Kodak Verichrome,
I   Super Sensitive Panchromatic or pani
    atomic Film. If Kodak N. C. Film is
    used, exposures can be made from 2tl    hours after sunrise until 2rl hours be-
   fore sunset. If earlier of ht", the
    exposures must be longer.
     For a subject in the shade, under      ,,   the roof of a porch or under a tree,
   when the light is poor, a time-exposure
                                            gS.   must be made, see pages gZ ahd
  To make pictures unddr these condi-
    tions the camera must be placed on
   some steady, firm support.
View original page 16Page 18 · Read text
www.butkus.us
                            Kodak Six-16
          Dnprn oF Focus
      Depth of focus is the distanee from
     the nearest to the farthest objects that
     will appear sharp in the negative or
    print. It depends upon the distance
    between the subject and lens, the focal
     length of the lens, and the size of the
    stop opening used. The smaller the
    opening the greater the depth of
    focus. See the table on page 16 which
      is for use with the Kodak Six-l6.
         THn ,f." SysrEM
    A lens is said to work at a certain
    "speed;" this means that the lens will
    give a sharp image from corner to
    corner of the film with an opening a
     certain proportion of its focal length.
    The focal length of a lens is the dis-
    tance between the lens and the film
   when the Kodak is focused for 100
    feet. It should be borne clearly in
   mind that this "speed" depends nol
t   upon the size of the opening, but upon
    the size of the opening in proportion

     I     to the focal length of the lens. The lens
a   that will give sharp images with the
    largest opening is said to have the
    greatest "speed."
                               t7
View original page 18Page 20 · Read text
www.butkus.us
                            Kodak Six-16
    Six-16. They clearly show the relative
     sizes of the stop openings and how
     their areas differ.
t    How to Use the Kodak Six-16
        as a Fixed Focus Camera
     SBr rnp Focus tr 25 FEET.iI     Usn Srop Opnxrxc /.16,      axo 1/25 sECoND.
     lVhen using the Kodak as a fixed
    focus type, nearby subjects must be
    in bright sunlight, to obtain fully
    exposed negatives.
      f_ng range- of sharpness when your     __
   Kodak is adjusted as a fixed fbeus
    camera will be found on page 10.        l
         TnB VrBrv FrunBn
    The view finder 8, page 2, shows
    what will appearin the piclure, but on
    a much reduced scale. It can be turned
    quickly for either vertical or horizon-
    tal pictures.
     Look into the finder from directlv
    over the eenter of it and include whal
      is       bV turning to the right or     -wante4     left, see illustration on page 22.-

                                19
View original page 20Page 21 · Read text
Picture taking with the
          l

                 www.butkus.us

  To make a vertical
picture, hold the
Kodak as shown
above. Only what is
seen in that part of
the finder shown as
white in the diagram,
will appear in the pictu re.    ru
      3f
                           I
View original page 21Page 22 · Read text
www.butkus.us
                            Kodak Six-16
    To make a hori-
    zontal picture, turn
    the finder and hold
    the Kodak as shown
     in the lower illustra-
     tion on page 20. OnlY
    what is seen in that
     part of the finder shown as white in
     ihe diagram, will appear in the picture.
      THn MBtel FnenrB FIwonR
                                  view      In addition to the brilliant
      finder the camera is equiPPed with a
     metal frame finder 9, Page 2, attached
      to the side of the Kodak. To use this
     finder raise the rear frame bY the
     button and both Parts of the finder
      will spring into position. Hold the
     camera with the sight or rear frame
      as close to the eye as possible with the
     camera held firmly against the face,
     and frame the picture within the front
     frame of the fihder. All vertical lines
      in the subject should be kept parallel
     with the vertical sides of this frame,
    when holding the camera either in the1I    vertical or horizontal Position.
View original page 22Page 23 · Read text
Picture taking rvith the


  When making instantaneous exposures or
snapshots with any Kodak, hold it  firmly
against the body as shown; or against the face
if using the metal frame finder. When pressing
the exposure lever, hold the breath for the
instant. If the Kodak is moved during the
exposure, the picture will be blurred.
View original page 23
Related documents and language editions
From the M. Butkus archive. Original publisher and archive notices are retained.
Check the model and edition against your equipment.
PDF verified 2026-10-10.