Film cameras
Kodak Six-20 Bulls-eye Camera User manual
User manual for Kodak Six-20 Bulls-eye Camera. 19 pages in English. Read the original PDF, download or print a copy without registration.
19 pagesEnglish2.1 MB PDF
Loading your manual…Open PDF directly
Document details
- Brand
- Kodak
- Model / document
- Kodak Six-20 Bulls-eye Camera
- Document type
- User manual
- Language
- English
- Pages
- 19
- File size
- 2.1 MB
- Category
- Film cameras
- Document date
- Not specified in catalog
Search available document text
Find a term, then jump to its page in the original PDF. Image-only pages may not be searchable; check the PDF for exact wording and diagrams.
Page 1 · Read text
r'                                  www.orphancameras.com                                      t '
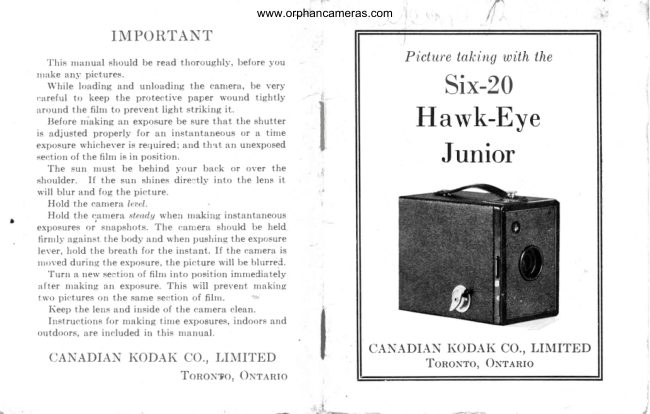
       IMPOITTANT

    'l'lris         rrrunuul  slrould be rezrd thoroughlS',  before  )'ou                  Picture taki ng u)ith the
rnake an1' pictures.
  While  loading  and  unloadine   the  eAnreril, be  t'eryr':rreful  to  keep  the  proteetive   paper  u'outtd   tiglrtly            Six-20
:rround the  filrrr to prevent  light  striking   it.
   IJefore lriaking  an expos{rre be sure that  the  shutter                        Hawk-Eveis adjusted  properly   for  an  instantaneous   or  a  tinre
exposure  rvhic'hever  is rerluired;  rtnd  th'rt  :tn ullexposed                          T
se('tiorr of the  filrrr is in positiotr.                                          .JUnlor
  The  sun  nrust  be  behind   )'()ur  b:rt'k  or  over  the
shoulder.     If  tlre sun  shines  dire:'tlv  into  the  lens  it
rvill blur and  fog the  pieture.
  Hold  the eanrertt  ltrcl.
  Hold  the  carrrer'.t sterrcly n'he:r  trrakiirg instatrtaneous
exposures  or  srrapshots.  The   ('irlrrerir should  be  held
 firnrl.r' against  the bodl' arnd rvhen puslritrg the expr;sure
lever,  lrold the breath  for the instant.   If the canrerit is
rrroved during  tlre exposure, the picture  rvill be blurred.
   'ftrrn         a new seetion of  filrrr into  position  inrrrreCiately
 :rfter  nraking  arr exposure. This   u'ill  prevent  lrraking
tu'o pir'tures ot) the sanre section  of  filrrr.
   Iieep the  lerrs und inside of the eanrera c'lean.
   Instruetions  for trraking  titrre exposures, indoors  attd
outdoors,  &re ineluded  in  this  rrranual
                                       CANADIAN I{ODAI{ CO., LINTITED
  CAIVADIAN I{ODAI{ CO., T,I}IITED                                                            Tonoxto, Oxrento
                     ToRoxto. Oxr.qnro
View original page 1Page 2 · Read text
www.orphancameras.com

                                                         Picture taking with the
                              Six-20
                      Hawk-Eve
                             Juniok3
                                                                 |


 A PRACTICAL     bool<  for   amateurs.     It
fldcscribes     in  a  simple,  understandable
way..everv  p.has-eof photography   that  theyare likely  to be interested  in, zuch as variou"s            fw#'it:l-m
methods  of  making-coloiing,exposures,  developing,
p.Iinting,  enlarging,           miking   lantenislides and  other  lnterestin!   subjecls.   pro-            d:"Et
fusely illustrated.                                         PubtirVu ..-t
  CANADIAN  KODAK   CO., I,IMITED        CANADIAN KODAK CO., Lrnrrunr
                                                               Tonorvro, ONrenro
Sold at your dealer's     Tonoxro, Oxranro              IIl
                                                                   I
View original page 2Page 3 · Read text
www.orphancameras.com
        THn Ceupne
                  F /
                                         IMPORTANT
                                          p  EFORE loading your camera with
                                   LD  film, and before taking any pic-
                                              tures rvith  it, read these instructions
                                                  carefully. Take especial care to learn
                                   how to operate the shutter.
                                           While  loading and unloading, be
                                            very  careful to keep the  protective
                                        paper wound tightly around the film
                                                   to prevent light striking it. The camera
                                     c&n be loaded or unloaded in daylight.
                                            This should be done in a subdued light,
             c                           not in direct sunlight.
A-Catch  for locking   C-trxposure Lever
     camera                                To Loeo                     D--Winding  I(ey
                                  Use fihn number:B-Exposure   Slide     E-Lens  Opening
                                   V620 or 620 for Six-20 Hawk-Eye
                F-Finder                      Junior.
                  2
View original page 3Page 6 · Read text
www.orphancameras.com

If  the spool of  film  is inserted the         the paper ouerthe rollers and acrossthe
wrong way the protective paper would        opening in the back of the roll holder.
come between the lens and the film
and no pictures could be made.


                                         Thread jn* pQnerthrough the longer
                                         opening of the slit in the reel os far as
                                                                                 it will g_o.Give the spool two or three
                                           forward turns to malie the paper hold
                                            securely on the spool.
  Remove the band that  holds the        Be sure that  the paper is started
end of the protective paper, and pass         straight. Do not unroll too much pro-
                                                                            7
View original page 6Page 7 · Read text
www.orphancameras.com

tective paper or the film will be fogged        then turn slowly until the figure 1 is in
and ruined.                                  the center of the window.
    I nsert the roll holder in the outside
box, so that  the slotted end of the
spool comes next to the winding key
in the outside box.
  Push in the  roll holder until  the
catch A, see illustration on Page 2,
snaps into Position.                         Press in the winding key slightly,
                                   when turning it.                  Press in and at
                  the same time turn         The film is now in position for the
                  the winding key un-           first picture.  After each exposure be
                                til the web at the        sure to wind the film, bringing the next
                 lower end  of  the       number into position.  This prevents
                 key fits into the slot       making  two  pictures on  the same
                      in the spool end.          section of film.
                   Turn the key and
                watch the red win-
                dow.  After a few
                   turns )  a  warning
               hand  will  appear;
                         8
View original page 7Page 8 · Read text
www.orphancameras.com
  MAKING THE EXPOSURES          When making instantaneous expo-
                                           sures or snapshots, the subject should
   INsraNtANEous Exposunns           be in the broad, open sunlight, but the
               t'Snapshots"                    camera must not.  The sun should be
                                          behind your back or over the shoulder.rFHE   Six-20 Hawk-Eye  Junior  is a                                                                           If  it shines directly into the lens it will  I  fixed-focus camera, therefore, sub-                                                  blur and fog the picture.jects that  are about  eight  feet and
farther from the camera will be sharp.           Special instructions for making por-
                                                        traits are given on pages 23 to 26.For  subjects that  are closer to  the
camera than about eight feet, use the           Slide B (seeillustration, page 2) con-
Kodak Portrait Attachment, see page          trols the shutter for time and instan-
25.                                       taneous or snapshot exposures.  For
                                           instantaneous exposures or snapshots  The  shutter  of the camera  is  re-
                                                     this slide must be pushed all the wayleasedby pushing the exposure lever C
(seeillustration, page 2) from one end           in; it must be drawn out as far as it will
                                   come for  time  exposures, see pagesof slot to the other with  the thumb.
                                      19 to 21.Push the lever slowly, in one d'irection
only, and os far  as  it  w'ill go.   If no
"click"  is heard no exposure is made.
  Do not jerk the lever as any moYe-
ment of the camera, at the instant of
exposure,will blur the picture.
                    10
View original page 8Page 10 · Read text
www.orphancameras.com
  Important:    The  exposrlre lerrer       the finder without  tilting the c&mera
must be pushed sloulu to avoid jarring       upwards, ilove backwards until   it  is
the camera. If the camera is not held           all included with the camera,held leuel,.
steadily the picture will be blurred.
  Snapshot exposuresmust ,be made
with the subjectsoutdoorsin the bright
sunlight, and during the hours from
two and a half hours after sunrise until
two and a half hours before sunset.
With Kodak Verichrome Film, how-
ever, €Xposurescan be made from one
hour after sunriseuntil one hour bcfore
sunset. If earlier or later the exposures
must be longer.
  For subjects in the shade, under
porchesor under tre€s,a time exposure
must be made, see page 27, and the                                                                        Iffect producedby tilting the ca'mera.camera must be on some firm support
-not      held in the hands.                                                                           If the subject is below the normal
     HOTp CnUERA LEvEI,                height, like a small child or ^ dog, the
                                     camera shoulclbe held down level with  The camera must be held level.  If                                            the center of the subject.all of the subject cannot be included in
                     L4                                                           1 5
View original page 10Page 11 · Read text
www.orphancameras.com
  Tunx A NBw SBcuoN oF Fnvr          on page 4. Hold the ends of the protec-
          INTO PoSTTIoN                        tive paper and the sticker together to
                                             prevent the paper from loosening.  If                 Press in the wind-
                 ing key slightly and          the sticker has been wound under the
                  turn  it  slowly until              roll, revolve the spool to bring  it up.
             number 2,ot the next
               number, is in the cen-
                   ter of the red window.                                                                     ilil  The wArning hand appears only be-
fore section No. 1
  Turn the next section of film into
position immediately after making each
exposure; this prevents making two
pictures on the same section of film.
     RBnaovrNG THB Fnnt
  After  all the exposures,have been
made, turn the winding key until the              Lift  out the  roll  of exposed film, as
end of the protective paper passesthe        shown in the illustration.
window.  The film  is now ready for            Fold under about half-an-inch of the
removal from the camera.                     protective paper, and fasten  it  with
   In a snbdued light, opcn the camera          the sticker.
and remove the roll holder as shown                                                     Marks:   After removing                                                    tI      "Cinch"
                     16                                                      r7
View original page 11Page 12 · Read text
www.orphancameras.com
the film from the camera, do not wind                         It is a good plan to reload the camera
it  tightly  with a twisting  motion,  or            as soon as an exposed film has been
the film might be scratched.                     rernoved, to be ready  for  the  next
                                                     pictures.  For best results, load the  Wrap up the exposed film.   It  is now                                         camera with Kodak Verichrome Film.ready for development.  This may be
done by a photo finisher, or by your-               Truo  ExposuRES-INDooRs
self.  If the latter is desired, you may
write to our Service Department, men-
tioning the size of the pictures made
with your camera, and we will send you                                                                                                                                                                             -...fi-.-.-1-J
a list-of the necessarymaterials which                                                                                                  t t
can be purchased from a Kodak dealer.                                 fi\
   Importanf.'   FiIm should be devel-
oped as soon as possible after exPo;             For time exposuresthe camera must
sure. The quality  of the image on all           always be placed on a table, ehair, or
sensitized products  is  retained  by            other firm support. The camera must
prompt development after exposure.            not be more than two or three inches
  Remove the empty spool and Place           from the edge, to avoid including part
it in the recesson the winding side of              of the support in the picture.  I{euer
the roll holder. The slotted end of the                 . l      hold the camera in the hands.
spool must show through  the round             Place the camera in such a position
opening in the roll holder.                                        I      that  the finder will include the view
                         1 8                                                          19
View original page 12Page 13 · Read text
I
                                                 www.orphancameras.com
desired.  The diagrAm on page 19          exposure lever C  is pushed to  the
shows three positions for the camera.           opposite end of the slot, the shutter
It should not be pointed directly at a          opens and remains open until the lever
window, &s the glare of light will blur        C is pushed again to its original posi-
the picture.  If all the windows cannot             tion.
be avoided, draw the shades of those                                         To make the exposure, steady thewithin range of the lens.                                        camera with one hand and push the
                                                 lever C slouly to open the shutter;
                                                give the proper time (using a watch if
                                       more than five seconds),and push the
                                          exposurelever C in the opposite direc-
                                                    tion or push in the slide B, to close
                                               the shutter.
                                             Press in and turn the winding key
                                                         until the next number appears in the
                                              center of the red window.
               c                           Exposure Table  for  Interiors
  Draw  ottt the exposure slide B as           The table on page 22 gives suitable
f.ar as  it  will come, see illustration.           exposuresrequired for varying condi-
When this slide is drawn out, and the            tions of light.
                                                                               2L
View original page 13Page 15 · Read text
www.orphancameras.com
                   whitetowelortable-             Kodak  Portrait   Attachment
                    cloth  held  by  an                                          The  Kodak  Portrait  Attachment                   assistant or thrown                                       makes head and shoulder portraits.                  over  a  screen or                                                                                 It can also be used for photographing                   other high piece of                                                 flowers and similar subjects.                    furniture  will make
                                                Place the Attachment  in the lens                 a suitable reflector:                                                  iooz=                                it should be at an           opening and compose the picture  in
                 angle and  in  the            the finder. The subject must be eractly
                   position  indicated           311feet from the lens; measure the dis-
                      in the diagram.               tance carefully from  the lens to the
                                                    face. The same exposure is required as
   Making  Portraits  Outdoors                 without the Attachment.
  When making  portraits  outdoors,               IJse Kodalt Portrai,t Attachment lt{o.
with the sun shining brightly, the sub-           3 with  the Six-20 Hawk-Eye  Junior.
ject should be in the shadow of a build-
                                              Kodak  Diffusion   Portraiting or a large tree, but with clear and
                                                       Attachmentunobstructed sky overhead. Place the
camera on some steady, firm support,            The Kodak  Diffusion  Portrait  At-
and make a very short time exposure          tachment is a supplementary lens used
of about one second. By following this               in  the same manner as the  regular
rule unpleasant and distorting shad-                   , Kodak Portrait Attachment. By using
ows on the face will be avoided.                     this Attachment,  portraits are made
View original page 15Page 16 · Read text
www.orphancameras.com
more  artistic,  due to the softening         Truo ExposunEs-OurDooRs
effect of diffusion.                                     On cloudy days short time expo-
  Use the Kodalt Diffusion Portrait          sures may be made outdoors.
Attachment  -l/o. 3  with  the Six-20           With  Light  Clouds-From   one to
Hawk-trye  Jtrnior.                              three seconds will be sufficient.
                                               With Heavy Clouds-Four   to eight   "Ar HouE wrrH r:Hn Koo.tKt'  is a                                          seconds will be required.booklet containing many diagrams and                                          The camera must be placed on someillustrations showing various lighting
effects. It  gives suggestions for mak-           steady, firm support. Do not hold it in
ing pictures, in and around the home.           the hands or the picture will be blurred.
   t'Ptctunp                                   Cenn oF THE Ceiupne.            Texrxc  er  NrcHr"   is a
booklet  that  describes in  detail the             Caution'    Prolonged exposure to
methods of making pictures by elec-            direct sunlight might cause the cover-
t_riclight, flash-light exposures, camp-           ing of the colored cameras to fade. To
fire scenes,fireworks, lightning, moon-           clean the camera use soap and water
light  effects, silhouettes and  other            sparingly. Do not use a cleaner con-
novel and unusual pictures.                      taining alcohol.
  These two  booklets are free. and           Keep Dust Out  of the Camera
copies of them  will be sent upon re-           Wipe the inside of the camera and
quest to our Service Department.                     roll holder occasionally, with a slightly
              L
View original page 16Page 18 · Read text
www.orphancameras.com
Vnr,ox TnlNspennnr Weron Cor,on
  Steurs, booklet of twelve colors. . . $     . 5 1
Vor,ox Warnn  Cor,on OurrrT, eon-
  sisting of Artist's Mixing  Palette,
  three Camel's Hair Brushesand one
  book of Velox Transparent Water
  Color Stamps (twelve colors)               t . 2 5
"How ro Mern Goon Prcrunns." an
   illustrated book of helpful sugges-
   tions. It describesvarious methods
   of making exposures, developing,                       The Kodak   printing, enlarging, coloring, mak-
  ing lantern slidesand other interest-     i n g s u b j e c t s . . . .                                    . 5 2      Portrait Attachment
           All  prices  subject  to change  uithout   notice.                     Fits your Hawk-Eye  for head and
                                              shoulder portraits-it   enables you to
 CANADIAN  KODAI(  CO., LIMITED                                           approach closer to  the  subject and                     TonoNro, Oxtento
                                                 get a larger image, sharply focused
                                                       at short rangd.

                                  CANADIAN  KODAK  CO., Lrurrpo
                                                 At your dealer's   Tonoxto,  ONrenro
                                                                       31
View original page 18Page 19 · Read text
www.orphancameras.com
    For Your Camera          StrRVICtr

            w€,@.g€trw@.6Me                    DtrPARTMtrl\T
                                            r((}     tl  Al(.      r  r r-h.A
                                                     AoprrroNAr,  AssrsrANCE FoR
                                           Merrxc Bnrrnn Prcrunps
                                          A LTHOUGH  we give in  this manual the
                                         A   essential directions for using the camera
                                                                                                     it accompanies,there are amateurs who wish          -  Comes  in the  Yellow  Bot  with  the                Checkered  Stripes                               for further knowledge of photography.
KODAK                                     The Service Department is at their service,
                                             aouT servrce.   VERICHROME
,                  FILM           onDoanynotphotographichesitate to callsubject.on us for information (Double-Coated)
 TZ  ODAK Verichrome Film, manufactured           We are at your seru,ice,write to us-
 -[       frt an exclusive Eastman process, is                   therei,s no charge,no obli,gation.
 double-coated. . . more sensitive to color . . .
 faster. It guards against under-exposure,the                          Address all Communications
 beginner's most common fault.                                               SERYICE DEPARTMENT   You're sure of better pictures with Kodak
Verichrome Film in your camera.            CANADIAN KODAK CO., Lrurrpn
  CANADIAN  KODAI(  CO., LIMITED                        Tonoxro  9, Omrenro
           TonoNro. ONrenro                            F-6995-4
View original page 19From the M. Butkus archive. Original publisher and archive notices are retained.
Check the model and edition against your equipment.
PDF verified 2026-10-10.