Film cameras
Kodak Six-20 Six-16 Series II User manual
User manual for Kodak Six-20 Six-16 Series II. 20 pages in English. Read the original PDF, download or print a copy without registration.
20 pagesEnglish1.3 MB PDF
Loading your manual…Open PDF directly
Document details
- Brand
- Kodak
- Model / document
- Kodak Six-20 Six-16 Series II
- Document type
- User manual
- Language
- English
- Pages
- 20
- File size
- 1.3 MB
- Category
- Film cameras
- Document date
- Not specified in catalog
Contents
- ASSISTANCE FOR MAKING BETTER PICTURES1
- THE CAMERA3
- To LOAD4
- OPENING THE FRONT6
- THE SHUTTER7
- Time Exposures7
- “Bulb” Exposures7
- Never oil the shutter.7
- Cable Release:7
- STOP OPENINGS8
- NEARNESS OF SUBJECT8
- Depth of Field Tables9
- THE VIEW FINDER10
- THE METAL FRAME FINDER11
- INSTANTANEOUS EXPOSURES OR SNAPSHOTS11
- HOLD THE KODAK LEVEL11
- CLOSING THE KODAK12
- REMOVING THE FILM12
- “Cinch” Marks:13
- TIME EXPOSURES - INDOORS13
- Exposure Table for Interiors14
- To MAKE A PORTRAIT14
- EXPOSURE TABLE FOR INTERIORS15
- Making Portraits Outdoors15
- Kodak Portrait Attachment16
- Kodak Diffusion Portrait Attachment16
- “AT HOME WITH YOUR KODAK”16
- “PICTURE TAKING AT NIGHT”16
- TIME EXPOSURES-OUTDOORS17
- CLEAN LENSES17
- Keep Dust Out of the Camera17
- PRICE LIST18
- The Kodak Portrait Attachment19
- Taking the Picture 19
- Check the focus.19
- Hold the camera level.19
- Keep the lens and inside of camera clean.19
- Never oil the shutter.19
- Outdoor Exposure Guide20
Search available document text
Find a term, then jump to its page in the original PDF. Image-only pages may not be searchable; check the PDF for exact wording and diagrams.
Page 1 · Read text
www.orphancameras.com


                     SERVICE DEPARTMENT
ADDITIONAL ASSISTANCE FOR MAKING BETTER PICTURES THOUGH we give
in this manual the essential directions for using the camera it accompanies, there are
amateurs who wish for further knowledge of photography.
             The Service Department is at their service, your service.
     Do not hesitate to call on us for information on any photographic subject.
      We are at your service, write to us, there is no charge, no obligation.
                           Address, all Communications
                     SERVICE DEPARTMENT
                EASTMAN KODAK COMPANY
                       ROCHESTER, N. Y.
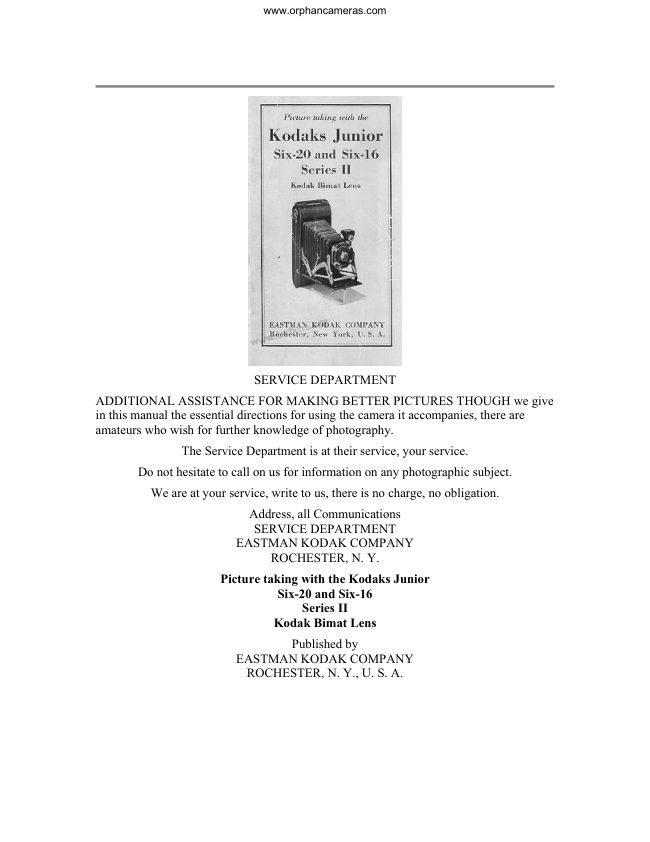
                      Picture taking with the Kodaks Junior
                                Six-20 and Six-16
                                      Series II
                        Kodak Bimat Lens
                                   Published by
                EASTMAN KODAK COMPANY
                    ROCHESTER, N. Y., U. S. A.
View original page 1Page 3 · Read text
www.orphancameras.com


  THE CAMERA


              1. Lock for Back
              2. Button for Opening Front
              3. Bed
              4. Vertical Support
              5. Shutter
              6. Lens
              7. View Finder
              8. Metal Frame Finder
              9. Tripod Sockets
            10. Release for Closing Front
            11. Winding Key
       A - Speed Indicator
        B - Stop Opening Pointer
        C - Exposure Lever
View original page 3Page 4 · Read text
www.orphancameras.com


                      IMPORTANT
BEFORE loading your Kodak with film, and before taking any pictures with it, read these
instructions carefully. Take especial care to learn how to operate the shutter, see page S.
While loading and unloading, he very careful to keep the protective paper wound tightly
around the film to prevent light striking it. The Kodak can be loaded or unloaded in
daylight. This should be done in a subdued light, not in direct sunlight.
                           To LOAD


                                 Push the button of the lock towards the arrow.
                               Use film number:
                      V 620, XX 620, FX 620 or 620 for the Kodak
                                       Junior Six-20 Series II.
                      V 616, XX 616, FX 616 or 616 for the Kodak
                                       Junior Six-16 Series II.


                              Open the back.
View original page 4Page 5 · Read text
www.orphancameras.com


        Lift up the spool holder in the recess adjoining
       the hinge of the back and place the roll of film in
           it, springing out the flanges until the pins engage
       the holes in the spool. The spool should be
        inserted so that when the paper is drawn off, the
       colored side of the paper will be up,
      and the black side will be towards
       the lens.


      Remove the paper band and pass the protective
       paper over the two rollers, and thread it through
        the longer slit in the empty reel, as far as it will
        go.


       Turn the winding key once or twice to bind the
       paper on the reel, and be sure that the paper is
         started straight.
View original page 5Page 6 · Read text
www.orphancameras.com


                       Close the back, pressing it so that
                          the spring lock snaps into place,
                          securely fastening the back.
                      Push the round slide that covers the
                         red window on the back of the
                    Kodak in the direction of the arrow.


Turn the winding key, watching the red window. After a few
turns, a warning hand will appear; then turn slowly until the
figure 1 is in the center of the window.
Push back the slide over the reel window. This slide prevents
fogging the film. The window should be uncovered only when
winding the film.
The film is now in position for the first exposure. After each
exposure be sure to wind the film, bringing the next number
into position. This prevents making two pictures on the same
section of film.


   OPENING THE FRONT

       Press the button 2, page 2, to open
       the front; then draw down the bed until it locks. This
       brings the lens and shutter into position. The Kodak is
       adjustable for close-ups, near-by views, and distant
       subjects.
     When the lens is revolved so that the white dot on the
       flange is at the arrow marked: “Beyond 15 feet,” the
     Kodak is in focus for all subjects beyond fifteen feet.
      For groups or near-by views the white dot on the flange
      should be at the line marked: “8 to 15 feet.” For close-
       ups, revolve the lens until the white dot is at the arrow
      marked: “5 to 8 feet.”
View original page 6Page 7 · Read text
www.orphancameras.com


                     THE SHUTTER


                                     Instantaneous Exposures
                              Move indicator A to 25, 50, or 100 (see
                                     Exposure Guide on back cover or table on
                                      pages 10 and 11).
                              Move pointer B to the correct stop opening
                                           (see Exposure Guide on back cover or table on
                                      pages 10 and 11).
                                 The Kodon Shutter has the stop openings and
                                            shutter speeds engraved on the top of the
                                            shutter as well as on the front, for greater
                                      convenience when making pictures with the
                                Kodak in the vertical position.
                                         Press lever C to make the exposure.
          A-Speed Indicator
        B-Stop Opening Pointer
          C-Exposure Lever


                          Time Exposures
Move indicator A to the letter “T.”
Move pointer B to f/11, f/16, f/22 or f/32, according to the time of exposure and nature of
the subject. See tables on pages 10, 11, 12, 25, 26 and 31.
Press lever C. This opens the shutter. Time the exposure by a watch. Again press lever C.
This closes the shutter.
For short time exposures from one half second to ten seconds, “Bulb” Exposures are
recommended.
                            “Bulb” Exposures
Move indicator A to the letter “B.”
Move pointer B to f/11, f/16, f/22 or f/32. See pages 10, 11, 12, 25, 26 and 31.
Press lever C to open the shutter which will remain open as long as lever C is held down.
Time and “Bulb” Exposures must never be made with the Kodak held in the hands.
Important: Never oil the shutter.
In case of accident, return the camera to your dealer or to us for repairs.
Cable Release: A cable release (No. 29) can be used with the Kodak if desired, but the
camera should not then be closed without first removing the cable release.
View original page 7Page 8 · Read text
www.orphancameras.com


To attach the cable release, remove the screw directly behind the lever C and replace it
with the cable release. After using the cable release, detach it and replace the screw in the
opening. The screw may be loosened and tightened with a small coin.
                     STOP OPENINGS
The stop openings regulate the amount of light passing through the lens. The openings
are enlarged or reduced by moving the pointer B, see page 8.
The largest stop opening is f/11. This opening allows approximately twice the light to
enter the lens as f/16; f/16 admits twice the light of f/22; and f/22 twice the light of f/32.
There
fore, if the correct exposure is 1/100 second at f/11 the same amount of exposure would
be obtained with f/16 and 1/50 second, and 1/25 second with f/22.
f/11 - For all ordinary outdoor pictures, such as near-by landscapes showing little or no
sky, groups and street scenes, when the subject is in bright sunlight, use speed 25; for
moving objects in very bright sunlight, use speed 100.
f/16- For open views, when the sunlight on the subject is unusually strong’and there are
no heavy shadows, such as views at the seashore and on the water, use speed 50; for
ordinary landscapes, in bright sunlight, with clear sky overhead, use speed 25; also for
Interior Time Exposures, the time for which is given on page 26.
f/22 - For instantaneous exposures of extremely distant landscapes, marines, snow scenes
without prominent dark objects in the foreground, and clouds only, in bright sunlight, use
speed 25; also for
Time Exposures.
f/32 - For Time Exposures Outdoors on cloudy days, see page 31.
For Interior Time Exposures, see pages 25 and 26. Do not use for instantaneous
exposures unless using Kodak Super XX Panchromatic Film.
The smaller the stop opening the greater the depth or range of sharpness, see tables on
page 13.
The exposures given in the table are for Kodak Verichrome, Panatomic X, and Regular
Film; with Kodak Super Verichrome Film, use the second smaller Stop opening than the
table recommended in the table, or use the same stop opening with a shutter speed four
times as fast as the one given in the table.
For a subject in the shade, under the roof of a porch or under a tree, a short time exposure
should be made, with Kodak Verichrome, Panatomic-X, or Regular Film; with Kodak
Super-XX Panchromatic film snapshots can be made. When making time exposures the
camera must be placed oil some steady, firm support.
NEARNESS OF SUBJECT
To get everything sharp and distinct in your pictures, the Kodak must not be nearer than a
certain number of feet to the subject. This distance varies according to the focal length of
the lens; the adjustment of the lens for close-ups, near-by views or distant subjects; and
the size of the stop opening used-the smaller the opening the greater the range of
sharpness. The following tables give these distances.
View original page 8Page 9 · Read text
www.orphancameras.com


Depth of Field Tables


                  For Kodak Junior Six-20 Series II

                           Distance from Lens to Subject

   Stop   With Kodak focused for With Kodak focused With Kodak focused for
 opening     beyond 15 feet         for 8 to 15 feet         5 to 8 feet

 f/11      15 ft. & beyond        8 to 15 ft.          5 to 8 ft.

 f/16      11 ft. & beyond         61to24ft.           4 ½ to 91 ft.

 f/22      9 ft. & beyond         6 to 47 ft.          4 ½ to 111, ft.

 f/32      7 ft. & beyond         5 ft. & beyond      3 ¾ to 18 ft.


                  For Kodak Junior Six-16 Series II

                           Distance from Lens to Subject

   Stop   With Kodak focused for With Kodak focused With Kodak focused for
 opening     beyond 15 feet         for 8 to 15 feet         5 to 8 feet

 f/11      15 ft. & beyond        8 to 15 ft.          5 to 8 ft.

 f/16     13½  ft. & beyond    7¼ to 18 ft.       4¾ to 8¼  ft.

 f/22     11¼  ft. & beyond    6¾ to25ft.       4½ to 9¼  ft.

 f/32     8¾  ft. & beyond     5¾ to 68 ft.        4 to 12¼  ft.
View original page 9Page 10 · Read text
www.orphancameras.com


                                        These circles are the same size as the
                                              stop openings of the shutters used on the
                                        Kodak. They clearly show the relative
                                                 sizes of the various stop openings and
                                  how their areas differ.


                   THE VIEW FINDER

                               The view finder shows what will appear in the
                                           picture, but on a much reduced scale. It can be
                                      turned quickly for either vertical or horizontal
                                           pictures, see diagrams on pages 15 and 17.
                               Look into the finder from directly over the center
                                       of it and include what is wanted by turning to the
                                           right or left, see illustration on page 16.
                             To make a vertical picture, hold the Kodak as
                               shown above. Only what is seen iii that part of the
                                         finder shown as white in the diagram at the right
                                          will appear in the picture.


When making instantaneous exposures or snapshots with any Kodak, hold it firmly
against the body as shown; or against the face if using the metal frame finder. When
pressing the exposure lever, hold the breath for the instant. If the Kodak is moved during
the exposure, the picture will be blurred.
View original page 10Page 11 · Read text
www.orphancameras.com


                                     To make a horizontal picture, turn the
                                                    finder and hold the Kodak as shown
                                                     in the lower illustration on page 15.
                                         Only what is seen in that part of the
                                                    finder shown as white in the diagram
                                         on this page will appear in the
                                                       picture.


                 THE METAL FRAME FIND
In addition to the brilliant view finder, the camera is equipped with a metal frame finder
8, page 2, attached to the side of the Kodak. To use this finder, raise the rear frame by the
button and both parts of the finder will spring into position. Hold the camera with the
sight or rear frame as close to the eye as possible with the camera held firmly against the
face, and frame the picture within the front frame of the finder. All vertical lines in the
subject should be kept parallel with the vertical sides of this frame, when holding the
camera either in the vertical or horizontal position.
      MAKING INSTANTANEOUS EXPOSURES OR SNAPSHOTS
When ordinary instantaneous exposures or snapshots are made, the subject should be in
the broad, open sunlight, but the camera must not. The sun should be behind your back or
over the shoulder. If it shines directly into the lens, it will blur and fog the picture. For
obtaining back- or side-lighted pictures, use a Kodak Adjustable Lens Hood No. 2.
Special instructions for making portraits are given on pages 27 to 30.
                HOLD THE KODAK LEVEL
The Kodak must be held level. If all the subject cannot be included in the finder without
tilting the lens upwards, move backwards until it is all included with the camera held
level.
If the subject is below the normal height, like a small child or a dog, the Kodak should be
held down level with the center of the subject.
View original page 11Page 12 · Read text
www.orphancameras.com


Unusual effects can be obtained by
tilting the Kodak.
Hold the Kodak steady!.
After an exposure has been made, turn
the winding key slowly, a few times,
until No. 2 (or the next number) is in
the center of the red window.


  CLOSING THE KODAK


     Close the Kodak by pressing the bar release 10, page 2,
     as shown in the illustration at the top of page 20, raise
     the bed and snap it shut. The front and bellows fold
     automatically. Be sure the finder is in the upright
      position, and that the lens has been turned so that the
     white dot is at the arrow: “Beyond 15 feet.”
    Remove the cable release before closing the camera.


  REMOVING THE FILM

           After the last section of film has been exposed,
            turn the winding key until the end of the paper
           passes the red window.
           In a subdued light, open the back of the Kodak,
           see pages 3 and 4.
         Hold the end of the paper taut and turn the key
             until all the paper is on the roll, see lower
             illustration on page 20. If the sticker folds under
           the roll, turn the key to bring it up.
         Take hold of the ends of the paper and sticker to
           prevent the paper from loosening. Draw out the
          key and remove the film. Fold under about half-
           an-inch of the protective paper, and fasten it with
           the sticker.
View original page 12Page 13 · Read text
www.orphancameras.com


“Cinch” Marks:
After removing the film from the Kodak, do not wind it tightly with a twisting motion, or
the film might be scratched.
Wrap up the exposed film. It is now ready for development. This may be done by a photo
finisher, or by yourself. Our Service Department will be glad to send you, upon request,
complete instructions for developing and printing.
Important: Film should be developed as soon as possible after exposure. The quality of
the image on all sensitized products is retained by prompt development after exposure.


                               Remove the empty spool and place it in the
                                     winding end of the camera. The Kodak is now
                                       ready for reloading.
                                                         It is a good plan to reload the Kodak as soon
                                         as an exposed film has been removed, to be
                                       ready for the next pictures. For the best
                                                results, load with Kodak Film.


                TIME EXPOSURES - INDOORS

                                   For time exposures the camera must always be
                                     placed on a firm support like a tripod, Optipod,
                                          table or chair, never hold it in the hands. The
                              Kodak has two tripod sockets for use with a
                                           tripod, an Optipod or a Kodapod, with the Kodak
                                           either in the vertical or horizontal position.
                                     Place the Kodak in such a position that the finder
                                          will include the view desired. The above diagram
                                shows three positions for the camera. It should
                                      not be pointed at a window as the glare of light
                            may blur the picture.
View original page 13Page 14 · Read text
www.orphancameras.com


                                                 If the Kodak is placed on a table, for making a
                                           vertical picture, use the vertical support 4. The
                                  camera must not be more than two or three
                                      inches from the edge of the table.
                             To make a horizontal picture without a tripod,
                                        turn the finder and place the camera in the
                                        position shown in the illustration on page 25.
                                    Adjust the shutter for a time exposure as
                                      described on page 9.
                                      All being ready, press the exposure lever
                                          carefully, once to open, time the exposure by a
                                     watch, and again press the exposure lever to
                                       close the shutter.


                                           After making an exposure, turn the winding
                                      key until the next number appears in the red
                                     window.
                                                       If no more time exposures are to be made,
                                              adjust the shutter for an instantaneous
                                           exposure, see page 8.


                       Exposure Table for Interiors
The table on page 26 gives suitable exposures for varying conditions of light, when using
stop f/16.
With stop f/11, give one-half;
“ “ f/22, “ twice;
“ “ f/32, “ four times the exposures given in the table.
The smaller the stop opening the greater the range of sharpness, see tables on page 13.
Stop f/16 gives the best average results for Interiors.
                     To MAKE A PORTRAIT
The subject should be seated in a chair partly facing the light with the body turned
slightly away from, and the face turned towards the Kodak which should be a little higher
than an ordinary table. The subject should look at an object level with the lens or directly
at the lens. Compose the picture in the finder. For a three-quarter figure the Kodak should
be about eight feet from the subject; and for a full-length figure, about ten feet. Revolve
View original page 14Page 15 · Read text
www.orphancameras.com


the lens so that the white dot is at the line marked: “8 to 15 feet.” The background should
form a contrast with the subject; a light background usually gives a better effect than a
dark one. To get a good light on the face, follow the arrangement shown in the diagram.


        EXPOSURE TABLE FOR INTERIORS USING STOP f/16

                         Bright sun   Hazy sun   Cloudy bright  Cloudy dull

White walls and more than
                         4 secs.      10 secs.       20 secs.       40 secs.
one window.

White walls and only one
                         6 secs.      15 secs.       30 secs.       1 min.
window.

Medium colored walls and
furnishings and more than    8 secs.      20 secs.       40 secs.    1 min. 20 secs.
one window.

Medium colored walls and
furnishings and only one     12 secs.     30 secs.       1 min.        2 mins.
window.

Dark colored walls and
furnishings and more than    20 secs.     40 secs.    1 min. 20 secs. 2 mins. 40 secs.
one window.

Dark colored walls and
furnishings and only one     40 secs.   1 min. 20 secs. 2 mins. 40 secs. 5 mins. 20 secs.
window.

These exposures are for rooms where windows get the direct light from the
sky and for hours from three hours after sunrise until three hours before sun
set. If earlier or later the exposures must be longer.


A reflector helps to get detail in the shaded part of the face. A white towel or tablecloth
held by an assistant or thrown over a screen or other high piece of furniture will make a
suitable reflector; it should be at an angle and in the position indicated in the diagram on
page 27.
If the above suggestion for lighting is followed, an exposure of about one second at f/11
will be sufficient on a bright day.
                      Making Portraits Outdoors
When making portraits outdoors, with the sun shining brightly, the subject should be in
the shadow of a building or a large tree, but with clear and unobstructed sky overhead.
Place the Kodak on a tripod or other steady support, use stop f/22 or f/32 and make a
Time Exposure (“Bulb”) of about one or two seconds. By following this rule unpleasant
and distorting shadows on the face will be avoided. When the subject is five to eight feet
from the Kodak, the white dot on the lens must be at the arrow marked: “5 to 8 feet.”
View original page 15Page 16 · Read text
www.orphancameras.com


                     Kodak Portrait Attachment
The Kodak Portrait Attachment makes head and shoulder portraits. It can also be used for
photographing flowers and similar subjects.
Place the Attachment over the lens and compose the picture in the finder. Turn the Kodak
just a little to the left, as the short distance at which the subject must be from the lens
makes it necessary to center the subject by eye instead of by the finder.
If the white dot on the lens is at the arrow marked: “Beyond 15 feet,” the subject must be
3 feet 10 inches from the lens. Larger images can be obtained by having the Kodak 3 feet
1 inch from the subject, if the white dot on the lens is at the line marked: “8 to 15 feet,”
and 2 feet 6 inches from the subject, if the white dot on the lens is at the arrow marked:
“5 to 8 feet.”
Measure the distance carefully from the lens to the face.
The same exposure is required as without the Attachment.
Use the Kodak Portrait Attachment No. 6A, with the Kodak Junior Six-20 Series II with
Kodak Bimat Lens.
With the Kodak Junior Six-16 Series II, use the Kodak Portrait Attachment No. 7A.
                 Kodak Diffusion Portrait Attachment
The Kodak Diffusion Portrait Attachment is a supplementary lens used in the same
manner as the regular Kodak Portrait Attachment. It produces a true, soft-focus effect.
Use Kodak Diffusion Portrait Attachment No. 6A, with the Kodak Junior Six-20 Series II
with the Kodak Bimat Lens.
With the Kodak Junior Six-16 Series II, use Kodak Diffusion Portrait Attachment No.
7A.
“AT HOME WITH YOUR KODAK” is a booklet containing many diagrams and
illustrations showing various lighting effects. It gives suggestions for making pictures in
and around the home.
“PICTURE TAKING AT NIGHT” IS a booklet that describes in detail the methods of
making pictures by electric light, flash-light exposures, campfire scenes, fireworks,
lightning, moonlight effects, silhouettes and other unusual pictures.
These two booklets are free, and copies of them will be sent upon request to our Service
Department.
View original page 16Page 17 · Read text
www.orphancameras.com


                TIME EXPOSURES-OUTDOORS
When the smaller stop openings (f/22 or f/32) are used, the light passing through the lens
is so much reduced that very short time exposures may be made outdoors.
With Light Clouds - From one to three seconds will be sufficient.
With Heavy Clouds - Four seconds to eight seconds will be required.
With Sunshine - Time Exposures should not be made.
When making time exposures the Kodak must be placed on some steady, firm support; do
not hold it in the hands or the picture will be blurred.
                    CLEAN LENSES

                            The pictures on page 32 illustrate the difference
                               between results with a dirty and a clean lens.
                                Lenses should be cleaned as follows:
                           Open the back of the Kodak, see pages 3 and 4;
                                  then open the front as described on page 7.
                           Wipe the front and back of the lens with Lens
                                Cleaning Paper or with a clean handkerchief.
                              Never unscrew the lens.


Keep Dust Out of the Camera
Wipe the inside of the camera and bellows, occasionally, with a slightly damp cloth,
especially if the camera has not been used for some time.
                EASTMAN KODAK COMPANY,
                       ROCHESTER, N. Y.
View original page 17Page 19 · Read text
www.orphancameras.com


KODAK NEGATIVE ALBUM, to hold 100 2 ½ x 4 ¼ 2 ½ x 3 ¼ , or
                                                                         $1.25
smaller negatives

“HOW TO MAKE GOOD PICTURES,” an illustrated book of helpful
suggestions. It describes various methods of making exposures, developing,       $.50
printing, enlarging, coloring, and other interesting subjects

                      All prices subject to change without notice.
         EASTMAN KODAK COMPANY, ROCHESTER, N. Y.
                    The Kodak Portrait Attachment


                      Fits your Kodak for head and shoulder portraits-it enables you to
                  approach closer to the subject and get a larger image, sharply focused
                      at short range.
                At your dealer’s


                EASTMAN KODAK COMPANY
                       ROCHESTER, N. Y.


                      IMPORTANT
This manual should be read thoroughly, before you make any pictures. While loading
and unloading the camera, be very careful to keep the protective paper wound tightly
around the film to prevent light striking it. Before making an exposure be sure that the
shutter is adjusted properly, for an instantaneous or time exposure, whichever is required.
Use the correct stop opening and speed.
Check the focus.
An unexposed section of film must be in position. The sun must be, behind your back or
over the shoulder. If the sun shines directly into the lens, it will blur and fog the picture.
Hold the camera level.
Hold the camera steady when making instantaneous exposures or snapshots. The camera
should he held firmly against the body (or against the face if using the metal frame
finder) and when pressing the exposure lever, hold the breath for the instant. If the
camera is moved during the exposure, the picture will be blurred. When making a close-
up between ,5 and 8 feet, be sure to revolve the lens until the white dot is at the arrow
marked: “5 to 8 feet,” and that it is turned as far as it will go. Turn a new section of film
into position immediately after making an exposure. This prevents making two pictures
on the same section of film.
Keep the lens and inside of camera clean.
Never oil the shutter.
Instructions for making time exposures, indoors and outdoors, are included in this
manual.
View original page 19Page 20 · Read text
www.orphancameras.com


                EASTMAN KODAK COMPANY,
                       ROCHESTER, N. Y.
                                 6-39-KP-25
                              Printed in the United States


                        Outdoor Exposure Guide
                          for the Kodaks Junior Six-20 and
                             Six-16 Series II with the
                        Kodak Bimat Lens


               SUBJECT                  STOP    SHUTTER
                                      OPENING1   SPEED

Near-by landscapes showing little or no sky. Near-by
                                                                f/11          1/25
subjects in open field, park or garden. Street scenes.

Ordinary landscapes showing sky, with a principal object
                                                                f/16          1/25
in the foreground.

Marine and beach scenes. Distant landscapes. Snow
scenes without prominent dark objects in the foreground.        f/22          1/25
Mountains.

Portraits in the open shade, not under trees or the roof of a              B
porch. Shaded near-by scenes. Narrow and slightly shaded      f/22         1 sec.
streets.

Moving objects.
When photographing a moving object such as a rustler,
                                                                f/11         1/100train or an automobile, the subject should be moving to
wards or away from tile camera at an angle of about 45
degrees.

Exposures are for the hours from one hour after sunrise until one hour before sunset on
days when the sun is shining. If pictures are made earlier or later, or if it is a slightly
cloudy or hazy day, use a larger stop opening. This table is for Kodak Verichrome and
Panatomic Films; if using Kodak Film (Regular), exposures ma he made from 2 1/2 hours
after sun rise until 2½ hours before sunset.
With Kodak Super-XX Panchromatic Film use the second smaller stop opening than the
one given in the table. Use largest stop opening.


1 The higher the number the smaller the opening.
View original page 20From the M. Butkus archive. Original publisher and archive notices are retained.
Check the model and edition against your equipment.
PDF verified 2026-10-10.