Film cameras
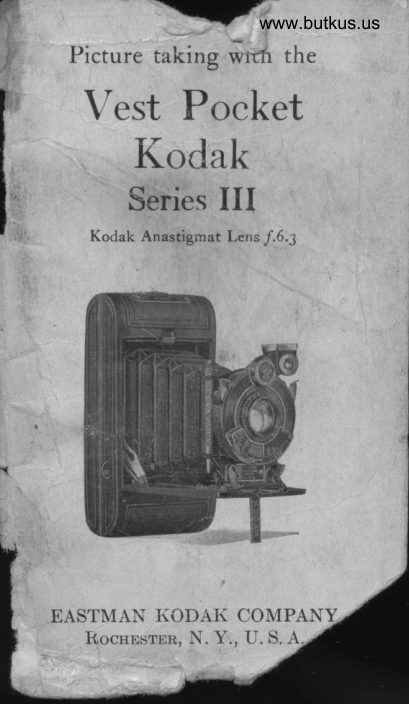
Kodak Vest Pocket Series III User manual
User manual for Kodak Vest Pocket Series III. 72 pages in English. Read the original PDF, download or print a copy without registration.
72 pagesEnglish6.5 MB PDF
Loading your manual…Open PDF directly
Document details
- Brand
- Kodak
- Model / document
- Kodak Vest Pocket Series III
- Document type
- User manual
- Language
- English
- Pages
- 72
- File size
- 6.5 MB
- Category
- Film cameras
- Document date
- Not specified in catalog
Search available document text
Find a term, then jump to its page in the original PDF. Image-only pages may not be searchable; check the PDF for exact wording and diagrams.
Page 1 · Read text
48,                          www.butkus.us '*'
 lt     Picture taking wrdr the#,'tt'
[i,    Vest Pocket
      Kodak
         Series III
          Kodak Anastigmat Lerrs /.6.3


    EASTMAN I(ODAK COMPANY
         RocHnstnn, N. Y., U. S. A
View original page 1Page 5 · Read text
www.butkus.us              --.,
   Picture takit; z.uitlt the
  Vest Pocket
     Kodak
       Series III
     Kodak Anastigmat Lens /.6.3


            Published bg
EASTMAN KODAK COMPANY
    Rocnnsrpn, N. Y., U. S. A.

                                             **tr,
View original page 5Page 6 · Read text
'-             !wT-                   t
                                                                                        iI
                              4i
   Order Filn, bv Number

        All Kodak Films are distinguished by
    numbers on the ends of the cartons.
    The number is also on the cartridge,
    and on the Kodak.
    A 127 is the number of the film for
     the Vest Pocket Kodak, Series III.
       Autographic Film can be used in the
     earlier models of Kodaks, and "N. C."
      film can be used in Autographic Kodaks.
      Autographic results can only be ob-
     tained by using Autographic Film in an
    Autographic Kodak.

           IMPORTANT
    When autographing film, beat
t"  down with the stylus c.r heauily
   as the paper will stand without
     tearing.
View original page 6Page 7 · Read text
7                       www.butkus.us


                                                                                                                   j     Before Loading

_ Before taking any pictures with your
Kodak, read the following instruciions
 carefully. Make yourself familiar with
 the camera, taking especial care to learn
how to operate the shutter (see page 10).
W'ork it for instantaneous, time and
"bulb" exposures several times before
loading the Kodak with film.
  The first thing to remember is that
the light which impresses the photo-
graphic image upon the sensitive film in
a fraction of a second, when it comes
through the lens, can destroy the film
as quickly as it makes the picture.
While loading and unloading the
Kodak, be very careful to keep the red
paper wound tightly around the film to
prevent the light striking it.
       ?
View original page 7Page 8 · Read text
-{-"r       t,                       I

     CONTENTS
     Loading the Kodak          5
     Making the Exposures     I
          Opening the Front            I
           Operating the Shutter        L0
           Instantaneous Exposures   17
        Focusing                    18
       -   Diaphragms or Stops .        23
           Autographic Feature        33
         Time Exposures-Interiors  38
        To Make a Portrait          44
         Time Exposures-Outdoors 47
            Flash-light Exposures.     49
           Closing the Kodak           50
    Removing the Film          51
      Finishing the Pietures          DI
hIt\
View original page 8Page 10 · Read text
F
   Ttre word "TOP," which is printed
 o.q thg c-artridge, must be on th^e same
 srde ot the camera as the winding key.
 If the,,cartridge is inserted the irong
way, the red paper will come between
the lens and the film and no pictures
could be made.
   3. See that the pins at the ends of the
ppogl of fi.lm fit pioperly into the holes
rn the two spool retainers.
  4. Remove the band that holds there paper, pals the paper                        oaer the two                        -enilrollers, unfold the    and thread it
into the longer opening in the slit in the
reel,^ af lgr as_it will go, Fig. III.  Becareful that the papei draw-s straight.


                                                                          Digitally signed by Mike Butkus
                                                        DN: cn=Mike Butkus, o=Butkus camera manuals,
                                                              ou=butkus.org, email=mike@butkus.org, c=US Mike Butkus      Date: 2023.10.31 16:38:01 -04'00'


                    Fig. III.
       Threading Red Paper into Reel.
View original page 10Page 11 · Read text
'iT       i                        www.butkus.us
    !       i       5. Turn the key once or twice_just
      enougl. to_bjnd the paper o" tli"      as in Fig. IV.                            "eei,


               www.butkus.us


                           Fig. IV.
             Binding the Bed paper on ReeI.
       Ttrp papgr should now be in the      posrtron rndicated in Fig. V.


                          Fig' v'
             Showing position ol paper.
       6. Replace the back by fittins the    nange^    on the edge of the back, farlhest
    Irom the autographic door, over the
View original page 11Page 12 · Read text
edge of the Kodak below the full spool,     and closing the back into place. Press
       the back so that the spring catch on the
      end of the Kodak snaps over the stud,
       securely locking the back.
        Handle the back of the Kodak care-
        fully as even a slight bend would make
          it fit badly, allowing light to get in and
       ruin the film.
       From the time the band on the roII of
       fiIm is broken until the back'is again in
       place, keep the red paper wound tightlg
      on the roll. If  r)t should loosen, h)ght wiU
       get in and, the film will be fogged and
        ruined.
          7. Turn the key and watch the red
     window. After 18 to 20 turns, a warn-
       ing hand will appear; then turn slowly
        until the figure 1 is in the center of the
       windorv.


       The film is now in position for the
         first exposure.
t
View original page 12Page 13 · Read text
www.butkus.us
    Making the Exposures
 pEF.ORE an exposure is made, five   l-l  thrngs must be done:
   First-The shutter must be adjusted  for an instantaneous, time oa  ;,'t rrtt ;
  exposure.
  _Second-The diaphragm lever--  r'plac_ ed at the proper stop opJning.   Third-Tie  shutter',,set. fr
   Fourt h-The Kodak focused.
 ^-FiJth-An unexposed section of the film turned into po-sition.                        i'set,'                    by pressing lever _ The shutter is p, and exposures a1e tpaa^e                       Qv pi"r.i"g rle €xposure lever (,, shown in diaEram---o- of shutter on page 1'1.
     Opening the Front


                           Fig. I.
                   Opening the Front.
  Press the spring lock to open theIront^    of the Kodak, as shown in Fie. I,
View original page 13Page 14 · Read text
and push down the bed of the camera.
  Draw out the lens standard as far as
 it will come, using the finger grips at the
 base, see Fig. II, page 15.
   Operating the Shutter
   Familiarity with the shutter is neces-
 sary for successful picture-taking with
any camerd,. Read the followinE-direc-
 tions carefully and operate the ihutter
 several times before loading the Kodak
with film.
  Over the lower scale on the shutter is
a slide, with divisions indicating four
 degrees of llght intensity: "Bril[ant,"                       t'Dull." "Clearr" "Gray" and          This
 slide has an opening, which, when its
pointer is at any of the diaphragm or/.
numbers, uncovers figures which indi-
cate the correct exposures for that
diaphragm or stop opening, under the
four light conditions defined as follows:
  Brilliant-intense sunlight. When
the sunlight is very clear and intense,
and is shining directly on the principal
part of the subject.
  Clear-ordinary sunlight; also in-
t_ense_ sunlight when it is not shining
directly on the principal part of the
subject.
  Gray-hazJ' or dull sunlight. Best
ju4ggd by the shadow cast 6y the sun
which would be called "half-shadow;"
or when only a faint shadorv is visible.

                                 10..
View original page 14Page 15 · Read text
T                          www.butkus.us
       Dull-sun not,visible; sky completely
     overcast with clouds oi. srirokv-i,tmod-
     ph_gg.- Rain in rhe middie-LfirrJ a":i.
                      an{                                     a"ri-"s                                 u"y     rarn-^,Yltl-,1"?I{early or late9lotin-ds,.th_e                           day,                               use stoi     f.6.3 andl/10 r.rona.--tl iriii nt neces-
    sary to place the camera on   arip;;     or some other stea_dv support io" avoid    moving it during the exfds.rrl.--


       www.bukkus.us


   Instantaneous              and Retarded
            Bxposures
   _r!ilt_!;Turn..the dial at the top of    }ne Lhuller until the division represent-
   mg the trme of instantaneous oi retard-
                required is exactly below    f$^ 9lp'grure   tne tndlcator A.
                           ri
View original page 15Page 16 · Read text
The shutter is marked: 10, 25, 50 and     ti
      100. These figures indicate fractional
       parts of a second, thus: llI0, 1125,ll50
      and 1/100.
       Importanf-Although an automa-
       tic exposure of 1/10 second may be
     made, exposures of this speed must
      be considered time exposures so far as
       providing a tripod or other firm sup-
       port is concerned. The camera cannot
     be held steadilv enough in the hands
       for exposures slower tharr ll25 second.
        For ordinary outdoor work such as
        street scenes, nearby views, etc., with
      the subject in the sunlight, use stop
       /.11 and 1/25 second.
        For open views, when the sunlight on
      the subject is unusuallgi strong and
       there are no heavy shadows, such as
       views at the seashore and on the rn'ater,
       use stop/.16 and 1/50 second.
       For ordinary landscapes, in bright
       sunlight with clear sky overhead, use
       stop /.16 and Ll25 second.
       When the skv is overcast with clouds
      or smoky atmosphere, or during anY
       rain in the middle of the day, use /.6.3
      and ll25 second. If greater depth of
       focus is required, place the Kodak on a
       tripod or some other firm support, use a
       small stop opening and ma,ke a longer
      exposuref according to the table on
      pages 47 and 48.
t,t                              t2
View original page 16Page 17 · Read text
www.butkus.us
  _ As a general rule, 1/100 second
 should be used only when making
 snapshots of rapidll' moving obiects in
 bright sunlight, and stop f .6.9 or /.8 must be used for all such pictures.
  Second-Move the slide B control-
 ling the diaphragm or stop openings to
 the proper/. numher (the lowest row of
numbers on the scale at the bottom of
 the sh-utter), depending on the intensity
of light, kind of subj6ct, and time df
e.xposure-. See instructions for using
the diaphragms or stops, on pages 28]
24 and 25.
  Third-Press lever D to ,,set,, t]ne
shutter, ready for an exposure.
  Fourth-Press the exposure lever
C. This makes the erposure.
  Hold the Kodak sleady, as a slight
jar will c4,use a blurred negative. Ex-
posures slower than ll25 second must
not be made with the Kodak held in
the hands.
      Exposure Guide
        follp_wing method of using the-t.TheDiomatic Shutt-er as a guide to co-rrect
exposure will be found a sreat heln:
  The slide below the l-ens uncovers
various figures which indicate the cor-
rect ex-posure             _for a normal subject"forunder_.fbur light conditions, and
each diaphragm or stop opening. The
lowest figure indicates the diap-hragm.
View original page 17Page 18 · Read text
To find the correct exposure:
            It tF neces.qary_ to classify the subject         .        in order to decide upon the diaphragm
        to be used. As the greatest number-of
        pictures to be taken will be of normal
       subjects, the figures given on the
      Diomatic Shuttei are for these sub-       jgcts.. Fgr nearby landscape views
      showing little or no _ sky;- groups;       ordinary street scenes that incluae  iiti
         tle or no movement, use slop /.11. For       scenes on streets that are narrow and
      somewhat shaded, use stop /.8. If the       subject includes rapid movement stop
        /.6.3-or/.8 must be used. W'here greater
      depth of focus is required and a ionger
       exposure_can be given, use stop /.16,
           f .22 or f .32.
      When the subject differs from the
       normal, such as a distant landscape; a
     beach or marine vrew; snow scene;
      clouds qnly; pictures taken early or
        late in the day; or a portrait or group
       that is in ihe-shadow, these willlUvi-
       ogs.ly call for different exposures, for
       which_see "Diaphragms" dn pagei 23,
     24 and 25.
       Having decided upon the diaphragm;      ;jq
      Move the slide B until the indicator
         is _im_mediately under the diaphragm       called for. The figure in  t he bolumn
      above tle diaphragm number and op-
      posite the prevailing light condition,

t
View original page 18Page 19 · Read text
www.butkus.us
 is the correct exposure for a normal subject.
      . For .example: you wish to make a
 preture of a nearby landscape with  little or no sky; thi,s is a .rormal'*ni"Li
 ald calls for"diaphrug- o"-.toi}:ii.
 Move the slide B-unti-i the inciic!,tbr is
 exactly under /.11, then, havinE de_
 crded that the day'-the light eondftion,
  irs. "Clear," look-in_ the c?lumr rborr"
 J.rr and rmmediat_ely opposite ,,Clear"
 you wlll find the figure-ib, which indi_
 c-?tes tfre correct exposure ,,ll2S second.
 Should the sun .b-e and. the sky brilliant,""u,6"1tty"ilightthe exposure
 'w'outd then be llb}, or should the sky
 De gray, an exposure of l/10 will b"e correet.
  IMhen there are blank spaces in thecolumn over the higher' diaphragm
numbers (qmaller stop- openinEs)- tiisrndrcates that no instantaneous- expo-
sures can be made, and either a time or
a _."bullr" exposure must be eiven.Wrth stop /.6.3 there is a hlank-spaee
opposite "Brilliant,,-indicatine  ftrai
no, exposlre should be made wiih thatIlglt gnd l?rgest- opening. Move the
stlde IJ to /.8 and use the speed oppo-site "Brilliant.',
     Time Bxposures
. First-Turn the dial until the letter"T" (time) is under the i"aieato, A.
                     l5
View original page 19Page 20 · Read text
v
    This adjusts the shutter for Tirne
      Exposures.                                                 il      Second-Move the slide B to /.6.3,
      8, 11, 16,22 or 32, depending on the      time of exposure and nature of the sub-   {      ject. See instructions for using the
     diaphragm or stop openings given on
       l)ages 23, 24 and 25, also, the table for
      fnterior Time Exposures on pages 42
     and 43, and the table for Time Expo-
       strresOutdoors, given on pages4T and48.
       Third-Press the lever D to "sel"
      the shutter.
       Fourth-Press the exposure lever C.
      This operzs the shutter. Time the expo-
      sure bv a watch. Again press the ex-
      posure lever. This Iloses'the shutter.
       For short time exposures of ten sec-
     onds or less, "Bulb" Exposures are
     recommended.
         "Bulb" Exposures
       First-Turn the dial until the letter    "B" (bulb) is under the indicator A.    #f
     This adjusts the shutter for "Bulb"
      Exposures.
      Second-Move the slide B to /.6.3,
     8, 11, 16, 22 or 32, according to the
      time of exposure and nature of the sub-
                          I
                                                                                    #lA

E.
View original page 20Page 21 · Read text
www.butkus.us
    and 4i, and the table for Time Expo
     sulgq Ou_tdoors, on pages 4Z and,4g.'
      _ Third-Press th^e l"ever D to ,,set,,     the shutter.
,     Fourth-Press the exposure lever CI   tg open the shutter and release it to,    close the shutter. This makes the en_
    posure. The shutter will remain open
    as long as the exposure lever is under     pressure.
      Neuer make a Time or a ,,Bulb,, Er-
    posure with the Kodalc held i,n the hand,s.
     Important z Do not o,il any pirt of       ,     the shutter.
      fn ease of accident return the Koclak
    to your dealer or to us for repairs.
     __ A cable release can be used with this
   Kodak if desired, but the .a-".u .urr-
    not then be elosed without first remov-
    ing the cable release.
    To attach the cable release, remove      -
    the screrv direetly behind the'e*pos,rre
    lever C and replace it rvith the cable
    r-eleasg. After uslng th_e cable release,
   detach it and replaEe the screw i"  tnrj   opening. This screw prevents dust
    getting into the shutter.
    Instantaneous Exposures
            "Snapshots"
     W'hen makirrg ordinary instantaneous
   elposures or snapshots, the subject
   should be in the broad, bpen .ilii6[i;   but the camera must'nol. The-'sun
                          t7
View original page 21Page 22 · Read text
should be behind your back or over
 the shoulder. If it shines directlv into
 the lens it will blur and fos the picture.
   Special instructions for' making por-
 traits are given on pages 3l and 44.
   To Focus the Kodak
  On the bed of the camera is a focus-
 ing scale marked 6, 10, 25 and 100 feet.
 T[e scale is marked both for feet and
 for meters and care should be taken
 not to eonfrtse them.


                    Fig. II.
       Drauing out the Lens Standard.
   Press the two finger grips at the base
of the lens standard and draw it out, as
far as it will conl,e, where it will lock,
automatieallv, see Fig.II. The Kodak is
                      l8
View original page 22Page 23 · Read text
www.butkus.us
 now in focus for anything 100 feet or Deyond.
    ,.   To adjust the _focus for subjects at
 grctanees nearer than 100 feet, turn the
 \nurled screw by pushins-it'*ith tt. lhumb until th"e indicuior" o"",-tt    tn. focusing scale                _is exactly ut         lirru marked with the, figure .o.i.rpo"ai"g"
 nearest to the distanle in feet, between
 the camera and the priiiiii   iiirct to be photographed.
 __ lhg distance from the subject to the Kodak c-an be estimared;irti;;i                              -*ur_  r,rring^, w.hen the subjec t is Ueiiii                                          i,ftrrn
 teet; f.or instanc_e, if the forus'is s" i,h ZS Ieet (the usual distance for ordinary street      worF)             the                  sharpest                         part                              oi-thaitt"e prcture         will          be the                     bbjecis                               at
 distance from the_"ameia, brilrr"ry- thing from about 13 feet-io-"Uo,ii fSO
 reer will be rn good focus with the
 largest stop openiitg ff.o.g) i" po.itio".
  For general street work the focus
             25                         feet,                          where                      but                                   the           }<ep.t.at przncxpo,t1?{ pu           oblect                  nearer                is                                 farther                      or
&w&yr-. th-e focus should be changed.accordingly.
                       set the focus at 100^ For distant views      Everything                       tOO ieet                                           is in                 beyond."                focus.tl"{gut.-100-foot                  NothinE                                    ,"u,r",than six feet can ne tocusld-*il"hoot
using a Kodak portraif ellachrrient,
see pages 45 and 46, or a small stof
opening, see table on page 21.
                       l9
View original page 23Page 24 · Read text
What Depth of Focus Means
      When using the Anastigmat Lens with
       the largest stop opening,/.6.3, and with
      the focus set at six feet, an object six
       feet distant will be sharp, but objects
      about four and a half feet and about
       eight feet distant will not be sharp. Usea
       smaller stop opening, /.16, and objects
       in front of and behind the exact point
       of focus rvill increase in sharpness. Go
       farther and use the smallest stop open-
       ing, f .32, and evervthing about three
       feet and beyond, will be sharp.
          It will thus be seen that the smaller
      the stop opening, the greater the depth
       of focus, that is, the greater the power
        of the lens to define sharply, at the same
      time, objects nearer the camera, and
      farther from the camera, than the
       principal object in the picture, rvhich,
      of course, is the object focused upon.
        It is obvious that with the small stop
      openings the exposures must be cor-
      respondingly increased.
       The table on page 21 gives the range
     of sharp definition or depth of focus
h      with the Vest Pocket Kodak, Series ffl,
il     when focrrsed with different stons.
tlf
m

lili


\                      H
View original page 24From the M. Butkus archive. Original publisher and archive notices are retained.
Check the model and edition against your equipment.
PDF verified 2026-10-10.