Film cameras
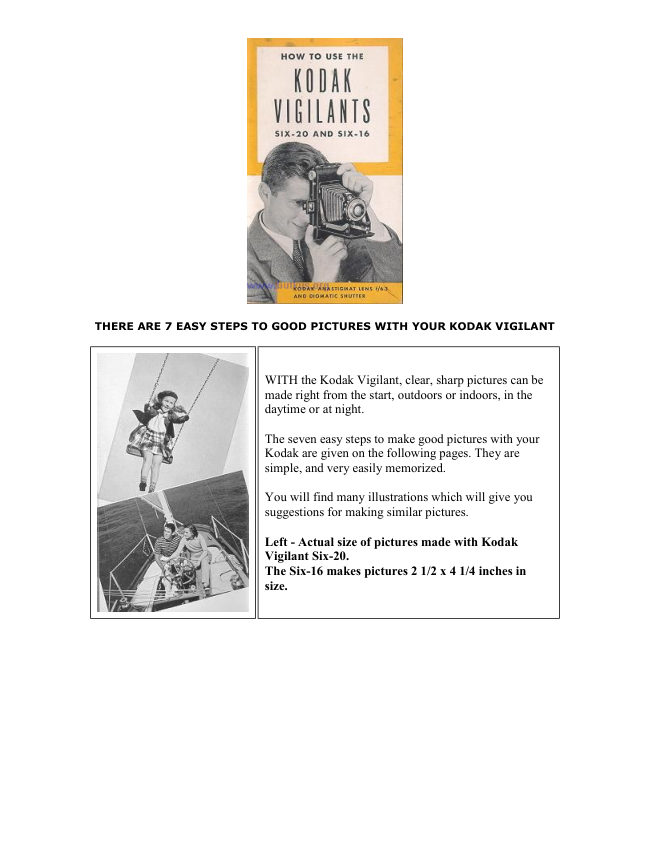
Kodak Vigilants Six-20 and Six-16 User manual
User manual for Kodak Vigilants Six-20 and Six-16. 26 pages in English. Read the original PDF, download or print a copy without registration.
26 pagesEnglish2.2 MB PDF
Loading your manual…Open PDF directly
Document details
- Brand
- Kodak
- Model / document
- Kodak Vigilants Six-20 and Six-16
- Document type
- User manual
- Language
- English
- Pages
- 26
- File size
- 2.2 MB
- Category
- Film cameras
- Document date
- Not specified in catalog
Search available document text
Find a term, then jump to its page in the original PDF. Image-only pages may not be searchable; check the PDF for exact wording and diagrams.
Page 2 · Read text
THERE ARE 7 EASY STEPS TO GOOD PICTURES WITH YOUR KODAK VIGILANT


                     WITH the Kodak Vigilant, clear, sharp pictures can be
                         made right from the start, outdoors or indoors, in the
                             daytime or at night.

                          The seven easy steps to make good pictures with your
                         Kodak are given on the following pages. They are
                                simple, and very easily memorized.

                       You will find many illustrations which will give you
                                suggestions for making similar pictures.

                              Left - Actual size of pictures made with Kodak
                               Vigilant Six-20.
                        The Six-16 makes pictures 2 1/2 x 4 1/4 inches in
                                     size.
View original page 2Page 4 · Read text
Push the metal plate that covers the red window on the back of the Kodak in the
direction of the arrow, and turn the winding knob until a small hand --> appears in the
window. Then turn the knob slowly until the figure one (I) is centered in the window.

After each picture, turn the knob until a new number appears in the red window. This
prevents making two pictures on the same section of film.

The red window should be uncovered only while winding the film.

2. OPENING FRONT


                   PRESS the button near the winding knob to open the front
                           of the Kodak; then draw down the bed carefully until it
                           locks (Fig. 6). This will bring the lens and the shutter into
                             position.


3. FOCUSING


                              The lens mount to the right or left until the figure
                                      representing the distance from the subject to lens
                                               is under the pointer A. For ordinary street
                                          pictures, turn lens mount to 25 feet; if the
                                       principal object is nearer or farther, change the
                                     focus accordingly.
View original page 4Page 5 · Read text
www.butkus.us


4. SHUTTER SPEEDS


                        THE KODAK Diomatic Shutter on your camera
                                    has three snapshot speeds. 1/25, 1/50, and 1/100
                                  second For average subjects revolve the knurled
                                          collar of the shutter until the indicator B is at
                                   1/25 second. For moving objects or when
                                       subjects are in very bright light, use 1 /50 or l /
                                   100second.

                                  For time or "bulb" exposures the indicator B
                                must be at "T" or "B"
                                       (see page 22).

                                     After the indicator B is brought to the proper
                                   speed or to "T" or "B." it is necessary to set the
                                        shutter by pushing the setting lever C to the
                                     opposite end of the slot.


                When it is difficult to estimate the distance between the
                       subject and lens, like the moving subject on the left; then
                       adjust your Kodak as a fixed focus camera.


How to Use Your Kodak As a Fixed Focus Camera

WHEN the subject is not close to the Kodak, such as when making ordinary street
scenes, or when the subject is about I 2 feet or beyond, the camera can be easily
converted to a fixed focus type by making the following adjustments: Set the Focus at
25 feet. Use Stop Opening f/16. Make an exposure of 1/25 second.
The range of sharpness when your Kodak is adjusted as a fixed focus camera will be
found on page 26 or 27.
View original page 5Page 6 · Read text
5. STOP OPENINGS


                               THE stop openings regulate the
                                        amount of light passing through the
                                                      lens. The openings are enlarged or
                                            reduced by I . moving the lever D at
                                                 the bottom of the shutter.

                                           For average subjects outdoors when
                                                 the sun is shining, move lever D to
                                               F/11, and make an exposure of 1/25
                                              second. See directions on pages 23 and
                                        24 for the use of the different stop
                                               openings.


6. THE FINDERS

THE Kodak Vigilants have two finders: The direct view finder for action photography, and
the reflecting finder, ideal for child pictures.

The DIRECT VIEW FINDER is brought into position by lifting the front frame. It shows
what will appear in the picture, but on a much reduced scale. When viewing, hold the
Kodak at a distance from the eye which will make the edges of the rear opening appear
superimposed on the edges of the front opening. This will insure proper aiming of the
Kodak. When making the exposure, hold the Kodak steady by pressing the hand
supporting it against the face. All vertical lines in the subject should appear parallel with
the vertical sides of the front frame of the finder, when the Kodak is held either in the
vertical or horizontal position. The Kodak can be tilted for unusual effects.

After composing the picture in either the Direct View or the Reflecting Finder of a subject
ten feet or nearer to the Kodak, it will be necessary to move the Kodak a little to the
right if making vertical pictures, or tilt it up a trifle for horizontal pictures. This will bring
the Kodak to the proper position to include in the picture what is seen in the finder.
View original page 6Page 7 · Read text
www.butkus.us


HOLD THE KODAK STEADY


Holding the Kodak for a vertical picture, using the direct view finder.

Holding the Kodak for a horizontal picture, using the direct view finder.

The REFLECTING FINDER (page 13) shows what will appear in the picture. With this
finder hold the Kodak firmly against the body at waist level.
Look into the finder from directly over the center of it and include what is wanted by
turn to the right or left.
Only what is seen in that part of the finder within the dotted lines, will appear in a
vertical picture.


                       To make a horizontal picture, turn the finder and hold the
                        Kodak in the horizontal position.

                         Only what is seen in that part of the finder within the
                               dotted lines in the illustration, will appear in a horizontal
                                  picture.
View original page 7Page 8 · Read text
7. SNAP THE PICTURE


                            HOLD the KODAK in the vertical or
                                               horizontal position. After having pushed
                                               the setting lever (E) of the shutter to the
                                             opposite end of the slot, see page 5, press
                                               the exposure button E. When pressing
                                               the button, hold the breath for the instant.
                                                           If the Kodak is moved during the
                                             exposure, the picture will be blurred.
                                      Hold the Kodak steady.

                           A cable release (No. 2) can be used with
                                                     this Kodak if it is desired to use the
                                    Kodak Self Timer for self-portraiture, or
                                               the Kodak Flash Synchronizer. To attach
                                               the cable release, screw it into the center
                                              of the exposure button E.


CLOSING THE KODAK


                         BEFORE closing the Kodak, adjust the focus for
                                              infinity. The reflecting finder must be in the
                                       upright position; then press the same button that
                                                is used to open the Kodak (Fig. 7), raise the bed
                                  and snap it shut.
View original page 8Page 11 · Read text
www.butkus.us


THE EYE OF KODAK


               Good Pictures Depend on:

                 A. CORRECT FOCUSING
                The lens must be focused
                    properly so that the image of the
                     subject will be sharp and
                      distinct on the film.

                  B. PROPER SPEED
                The shutter must open and close
                   quickly enough to prevent a
                    blurred image of a moving
                      object.

                 D. RIGHT AMOUNT OF
             LIGHT
                     Just as the iris of the eye
                     contracts and expands when
                     there is more or less light the
                 diaphragm of the shutter must
                  be closed or opened to permit
                    the right amount of light to enter
                    the camera.
View original page 11Page 12 · Read text
GOOD PICTURE REQUIRE ACCURATE FOCUSING


The various distances at which the Kodak may be focused are engraved on the edge of
the lens mount. The scale on the Six-20 Kodak is marked for 3 1/2, 4, 5, 6, 8, 10, 15,
25, and 50 feet, and INF. (infinity); it is the same on the Six-16 Kodak, except that the
3 1/2 foot distance is not included.

To focus the Kodak, revolve the lens mount until the figure representing the distance
from the subject to lens is under the pointer at the top of the lens.

The distance between the subject and Kodak can be estimated without measuring, when
the subject is beyond fifteen feet; for instance, if the focus is set at ] feet (the usual
distance for ordinary street scenes) the sharpest part of the picture will be the objects at
that distance from the camera, but everything from about 18 to about 45 feet will be in
good focus with f/6.3, with smaller stop openings the range will be greater, see tables
on pages 26 and 27.

For distant views turn the lens mount until INF. (infinity) is under the pointer.

                   MORE PHOTO EXAMPLES
View original page 12Page 13 · Read text
www.butkus.us

SUGGESTIONS ON EXPOSURES

SNAPSHOTS -

SUNSHINE is not needed to make snapshots with your Kodak Vigilant. With one of the
larger stop openings, snapshots can be made with the subject in open shade, on slightly
cloudy days, and even during the rain in the middle of the day. See directions for using
stop openings on pages 23 and 24.

When the sun is shining, it should be behind your back or over the shoulder; if it shines
directly into the lens, it will blur and fog the picture. However, beautiful effects can be
obtained by back- or side-lighting. When pointing the Kodak towards the sun, the lens
must be shaded so that the direct sunlight will not strike the lens; for the best results,
use the Lens Hood of the Kodak Combination Lens Attachments, see pages 40 to 43, or
a Kodak Adjustable Lens Hood No. 2.

Snapshots should be made during the hours from one hour after sunrise until one hour
before sunset. If earlier or later, the exposures must be longer.


TIME AND "BULB" EXPOSURES

FOR a subject in the deep shade, under the roof of a porch or under a tree on dark,
cloudy days, a time exposure should be made. For all time or "bulb" exposures the
Kodak must be placed on a tripod or some other steady, firm support - do not hold it
in the hands or the picture will be blurred.

For short time exposures from one half second to ten seconds, "bulb" exposures are
recommended.

To make a time exposure, revolve the knurled collar of the shutter until the indicator B
is at the letter "T." see page 5, push the setting lever C to the opposite end of the slot,
and press the exposure button E (page 13) once to open the shutter and again to close
it. For a "bulb" exposure, the indicator B must be at the letter "B." the shutter set with
lever C, and then press the exposure button E; the shutter will remain open as long as
button E is held down.

CHOOSING THE CORRECT STOP OPENING

The stop openings regulate the amount of light passing through the lens. The openings
are enlarged or reduced by moving the lever D, see page 16.

f/6.3 - For rapidly moving objects in bright sunlight, use l/l00 second. For exposures on
cloudy days and during rain in the middle of the day, use 1/25 second. For portraits in
the open shade with clear sky overhead, use 1/25 second.
View original page 13
Page 14 · Read text
Important: When using stop f/6.3 and the distance between the subject and
Kodak is ten feet or less, the distance must be accurately measured, see range
of sharpness tables on pages 26 and 27.

f/8 - For snapshots on slightly cloudy or hazy days, use 1/25 second. For scenes on
narrow and slightly shaded streets, use 1/25 second. For moving objects in very bright
sunlight, use l /l 00 second.

F/11 - For all ordinary outdoor pictures, such as near-by landscapes showing little or no
sky, groups and street scenes, when the subject is in bright sunlight, use l /25 second.

        EXAMPLES OF SMALL DEPTH OF   EXAMPLES OF WIDE DEPTH OF
                   FIELD                         FIELD


f/16 - For open views, when the sunlight on the subject is unusually strong and there
are no heavy shadows, such as views at the seashore and on the water, use I/50
second. For ordinary landscapes, in bright sunlight, with clear sky overhead, use l 1/25
second. For Interior Time Exposures, see guide on page 30.

f/22 - For snapshots of extremely distant landscapes, marines, snow scenes (without
prominent dark objects in the foreground), and for clouds only, in bright sunlight, use I
1/25 second. Also for time exposures , see guide on page 30.

f/32 - For time exposures outdoors on cloudy days, using one to eight seconds,
depending upon the quality of the light. For interior time exposures, see guide on page
30. Not suitable for snapshots unless using Kodak Super-XX Panchromatic Film.

- All the exposures given in this table are for Kodak Verichrome or Panatomic-X Film.
With Kodak Super-XX Pan Film give one-quarter the exposure recommended, that is,
use a shutter speed four times as fast as the one given in the table, or use the second
smaller stop opening with the same speed.

The smaller the stop opening the greater the range of sharpness, see pages 26 and
27.(next charts)
View original page 14Page 15 · Read text
www.butkus.us


Depth of field for the SIX-20


Depth of field for the SIX-16


The picture above wee made with the lens focused on the third domino, using a large atop
opening.

In the illustration below the focus is on the third domino, but a much smaller atop opening was
used. Note the increase in the range of sharpness by using a smaller atop opening.
View original page 15
Page 16 · Read text
ROOM INTERIORS BY DAYLIGHT
To make a picture of a room interior by daylight, adjust the shutter for a time exposure
by revolving the knurled collar of the shutter until the indicator B is at the letter "T."
Push the setting lever C to the opposite end of slot, and move the stop opening lever D
to f/16 (this opening gives the best average results).


                                                       Place the camera on a tripod
                                                                                (it has two sockets for this
                                                       purpose, for vertical or
                                                          horizontal pictures), or place
                                                                                     it on some other solid
                                                          support. The illustrations
                                                below show the Kodak in the
                                                               vertical and horizontal
                                                             positions. With the Kodak on
                                                     a table, use support K or L.
                                       Do not place the Kodak more
                                                       than two or three inches from
                                                          the table edge, or the table
                                                             will show in the picture.


                                      Compose your subject in the finder to
                                                 include more of the floor of the room
                                                than of the ceiling.
                                          Leave the furniture in the room in its
                                                 usual place, as far as possible, but be
                                                 sure there are no pieces close to the
                                           camera lens.
                                           Focus the Kodak by revolving the
                                                   lens until the figure corresponding
                                              with the average distance between
                                                   the objects in the room and the lens is
                                                         at the focus pointer A, at the top of
                                                   the lens.
                                  When ready to take the picture,
                                                steady the Kodak and press the
                                              exposure button once to open the
                                                       shutter. When the proper time has
                                                elapsed (see Exposure Guide), press
                                                   the button again to close the shutter.


After the last time exposure has been made, revolve the knurled collar of the shutter
until the indicator B is at 1/25 second, to be ready for snapshots.
View original page 16Page 17 · Read text
www.butkus.us


Exposure Guide for Interiors by Daylight

FOR an interior with medium-colored walls and furnishings and two windows, with the
sun shining - make an exposure of about 8 seconds, with stop F/16. With one window,
double the exposure, and if there are more than two windows, halve the exposure.  If
the day is cloudy, make an exposure of 16 seconds to 32 seconds.

No definite rule can be given for all interiors because of the great variety of light
conditions. It is suggested that a series of exposures be made from about 2 seconds to
32 seconds, using stop F/16, doubling each successive exposure.

Interiors by daylight should be made from three hours after sunrise until three hours
before sunset; if earlier or later the exposures must be longer. The exposures
recommended above are for Kodak Verichrome, and Panatomic-X Films; with Kodak
Super-XX Pan Film give one-fourth the exposure.

Stop F/16 gives the best average results. Double the exposures with each smaller stop,
and halve the exposures with each larger stop opening.

DAYTIME PORTRAITS INDOORS


                                   To make an indoor portrait by daylight,
                                                 similar to that shown below, have the
                                                 subject stand or be seated in front of an
                                          unshaded window, with the body
                                                preferably at a diagonal to the camera.

                                             Place a reflector (a sheet or tablecloth
                                          thrown over a screen or chair will do) a
                                       few feet from the subject and at the
                                             angle shown in the diagram. This
                                                      reflects light to the shaded side of the
                                                    face.

                                         Revolve the knurled collar of the
                                                   shutter until the indicator B is at the
                                                         letter "B." Push the setting lever C to
                                                the opposite end of the slot, and move
                                                 lever D at the bottom of the shutter to
                                               F/11.
View original page 17Page 18 · Read text
AN INDOOR PHOTO EXAMPLE


Place the Kodak in either a vertical or horizontal position on a solid support (or on a
tripod) a little higher than an ordinary table. The Kodak must not be more than two or
three inches from the edge of the support. Locate the subject in the finder. If the
subject is ten feet or nearer to the lens, move the Kodak a trifle after composing the
picture in the finder, as described on page 9. Turn the lens so that the figure
corresponding to the distance between the subject and the Kodak is at the pointer A at
the top of the lens.

When ready to take the picture, steady the Kodak to keep it from moving, and press the
exposure button E to open the shutter. Keep the pressure on the button for one or two
seconds - depending upon the quality of the light-- then release the pressure and the
shutter will close.

KODAK PORTRAIT ATTACHMENT
WHILE these Kodaks can be focused for close-up subjects, permitting the obtaining of
head and shoulder portraits, they can be focused for even closer distances with a Kodak
Portrait Attachment.

By using the Kodak Portrait Attachment, large images of flowers and similar "still life"
subjects can be obtained.
View original page 18
Page 19 · Read text
www.butkus.us

Place the Attachment over the lens and compose the picture in the finder. When making
vertical pictures turn the Kodak just a little to the right, and for horizontal pictures tilt it
up a trifle, as the short distances at which the subject must be from the lens make it
necessary to center the subject by eye.

The subject must be at one of the distances from the lens, given in the table below.
Measure the distance carefully from the lens to the subject, and revolve the lens mount
until the correct figure is at the focus pointer, see table.

The same exposure is required as without the Attachment.

Use KODAK PORTRAIT ATTACHMENT No. 5A with the Kodak Vigilants Six-20 and Six-16
with the Kodak Anastigmat Lens f/6.3, and the Kodak Diomatic Shutter.

To produce a true, soft focus effect, use the KODAK PORTRAIT DIFFUSION DISK SERIES
VI with the Kodak Combination Lens Attachments, see pages 40 to 43.


INDOOR PICTURES AT NIGHT


           To take snapshots or other indoor pictures at night, you need only a roll
               of Kodak Film, a few Kodak Handy Reflectors, and a few Photoflood or
              Photoflash bulbs. The bulbs can be screwed into all regular lamp sockets.
View original page 19Page 20 · Read text
PhotoFlood gives a steady light of great brilliance. Comes in two sizes for the amateur:
No. I and No. 2. The No. 2 bulb gives twice the light, lasts about twice as long.


FLASH PHOTO EXAMPLES


TABLE FOR FLASH PHOTOGRAPHS
View original page 20
Page 21 · Read text
www.butkus.us


SNAPSHOTS with PHOTOFLOODS

To TAKE snapshots at night with the Kodak Vigilant, load the camera with Kodak Super-
XX Panchromatic, Panatomic-X, or Verichrome Film. Place two bridge lamps fitted with
the Kodak Handy Reflectors, and two No. 2 Mazda Photoflood Lamps, one four feet from
the subject and the other eight feet, as shown in the illustration on page 36.

Measure the distance between the camera and the subject; then adjust the focus
accordingly.
View original page 21
Page 22 · Read text
Move the stop opening lever D (page 16) to f/6.3. With Kodak Super-XX Panchromatic
Film make an exposure of l/100 second; with Panatomic-X or Verichrome Film use 1/25
second.

Other combinations for making snapshots and quick time exposures are given in the
table on page 37.

CAUTION: Photoflood Lamps, especially the No. o size, become quite hot and should
not be kept burning any longer than necessary. Do not permit the bulbs to come into
contact with the Kodak Handy Reflectors or the fabric of shades on home lamps.


SNAPSHOTS - PHOTO EXAMPLE 1
It is easy to make snapshots at night with your Kodak, using No. 1 or No. 2 Photofloods
and Kodak Handy Reflectors, see pages 35 to 38.

TIME EXPOSURES - PHOTO EXAMPLE 2
Quick time exposures should be made when the distance between subjects and lamps
requires it, see table on page 37.

PHOTOFLASH - PHOTO EXAMPLE 3
When the subject is likely to move, make the exposure with a Photoflash Lamp, see
pages 38 to 40.


PHOTOFLASH PICTURES


                 Photoflash gives an instantaneous flash, it is good for one picture.
             No smoke, no noise. Comes in two sizes for the amateur, No. I 11 A
                 and No. 2. The No. 11A size is suitable for most indoor shots.

           WHEN making a Photoflash picture, adjust the shutter for a time
                  exposure, with indicator B at "T." see page 16, and set the shutter
                  with lever C. Measure the distance between subject and lens; then
                  focus the lens. Use the proper stop opening, depending upon
                   distance between lamp and subject, size of lamp, kind of film, and
                      reflector, see exposure table on page 39.


Use a Photoflash bulb in any home lamp or a portable reflector unit having flashlight
batteries.

To make the exposure, turn out all lights (except a small light behind the camera),
direct the Photoflash at the subject, open the shutter, flash the bulb, and close the
shutter.
View original page 22Page 23 · Read text
www.butkus.us


PHOTOFLASH SETTINGS


KODAK COMBINATION LENS ATTACHMENTS

THE Kodak Combination Lens Attachments permit using in combination an unmounted
Wratten Filter, one of the Kodak Supplementary Lenses such as the Kodak Portrait
Diffusion Disk for close-ups, the Kodak Pola-Screen and the Kodak Lens Hood. The basis
of the combination is the Kodak Adapter Ring with its Adapter Ring Insert. The Adapter
Ring must be of the proper Series and size to fit your lens. These Combination Lens
Attachments are available in four Series, to fit lens diameters from Chinch to 2 inches,
and are designated as follows:

Series V for lenses from 3/4 to 1 3/16 inches

Series VI for lenses from 1 1/4 to 1 21/33 inches

Series VII for lenses from 1 11/16 to 2 inches

Series VIII for lenses from 2 1/16 to 2 1/2 inches
View original page 23
Page 24 · Read text
After determining the proper Series to be used with your camera lens, an Adapter Ring
of the proper diameter must be obtained to fit the lens. The filters, supplementary
lenses, Pola-Screen, and Lens Hood must be of the same series.

The Series VI Lens Attachments are used with the Kodak Vigilants Six-~o and Six- 16
with Kodak Anastigmat Lens f/6.3. The Kodak Adapter Ring must be 1 1/4 inches
(31.5mm) in diameter. All Wratten Filters, supplementary lenses, Pola-Screen and Lens
Hood must be Series VI.


The Adapter Ring Insert, which is a retaining collar, is first unscrewed from the Adapter
Ring. The Adapter Ring is then slipped over the lens mount, and an unmounted Wratten
Filter Series VI or supplementary lens Series VI inserted in the Adapter Ring and held in
place by screwing in the Adapter Ring Insert.

If it is desired to use a Kodak Pola-Screen with a supplementary lens or a filter, the
Pola-Screen is first screwed into the Adapter Ring and the filter or supplementary lens is
placed in front of the Pola-Screen, which then is held in place by the Adapter Ring
Insert. If you wish to use a Kodak Lens Hood in this combination, the Adapter Ring
Insert is omitted and the Lens Hood is used to hold the filter or supplementary lens in
front of the Pola-Screen.

To use a Portrait Diffusion Disk with a filter it will be necessary to obtain a double
threaded Kodak Retaining Ring, Series VI. The Portrait Diffusion Disk is placed in the
Adapter Ring and then the double threaded Retaining Ring is screwed into the Adapter
Ring. The filter is inserted into the Retaining Ring and held in place either with the
Adapter Ring Insert or Kodak Lens Hood. If a Kodak Pola-Screen is used in this
combination, the Portrait Diffusion Disk is put into the Adapter Ring. Then the double
threaded Retaining Ring is screwed into the Adapter Ring, which in turn takes the Pola-
Screen. The Wratten Filter is placed in front of the Pola-Screen and held there with
Adapter Ring Insert or Kodak Lens Hood.
View original page 24
Related documents and language editions
From the M. Butkus archive. Original publisher and archive notices are retained.
Check the model and edition against your equipment.
PDF verified 2026-10-10.