Film cameras
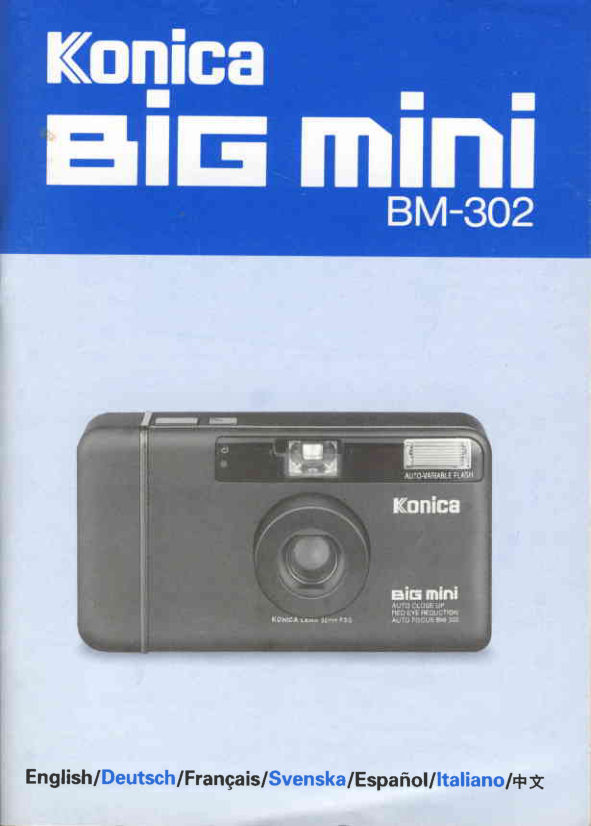
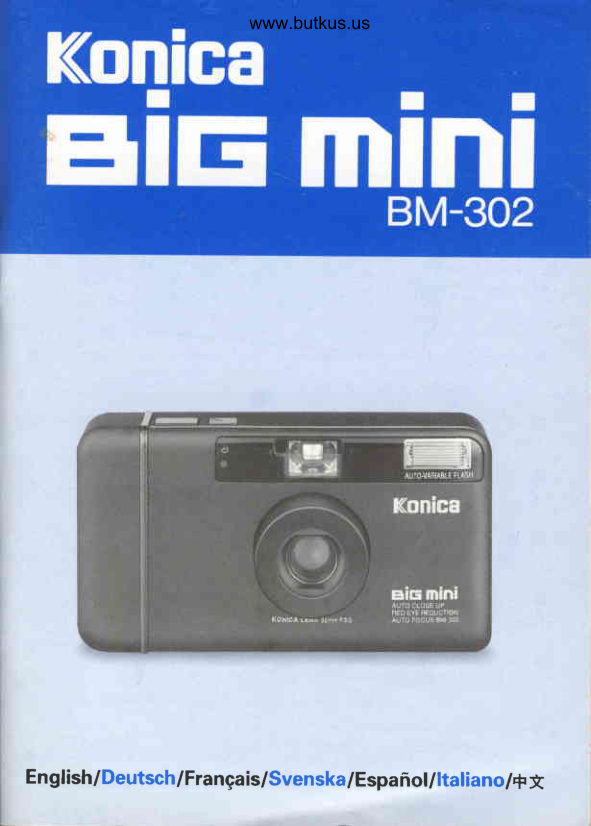
Konica BM-201 User manual
User manual for Konica BM-201. 29 pages in German, French, Swedish, English. Read the original PDF, download or print a copy without registration.
29 pagesGerman, French, Swedish, English1.9 MB PDF
Loading your manual…Open PDF directly
Document details
- Brand
- Konica
- Model / document
- Konica BM-201
- Document type
- User manual
- Language
- German, French, Swedish, English
- Pages
- 29
- File size
- 1.9 MB
- Category
- Film cameras
- Document date
- Not specified in catalog
Search available document text
Find a term, then jump to its page in the original PDF. Image-only pages may not be searchable; check the PDF for exact wording and diagrams.
Page 2 · Read text
www.orphancameras.com


                                                 €!tE


English,/Deutsch,/FranCais,/Svenska,/Espaiol,/ltaliano/' + A
View original page 2Page 4 · Read text
InformationDisplaySymbolswww.orphancameras.com


@ nuto-flashMode Sym                                Frame Counter
  (StandardMode)

                                                                Battery Power Symbol
@ ftastr ON Mode Sym
    (Fill in Flash)
                                                          Flash Charge Symbol
             toN
@ ntastrOFF Mode            ' OFF
  Symbol                        . Y  , I J -
                                                               Film Rewind Symbol                 [-l,EtUtll.Il


                                                             Film Advance Symbol


@ E*posure Compensation Mode                               Film Loaded Symbol
   Symbol


                                                                   Self-timer Mode
                                                     Symbol


                  (ln the drawing the symbols are shown as displayed on the LCD display)


    How to use the strap
View original page 4Page 5 · Read text
www.orphancameras.comLoading the Battery
                              Einlegender Batterie                   I                            Mise en place de la pile
                                 lstoppning av batteriet
                                Insercionde la pila
                             Per Inserire la Batteria
                                   #,\€iu


StandardModeOperation
                                           EnglishGrundlegende
Bedienungshinweise  Use(3V) abattery.singleThislithiumcameraCRI23A,will notDLI23Aoperate
0pdrationsnormalesde        unlessI )  Insertthe abatterythin coinis intoinserted.the groove of the
                                                Battery                                            Chamber                                                        Cover @and turn to
                                                         cover.prisedevue                        open                                                      the
Grundliggande                2)  Insert a  f'resh battery,  aligning  the
anviindning                         the"+" cover,and "-"then closepolestheas showncover. inside^
                                                3)   If  the Battery Power Symbol (N  is0peraci6nenel modo              black, the power is full.
                                              Since the Auto-date  calendar/clockestindar                                      *
Funzionamentonel modo         camera,runs  on pleasethe samereset batterydate/timeasafterthe
                                                  loading the battery. (Paee 46)standard                         When to replace the battery
*f{frffis#fl                @  Adequate  power   supply.  (Battery
                                      Power Symbol is black.)
                       @  Low power. (Battery Power Symbol is
                                                  2/3 blank,  I /3 black.) Time to replace
                                                 the battery.
                       @ No more power. (l/3 black portion of
                                                Battery Power Symbol blinks, then
                                                 turns completely blank.)
                                     No more pictures can be taken.
                                                             *   Replace the battery when the Battery
                                        Power Symbolis2/3  blank. Wait until.
                                                 the end of a roll of lilm before replac-
                                                     ing battery.
View original page 5Page 6 · Read text
www.orphancameras.com


                    o@   @
                                        r-fil t ; ) l r-"-r, ) .r.-t1l , l T-t,       rrul   tAtA__n-,,_
                @

Deutsch                                 Frangais
Verwendung einer Lithiumbatterie CR123A,       Utiliier  une  pile au  lithium  CRl23A,
DLl23A  (3V). Die Kamera funktioniert     DLl23A   (3V).  Cet  appareil ne  peut
nur bei eingelegter Batterie.                   fonctionner sans pile.
 l)  Flache Miinze gemdB Abbildung  in die         l)  Ins6rez une piice de monnaie dans la
   Kerbe frihren. und Batteriefachdeckel          rainure m6nae6e sur le couvercle du
  @ offnen.                                 logement a pile (D et tournez la pidce
2\  Frische Batterie einlegen, und Deckel        pour ouvrir le couvercle.
    schlieBen.(Auf Korrekte Ausrichtung      2)  Mettez une pile neuve en respectant les
    d e r P o le " * "   u n d " - "   a c h t e n .)            indications "+"   et "-"   appos6esd
3)  Bei frischer Ratterie erscheint das Bat-           I'int€rieur du couvercle et refermez le
    teriesvmbol (F) schwarz.                     couvercle.
 *   Die (alenderTUhr-Anzeige wird  mit      3)  Si I'indication de la pile f)  est noire,
    derselben Batterie  gespeist wie  die          c'est que  la  pile  dst si-ffisammeni
   Kamera selbst. Nach Batteriewechsel       charg6e.
    miissen daher die Daten neu eingestellt      *   Etant donn€ que la pile qui  fait fonc-
    werden. (Seite 47)                              tionner I'appareil alimente dgalement
Batteriespannungprtifen und               I'horodateur,l'heure ou la daten'oubliezquandpasvousde corrigerchangez
Batteriewechsel                                   la pile. (cf. page 47)
                   ausreichend.@  Batterieleistung                                    (Batterie-   Remplacementde la pile                      schwarz.)   symbol vollstdndig
@  Iiatterieleistung ihwach.   (Batterie-  @   flte  suffisamment  chargee (Le sym-
    symbol ein Drittel  schwarz.) Batterie         bole de chargement de la pile est noir).
    wechseln.                @  eite p.esquJ 6puis6e (Le symbole cie
@  Batterieleistung    erschcipft.   (Das        chargement de la pile est 2i3 blanc et
    schwarze Drittel des Batteriesymbols           l/3  noir).  Il est temps de remplacer la
     blinkt;   verschwindet  vollstdndig.)          pile.
    Keine Aufnahmen mehr moglich.     @  Pile completement d6charg6e(la par-
 *   Frische Batterie einlegen, wenn das           tie noire (1/3) du symbole de charge-
    Batteriesymbol nur noch  ein  Drittel        ment de  pile  clignote,  puis  devient
    schwarz  angezeigt  wird.   Batterie         blanche). Aucune photo ne peut Ctre
     erst  nach  Entnahme   eines  Films          prlse.
    auswechseln.                                       *  Remplacer la pile lorsque le symbole
                                            de chargement de la pile est au 2/3
                                                  blanc. Finir le rouleau de pellicule se
                                                 trouvant  dans  l'appareil  avant  de
                                             remplacer la pile.
View original page 6Page 7 · Read text
Loading the www.orphancameras.comFilm
     Einlegendes Films
     Mise en place de la pellicule
      lsdttning av film
     Carga de la pelicula
     Caricamentodella pellicola
      #,\F#           @@or


English                                   Deutsch
This camera usesstandard 35mm 0 35) roll       Fiir die Kamera sind 35-mm-Kleinbildfilme
 film with a DX code. The film speed (lSO     zu verwenden. Bei Filmen mit DX-Codie-
25-3200) is automatically set when the film      rung  stellt sich die Empfindlichkeit  (ISO
is loaded in the camera.                    25-3200\. automatisch ein.
 *   With non-DX  film,  the  film speed       *   Bei  fehlender  DX-Codierune-ISOstellt
    defaults to ISO 25.                            sich die Emplindlichkeit  auf      25
 *  Use ISO 25/50/100/200/400 film for           eln.
    color slides.                                        *   Bei Farbumkehrfilmen  sollte die EmD-
 l)  Push down the Back Cover Lock @           findlichkeit zwischen ISO 25 und 400
    and open the Back Cover.                     liegen.
2)  Place the  film  cassette in  the  film          l)  Riickwandverriegelung@ nach unten
    chamber.                                        drticken, und Rrickwand offnen.
3) Draw the film tip out of the film cas-     2)  Film in die Filmkammer einleeen.
    sette,while holding the film cassettein      3)  Filmrolle festhalren, und Film-anfang
    place.                                    herausziehen.
4)  Draw the film out up to the symbol in      4)  Filmanfang an die Markierung  in der
    the camera, and ensure that the holes       Kamera anlegen, uhd darauf achten.
     in the film  engage the teeth of  the        daB die Zdhne des Tiansportrades in
    Sprocket. Close the Back Cover.              die Perforation greifen. AnschlieBend
   Press the Shutter Release Button @         Riickwand schlieBen.
    once. The  film  is automaticallv  ad-     5)  Auslciser @  einmal  driicken.  Film
   vanced to  the  first frame. and the         wird  automatisch  zur  ersten  Auf-
   Frame Counter on rhe Display Panel       nahme  transportiert, auf dem  Bild-
    indicates "   I ".                             zdhlwerk im Display erscheint "  /  ".
6)   If  the  film  has not been correctly     6) Das Symbol  "Film  eingelegt", das
    loaded, the Film Loaded Symbol, the         Filmtransportsymbol und die " 0 " im
    Film Advance Symbol and the Frame         Bildzdhlwerk blinken, wenn der Film
   Counter  " C "  will  blink. Open the          nicht korrekt eingelegt wurde. Kamera-
   back cover and reload rhe film.               riickwand tiffnen, und Film nochmals
                                                einleeen.
View original page 7Page 8 · Read text
www.orphancameras.com


ffi=4iJ=+F               r-cEl                                                          I-v        o.ll'L- ?t--^|IwgqDwil
r@E4EU   f-^'-mE                                                      I     o_l
Frangais
Les pellicules les mieux adaptdes  i  cet
appareil sont les pellicules DX 24 x 36 (35
mm).  Le  rdglage en  fonction  de  la
sensibilit6 du film (ISO 25 d 3200) se fait
automatiquement au moment de la mise
en place de la pellicule dans I'appareil.
 *   Si la pellicule ne porte pas la mention   DX,  le rdglage se fait systdmatique-  rcq
   ment pour une sensiibilitd de film ISO
    25.
*   Pour les diapositives, utiliser des pel-
    ficules ISO 25, 50, 100, 200 ou 400.
l)  Abaisser le loquei @ pour ouvrir  la
    porte du compartiment  film.
2)  Mettre  la bobine de  pellicule d sa
    place.
3)  Tirer I'amorce du film  tout en main-
    tenant la bobine en place.
4)  Tout en s'assurant que les perforations
     le long du film sont bien engag6essur
    les ergots des pignons, sortir le film
    jusqu'a I'indication.
5)  Appuver une fois sur le ddclencheur
     6.'   t,  film avance automatiquement
    jusqu'ir la premidre pose et le com-
    pteur d'images indique  "  /  ".
6)  Si le film  n'est pas installd correcte-
    ment, I'indication de I'appareil charg€
    et I'indication du transport de film
    ainsi que le " O " du compteur de vues
    clignotent. Ouvrir  le dos de I'appareil
    et r6installez le film correctement.
View original page 8Page 9 · Read text
Using the Viewfinderwww.orphancameras.com
    Sucher
     Viseur
    Sokarensanvdndning
    Empleo del visor
    Uso del Mirino
     EfiT*{FH''*
Auto-focus   Light:  Green (AEIAF                 Pictureframe   Sucherfenstel
Lock and close-up warning signal)                  Cadrecollimat6   Bildram
Autofokus-Anzeige:   Griin  (Belich-               Marco de la fotografia
tungs  automatik  und  Nahbereich-                        Ritratri      ffiffifrffiliE
Warnung)
T6moin de mise au point automa-
tique: vert (s'allume quand la mise au
point est faite et I'exposition rdgl6e;
clignote quand le sujet est trop pris ou
trop  loin  pour  le mode photogra-
phique choisi.)
Autofokus indikering: Gron (AElAF
lAs och ndrbildsvarningssignal)
L6mpara de enfoque  autom6tico:
Verde (Seflal de aviso de bloqueo de
AEIAF  y primeros planos)
Spia di messa a fuoco automatica:
Verde (Segnaled'allarme dell' AE,/AF
bloccaggio e primi piani)
irujEEEqFtFzrtT,t*
( AE/ Ar-'tiitr tu+H+tquglttr fl.g g )

Close-up light: Red (On for close-up            Flash On Light: Red (indicates flash
photography)                                                will operate,/low light warning)
Nahbereich-Anzeige: Rot  (leuchtet             Blitzbereitschafts-Symbol:  Rot (zeiqt
bei Nahaufnahmen)                                Blitzbereitschaft,Warnung vor Unter-
T6moin de gros plan: rouge (s'allume             belichtung.)
en cas de photographie rapproch6e)            T6moin de flash: rouge (indique que
Niirbildsindikering: Rod  (For  ndr-                le flash est chargd ou que la lumidre est
bildsfotograiering)                                  insuffisante)
L6mpara de primeros planos: Roja               Blixtindikator: Rcid (indikerar att blix-
(Encendida para fotografia de prime-              ten tas i bruk,/otillrdcklig belysning)
ros planos)                               L5mpara de flash conectado: Roja
Spia per primi piani: Rossa (Accesa              (Indica que el flash funcionar6/aviso
per fotografia  in primo piano)                 de iluminaci6n baja)
{+5tE7F'tT'tI  (rS1-++5EfE!-flzi)                      ilSpiaflashdel sardflash in(onl:funzione/seenaleRossa (Indica chead
                                                   illuminazione debole)
                                                      l\Jt'fIl?-r'lT'   tI
                                                         (t )ft,'k|')iitfu Ji€T  tr g€  )


                       12
View original page 9Page 10 · Read text
www.orphancameras.com


Auto-focus frame                             Close-up  compensation   (parallax)
Autofokusfeld                              mark (at 35-60cm)
Cercle de mise au point automatique            Nahauf nahme-Parallaxen-Ausglei-
Ram  fiir auto-fokusering                       chs-markierungen (bei 35-60cm)
Marco de enfoque automAtico                 Repires de correction de  la Paral-
Ouadro Auto-Fuoco                             laxe (ir 35-60cm)
Hz'JiEfrE                                 Kompensationsmdrken  (parallaxmdr-                                               ken) (35-60cm)
                                         Marca de compensaci6n  Para Pri-
                                         meros planos (paralaje) (a 35-60cm)
                                    Campo di compensazione Per Primi
                                                    piani (parallasse) traccia (a 35-60cm)
                                        iEfiEH{Efiffi ,t ( -&4. dlr  tr EEH 35-
                                   60IE)<1$hli|J1A\+*frti6ffi)


English                                Svenska
Ensure that the lens and the autofocus    Se till  att objektivet,  blixten och fcinstret
window are not obstructed by anything:       fcir autofokus  inte skyms av nigonting,
 fingers, strap, etc.                                t.ex. fingrar eller kamerarem.
 Deutsch                                    Espaiol
 Vergewissern Sie  sich,  dafJ sich weder     Asegurese de que ni el cabello ni la correa
 Tiageriemen noch Haare  vor dem Ob-     tapan el objetivo o la ventanilla de auto-
 jektiv  oder dem Autofokus-Markierfeld       enfoque.
 befinden.                                                  Italiano
 Frangais                                      Assicurarsi che la cinghia o  i cappelli non
 Faire  attention que  ni  la  bride,  ni des     siano di fronte all objettivo o al finestrino
 cheveux ne viennent se placer devant I'ob-     dell'auto-focus.
 jectif      ou  I'ouverture de mise au point   +t automatique.                             irHi@4,**.E.++ffi++5ti+fr.*.ai^h
                                             iEF,:68t,  FJnlaJIX.F"                        13
View original page 10Page 11 · Read text
www.orphancameras.com4  lli'lf"J3l5l??,*      Prise de vues Fotografering
      Fotografia
     Ripresa
      Fotografica
     ,tw


English                                  Deutsch
l)-  Press the Power Switch O.  the  lens         l)  Ein,/Aus:Taste Q  drtcken.  Objektiv
    barrel will move forward.                      wird ausgefahren.
*     If  the front  filter  gets dirty, wipe  it        *   Ein  verschmutztes  Frontfilter   mit
    with a dry cloth.                          einem trockenen Tuch reinieen.
2)  Look through the Finder Eyepiece @      2)  Durch Sucherokular @ sch-auenund
   and frame the subject with the auto-        Aufnahmeobjekt  mit Autofokusmar-
    focus frame in the center of the view-          kierfeld zulDeckung -dnickln,bringen.
    finder.                                       3)  Auslciser @  hatU          sodaB
3)  Press the Shutter Release Button @           griine AnzeiCe (O)  im  Sucher auf-
    halfway until the green indicator (O)          leuchtet und  sich die Schdrfe auto-
     in the viewfinder comes on. The focus         matisch einstellt.
     is automatically set.                         Ausloser  vollstdndig  driicken.  Film
    Gently  depress the  shutter  release         wird  anschlieBend automatisch  zur
    button the rest of the way to take the        ndchsten  Aufnahme    transportiert,
    picture. The film will be automatically        und Bildziihlwerk  lduft um eine Zahl
   be  advanced one  frame,  and  the          weiter.
   Frame Counter  will increase by one.       4\  Gleichzeitig erQcheint das  Blitzlade-
4l  At thislime, the Flash Charge Symbol        symbol (  t   ) (G) im Display, wenn der
      (  t   ) (G) on the display lights if flash          Blitz aufgeladei wird. (Auskiser bleibt
     is chafing.   (During  flash charging,        wdhrend des Aufladens gesperrt.)
    the shutter locks.)                          5) Zum Ausschalten der Kamera erneut
5)  After  using  the camera,  press the          die Ein,/Aus:Taste driicken. Objektiv
   Power Switch to turn  off  the power.         wird eingefahren.
   The lens barrel will retract.                 6)  Das Objectiv  wird  (zur Vermeidung
6)   If your  finger  is pressed against the        von  Autofokusfehlern)   auch  dann
    lens barrel accidentally when the Shut-         eingefahren, wenn Sie wdhrend des
     ter Release Button  is pressed, the lens        Ausl6sens  versehentlich gegen das
     will retract and the picture will not be         Objektiv  dri.icken. Erneut  die  Einl
    taken. (This is to prevent auto-focus         AuslTaste driicken. und die Aufnahme
    error.) Press the Power Switch again        machen.
    to extend the lens and take the picture.

                          14
View original page 11Page 12 · Read text
www.orphancameras.com

 EJ


                                Camera-to-Subiect Distance
Frangais
l) AppuyezsurI'interrupteurQ. L'ob-
     jectif escamotable sort du boitier.
*   Si le filtre frontal  est sale, le nettoyer      g   avec un chiffon  sec.           s"r}2)  En regardant   i  travers le viseur @,
    centrer I'objet dans le cadre de mise au    point automatique.  qW
3)  bnfoncer  le d6clencheur O  e moiti6
    afin que le voyant vert (O)  s'allume
   dans le viseur indiquant que la mise au
    point automatique est faite.
    Enfoncer  doucement  le d6clencheur
    jusqu'au bout pour prendre la photo.
    La pellicule avance automatiquement
    jusqu'd la pose suivante et le compteur
    d'images progressed'un c!(fre.
4)  Le symbole de flash (  t  ) G) s'allume
    sur l'6cran d'affichage pendant le re-
    chargement du flash. (Le d6clencheur
    est bloqu€ pendant le rechargement du
     flash.)
 5)  Une fois que vous aurez fini de photo-
    graphier, appuyez sur I'interrupteur
    pour 6teindre l'appareil.  L'objectif  se
     r6tracte dans le boitier.
 6)  Si  vous  mettez  les  doigts  contre
     I'objectif quand vous appuyez sur le
    d6clencheur, I'objectif se rdtractera et
    vous ne pourrez pas prendre la photo'
     (c'est pour dviter une mauvaise mise
    au point.) Appuyez sur I'interrupteur
    pour faire sortir I'objectif  et prenez la
    photo.
                        15
View original page 12Page 13 · Read text
Automatic Flash
     Blitzautomatikwww.orphancameras.com
     Flash automatique
     Automatisk blixt
     Flash automdtico
     Auto/Flash
       trliE,rIein&.lt        q         E                                                                                                                                                                                                                          , a ,


English                                   Deulsch
l)    If thelightlevelistoolow, thered(  |  )         l)  Bei unzureichenden  Lichtverhaltnis-
   and green (f)   indicators in the view-        sen leuchten die rote  (   |    ) und die
    finder  will  light  to indicate that the          griine Anzeige (O) im Sucher auf, um
    flash will operate automatically.               anzuzeigen, daB sich der  Blitz  auto-
2)  Press the Shutter ReleaseButtoh @ to         matisch zuschalten wird.
    take the picture with flash.                 2)  Ausl<iser @  dnicken, um  Blitzauf-
3)  After taking a picture with lgsh, the       nahme zu machen.
    Flash Charge symbol (   |   ) @) on the      3)  Nach einer Blitzaufnahme  blinkt   ftir
    display panel  will appear  for a few          einige Sglunden das Blitzladesymbol
   seconds while the flash is recharging.              (   t    ) @  im Display. Bis zum voll-
    Shutter locks until recharging is com-         stdndigen Aufladen  bleibt  der Aus-
    pleted.                                              lciser gesperrt.
*   Flash range will be adjusted based on        *   Die Blitzreichweite wird auf die auto-
    the distance and the film speed auto-         matisch von  der Kamera gemessene
    matically measured by camera itself.          Entfernung  und Filmempfindlichkeit
When Taking Pictures of People           eingestellt.
with Flash:                       Bei Blitzaufnahmenvon Personen:
When  flash  is used to take pictures of      Bei  Blitzaufnahme  von  Personen   tritt
people, light from the flash may reflect off       hiiufig das Phdnomen "roter Augen"  auf.
the retina, causing the eyes to appear red    GegenmaBnahmen:
in the picture.                                                (l)  Sorgen Sie  fiir  ausreichende Umge-
To help prevent this:                              bungshelligkeit, indem Sie beim Blit-
(l)  Tirn  on  room  lights when  taking         zen in geschlossenenRdumen die Zim-
    pictures indoors with flash.                 merbeleuchtung einschalten.
(2) Move up close when taking pictures of       (2) Arbeiten  Sie mit  kurzen Aufnahme-
    people with flash.                             distanzen.


                                                                 l 8
View original page 13Page 14 · Read text
www.orphancameras.com


                   Flash Photography Range
                             Film Speed          Camera-to-Subj ect Distance
                       ISO 100         0.35m - 3.8m (t. l5ft - l2.5fr)
                       ISO 2OO         0.35m - 5.3m (1.l5ft - l7.4ft)
                           lso 400         0.35m - 7.6m (l.l5ft-24.9ft)


Francais                               Svenska
l)  Quand   il  fait trop sombre,  la fldche          l) Om  ljuset dr  fcir svagt lyser de rrida
   rouge (  |   ) s'allume en plus du voyant               (  I   ) och grona (O) indikeringarna   i
    verf (O) (dans le viseur) pour indiquer          scikaren och visar ddrmed att blixten
   que le flash se d6clenchera.               kommer att utldsas.
2)  Enfoncer  jusqu'au  bout  le  d6clen-      2)  Tryck ned avtryckarknappen @ for att
    cheur @  la photo sera pris-ea9 fla$'           fotografera med blixt.
3)  Aprds qu'une photo au flash4  6td      3)  Efter   att  en  bild  tagits med  blixt
    prise, le symbole de flash (  I   ) (Q) sur       kommer sy4qbolen lor  blixtuppladd-
    i'ecran   d'affichage   reste  allum6         ning (  I   ) (G) att Aterges pi displayen
    quelques secondes, le temps que  le        under en koitare stund medan blixten
    flash se recharge. Le d6clencheur est         iteruppladdas.  Avtrycket  dr lAst tills
    bloqu6  pendant  que   le  flash  se          blixten dr uppladdad.
    recharge.                      Ndr du anvender blixt for att
 *  La port6e du flash sera r6gl6e ir partir     fotografera mdnniskor:                                    vitesse                          de la                               et                       sujet         la distance au    de                                                                               av                                                                                        ta bilder                                                                                         f<ir                                                                                           att                                                                                  blixt                                          Ndr                                             du anvdnder                            pellicule                            mesurde                           la                 de       diiroulement    de                                                                        mot                                                                                        blixtljuset                                                              reflekteras                                                                            ofta                                                   lui-     mdnniskor                      par                               l'appareil    automatiquement                                                                                                                  blir                                                          och                                                                              bildresultatet                                                      nathinna                                        dgonens   mOme.                                                    ofta rcida cigon.
Photos de personnes Prises au         Fcir att minska eller  fi  bort denna effekt
flash:                                  kan du:
Lorsque I'on  utilise le flash pour photo-         (l)  Tiinda all belysning i rummet fOr att fa
graphier  des personnes,   il  arrive  que        personens pupiller  att dra ihop sig.
 i'6clair du flash se reflite dans la r6tine du       (2) Ta fotografiet med kort avstind.
 sujet d'or) I'apparition des yeux rouges sur
 la photo.
 Pour dviter cela:
 (l)  Allumer   les  lumidres  de  la  pidce
    lorsque  I'on  prend  des Photos en
     int6rieur avec un flash.
 (2)  Il  est  pr6f€rable  de  photographier
     les personnages au  flash   it  courte
     distance.
                        19
View original page 14Page 15 · Read text
www.orphancameras.comE| fii"t"filigfrfl?'n'"ont    Gros plans
     Ndrbildsfotografering
     Fotografia de primeros planos
     Fotografiadi Primi Piani
   WETFW


English                                 Close-up photography Range
Close-up photos can be taken in a range
from 0.6 m to 0.35 m (13.7" to 23.5').
l)  Press  the  Shutter  Release Button
    halfway down and hold  it. Both the
    red  ( rl? ) and the green lights in the
    viewfinder  will  turn on  to  indicate
   Close-up mode.
2)  Frame the subject in the Auto-focus
    frame inside the viewfinder, then press
    the Shutter ReleaseButton all the way
   down. Parallax Compensation Marks
    inside the finder show the picture area
     for close-up photography.
3)   If the green indicator  is flashing and
    the shutter releaselocks, then the sub-
    ject is too close. Move back slightly     Frangais
   and take the picture.                  Vous pouvez photographier en gros plans
                                                   les sujets situ€s d une distance comprise
Deulsch                                       entre 60 cm  ir 35 cm.
Nahaufnahmen  sind  in einem Abstand          l)  Maintenez  le d€clencheur d  moiti6
von 0,6 bis 0,35 m moglich.                     enfonc6. Les t6moins rouge ( V   ) et
l)  Ausloser halb driicken und gedriickt          vert s'allument dans le viseur pour in-
    halten. Sowohl die rote ( g  ) als auch          diquer. que I'appareil est en mode de
    . die grine Anzeige leuchten, um Nah-         gros plans.
   au[nahme-Modus anzuzeigen.             2)  Cadrez de faqon que le sujet s'inscrive
2)  Motiv im Autofokusrahmen im Sucher         dans.le cadre int€rieur du viseur et
    anvisieren, dann Auslciser vollstdndig         enfoncez le d6clencheur  ir fond. Les
    driicken.  Die  Parallaxenmarken  im         repdres de correction de la parallaxe d
   Sucher  zeigen den  Bildbereich  bei          I'int6rieur du viseur d6limitent le cadre
   Nahaufnahmen.                          de I'image en mode de gros plans.
3)  Bei Blinken der griinen Anzeige ist der      3)  Si  le voyant  vert  clignote  et que  le
   Aufnahmeabstand  zu kurz. und der         d6clencheur est bloqud, I'objet est trop
    Ausl<iser ist gesperrt. VergroBern Sie         prds. Reculez vous l6gdrement ou  la
    die Aufnahmedistanz.                        photo.
                       21
View original page 15Page 16 · Read text
Focus Lock www.orphancameras.com
     Fokusverriegelung
     Maintien de la mise au point pour recadrage          '     Lisning av bildskirpan
     Bloqueo del enfoque
     Bloccaggio della messa a fuoco
       ti[tri8fr
                             a      *$,
                       ]IX                                                          (yHO                                T
                             -4m"<-qd@
                             /tt\English                   rO
l)  Aim  the  auto-focus  frame  at  the    subject. Depress the  shutter release      11    t1
    button @  part way  until  the green
    indicator turns on.
2\ With the shutter releasebutton held at
    this point, compose the picture, and    then release the shutter.      "ir                  :      If you remove your  finger from  the     ffiti
    shutter release button, the focus lock
     will be released.
3) Focus Lock may not operate properly
    with  some kinds  of  dark  or  grey
    objects,  reflective  or  light-emitting
    objects, or very small objects. In such
    cases, set the Focus lock by aiming the
   camera at another object  of  similar
    brightness at about the same distance.
4) When taking pictures through a glass
    window,  the  Autofocus  mechanism
   may  not  focus properly  because of
    reflections. To take photos through
    glass, use the Focus lock or press the
   camera directly against the glass.
   Be careful not to press to hard or the
    lens will  retract and the camera will
    shut off.


                        23
View original page 16Page 17 · Read text
E| H,T,ll#iln*'"'www.orphancameras.com    Comment enlever la pellicule
     Urtagningav film
     Extraccionde la pelicula
     Per Toglierela Pellicola
    ryHFT
 r-r,Dl ryE-DI

    :   +
English                                 Deutsch
l)  When the last frame of the film has         l)  Nach Belichten der letzten Aufnahme
   been used, the film  will be automati-         eines Films wird dieser automatisch
    cally rewound. When the film is fully          zuriickgespult. Nach  vollstdndigem
   rewound, the motor stops automati-         Riickspulen  stoppt der Motor  auto-
     cally.                                  mauscn.
*   While  film   is  rqwinding,  the  Film        *  Wdhrend des Rtickspulvorg4qgsblinkt
   Rewind symbol @) will b"link and the        das Filmriickspul-SymbolQ!,  und
   Frame Counter  iili  count down  to        das Bildzdhlwerk zdhlt riickwdrts bis
           L  t   '                                          auf  "  il ".
2l  After  rey{nding,  the  Film  Loaded      2)  Nach erfolgtem Riickspulen weist ein
   symbol Qf on the display panel will                fiir einige Sekqnden blinkendes Film-
    blink  tor several seconds to remind        lade-Symbol Ql) darauf hin, den Film
   you to remove the film. Open the Back        herauszunehmen.  Kamerariickwand
    Cover and remove the film  for proc-          ciffnen, und Film herausnehmen.
    essing.                                              *  Wdhrend des Riickspulvorgangs bleibt
 *   Shutter locks while film  is rewinding.         der Ausloser gesperrt.
*  More pictures can be taken than the        *  Es sind mehr Aufnahmen  moslich
    specified number of frames in the film          als die auf der Filmrolle angege-bene
     roll. but the last two pictures may         Bildzahl ; die letzten Aufnahmen Kon-
    overlap each other.                       nen allerdings uberlappen.
ManualRewind                    VorzeitigesRtickspulen
To rewind film manually (forced rewind)     Riickspulen des Films schon vor Belich-
before the roll is finished.                   tung des letzten Bild.
l)  Use the Strap Ring tip to press the         l)  Dri.icken Sie die Rrickspultaste@ mit
   Manual Rewind Switch @. Film will         der Spitze des Trageriemenrings. Der
    besin to rewind.                              Film  wird motorisch an den Anfane
                                                      zuriickgespult.


                        27
View original page 17Page 20 · Read text
Davliqht Flash www.orphancameras.com(Flash ON Mode)
     Blifza-ufnahme bei Tageslicht (Blitzzuschaltung)
     Prise au flash de iour (intentionnellement)
     Blixtfotografering-i daislius (Absolut bl ixtfu nktion)
     Flash con luz diurna (Modo de flash forzado)
    Flash con Luce Diurna e Mode di Flash Fozato
    E iEtEtf  lrltEffir ( trlrE'ITltf )


                   / E V        R
          o   C


                                   with  flash


                                             no flash

English                           Deutsch
Daylight flash photography is effective for     siiiiaufnuh-enbei Tageslichtempfehlen
back-lit subjects, strong shadows, or on      sich bei triibem Wetter, im Schatten oder
cloudy days.-the                                 bei Gesenlichtaufnahmen.
l)  Piess    Mode  switch @  and the         l)  Fuiktionstaste @  dricken.  Symbol
   tON  symbol will aPPear on the dis-                  t ON   fiir  manuelle  Blitzzuschaltung
    play panel to indicate Flash ON Mode.          erscheint im Display.                                                        t
2)  The  flash  will  light  even  in  bright      2)  Blitz arbeitet auch bei hellem Licht.
    places.


                      34
View original page 20Page 21 · Read text
Slow Shutter Synchwww.orphancameras.com(Flash ON Mode)                               I
    LangsameBlitzsynchronzeit(Blitzzuschaltung)
    Synchronisationi basse viteise d'obturation (intentionn
    Synkroniseringfcirl6ngaslutartider(Absolatblixt funktion)
    Sincronismo de obturador lento (Modo de flash forzado)
     Otturatore Sincronizzato Lento (Mode di Flash Fozato)
     'iR;E,Fft tElt  ( hlrb,rTfi6)


   MOIIE/EVP     s    R
 eco


                        Slow shutter sync


                                      'AUTO

English                                 Deutsch
In  the Flash ON  Mode,  slow  shutter     Bei Blitz-Modus EIN wird bei ungrinstigen
speeds (up to 3.6 seconds) are used for      Lichtverhdltnissen  mit  langsamen  Ver-
available light.                              schluBzeiten(bis 3,6 Sek.) gearbeitet.
l)  Press the Mode Switch @ and the         l)  Funktionstaste @  driicken.  Symbol
   tON   symbol  will  appear on  the       tON    fiirmanuelle Blitzzuschaltung
    display panel to indicate Flash ON          erscheint im Display.
   Mode.                                       2)  Belichtungsautomatik   arbeitet  auch
2)  The AE operates normally  in the flash          bei Blitzzuschaltung,  so daB  richtig
   mode, so it is possibleto take correctly          belichtete Aufnahmen auch bei Ddm-
   exposed photographs  at dawn  and        merung,  an  bewolkten  Tagen,  auf
    dusk, on cloudy days, or at close range         kurze Entfernung  und  vor dunklem
   and against dark backgrounds. The         Hintergrund  moglich  sind. Verwen-
   use of a tripod  is recommended to        dung eines Stativs wird  empfohlen,
    prevent camera shake.                 um Verwackeln zu vermeiden.
                       36
View original page 21Page 22 · Read text
^tl   Available Lightwww.orphancameras.comPhotography (Flash OFF Mode)Hr   Aufnahmenmit vorhandenemLicht (Blitzabschaltung)
      Prise de vue sans flash (mode flash OFD
      Fotograferingi tittgangligtfus @lixtfunktionOFF)           |
      Fotografiacon la iluminaci6ndisponible (modo de flash t
      Fotografia con Luce sufficiente (modo di disattivazione I
      &.RFffi( lrJtE'FIorrtF=t)


                                                         (  )                                         r r  r z
                   )r:                             '*-!                  I    ruo{ezevI       u    R
 aco


English                                          2)  Ein blinkendes Blitzsymbol  (   I   ) im
With this camera, AE photography  is still               '   Sucher bei halb gedriicktem Auslciserpossible at low light levels. City views and          zeigt an, daB die Lichtverhdltnisse  fiir
landscapes at night can be photographed          eine  korrekt   belichtete  Aufnahme
using shutter speedsas low as 3.6 seconds,        ohne Blitz nicht ausreichend sind.
without the flash.                                      *  Um  Verwackeln bei langsamen Ver-
l)  Press the Mode  switch @, and the         schluBzeiten zu vermeiden, wird em-
    iOFF   symbol  will  appear on  the          pfohlen, ein Stativ zu verwenden.
    display  panel,  indicating  the Flash
   OFF Mode.
2)   If  the  (   |    ) Flash Mark  inside the    Frangais
    finder  blinks  when  the  shutter  is     Le  r6glage  automatique   d'exposition
   pressed half way down, there is not     fonctionne m€me quand  il  fait trds som-
   enough available  light  for  a correct      bre.  Il est possible de photographier une
   exposure in Flash OFF mode.                 ville ou un paysage de nuit, sans flash,
*  Use of a tripod  is often advisable in     avec une  vitesse d'obturation   de  3,6
    Flash OFF mode, to prevent blurring     secondes au maximum.
   due to slow shutter soeeds.                         l)  Appuyez sur le s6lecteur de mode @
                                                      I'indication tOFF  s'allumera.
                                                  2)  Si vous voyez le symbole de flash (  |  )
Deutsch                                           clignoter  dans  le  viseur  lorsque  le
Mit  der Kamera  ist  Fotografieren  mit         d6clencheur est ir moiti6 enfoncd, c'est
Belichtungsautomatik auch bei schlechten       que la lumidre est insuffisante m€me
Lichtverhdltnissen moglich. Stadtpanora-         pour un temps de pose de une seconde.
men und Landschaften bei Nacht konnen        *  Nous vous conseillons  d'utiliser  un
mit VerschluBzeiten bis zu 3,6 Sekunden         pied en mode "flash coup6" pour que
ohne Blitz aufeenommen werden.                  les photos ne soient pas "boug6es".
 l)  Funktions6ste @ driicken. Das Sym-
    bol  IOFF    fiir  Blitzabschaltuns  er-
    scheint im Display.
                      38
View original page 22Page 23 · Read text
Photographingwith Exposure Gorrected(FlashOFF Mode)
    Aufnahmenmitwww.orphancameras.comBelichtungskorrektur(Blitzabschaltung)
    Lors de  la prise de photos avec Exposition corrig6e
    Fotografering med korrigerad exponering (blixtfunktion
   En fotografia con correcci6n de la exposicion (modo de
    Per fare delle fotografie con I'esposizione corretta (modo
      l*)E ?1.1+( txtiE,rIo FF iF*)


   MoPE/EVP     S     R                        R
                      o OCo     6 i

English                           Deutsch
Automatic  exposure  is  controllable  as     Als gestalterisches Mittel kcinnen Sie den
desired; Flash does not work.                 Belichtungswert um    t  1,5 Blendenwerte
l)  When  it  is desired to take a picture      beeinflussen, sofern der Blitz ausgeschal-
    brighter  (darker) than the standard,       tet ist.
    depressthe Mode switch @to produce          l)   Frir eine gewollte Uber- oder Unter-
   iOFF  + 1.5 ( iOFF     - 1.5) on the         belichtung   die  Funktionstaste  (D
    photographic display panel.                     driicken, um den Wert  IOFF  + 1,5
2)  Releasing the shutter toward the ob-         bzw. iOFF    - 1,5 in das Anzeigefeld
     ject, automatic exposure photograph-         zu setzen.
    ing is provided brighter (darker) than      2)  Durch Driicken des Auslcisers wird die
    the standard by about 1.5 aperture.         Aufnahme dann um ca. 1.5 Blenden-
*   iOFF   + 1.5 Mode   is  particulary         werte iiber- bzw. unterbelichtet.
    effective in taking a bright picture of a        *   Die  Betriebsart  |OFF   + 1,5 bietet
    dark part of a building in high contrast         optimale   Belichtung   bei  dunklen
    of light and shade or a person skiing         Motiven vor sehr hellem Hintergrund,
    against a  bright  background  or  in         wie z.B. einer Person im Schnee oder
    strong backlight.                         einem  Hochhaus   vor   sonnisem
*  Use IOFF  -1.5  Mode when vou        Himmel.
   want to make the whole  picture dark-        *  Verwenden Sie den Modus   iOFF
    er, or to emphasise the colour  of the               -  1 ,5 , we n n d a s Ge sa mtresultat
    sky, or to photograph a person spotlit         dunkler werden soll, Sie die Farbe
   on a stage or against a black back-        des Himmels hervorheben mdchten
   ground.                                     oder eine Person im Rampenlicht auf
                                               der Biihne oder vor einem dunklen
                                                Hintergrund aufnehmen wollen.


                       40                                                                                                                                                                              *I*
View original page 23Page 24 · Read text
Self-timer Modewww.orphancameras.com
      Aufnahmen mit Selbstausltiser
       Retardateur
        Sidlvutlcisare
     MoOode autodisparador
       Mode/Autoscatto
     H'H'*
 rruB|'._   {uE   I
    M o D E / E VIp    R
                                           Deutsch
                                                                                   l)  Die SelbstausloserjTaste (D drticken.
                                                     Selbstausloser-Symbol                                          Das                                                                                                                                ( U    )  oao                                                         im Anzeigefeld.                                                    erscheint
                                                         2\  Kamera auf  Stativ oder feste Unter-
    English-                                             lage setzen, Bildausschnitt festlegen,
       l)  Press the Self-timer Switch (D and the        und Ausloser driicken. VerschluBaus-
        Self- timer symbol ($   ) appears on the         losung erfolgt nach etwa l0 Sekunden.
       display panel.                             Selbstauslose-Anzeige@ vorn an der
       Set the camera on a tripod  or steadY       Kamera leuchtet: Sie blinkt wdhrend
        surface, frame the picture, and press         der  letzten drei Sekunden von  Ver-
        the shutter release button. The Self-         schluBauslcisung.
        timer will start, and releasethe shutter        *  Selbstausloser-Aufnahmen sind   in
         after about l0 seconds. The Self-timer        Kombination   mit   Belichtungskor-
                                                    rektur                                                IAUTO,                                                      will                                                     ION  ,  f OFF (0, + 1,5                            camera                       front  of                              the        Lieht               on       @
                                                            1,5) moglich.                                           und  -                                             for                                          the                                   blink               7                       and         light  for                seconds
         last 3 seconds before shutter release.           In Stellung t AUTO (keine Belichtungs-
   * Any  of  the TAUTO   ,  tON   and          korrektur) wird aufgrund der fehlen-
              f OFF   (0,  + 1.5 and   - 1.5) modes       den Blitzzuschaltung bei ungiinstigen
       can be chosen.                            Lichtbedingungen  automatisch  auf
   * When taking a picture under I AUTOat          eine langsame VerschluBzeitgeschaltet.
       a dark place, the mode  is automati-         Zur  Aktivierung  des Selbstauslosers
         cally shifted to Slow Shutter Synch-          nicht das Objektiv verdecken.
       ronlsm.                                  Jede SelbstausloseraufnahmemuB mit
   *  Do not stand in front  of the camera         der  Funktionstaste erneut  eingestellt
      when starting the Self-timer.                werden.
   *   It   is necessary to  reset the Mode      Um  den  Selbstausl<iserlauf vor  derf    Switch each time a Self-timer Mode         VerschluBauslosung abzubrecheq, die
        picture is taken.                         Kamera mittels Hauptschalter O  ab-
    *  To  stop  the  Self-timer  before  the          schalten.
        oicture  is taken,  press the Power          Schdrfe-  und  Belichtungsspeicherung
       Switch O.                                wdhrend des Selbstauslciserbetriebsist
       Focus            and AE lock may be used with          mciglich.#p*                                                                       Fiir  Aufnahmen   mit  Selbstauslciser        the self-timer.
    *  Self-timer photography  requires a         wird  die  Verwendung  eines Stativs tw|&, tripod.                                      emofohlen.
                         43
View original page 24Related documents and language editions
From the M. Butkus archive. Original publisher and archive notices are retained.
Check the model and edition against your equipment.
PDF verified 2026-10-10.