Film cameras
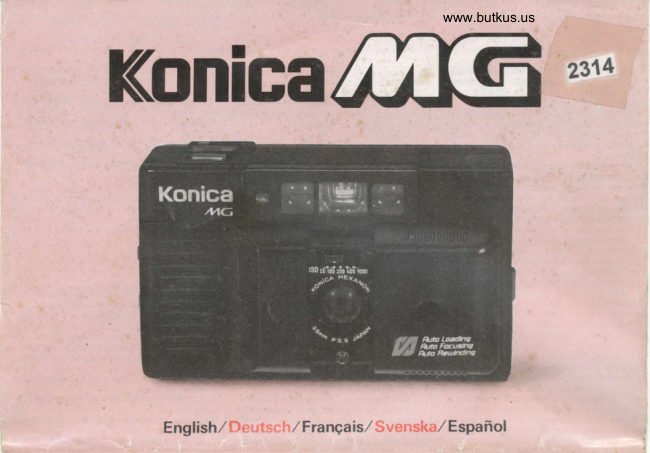
Konica MG User manual
User manual for Konica MG. 34 pages in English. Read the original PDF, download or print a copy without registration.
34 pagesEnglish11.0 MB PDF
Loading your manual…Open PDF directly
Document details
- Brand
- Konica
- Model / document
- Konica MG
- Document type
- User manual
- Language
- English
- Pages
- 34
- File size
- 11.0 MB
- Category
- Film cameras
- Document date
- Not specified in catalog
Search available document text
Find a term, then jump to its page in the original PDF. Image-only pages may not be searchable; check the PDF for exact wording and diagrams.
Page 4 · Read text
Bitte spenden Sie 2,50 Euro, um diese Website über E-Bay zu unterstützen ... www.PayPal.me/butkusView original page 4
Page 7 · Read text
Tack fcir valet av Konicas MG         Le estamos agradecidos por haber
   kamera.                             seleccionado nuestra c6mara
4   Konica MC dr en kompakt 35 mm kamera   Konica MG.
Lt  med inbyggd elektronblixt och automatisk     L:s Konica MG son camaras compactas de 35
n     instiillning av bildskArpa, exponeringstid samt  mm con flash electr6nico incorporado. en las
t   automatisk iliiggning, framd ragning och iter-    cuales el enfoque, el control de exposici6n,  la
I    spolning av filmen. Kameran ir dessutom ftjr-    carga de la pelicula y el bobinado y rebobinado
    .sedd med fokuslAs, si att motiv  i bildens ytter-   de la pelicula se efectian en forma automdtica.
1    kanter blir skarpa. och en sjdlvutliisarfunktion.    Cerrando  la tapa anterior. se protege la lente y
    Objektivet skyddas av det skjutbara locket niir    se bloquea el bot6n del disparador.
;   kameran intc anvAnds.                       Tambi6n, la c6mara. puede ser puesta en el
                                         modo de hjacion de enfoque. para poder enfo-
                                                       car sujetos situados en el borde del marco de la
                                              imagen. Tambi6n se ofrece el modo de dis-
                                                parador autom6tico.       /
View original page 7Page 8 · Read text
www.butkus.us


Sechs einfache Schritte zum Fotogra          Six etapes simples pour la photographie
Sex enkla punkter f6r fotografering           Seis pasos sencillos para la fotografia


                       Inserting of Batteries.      Film Loading.              Seuing of Film Speed.   Daylight phorogmphy.      Flash Photography.         Film Removing.
                     Einlcgcn der Battcrien         rlmeinlegen                               l rn\tcllcn d( r l-tlmcmpltnd- ,\ulnahmrn bci              Elitzlichraufnahmen.         Entnchmen des l;ilms.
                   Mise en place des piles.     lChargement du film.         lichkeil.                      fagcslichr.                  Photographie au flash        Retrait du film.
                    llaggning ar battcricr          ls:ittning av lrlmen.           R6glage de la sensibilitt6     Photographie d la lumibre   tllixtfotogralcring.            Filmurtagning.
                      lnserci6n de las pilas.               de {a pelicula        de la film.                 du jour.                    Fotografia con flash        Rebobinado de la pelicura
                                                ]Cargar                            Instiillning ar lilnrhastighc     [:otogralering  i dagsl  jrrs.
                                                                                                      len.                            Fotografia a Ia luu del
                                                            Combio de sensibilidad        dia.
                                                                   de la pelicula.
View original page 8Page 10 · Read text
www.butkus.us


L   l) Pull the Battery Chamber Cover (26) in the     2) lnsert batteries according to the diagram on    3) Pull out the slide Cover  (  | 5) and depress the
L  direction indieted by the arrou. to open  it.      the bottom of the amem, and with the positiv€   Shutter Release Button (.1) halfway.  If the gren
    *This emera requires two LR6 (AA) batteries.   and negative poles comectly positioned. Close   Focus Lock tamp (21) comes on, then the
:   *Nickel Cadmium batteries of the recharging     the battery chamber.                            battery charge is sufficient.  lf not. then the
)  type should not be used.                                                                                   batteries are not properly positioned or have
          I ) Schieben Sic dcn l)cckcl dcr IJalteric-kam-      2) Legen Sie die Batterien gemii8 der Skizzc am   run down and must be replaced with new ones..  mcr (26) in l)lcilrichtung aul. xFiirdicsc ('amcra    Boden der Batteriekammer  so ein. dalj Minus-    ln this state, the shutter cannot be releasd even
L  sind z\ci l.R6 (AA) Battcricn notuendig.      und Plus richtig zu liegen kommen und      if the shuler release button  is depressed.
   *Wiederautladbare Nickel-Kadmium  Bat-     schlielSen sic die Batteriekammer  wieder.
    terien kcinnen nicht verscndct werdcn.                                                                                                  -l) Wenn Sie nach dem Aufschieben der Schie-
           | ) Tirer le couvercle du logement de piles (26)    2) Introduire les oiles conform6ment au sch6-   bedabdeckung (15) den Ausldser (4) halb
   dans le rns de la fltche pour I'ouvrir.          ro situd au bas de l'appareil. en positionnant    durchdriicken und die Anzeigelampe  fiir die
    *Cet appareil n6essite deux piles LR6 (AA).     correctement  les poles positif et n6gatif. Fer-   Schlirlespeicherung (grUn) (21) aufleuchtet.
    *L'emploi des piles au nickel edmium de type    mer le logement de pile.                  dann ist der l.adezustand der Batterien  sut.
    recbnrgeable est d6consil16.                                                                      Andernlalls sind sic entueder lalsch eingelegt
     l) Oppna luckan  till batterikammre  (26)     2) L?igg  i battenerna   i lacket enligt miirknin-   oder leer. f)er Verschlu8 l6st dannauch bei voll
   genom att skjuta det i pilcns riktning.           gen si att deras positiva och negativa poler   gedriicktem Ausliiser nicht aus.
   *Kameran behii\er tvi LR6 (AA) battcrier.       placeras rzitt. Si4 tillbaka locket.
   *Nickel-Cadmiumbatteriar av uppladdnings-
    bar typ bdr ej anvdndas                            2) lnserte las pilas de acuerdo al diagrama pro-
      l) Abra la tapa del compartimiento de las pila     vislo en la parte inferior de.la cimara, y con los    126) movi6ndola en direcci6n de la flecha.        POIOS pOSltlVOS y negatrvos correctamente
   ,tEsta cdmera utilia dos pila LR6 (AA).        posiciomdos. Cierre el compartimiento de las   *No se deben usar bateria de niouel-cadmio     pxas.
 --del ripo reergable.
View original page 10Page 11 · Read text
I

                                                                                                                                                                                                                                                                                                                                                                                                                                                                                                         I  I
3) Ouvrir le capot coulissant  ( l5) et enfoncer le   *The batteries must be replaced with new ones   *Les piles doivent €tre remplac6es par des
bouton de declenchement (4) d mi-course. Si la     if the rate of film winding or lighting of the   neuves si la vitesse d'avancement du film ou
lampe verte de verrouillage de nrise au point    Flash Ready Light (22) becomes slow. Replace    d'allumage de la lampe de flash prOt (22) se
(21) s'allume,  la charge des piles est suffisante.    the batteries with two new ones of the same     ralentit. Dans un tel cas. remplacer les piles par
Sinon, les piles ne sont pas correctement mises    type in such a situation.                       des neuves de mOme type.
en place. ou elles sont 6puis6es et doivent etre
remplac6es  par des neuves. Dans cet 6tat. I'ob-   *Wcnn das Filnrr-uckspulcn oderdas Aufleuch-   *Batterierna miste bytas ut om filmframdrag-
turateur ne peut pas Otre d6clench6, mOme si le    ten der Blitzbereitschaftslampe  (22\ tu lange   ningen och blixtaggregatets  uppladdning  sker
bouton de d6clenchement est enfonc6.            dauert. dann sollten Sie die Batterien erneuern.    lAngsamt. Byt samtidigt ut begge batterierna
                                       und zwar stets beide zusammen und mit zwei   som ska vara av samma typ.
3) Oppna skjutluckan  ( I 5) och tryck ner avtry-    gleichen Batterien.
ckaren (4) halvviigs. Om den gr<ina lampan                                            *Las pilas deberdn ser cambiadas por otras
"Fl-" (21) lvser. iir batterierna  tillriickligt lad-                                                   nuevas. cuando disminuya la velocidad de
lade. Lvser inte lamDan dr batterierna antin-                                               avance o de alumbrado de la luz testieo del
tlen urtaddade och miste bytas eller felplace-                                                            flash (22).
rade. I detta lall kan slutaren inte utltisas iiven
om avtryckarknappen trycks ned.
                                            For 24-exposure films at 2OoC (52'F) with new batteries:
3) Abra la tapa deslizante (15) y oprima  el    Bei frischen Battenen. Filme   f ur 24 Aufnahmen, bei 20"C:
bot6n del disparador (4) hasta la mitad de su    Pour des films de 24 images e 2O'C, avec de mouvelles  piles:              se enciende                                 de           Si                                 la l6mpararecorrido.                                           fijaci6n
             (verde)                             que                                              la                                          carga     Antirlfilmrullarforfilm med 2-l exponr'f irg i20 J med nya oatterier:de   enfoque                       (21), significa
de las pilas es suficiente. Si no se enciende. sig-    Para pelicula s de 24 expsiciones a 20 C, con pilas nuevas:
nifica que las pilas no han sido posicionadas                                Without Electronic Flash       With Electronic Flashcorrectamente, o que est6n descargadas y
deben ser reemplazadas por otras. En este       Mansanese Batteries           about 40 rolls                 about 4 rolls
estado. el obturador no podra ser liberado
                                                                                                                                                                                                                                                                                                                                                                                                                                                                                                                                                                        .aunque se oprima el bot6n del disparador.            Alkaline Batteries              about 80 rolls                 about 8 rolls


i
View original page 11Page 12 · Read text
2. Film loading      Filmeinlegenlsiittning av filmen ChargementCarga de la peliculadu filmwww.butkus.us


 I ) Push the Back Cover Latch  (  I 8) in the direc-    2) Insert a film into the Film Chamber (24) so    3) Pull out the film leader slightly, and put the
tion of the arrow and the Back Cover (25) will    that the Rewind Spindle (27) engages with the    film tip on the Take-up Roller  ( l7) so that the
open.                                              spindle of the film cartridge.                      film is bent over the roller. Inside the camera.
                                                                                              there is a mark indicating the position of the
  i ) ()llrrtn \tr' tiri iluri\\\irn(l (li)  rrttltrtt  \rr' tlre    l) l.cgcn Sic cinc I ilrrpatlonc so irt drc I iltn-    film tip. Align the tip with this mark.
 Itrrtkrr;ritl,Lrrr'!r'lLlrrr    r I\) rn l)lr'rlrrclttrrn.g     patl ()r)cr)kanrrncr (l-1). dalJ dic RLick:piri-
 ,irrttk,  l                                            .pindcl 1ll1 irr dic I)alroncnuehsc  cingrcilt.
 l) Pousser le verrou du capot (18) dans le sens    2) Introduire  le film dans le logement du film
de la fldche pour ouvrir le dos (25).               (24), de fagon d ce que l'axe de rebobinage
                                                     (27) s'engage sur la broche correspondante de
              l,i\cl l()r h.ii\\1\clct ( IS ) bakut  r prlcnr     la cartouche du film.
             lrir all,tnn",  hak\t\ekct {15i.

  I ) Abra la tapa posterior (25) deslizado la traba
(18) en la direcci6n de la flecha.
                                             2) Inserte la pelicula dentro de su comparti-
                                           miento (24), de manera que el husillo de rebo-
                                           binado (27) enganche con el husillo del cartu-
                                           cho de pelicula.
View original page 12Page 13 · Read text
-1) Zichen Sie den Ftihrungsstreifen des Filmcs
     etwas heraus. fiihren Sie ihn zur Aulwickelrolle
    (17) und biegen Sie den Ftihrungsstreifcn
      iiber die Rolle. Richten sic den Filmanlang mtt
     der Filmanfangimarkierung   in der Camen aus.
      3) Sortir l6gbrement I'amor€ du film, et placer
      I'extrCmit€ du hlm sur la bobine d'entraine-
    rcnt (17), de fagon i e que le film soil re-
     courb6 sur la bobine d'entrainement.  L'interi-
     eur de I'appareil comporte un reprtre indiquant
      la position de I'extr6mit6 du film. Aligner I'ex-
     tr6mit6 du film sur ce repdre.                     * ln case too much of the film leader has been   4) Depress the outlet of the cartridge in such a
                                                           pulled out. turn the spindle of the cartridge and   manner that the claws of the Sprcket (16)   '
      3) Drag ut en smula av filmen och stick in lllm-    adiust rhe length of the film leader.             engage with the perforations  of the film.
LC   tungan i upptagningsrullen  (17) pA se satt att
     filmen 5r bctjd itver spolen. Det finns ett marke     * Wenn sie zuviel Film aus der Patrone heraus-   4) Driicken Sie so auf das Patronenmaul,  dafj
      inuti kameran som anger fllmtungans placer-    gezogen haben. ziehen Sie etwas Film durch    die Transportwalze   ( I6) mit ihrer Zahnung  in
      ing. Passa in filmen efter detta marke.          Drehen an der Aehse der Patrone wieder in   die Filmperforation eingreift.
                                                            diese zurick.
     3) Tire del extremo de la pelicula, y col6quelo                                                 4) Appuyer sur la sortie de la cartouche, de
     sobre el rodillo de tom  ( l7), de manem que la     * Si une trop grande longueur d'amorce de film   fagon i ce que les griffes de la roue dentee (16)
      pelicula quede doblada sobre el rodillo. Dentro    a ete tire, toumer lbxe de la canouche et ajus-   Jengagent dans les perforations du film.
     de la emara, se provee una marc3 que indica la     ter la longueur la I'amorce du film.     posici6n del extremo de Ia pelicula. Alinee el                                             4) Tryck pi kassettens ovansida si att kug-                                                      * Har fijr mycket film dragits lram ska kasset-   garna pi transporthjulet (16) hakar i filmens     extremo con esta mar€.                                                   tens axel vridas fcir att justera film?indens    perlbrering.
                                                                      liingd.
                                                                                                               4) Apriete la salida del cartucho de manera tal
                                               * Si se ha extraido demasiada.pelicula  guia,   que las perforaciones de la pelicula enganchen
                                                               gire el husillo del cartucho y ajuste el largo.     en los dienta de la rueda dentada (16).
View original page 13Page 19 · Read text
6. Daylight Photography


                                 @  Close-up parallax
                                                        marks
                                o  Auto-focus frame


@ Rahmen der Scharfeautomatik           2) In the nomal photography mode, the area
@ Champ d'image                              inside the frame (indicated by slanting lines),  is
@ Rep6re de parallaxe pour gros-plan      photographed. The lens may be focussed at dis-
O Cadre de mise au point automatique     tances from Llm to infinity.
G) Bildram                                    2) Nornurlerucrsc  konrnrt rier lnhalt Lirr Rah-
(e-i Msrkering  ftir paraltaxfel vid niirbild    mcn\ (dLlrch Schfall\inelrc (jargcstelit)  aLll (ia\
 f  Ram {dr automatisk skbrpetn'              Ilild. I)rrr grit lif  ,\Lrlnahmcabitand!  \orl
     stdllning                                     nrchr ais l.i nr brs uncnciliclt
@ Campo del marco d€ la fotografia
@ Marca de paralaie de acercamiento      2) En mode de photographie normal. la zone                                                                           I'int6rieure du cadre (indiquEe parO Marco de enfoque automStico           comprise  i                                                       les lignes inclin6es) sera photogmphi6e.  L'ob-
 | ) Open the Slide Cover  (l 5) and look straight     jectif peut etre mis au point sur des distances
through the Eyepiece (23).                      comprises entre l.l mbtre et I'inllni.
 It Ollnen Sic dir Schrcbeabdeckun{ {l5) unrj bhckcn Sit gcradcaus dutch das Suchctt'      l) \ id rrornrallirtLrgrafi:nng  arbildas onrrirdci
luhr  (2-'l)                                                         rrlrlnr ranlen (angt\et a\ lularldr' llrllrirl.  \loll'.
l) Ouvrir le mpot coulisunt (15) et regarder   pa clt a\\tllDd nrcllan  I.l nrctcr ocll oand Lghr,
tout droit dans I'oculaire de vis6e (23).                 f,atl loku\ctit:.
 I t Oppna skjutluckan   (  I 5) och titta rakt gcnon'     2) En el modo nomal, se fotografiar6 la parte
okuiaret (2-1)                             que esti dentro del cuadro (indimdo por Ias
I ) Abra la tapa desliante (15) y mire en linea    lineas sesgadas). La lente puede ser enfoeda
recta a trav€s del ocular (23).                    para distancias desde I,lm hasta el infinito.
View original page 19Page 20 · Read text
x  ffi
      o glgwww.butkus.us                 liiEiggi Eiigiililils!  ffi
            itii;EEige€ii€ei;
                                      gigg
              €ix*E.Eii;;, Ei;
               enE: lz?iu a;a!F gr: i;E:
                 :raE 5gEiB 3i5t: *9E 1s;E


    G.
    !.
             giEg.#;giigiEEggii,

               ig:aiii igig*i';.ffEgi
View original page 20Page 21 · Read text
5) Appuyer lentement sur le bouton de d6clen-   *En algunos casos, poco frecuentes, materias    suivants ou pour tout autre sujet dont la
chement (4) pour d6clencher l'obturateur.    extranas adheridas a las baterias pueden hacer    mesure de h distance appareil-d-sirjet  est ilif-
Lorsque la photo a 6t6 r€alisee, le film avance    que la liimpara de enclavamiento del enfoque      ficile.
automatiquement  d'une vue.                       (21) y la hmpara indicadora  (roja) permanez-    (l) Objets noirs, gris ou autres, r6flEchissant
*ll peut arrjver que la distance de I'appareil au   can encendidas despu6s de oprimir el bot6n del    peu la lumibre.
sujet ne soit pas mesurOe avec pr6cision si seule-    disparador. Limpie las baterias.                     (2).Objets brillants (par exemple, carrosserie de
ment une partie du sujet se situe dans le cadre                                                               volture).
de mise au point automatique, ou si le sujet est                                                              (3) Objets Cmettant de la lumidre (par exemple,
trop petit.                                                                                           feu d'artific.e)
*ll arrive, quoique cela soit extrOmement rare,   Notes Regarding Distance Measurement     (4) Sujets lus i travers des panneaux vitr6s
que les salissures depos6es sur les piles provo-   The auto.focus system may not operate for the   Anmarkningar om avstdndsmatning
quent un allumage maintenu du t6moin de    following subjects. It is advisable to switch to   Den automatiska skiirpeinst6llningen kanske
blocage de focale (21) et de la lampet6moin     the focus-lock mode for the following subjects    inte fungerar fcir f<iljande motiv. Vi rekom-
(rouge) aprbs que I'on ait appuy6 sur le    or for any other subjects for which  it is difficult   menderar att kameran  stiills in pi list fokuser-
d6clencheur. Nettoyer les piles.                   to measure the camera-to-subject  distance.        ing fcir fciljande motiv och alla andra diir avst-
5i trtlos slutarcn genonl att lingsamt trycka     (l) Black, grey and other objects with a low    indsinstiillningen ir svir.
ner avtryckarknappen (41. Filmen dras fram     light reflectivity.                                                                 ( l) Svarta och gria fciremil med dilig ljusre-
automatiskt en bildruta efter fotografering.        (2) Glossy objects (e.g. car bodies)               flexionsfdrmiga.
*Om motivet 5r litet och endast en del av det iir    (3) Light emitting objects (e.g. fire-works)        (2) Gliinsande fciremAl (bilkaross tex).
inom ramen fijr automatisk skiirpeinstiillning.     (4) Subjects visible through glass panes           (3) Lysande fiiremil (tomtebloss  tex).
lkan ibland avstindsinstiillningen  inte gdras    H rnwerse  f ur dre Entternungsmessung           (,4) Motir, bakom €n glaq!-1113
korrekt.                              Manchmal kann die automatische Schar-   Notas sobre la medici6n de la distancia
 *l mycket ovanliga  fall kan smuts pe batterier-     l'einstellung die Entfernung nicht korrekt    El sistema de enfoque autom6tico podria no
na orsaka att indikatorlampan  fcir fokuslAs     feststellen, etwa bei den folgenden Objekten.    operar en el caso de los siguientes sujetos. Se
1(2l) och den (rtlxJa) indikatorlampan fortsAtter   benutzen Sie in diesem Fall die Schiir-    aconseja cambiar al modo de enfoque auto-
jatt lvv elier det avtryckaren tryckts. Rengcir    fespeicherung                                  mAtico en el caso de los siguientes sujetos. o
 Dattcnerna.                                         (l) Schwarze. graue und andere Objekte, die    cualquier otro sujeto que presente dificultades
 5) Oprima lentamente el bot6n del disparador    das Licht schlecht reflektrercn.              en la medici6n de la distancia de c6mara a
 (4) para liberar el obturador. La pelicula avan-    (2) Gldnzende Objekte (2.B. Autos)                  suieto.
 zard autom6ticamente una exposici6n cada vez    (3) Lruchtende Objekte (2.B. Feuerwerke)              ( l) Objetos negros, grises u otros con una baja
que se tome una fotografia.                         (4\ Objekr,' hinter Glasschcrhen                      reflectividad de luz.
*Podria ocurrir que la distancia de c6mara a   Notes relatives  i la mesure de la distance     (2) Objetos brillantes (por ej. carrocerias de
 sujeto no sea medida con precisi6n, cuando   Le systbme de mise au point automatique     automoviles).
 s6lo una parte del sujeto quede dentro del cua-    risque de ne pas fonctionner pour les sujets     (3) Objetos emisores de luz (por ejemplo, fuegs
 dro de enfoque autom6tico, o cuando el sujeto    suivants.  Il est conseill6 de passer au mode de   de artificio).
pea demasiado pequefro.                          verrouillage de mise au point pour les sujets     (4) Sujetos visibles a trav6s de cristales.,i
L
View original page 21
Page 22 · Read text
www.butkus.us


l) When the red lamp in the viewfinder lights   2) Depress the elrctronic Flash Operating   3) The Flash Ready Light (22) will light to
upon slight depression of the Shutter Release    Button  ( l4) and the electronic {Iash will pop up,    indicate that the rrcharge  is complete.
Button (4). the subject is too dimly  lit. Switch   turning on the switch.
to the electronic flash mode.                                                                                3) iWenn die Blitzb€reitschaftslampe  (22) auf-
 l) Wenn bei halb durchgedriicktem  Ausltjser   2) Driicken Sie den Einschaltknopf (14) des    leuchtet.  ist der Blitz aufgeladen.
(4) die rote tampe im Sucher leuchtet, dann    Elektronenblitzger:its. Es springt dann hemus
ist das Aufnahmelicht 7u schwach und das   und schaltet sich ein.                            3) ta lampe de flash pret (22) s'allumera pour
Btitzger:it mu8 eingesetzt werden.                                                               indiquer la fin de Ia charge.
                                                                                flash 6lrctronique                                                                  le bouton                                                      du                                          2) Enfoner                       dans                                  le viseur                   rouge           la lampe  I ) Quand                                            pour faire                                                                     surgir ce                                                                 demier                                                                  en I'enclen-    l) Nlir blixtkontrollampan  (22t lyser ar aggre-                                            sur   (14)                               presslon        pendant                        lbgbre              unes'allum€
le bouton de d6clenchement  (4), le sujet est   chant.                                           gatet uppladdat.
insuffisamment  6clai16. Passer sur le mode
de photographie au flash €lectronique.         2) Tryck in blixtomkopplaren  (14) mh elek-    3) ta luz testigo del flash (22) seencender6 para
 l) NAr avtryckaren (4) trycks ned halvviigs    tronblixten skjuts upp varuid den ar khr att   indier que se ha efectuado la recarga.
och den ritda lampan   i stjkaren lyser med fast   anvdndas.
sken. betyder det att motivet iir fdr svagt
upplyst.  Stiill i si fall in kameran ftjr blixt-   2) Oprim el int€rruptor del flash electr6nico                                                         (14). El flash electr6nico sri eyfftado, conec-[otosraferinp,.
 | ) Li luz roja que se enciende en el visor al   tfndose el interruptor.
oprimir ligemmente el bot6n del disparador
(4), indica que el sujeto est6 debilmente
iluminado y que w debe cambiar al modo de
flash electr6nico.
View original page 22Page 24 · Read text
www.butkus.us                                         *The electronic flash will not operate, or the  *Om artrvckarcn trycks ner innan blixt-
                                                        flash will be weak, resulting in a dim picture if    kontrollampa (22) tands. utliises ingen bli.rt
                                               the shutter release button is depressed before    ellcr en slag sitian nted en mijrk bild sonr
                                               the Flash Ready Light (22) will lights up.           resul tat.
                                         *Note that recharging will stop and the flash    *Observera att uppladdnrngcn arbrtts och
                                            ready light will not light if the shutter re-    blixtkontrollampa  llser rnte om artrrckarcn
                                                      lease button is kept depressed while the elec-    hills nedtrl,'ckt under uppladdning ar blr.r-
                                                      tronic flash is recharging.                           taggregalet.
                                       xWe nn der Auslrjser gcdrtickt n ird. bcr or die'   *El flash electr6nico no operar6, o el flash
                                                      Blitzbereitschatisanzergc (22) aut)euchtet, dann   accionar6 d6bilmente. resultando una foto
                                                      lunktioniert der Blitz cntwcdcr nicht oder zu    osbura, si se oprime el bot6n del disparador
Distance for Flash Photography          sclru'ach. so daiJ eine unterbelichti:te Aut-    antes que se encienda la la'mpara indicadora e
Take pictures of the subject at a camrjra+o-    nahme entsteht.                                    recarga  (22).
subject distance of l.l4.5m (3.6-l4.5ft) when    *Beachten Sic. datl der Aulladevorgang des   *N6tese que se interrumpir6 la recirrga y que
using the flash mode.                                 Blrtzgerites unterbrochen wird. und die Blitz-   no se encender6 la l6mpara indicadora de re-
                                                 bcreitschaltsanzcigc nicht aufluchtct. wcnn   carga en caso que se mantenga oprimido el
Autnahmeabstiinde mit Blitz            Sic den Ausloser gedliickt halten. wdhrend    bot6n del disparador mientras se est6 recar-
Das BlitzgerAt bretet genug l-icht bcr Aul'nah-     sich das Blitzgeriit auflddt.                     sando el flash electr6nico.
mcabstdnden zwischen l.lm und 4.5rn.                                            *Le flash 6lectronique ne fonctionnera pas, ou
Distances pour la photographie au       l'6clair sera faible. produisant une image som-
flash                                                 bre, si le bouton de d6clenchement est enfonc6
R6gler la distance de I'appareil au sujet entre    avant que le t6moin de flash prEt (22) ne s'al-
 I,I et       4,5 m pour le mode de photographie au    lume.*Si le bouton de d6clenchement est conserv6flash      6lectronique.
                                               enfonc6 pendant la recharge du flash 6lectro-
Avsti nd vid blixtfotografering            nique, la recharge s'arr0tera et le t€moin de
Ar stindct till rnotiret biir rara l.l-4.5 nretcr     flash pr6t ne s'allumera  pas.
rid lotogralcring mcd blixt.
Distancias para fogotrafias con
flash
En el modo de flash electr6nico. tome las fotos
a una distancia de eimara a suieto de  I . I - 4,5m.
View original page 24Page 25 · Read text
Blitzaufnahmen bei Tageslicht
                                                       \\crrn sich lhr \lotir  rnt Schattcn rxicr ncbeir
                                                  cincnr l-cnstcr betinclct. schaitcn Src den lllrti
                                                                                  r'il]. \\cnn tjie \trlnalrrnccnlt( rnunS  ,/\\r\!it(.r
                                                                                                  l. Itn Lrrtti .lrn lrcgt. riairrt ucrticn \lrltir    tirr,'
                                                           llrntcrgrunrl  brillrarrt und scharl abgcbildc,
                                     Photographie au flash en lumi6re
                                 du jour Plage de prise de vues
                                    pour image nette
                                      Commuter sur le mode flash pour des sujets d
                                                    l'ombre ou se trouvant d c6t6 d'une fenOtre. Les
                                                        sujets et leur fond seront photographi6s d'une
                                               manidre lumineuse et nette, tant que la photo
                                                            est r€alis6e avec une distance entre I'appareil et
                                                              le sujet comprise entre l,l et 3 m.
                                         Blixtfotografering  i dagsljus
With Flash                Non Flash       \rrr.rrrri blirt riJ  lillilrrill(tirr-u lrUlt,rtrr
                                          :kugga cllcI hrccjr ttj tonstci \lotl\ct  ()cl)
 Daylight Flash Photography               frakgrundcn  blrr du rAl uppir:t rrcl ar:thr',ti pi, Switch to the flash mode for subjects in the              i . l-l rnctcr.
 shade or beside windows. The subiects and    Fotografia con flash a la luz del dia
 their background will be brightly and clearly    Margen para poder tomar fotos nitidas Cam-
 photographed as long as the picture is taken at      bie al modo de flash, para fujetos a contraluz o
 a camera-to-subject  distance of l.l-3m (3.6-     situados detr6s de las ventanas. Los suietos v su
 9.9  ir).                                      fondo serirn fotografiados  clara y nitidamente.
                                                siempre que se tomen las fotos a una distancia
                                            de cdmara a srrjeto de l.l--lm.
View original page 25Page 28 · Read text
Mode de verrouillage de mise au point                              www.butkus.us
Modo de fijaci6n de enfoque

2) Frame the subject keeping the shutter release   *There is no change in the focussed position    *Skiirpan iindras inte efter det. avtryckark-
 button halfway depressed and then full depress   once the shutter release button has been half-   nappen tryckts ned halwiigs. Andra diirfcir
the shutter release button. A sharp picture can   way depressed. Therefore, do not change the    inte avstindet  till motivet innan slutaren utl6-
thus be taken of subjects which are not in the   camera-to-subject distance once the shutter     ses.
                                                                               *Kamerans            frame.                                                       releaseauto-focus                                                              has                                                      button                                                           been                                                                   halfway                                                                                      depressed.                                                                                                                              instiillning                                                                                                                            fokuslis                                                                                                                                                                                                                                           llitt                                                                                                kan                                                                                                    pi           Src den Auslciser halb gedrtickt,   *The                                                       focus                                                             lock l1 l.asscn                                                  mode                                                                can                                                                  be released                                                                               bv sim-                                                                                                                     sleppa                                                                                                                            awry-                                                                                                      bara                                                                                        kopplas frin                                                                                 genom att
 schwenken Sie auf den gewiinschten  Bildaus-    ply removing the finger from the shutter r;lease   ckaren. Bildskiirpan kan ddrefter stAllas in
 schnitt und drticken den Auslciser ganz durch,    button. Refocussing can then be performed.     automatiskt som vanligt.
 und sie bekommen ihr Motiv scharf auf den
 Film.                                          *Solange der Auslciser halb gedriickt ist, bleibt   *No hay cambio en la posici6n enfocada una
 2) Cadrer le sujet en conservant  le bouton de   die Entfernungseinstellung  unverdndert. Ver-   vez que se oprima el bot6n del disparador hasta
 d6clenchement enfonc6  ir mi-course. puis en-    iindern Sie also nicht in der Zwischenzeit den    la mitad de su recorrido. Por lo tanto. no cam-
 foncer ce dernier d tbnd. ll est ainsi oossible    Aufnahmeabstand.                                 bie la distancia de c'imara a sujeto una \ez que
                                *Zum Lcischen der Schiirfespeicherung  neh-   se oprima el bot6n del disparador hasta la d'obtenir une prise de ',ue nette de sujets ne se
 trouvant. pas dans le cadre de mise au point   men Sie einfach den Finger vom Ausl6ser, und    mitad.
automatloue.                                    Sie kcinnen wieder neu scharfstellen.
 2) Komponera bilden med avtryckarknappen                                             *El modo de frjaci6n de enfoque puede ser
 alltldmt halvt nedtryckt och tryck sedan ner   *Dbs que le bouton de d€clenchement a 6te   liberado quitando simplemente el dedo del
avtryckaren  helt. Pi detta vis kan en skarp bild   enfonc6 jusqu'd micourse, il n'y a plus de   bot6n del disparador. Entonces, se podr6
 tas av motiv som inte befinner sis inom ramen    modification de la position mise au point. Par   volver a efectuar el enfoque.
 fcir automatisk skiirpeinstdllningl                cons6quent. ne pas modifier la diitance de
2) Encuadre el sujeto manteniendo oprimido el    I'appareil au sujet dbs que le bouton de de-
bot6n del disparador hasta la mitad de su re-   clenchement a ete enfonce jusqu'd mi+ourse.
corrido, y luego oprima a fondo el bot6n del     * Le mode de verrouillage de mise au point peut
disparador. De esta manera, se podr6n tomar    0tre liber6 en retirant simplement  le doigt du
fotos nitidas de suietos que no est6n dentro del   bouton de d6clenchement.  [-a mise au ooint
marco de enfoque automdtico.                   peut alors Otre ex6cut6e a nouveau.
View original page 28Page 29 · Read text
Specifications of the Konica MG             --l

Type: Automatic focus, automatic exposure   Film speed settings: ISO 50. lm. 200.400.   Frame counter: Additive type, automatic
35mm slide cover type lens shutter camera with     r000.                                                        reset.
built-in auto-flash. automatic wind and auto-    Finder: Reverse galileo type albada direct view   Self-timer: Electronic timer activated bv
matic rewind mechanism.                       finder. 0.43X magnification, bright frame    simultaneous  depression of timer switch and
Format: 24 X 36mm negative. l-15 (35mm)film     (plcture area) covers approx. 80/6 of finder    shutter; approx. l0 sec. delay indicated by
Lens: Konica Hexanon 35mm F 3.5, 4    area; auto-focus frame and parallax correction     blinking red light.
groups, 4 elements.                             marks.                               Power consumption: At room temp. (20'C.
Shutter: Between-theJens electronic shutter.    Flash: Built-in electronic  flash: couoled with    52'F), w/ neu' alkaline batteries, 24 frame film,
 I l0-lr500th  sec.                              auto-focus mechanism  (auto-flash);'coupling    approx. 80 rolls can be exposed without flash,
Shutter release: Electromagnetic  release.   range   | . | -4.5m  (-j.6- 14.5 ft); guidc numbers   approx. 8 rolls with flash; wl new manganese
shuts off automatically when slide cover  is   coupled to ISO settings; recycle light; equiva-    batteries, approx. 40 rolls can be exposed
closed.                                                   lent GNI2 (lSO I00.m); recycle rime 8 sec. wi'      \.r'ithout flash, 4 rolls w/flash.
Focus: Automatic focusing (active-type in-   new alkaline batteries, l0 sec. wi new man-   Power source: 2x 1.5 volt LR6 (AA) batte ry
frared type system), effective range  l.  I m   ganese batteries.                                     cells (Nickel cadmium batteries may not be
through  infinity, with focus lock mechanism   Film loading: Konica autoload system           used).
and finder-peripheral focus lock LED.         Film advance: Internal electric motor ad-   size, weight: ll9x7 lx44.5mm. (4.7"x2.8"
Aperture: Electronically controlled program    vances and reu,inds film automaticallr,. film    X1.8").288g (10.2 ot) (without batteries).   .
auto-exposure  system.                       adrance one frame sec.: film advance motor   The abor e specifications are based on the results
AE coupling range: EV9 (F 3.5 at I 30th   stops automatically at end of roll and red light    ol tests conducted b1, Koniciis.
sec.)-EVI7 (Fl l6 at I 500th sec.) for ISO 100;    flashes to signal film end; rewind switch for    1-he specilications and cxtcrnal appcarance ol'
at ISO 400 coupling effective as low as EV7;   automatic rewind (w,lock); red lamp lights     thrs product are subjcct to alteration uithout
underexposure warning signal activated  at   durine rewind.                                        not ice.
EV9 (rSO r00).
                                                KONISHIROKU PHOTO.l  IND, CO., LTD.                                                        No 26 2. Nrshrshrnluku  -Chome, Shrnluku-ku Tokyo 160. Japan
                                                KONICA CAMERA CORPORATION
View original page 29Page 31 · Read text
let du filmlBehandla kameran och filmen korrekt,/Uso correcto de h c5mara y
                                                                          and                                                          Camera                                                               Storing                                     Batteries                  Removing
                                                                                                     gas                                                                             Formalin                                                  to                     You are advised   tL),      /---,   r\.                                                             Film -                                                             emitted                                                         from plastic                        takethebatteriesoutof-
                                                                                                                          etc.    Di-]f7r?-1va        rt  I        the camera if it is notto                        fumiture and tile,                     be used for more than                     produces an adverse
     dlttrbI1l:l             l,ilioJfi:'o".itive and                             effectfilm. Keepon camerasyourcamenrand
    negative poles of the batteries with a piece of   away from these materials.ials. UseUse film before the
   dry cloth  if they are stained.                    date printed on the film box. and when  it has
   Herausmehmen  der Batterian Wenn Sie   been exposed take  it for processing as soon as
   die Camera ldnger als zwei Wochen nicht     possible.
    benutzen. dann sollten Sie die Batterien  ent-   Sichere Behandlung des Filmmaterials
    nehmen.                                     Es ist zu empfehlen, den Film vor Ablauf des
   Wischen Sie verschmutzte Batteriepole (Pluspol   auf der Verpackung aufgedruckten  Ver-
   und Minuspol) mit einem trockenen Tuch ab.    brauchsdatums zu belichten. Nachdem der
                                                                   wurde.                                                                                              sollte er                                                                           betichtet                                        Film vollstlindig                 piles          des    Retrait                                                                       gegeben                                                                                       werden.                                          zum Entwickeln                               si- ceIl dernierest conseill6ne doitde sortirpas Otreles    sofort    piles de              I'appareil
                                                   du                                  semaines.          pendant                    plus                                                Protection                     de deux     utilis6                                                                   film -   ll estde conseill6la date d'emploid'utilis6                          positifs                                                                     expiration                                 et negatifs                                      des piles ir   un               les p6les                                                       film avant    Essuyer
      I' ide d'un chiffon sec s'ils sont taches.          imprim6e sur sa boite. Lorsqu'un film a 6t6
   UrAgning av batterier  Vi rekommen-    entibrement expose, le faire dEvelopper im-
    derar att batterierna  tas ut ur kameran om den   m6diatement. Certains produits chimiques
     inte ska anvdndas pi tvi veckor eller mer.      pour mobiher, comme la formaline par exem-
   Torka av smuts frin batteriernas poler med en    ple, risquent d'endommager  les films.
    torr trasa fiir att erhilla god kontakt.         Filmens fcirvaring    Film iir flirskvara.                                                                        - Anviind filmen fore   Descarga de las pilas    Es aconsejable ex-   Fdrvara filmen svalt.    traer las pilas cuando no- vaya a emplearse la   angiven sista fcirbrukningsdag. Lemna in fil-
   c6mara durante m6s de 2 semanas.           men till framkallning snarast efter exponering.    Limpie los polos positivos y negativos de kN    Formalin. som ofta anvdnds  till mcibler, kan
    pilas con un pan6 seco, en caso que est6n    skada Illmen.
                                                                   la pelicuh                                            de     sucros.                                 Cuidados                                                                     de su fecha-  Esde aconsejableexpiraci6n,                                                                         antes                                                         usar la pelicula
                                                    segrin figura en la caja. Cuando ha sacado
                                                    todas las fotos. ll6velo de inmediato a revelar.
                                             Tenga en cuenta que agentes quimicos como el
                                               Formalin, que s€ usa en muebles, pueden
                                                        dafiar la pelicula en ciertas ocasiones.
View original page 31Page 33 · Read text
Sudden Tempera-   con calefacci6n. [a condensaci6n  resultante
                    Changes                    ture
                    lens                  may cloud-  overThe
                                     if the camera is quickly
                     brought from the cold                     your camera is dam-
                      outside into a heated                     aged or does not op-
                 room. This clouding                          erate properly, do not
will soon disappear but any water droplets                                try to repair  it yourself.
remaining with the camera may become a                   Take it to the nearest
source of failure Sudden temperature changes
should be avoided wherever possible.
Plcitzliche Temperaturdnderungen          to disassemble it yourself.
Wenn die Camera aus gro8er Kdlte in einen-   Versagen der Camera Vcrsuchen Sie auf
warmen Raum gebracht wird, dann kann   gar keinen Fall die Camera selbst zu zerlegen.
das Objektiv anlaufen. Dieser Beschlag ver-  da sie mit einem Hochspannungsschaltkreis
schwindct zwar bald uicdcr. abe r cs k(inncn    ausger[istet ist. Bringen Sie die Camera zu
Wassertrbpfchen im innern zurtickbleiben.  die   lhrem Fachhiindler. uo Sie sie gekauft haben
Funktionsstcirungen hervorrul'en kcinnen.   oder zu einer Kundendienststelle  unserer Fir-
Vermeiden Sie rasche Temperaturwechsel    ma.
nach Mciglishkeit.                                          de panne                                   En cas                                                   de d6monter-  Que: quesoim€mesoit le cas,I'appa-ne                                                      essayerVariations          brusques de tem6rature      jamaisL'objectif peut s'embuer si I'appareil est rapide--      ieil, car  il est dot6 d'un circuit i haute tension:
ment d6plac6 d'un endroit ext6rieur froid dans   mais confier toute r6paration 6ventuelle a un
une pibce chaude. Cette bu6e dis paraitra   centre de r6paration de la soci6t6 Konica ou au
rapidement mais des gouttelettes d'ea.u restant   revendur qui a fournit I'appareil.
sur I'appareil peuvent Ctre une source de panne.  Kameran fungerar ej    Fcirsdk inte under
Dans la mesure du possible, les variations    n6gra omstandigheter  att plocka isdr kameran
brusques de temp€rature doivent €tre 6vit6es.     sjiilv eftersom den dr utrustad med en
Pkitsliga temperaturfiiriindringar Lin-    hcigspiinningskrets. LAmna in kameran for
sen pi objektivet kan utsettas fiir imbildning    reparation.
                                                                fallas                                              de                                       rum.   Encaso                                 varmt                          kyla  till ett niir kameran                tas in frin
                                                   Ud.                                                    mismo-  Nuncaen ningunatrate decircunstan-desarmar                                                        la cimara                                        utgdra                          kan                  vattendroppar     kvarvarandeSmi
orsak  till felfunktion och kraftiga temperatur-      cia, ya que estii equipada con un circuito de alta
foriindringar  bcir undvikas.                       tensi6n y elementos de suma precisi6n. Lieve la
Cambios bruscos de temperature    Evite   cimara al establecimiento donde la adquiri6 o                                                     de servicio autorizado de Konicalos cambios bruscos de temperatura. -El obje-   a un @ntro
tivo podria empaflarse  si se lleva repentina-    para hacerla reparar.
mente la c6mara, de un lugar frio a un cuarto                             Printed in Japan 4o7E zo
View original page 33From the M. Butkus archive. Original publisher and archive notices are retained.
Check the model and edition against your equipment.
PDF verified 2026-10-10.