Film cameras
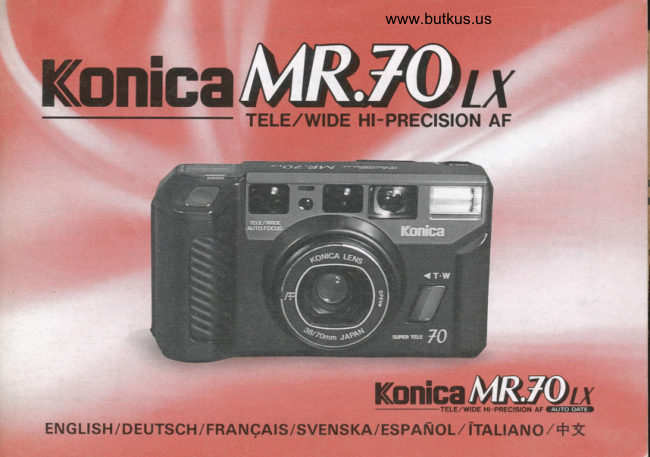
Konica Mr 70 Lx User manual
User manual for Konica Mr 70 Lx. 56 pages in German, French, Spanish, Italian, Dutch. Read the original PDF, download or print a copy without registration.
56 pagesGerman, French, Spanish, Italian, Dutch11.6 MB PDF
Loading your manual…Open PDF directly
Document details
- Brand
- Konica
- Model / document
- Konica Mr 70 Lx
- Document type
- User manual
- Language
- German, French, Spanish, Italian, Dutch
- Pages
- 56
- File size
- 11.6 MB
- Category
- Film cameras
- Document date
- Not specified in catalog
Search available document text
Find a term, then jump to its page in the original PDF. Image-only pages may not be searchable; check the PDF for exact wording and diagrams.
Page 1 · Read text
www.butkus.us


                    TELE,/WIDE HI.PRECISION AFKonicaMu


                  KqELq,p-mru#
EN G Lr s H / D E urscH  / FRA N gAts/svENs KA/EspnN ol,z itnLlAN o / + t
View original page 1Page 2 · Read text
Venmo @mike-butkus-camera  Ph. 2083
PayPal Name  Lynn@butkus.org      www.PayPal.me/lynnbutkus
View original page 2
Page 4 · Read text
www.butkus.us


4. Select the lens focal length (WIDE   5. Auslciseknopl drticken, um eine   6. When the last frames of the film has
  *TELE).                           Aulnahme zu belichten. (Bei Dunkel-      been used. Dress the rewind switch.
4. Objektivart wrihlen (Weitwinkel      heit werden die Aulnahmen auto-   6. Nach Beliihrung aller Bilder einer
   *Tele).                                 matisch mit Blitz gemacht.)                Films Filmrtickspulschalter  betaitigen.
4. S6lectionner la longueur focale   5. Appuyer sur le poussoir du d6clen-   6. Lorsque toutes les vues de la pellicule
   (Grand angulaire *Telephoto   ).            cheur pour prendre une photographie.      ont Ct€ exposees, appuyer sur le pous-
4. Valj objektiv (vidvinkel*telefoto).          (Lorsqu'il fait sombre,  la prise de pho-       soir de rembobinase.
4. Seleccione el objetivo (Wide*Tele).       tographie est faite automatiquement    6. Tryck pi iterspolningsknappen nar
4. Seegliere I'obiettivo (Grandangolare      au flash.)                                 lilmen dr slut.
   .,Tele).                               5. Ta bilden genom att trycka ned av-   6. Cuando todos los fotogramas de la
4. ;E+++HF.t1fr.')  ; (t'' fr *  ialttr  )              tryckarknappcn. (Vid svagt ljus brdnns       pelicula han sido expuestos, prestone
                                         en blixt av automatiskt.)                         el bot6n de rebobinado.
                                      5. Para fotografiar presione el dispara-   6. Quando la pellicola i    f inita, premere
                                          dor. (Cuando este oscuro, las foto-       I'interruttore di riavvolgimento.
                                                     grafias                                                           se toman autometicamente  con   6. +*.F.t&tr "  ffi tr, tn8r-lrt 7:"                                                      flash).
                                      5. Premere  il pulsante di scatto per ri-
                                          prendere una foto. (Quando b oscuro,
5. Press the shutter release button to take        le foto sono automaticamente riprese
   a picture. (lf there  is not enough light       col flash)
   the built-in flash svstem oDerates auto-   5.
   maticallv.)                                                     (
View original page 4Page 10 · Read text
www.butkus.us      Loading the Batteries Einlegen der Batterien Mise                                            en place des piles Satt forst    il.       batterierna, Cargue las pilas Inserire anzitutto le batterie #.,\€iU


 1 ) Pull the knob on the battery chamber   2) Insert the batteries with "*" and "  "   3) Push the battery chamber cover until
   cover @ in the direction of the arrow        set as indicated.                                           it locks.
   to open the cover.                    2) I)ie Battcfien polaritritsrichtig rvie   3) Battcriclachdeckel  andrrickcn bis er
1) Knopl arn Batterielachdeckel @ iD       gezeigt cinlcgcn.                             vcrncgclt  lst.
   Pleilrichtung :chicben und l)eckel  ijl l:   2) Mettre les piles en place en respectant   3) Appuyer sur le couvercle du compar-
   nen.                                             les polarit6s "+" et "-".                 timent des piles jusqu'ir ce qu'il se
1) Tirer le bouton @ du couvercle du   2) Siitt ibattcrierna med polerna"*"och       verrouille.
  compartiment des piles dans le sens      "  "cnligt bildcn.                  3)  | ry-ck tillbrka locket sl att dc{ st,ings.
   indiqu6 par la fldche pour ouvrir le   2) Inserte las pilas con las polaridades   3) Empuje  la tapa del compartimiento de
   couvercle.                                   "f " y "-" colocadas como est6 indi-       las pilas hasta que se cierre.
1) 0ppna batterilockct llenom att drii      cado.                                 3) Spirtp'err  il e,'perr'hr,' J(l (,,nrp.illr-  upp knappen @ i pilens riktning.        2) Inscrirc  lc batterie con "*" c "  " alla     mento battcrie linchc si blocca.
1 | Tire de la perilla en la tapa del com-      posizionc indicata.                     3) #t,l.€rtU'i"   partimienlo                         pilas             de las                                        la              @ en                                     direc-   2) # ,\4r,iU. ftE'tl'i1it €i$t&1+(Ofu                   para                                      la       de la flecha                                    tapa.                          abrir      .Ici6n1 )   irare la rnanopola sul coperchio del      e)i+a'T'+F'^.
   conrpartimcnio  battcrie @ nella dire-
     u ronc della lreccia pcr aprirc  il coper-
   chlo.
1)l{ f.ffiFF-rfi  I: Etilli\tri{.?;h
 @, f]+€r&'+;t.
View original page 10Page 11 · Read text
Panel display for battery setting
   Anzeige des Ladezustands der Bat-
     terie
    Affichage de l'6tat des piles
    Angivning for batteri
    Indicacion del panel para la instala-
    ci6n de las pilas                          Battery symbol (D) is blank when the bat-   Battery symbol is black when new batter-
   Quadro visualizzatore per la colloca-   tery voltage is low or batteries are not    ies are set properly.
    zione delle batterie                       properly loaded.                           Battcricsrrnbol ist schwarz, bei richtig
   #,\€iuF.ii!tm                        Batteriesymbol (D) ist leer, bei schwacher    eing.clr'glcn neuen llalterien.
                                            Batteriespannung oder bei falsch einge-   L'indicateur de l'6tat des piles est noir
                                               legten Batterien.                           lorsque des piles neuves ont 6t6 mises en
                                                   L'indicateur de l'6tat des piles (0) est vide   place correctement.
                                              lorsque la tension des piles est faible ou    Flattelisvntbolcn  iir svart ndr nya batter-
                                          que celles-ci ont et6 incorectement mises    rer ar isatta korrekt.
                                          en place.                                 El simbolo de las pilas es negro cuando
                                             Batterisymbolen  (0) ar tom utan batteri,    las pilas nuevas est6n colocadas correcta-
                                                    splinningsfall och fel isiittning:             mente.
                                                    El simbolo de las pilas {0} no se ve cuando      ll srnibolo delle batterie b nero ouando le
                                                la tensi6n es baja o no estin cargadas   nuove batterie sono montate nella manie-
                                                 correctamente.                                 ra corretta.
                                                                           bianco                                                            delle batterie                                                                            (01 b                                                                      ll sirnbolo                                                                      rE{E# /. *,i €,tl! ffi A'q #.                                       quando                                                                              b                                                                                  basso                                                                                                                  il voltaggio                                                                              delle batterie
                                         oppure quando la batteria non b montata
                                                    nel modo giusto.
                                          t  it E €lrt EI € rll6E. #f#  €,iruB-'l,
                                    €,&f+E(D) haE"


10
View original page 11Page 13 · Read text
Sensibilite de la pellicule Filmhastighet  Ct   Film Speed Filmempfindlichkeit  E.   Sensibilidad de la pelicula Velocita della pellicola' ffif,*rfiE
                                 When DX coded film is loaded into the Vid isdttning av l)X-kodad film stAlls
                                          camera, the film speed (15050-1600) is  filmhastigheten (lSO50-1600) in auto-
                                                automatically set.                         matiskt.
                                        * With non-DX film, the film speed * Hastigheten stiills in pi ISO 100 fijr
                                                    defaults to ISO 100.                 annan film iin DX.
                                                     Bei Verwendung von DX-codiertem Film    Si se ha cargado pelicula con c6digo DX
                                                      stellt sich die Filmempfindlichkeit im  en la c6mara, la sensibilidad (50-1600
                                             Bereich von ISO 50-1600 automatisch   ISO) se ajusta automdticamente.
                                                          ein.                                  * Con peliculas sin c6digo DX, la sensi-
                                        * Bei l'ehlender DX-Codieruns  stellt       bilidad se aiusta a 100 lSO.
                                                        sich die Filmempfindlichkeit iuf ISO  Quando una pellicola DX b caricata nella
                                                 100 ein.                              macchina fotografica,  la velocitd   ( lSO50-
                                            Lorsqu'une pellicule portant  le code DX    1600) e l'issata automaticamente.
                                                    est mise en place dans I'appareil,  la sen-   * Con una pellicola non-DX,  la velociti
                                                     sibilit6 (lSO 50-1600) est rbgl6e auto-     b fissata a ISO 100.
                                           matlquement.                                           l?r)fr E DX "&'64* /..E1i.fllfJllt, l'*)tlX                                        * En cas d'utilisation d'une pellicule   (ISO 50- 1600)]i,tlA r'J,irit-d"                                                      autre                                                 que DX, la sensibilit6  est r6gl6e d   * ttli*.fr DXEd4,         t'j ;rit-rE  1. 100.                                     ISO 100.
                                                                                                                                                                                                                             ']lJ


12
View original page 13Page 14 · Read text
www.butkus.us      Loading the Film Filmeinlegen Chargement de la pellicule Satt  i filmen
   .  Cargue la pelicula Caricamento della pellicola #/1F#


1 ) Open the back cover @.               2l Place the film can in the film chamber   3) Holding the cassette in place, draw
1) Rr.ickwand @ ciffnen.                   o.                                        outthe film evenly as far as the symbol1) Ouvrir  le dos de I'appareil g.           2l Film in Filmkammer einlegen @.            ln lne camera.
1 ) Oppna bakstycket @.                  2l Installer Ia bobine de pellicule dans le   3) Film gleichmiifJig  herauszie hen, wooer
1) Abra el respaldo @.                     logement de pellicule O.                 die Spule mit dem Finger gehalten
1 ) Aprire  il coperchio posteriore @.       2) Siitt filmen  i filmkammaren @.              wrrO.
1) +l+,tr#o.                        2) Coloque la pelicula en el comparti-    3) Tenir la bobine et tirer sur la pellicule
                                         miento que le corresponde @.             d'une manibre  r6gulibre.
                                      2) Porre la pellicola nel suo scomparto @  3| Hill filmpatronen med ett finger och
                                    2l *,\€its.                               dra ut filmen idmnt.                                                                              3| Sostenga el iartucho con el dedo, y
                                                                                                                    tire suavemente de la oelicula.
                                                                                 3t Tenendo  il caricatore iol dito, estrarre
                                                                                    delicatamente la pellicola.
                                                                       3) L]++F+ryT EB€, {tm€+1cJe,t*"
View original page 14Page 15 · Read text
4l Ensure that the holes in the film   4) Allineare I'estremitir della pellicola col
   engage on the teeth of the film spro-      simbolo nella macchina lbtogralica e
   cket O, and then close the back cover.       assicurarsi che i fori nella pellicola
4) Filmanfang an die Markierung in der      innestino  i denti dell'alberino dentato
   Kamera anlegen und darauf achten.        della pellicola @. Chiudere poi  il coper-
  daB die Perforierung des Films gut      chio posteriore.
   von der Transportrolle O aulgenom-   4) .1:rBt 6 &ift {f iFl tEq +ll ftr\  ffi rrlr i}
                                 schlieBen.                 Rrickwand  men wird.           dann                                                                    i,j.LftOuiTl'  fli                                sur le    +, rhiLni+lL\                de la pellicule             le            bout4) Aligner   reobre se trouvant dans le boitier et   FA }:tii'I;:.
   vtiifier oue les dents de la bobine
   enrouleuie Q s'engagent bien dans les
   trous de la oellicule.
4) Placera filmen vid symbolen ikame-
   ran och se efter att perforeringen fast-
   nar  i tandhjulet @. String bakstycket.
4) Alinee el extremo de la pelicula con el
   simbolo de la c6mara, y compruebe
  que los orificios de la pelicula se
   introducen en los dientes de la rueda
   dentada de la pelicula @. entonces cie-
    rre el resnaldo.
View original page 15Page 16 · Read text
www.butkus.us
                                                                             Panel display for film loading
                                                                      Anzeige des Ladezustands des Films
5) Depress the shutter release button a.                                        Affichage de chargement de la pel-   The film is automatically wound on to                                                    licule
   the first frame. and the frame counter                                        Angivning vid filmisattning
    (A) on the display panel indicates  "  l ".                                            Indicaci6n del panel para la carga de
5) Auslciseknopf Q dnicken. Film wird                                                   la Delicula   hiermit automatisch bis zur ersten                                 Quadro visualizzatore per la carica
  Aufnahme vorgezogen und das Bild-                                               della oellicola
   ,zahlwerk (A) des Anzeigefelds steht auf                                #,\h#r'fF!8fr
5) Appuyer sur le poussoir du d6clen-
   cheur Q. La pellicule s'enroule auto-
   matiquement jusqu i  la premibre vue
    et le compteur de vue (A) indique alors
   "l"sur  le panneau d'affichage.
5) Tryck ned avtryckarknappen Q. Fil-   *  Details 01 the film can be ascertained    Shutter release button symbol  (Cl flashing
  men dras automatiskt fram  till fcirsta      through the film check window @.    when the film is loaded and the back
  exponenngen och raikneverket  (A) "  l "   * Anr l-ilmiberwachungsfenstcr@  kdn-   cover closed.
   syns i visningsfdnstret.                   nen die [)aten des jeweils eingclcgtcn   Symbol fUr den Auslciseknopf (c) blinkr.
5) Presione el disparador O. La pelicula      Films abgelesen werden.                 bei eingelegtem Film und gerchlossener   ser6 automiticamente  llevada al ori-   *   ll est possible de v6rifier que la pelli-   Rrickwand.
   mer fotograma. y el contador de expo-      cule a bien 6t6 mise en place grace  i    L'indicateur du poussoir du d6clencheur
   siciones  (A) marcar6 "1" en el Danel       I'ouverture de.contrOle de la pellicule    lC) clignote pendant le chargement de la
   visualizador.                          o.                                           pellicule alors que le dos de I'appareil est5) Premere il pulsante di scatto Q. la   * Filmen kan ses genom fllmkontroll-   Ierme-
   pellicola si arrolgera poi automatica-      fonstret @.                           Avtryckarsymbolen  (C) blinkar med film
  mente {lno al primo fotogramma e il   * La pelicula puede ser comprobada a    isatt och bakstvcket stanst.
  contafotogrammi  (A) sul visualizzatore      travEs de la venlanilla de comproba-   El simbolo dei disparad6r  {C) parpadea
   indica  "l ".                              ci6n de Ia pelicula @.              cuando la pelicula esti cargada y  el
                                                                essere controllata    respaldo est6 cerrado.5l ++Ti*I'lfrfl e, rji€,tui&+fiEF|J   * t-a pellicola pou
                                                                                 simbolo                                                                                                   del pulsante                                                                                                                  lam-                                                                                                                       di scatto      fi -f5, SinriE6''JBi+t6&it&?S       dellaattraversopellicolail linestrino@.       di controllo   peggiaIl                                                                            quando                                                                                                                       la pellicola                                                                                                             b caricata1C1                                                                                                                       e il   (alE7JiH"i""                                                                                                                                                                                       |Jlrl qItfri\6.iQE   coperchio posteriore i chiuso.                               * 46.qi6iEil6O.                                            lJi€.                        *    6, ir Ftr,r;HJ. €'ttt lttiff+
                                                                  ?(c).{4"^{t
View original page 16Page 19 · Read text
de la distance E   Changing Focal Length of the Lens Wechsel der Objektivart R6glage-  Cl.  focalioSlet<tivoyte bambio del objetivo Cambio dbll'obiettivo {*6V1g.X
         t^
      )v  )s (-,i[___J].'J
  rro)'   \-\\\///i     //                                                        lrrril
                                                  I s@,D"e                 hrr,   www.butkus.us W
    1 l Press the Wide-angle/ Telephoto     1 ) Appuyer sur le s6lecteur grand angu-      cambiar6 de wide a tele.
       swilch @. The lens will change from       laire/t6l6photo @. La distance focale   2) El campo en el visor cambiar6 de
      wide to tele or back again.                 passe de grand angulaire a telephoto.      acuerdo con el objetivo.
   2) The field of view in the viewfinder   2| L'angle de champ du viseur est modi-   * Nunca suiete el obietivo cuando est6
      changes according to the lens mode        fi6 en fonction de la distance focale.       cambiandb la distancia focal.
         set.                                * Ne jamais tenir I'objectif pendant  le    1 ) Premere I'interruttoredicommutazio-
   * Do not obstruct the lens while chang-      r6glage de Ia distance focale.                ne grandangolare/ telefoto O. Lbbiet-
       ing the focal length.                         1 ) Tryck pi vidvinkel/telefotoknappen        tivo cambieri da wide a tele.
    1 ) Weitwinkel/ Teleobjektiv-Wechrelschal-     O. Objektivet byter mellan vidvinkel   2)  Il campo nel mirino cambia a seconda
      ter a drticken. Das Objektiv  steht      och telefoto.                                     dell'obiettivo.      damit auf Weitwinkel bzw. Tele.        2) Omridet i sokaren iindras med valt   * Non tenere mai I'obiettivo quando si
   2) Mit der Wahl des Objektives wird das       objektiv.                              cambia la lunghezza  focale.
                                                                                                                                                                                                           -ffi EI +n &+F.*.      Feld im Sucher veriindert.             *  Hill aldrig  i objektivet vid byte av    1 | tt+F.*+n &+ X a,   * Wiihrend der Brennweitenveriinde-        briinnvidd.
      rung                                                                 de                                                                           de                                                                 cambio                                                  Presione                                                                     el interruptor            darf das Objektiv nicht blockiert    1 )                                                                                                                                2)* Elr+)t iftifi.*Et, 668,H f lH{ifE*.      werden.                                             gran                                                                                   objetivo                                                                        El                                                      angular/telefoto                                                         a.


t8
View original page 19Page 21 · Read text
Using the Viewf inder Sucher Utilisation du viseur Scikarens anvdndningr!ED. Empi-eodel visor Uso del mirino Hte*
Field-of-View Frame
Bildfeld
Cadre du champ couvert
Liusram
Marco de la fotografia
Quadro del campo dell'immagine
+xa.ttffilIE


Parallax Compensation Marks(Field-of-
View for Close-up Pictures)
Parallaxen-Ausgieichsmarkierungen (frir
Nahaufnahmen)
Repbres de compensation de parallaxe
(Champ de prise de vue rapproch6e)
Parallaxkompensationsmiirke  (bilfiilt vid
niirbild)
Marcas de compensaci6n de paralaje (foto-
grafias de primeros planos).
Contrassegni di compensazione paral-
lasse (Campo per primi piani)
                                    ( &'r-:#11 fr.EFI&FtEtfr.iEB ltE tl$
B\I*F i'AH)


Auto-Focus Frame
Autofokus- Markierfeld
Cadre de mise au point automatique
Ram fdr auto-fokusering
Marco del autoenfooue-
Quadro auto-fuoco
H rliEHfE
View original page 21Page 22 · Read text
www.butkus.us
            indicator-on: When the shutter   que le poussoir du d6clencheur est i mi-  quedan bloqueados.--Greenrelease  is depressed part way, the grcen    course. pour indiquer que la prise de vue  Parpadeando: Si el motivo fotogr6l'ico
   .    indicator turns on, indicating that the AE    est possible; I'exposition automatique  et   esth demasiado cerca, se bloquea  el dispa-
      and the auto-l'ocus are locked. and the    la mise au Doint sont alors verrouillees.   rad o r.
      camera is ready lbr normal picture tak-   Clignote: Si le sujet est trop prbs, le  Spia verde-l   I luminata: Quando accesa
                                                dcclen-cheur sc verrouille.              con il pulsante di scatto premuto a meti,
                                      Gron lampa-Lyser:  Klart f'or l'otogral-  va bene per riprendere una foto; AE e
                                            ering om lampan lyser n:ir avtryckar-   fuoco sono bloccati.
                                          knappen hills halviigs nedtryckt; expone-  Lampeggiamento: Se I'oggetto d troppo
                                              ringsautomatik och fokus iir lista.        vicino. I'otturatore si blocca.
                                                Blinkar:                                                       Motivet                                                                                                         lcjr niira och avtryckar-    fi 'IT-XH, 1l.131*fl&tneT-+H!                                          knappen                                                                          liscs.
                                   Luz verde-Encendida: Cuando estA
                                                encendida y el disparador presionado a su   f[ H-riER]41]Atiitd"
                                                  mitad, quicre decir quc las condiones son  RX,  l&.F.i t'l*1t jrrH'l.{ X, 1* fl}A"tiji
                                                  correctas para tomar una fotogralia,  la   El"                                                exposici6n automAtica (AE) y el enl'oque

                                                 course. pour indiquer qu'il est nCcessaire   Parpadeando: Cuando la distancia  es
       turns on when the shutter release  is    d'utiliser  le 1'lash (l'aire attention de ne pas   excesiva para una lotogralia con llash
       depressed part way, then the light lcvel  is   bouger I'apparcil).                      (alarma de subexposici6n).
      too low for normal picture taking. and   Clignote: Lorsque la distance est trop  Soia rossa-llluminata:  si accende
        the flash system will automatically oper-   grande pour une prise de vue au I'lash  quando  il pulsante di scatto b premuto a
         ate                                      (alarme de sous exposition).            metb in un luogo oscuro per indicare la
       flashing: Indicates that the subject  is too  Rod lampa-Lyser: l.arrrpan llscl ndr  commutazione  alla fotografia con flash
          far for Ilash photography, and the picture   avtryckarknappen  hAlls halviigs ned-  (awiso contro  il muovere della mac-
      would be under-exposed.                    tryckt vid svagt ljus l'6r att ange byte till   china).
      Rnle Anzcrnc  I errchten: Sie leuchtet     blixtl'otogral'ering.                    Lampeggiamento: Quando la distanza
       bei halb gedrricktem Auslciseknopl, um   Blinkar: Avstindet  l'or stort fctr blixtlb-  b troppo grande per una foto con flash
         bei ungenrigenden Lichtverhiiltnissen den    togral'ering (varning  I'cir underexponer-   (allarme di sottoesposizione).
                              (Warnung        Einsatz              dcs                   Blitzesanzuzeigen                                                            rng).                                                                           tI'lT                                                                       afr,      gegen              Verwackeln).                                                                Se                                                                         enciende                                          Luz                                                                             cuan-                                                 roja-Encendida:                                                       T-+tt                                                                                       r.;t,lr:_-s_H*ttEf7 z;ltt)l ijf/t l?rl.kl'J+tirn]i?i/,t tti lll lIl)ttl                                                                       presiona            Wenn                                         en       Blinken:                         die Entfernuns                                           un lugar oscuro                                                                                                           dis-                             zum Aul-  do                                                                                     el       nahmeobjkekt   l'rir Blitzaufnahire zu gro13   parador a su mitad, para indicar  el cam-   tlrlr" (Hf-r)t'fi.1
          ist (Warnung gegen Unterbelichtung).    bio necesario a fotografia con flash     ,f, x,  |t.\frlNlxlJi'kl{Hfirlt AT,[f1 H d
      Voyant rouge-Allume:  S'allurne.  alors    (ar"isa cuando se mueve la c6mara)        ts H0.riL,/c.  ( it fl;fl*tT ]C )
      oue le Dousst'rir du d6clencheur  est a mi-
                                                                                                                                                21
View original page 22Page 23 · Read text
Hold the Camera Correctly Richtige Kamerahaltung Maintenir fermement I'appareil
                               c6mara correctamente Tenere I'apparecchio nella    .  Hall kameran rdtt Sostenga la     maniera giusta EnfrrFrffi**


* Ensure that the lens and the auto-       I'objectif ou I'ouverture de mise au   * Mantenga el flash en la parte de arriba
  focus window are not obstructed by      point automatique.                   cuando fotografie con flash con la
  anything:  fingers, strap, etc.          * En cas de prises de vue en tenant I'ap-     c6mera en posici6n vertical.
*  If the flash is used with the camera       pareil en position verticale et ir I'aide   * Assicurarsi che la cinghia o  i cappelli
  held vertical, the flash unit should be     du flash, faire attention que ce dernier     non siano di fronte all'obiettivo o al
  at the top of the camera.                   soit toujours dirig6 vers le haut.           finestrino dell'auto-focus.
* Vergewissern Sie sich, daB sich weder   * Se till att hAr och rem inte befinner sig   * Quando si riprende una foto con la
  Trageriemen noch Haare vor dem      framfor objektivcet eller fonstret for     macchina in posizione verticale e  il
   Objektiv oder dem Autofokus-Markier-       auto-fokusering.                               flash, assicurarsi di tenere I'uniti del
  feld befinden.                       * Vid blixtfotografering med kameran       flash nella direzione verso I'alto.
                                         bei                      sich,                              sich* Vergewissern               Sie                    da8                                              hillen uppriitt maste blixten var upp-   * irHE4,it* E. t*ffi S t!ti.tt);.  Blitzaufnahmen                   der                         auch                           Blitz                                  beiver-                                                                         till.  tikaler Kamerahaltung oben befindet.   * Asegrirese que ni el cabello ni la correa         El triE R 6 Ht, F'trit+&fr,"
* Faire attention que ni la bride, ni des     tapan el objetivo o la ventanilla del    * !+#  fifi fHilLrtlTffi N N)L *f +*.FiF+,
  cheveux ne viennent se placer devant      autoenfoque.                         E)L*r't tfi.&+1.8"
View original page 23Page 24 · Read text
www.butkus.us


1 l Frame the subject with auto-focus       leuchtet und sich die Entfernung auto-   3| Gently depress the shutter release but-
   frame in the viewfinder.                   matisch einstellt.                          ton funher until a picture is taken.
1 ) Aufnahmeobjekt mit dem Autofokus-   2f Enfoncer le poussoir du d€clencheur   3) Um die Aufnahme zu machen den
   Markierfeld zur Deckung bringen.     Q ir mi<ourse  afin que le voyant vert      Ausloseknopf endgultig dnicken.
1 ! Centrer le sujet dans le cadre de mise      s'allume dans le viseur et que la mise   3l Enfoncer  ir fond le poussoir du d6c-
   au pornt automatrque.                   au point soit reg16e automatiquement.       lencheur pour prendre laphotographie.
1 ) Komponera bilden med motivet inom   2) Tryck ned avtryckarknappen O  tiil   3) Tryck lingsamt ned avtryckarknap-
   ramen  frir autofokuserins.                     hiilften si att den grcina lampan lyser      pen hela vdgen for att ta bilden.
1 ) Encuadre  la composici6ien el marco     med fast sken  i sokaren, vilket visar att   3| Finalmente, presione suavemente y a
   del autoenfoque.                              bildskiirnan har stellts in.                fondo el disparador para fotografiar.
1 ) Inquadrare  il soggetto nel quadro di   2) Presion6 a la mitad el disparador Q   3| Premere delicatamente  il pulsante di
   auto-Iocus.                              para que se encienda la luz verde del      scatto a fondo per prendere una foto.
                                                                      se ajuste                                                  visor                                                  autoenfoque                                                                              auto-                                                   y el                                                                                                    loto.1 ) tr4 E AlE FfE^t iE&I&tztt *.                                          meticamente.                                                                                        3l                                                             F+++4eT'RI]efl,  ffinI+HlE"                                                                                       (O                                                           a                                          Premere                                                metA il pulsante                                      2)                                                                                     di scatto
                                                      in modo che la spia verde ne I mirino  si
2) Depress the shutter release bution C      illumini e il fuoco sia regolato auto-
   part way until the green indicator in      maucamenle.
                         on.                  turns   the       viewfinder                                                 AF{$tr                                       2l J+,F|&flO                                eT-+,                                       so                               drticken,   Aufnahmeknopf2)          O halb                                                    R.                                                    AtJt*Xf 'fr,E ft,                        Sucher auf-  daB      das grilne                 Licht                  im                                               E "r#1ifi
View original page 24Page 25 · Read text
www.butkus.us
r   lf the green indicator  is flashing, and
   the shutter release Iocks- then the sub-
   ject is too close (i.e. closer than l.2m).
t Wenn das gnine Licht leuchtet, ist der                    Camera-to-Subject Distance
  Aufnahmeabstand zu kurz (d.h. klei-
  ner als 1.20 m) und der Verschlull
   blockiert. VersrctBern Sie den Auf-      (avstendet under 1,2 m) och avtryck-   * Quando la spia verde d accesa, clo sl-
  nahmeabstand-aul 1.20 m oder mehr.     arknappen lises. Oka avstindei  till       gnifica che  il soggetto b troppo vicino
* Le voyant vert clignote lorsque  le sujet       motivet.                                       (ossia pii vicino di l.2m) e l'otturatore
   est situ6trop prbs(parex. moinsde  1,2      Si parpadea la luz verde, quiere decir        si blocca.
  m) et le d6clencheur se verrouille.     que este demasiado cerca de la com-    * tEH t*.lJ.F.X, *,r.EEHiiirr,'l*f l                                                (menos   S'6loigner               m ou plus.                                             posici6n           du sujet                 de 1,2                                                   de 1,2                                                          m) y el dispar-                                                                                           a-"J,oLffild.  rv H+1.2x t-lt, Etr* Om den grcina               lampan                           blinkar,                                                 bloquear6.                                     be-     ador                                       se                                                         Sepirese                                                       de la
  tvder det att motivet ar fcir nara      composici6n  1,2 m o m6s.                        I&F.:z"
View original page 25
Page 26 · Read text
www.butkus.us
                                            Panel display upon shutter release
                                        Anzeiee nach VerschlrrBauslosung
      *  lf the red indicator turns on. it indi-   Affichage apres pression sur le de-                                           clencheur           cates that the light level is too low for                                            Angivn ing vid fotografering       AE photography.  ( Refer to Flash Photo-
          graphy.)                              Indicacion del panel una vez liberado
                                 Quadro visualizzatore dello scattoil    * daljALrllcuchtendie Aufnahmedes roten mitLichtsdemz-eigtBlitzan,   el disparador
        gemacht werden mulJ, da die Licht-    dell'ottu ratore           verhdltnisse  frir automatische Belich-   f *frr.tH!f,fr
        tung zu schlecht sind (siehe unter
         "Blitzaufnahmen").
      * Lorsque  le voyant rouge s'allume cela
          indique  qu'il est necessaire d'utiliser  le
          flash car il n'y a pas assez de lumibre
        pour permettre I'exposition automa-
          tique (Voir les instructions sur la prise   Upon exposure of I frame, the film wind   Al realizar la exnosici6n de un foto-
        de vue au flash).                        indication (F) is displayed and the frame   grama, se visualiiar6 la indicacion de
      * I.)scr tlcn riicla lampan, betyder det   counter (A) advances one I'rame.           bobinado de la pelicula (F) y el contador
           att exponeringsautomatiken  inte liin-  Nach tselrchtung eines Bildes erscheint   de exposiciones (A) avanz.ara un foto-
          gre geiller p.g.a. for svagt ljus och blixt   Transportanzeige  (F) und die Zahl auf   grama.
        miste anvdndas. (Sa avsnittet Blixt-  dem Bildziihlwerk  (Al erhciht sich um L     All'csposizione di un fotogramma,  I'indi-
           fotograferinr:.    )                        Lorsqu'une vue a 6t6 expos6e,  I'indica-    caz-ione dell'avvolgimento  della pellicola
      * Si se enciende la luz roja, indicar6 que    tion d'avance de la pellicule  (F) est alTich6e      (F) b visualizzata e il contafotogrammi  (A)
         se debe fotografiar con flash, porque    et le compteur de vues 1A1 avance de un.   avanza di un'unitir.
         est6 demasiado oscuro oara utilizar     L-.rporicr uit .r\ cn bild g(ir att lilrrrupp-     +fi {'{    f6  rffi €' +fi  } i' H. rri (F),t 4 *F. ?4 Ej   I FJ,     AE (Consulte el aoartado de foto-   tagningssymbolen (F) och riikneverket  (A)      -          grafia con flash).                             flyttar fram ett steg.                    Frr4tit&*$(A)Ert  1f6"
     a (.)lt.rtt,lo llr .irilt rossa b accesa, cio si-
         gnilica la commutazione a fotografia
         col flash, dato che la luce b troppo
         debole per AE (Vedere: Fotografia col
           flash)
       * tn6 tI'rJ .F.R., t- HT)EETtr,
       T62fr11    t t,')til*jil#F:',,  fi r;h+n f{h
          tn txl lxl-)t,fl +* Ft" (4w+nl{Jt^1jt,rl{s
        FiH\iilFE)
View original page 26Page 27 · Read text
t_ociTot<usverriegelung  Verrouillage de la mise au point..LA.sni!g av bilds-
                                               messa a fuoco iflEiEft g. lffiT"  Bloqueo del enfo-que Bloccaggio d-ella


    1 I Aim the auto-lbcus frame at the sub-   2) Depress the sh.utter release button Q   3l With the shutter release button held at
         iect.                                    part way until the green indicator       this point, compose the picture, and
    1) bas Aufnahmeobjekt  mit dem Auto-      turns on.                                then release the shutter.
      fokus-Markierfeld zur Deckung brin-   2) Ausltiseknopf Q halb driicken. so   3) Mit dem Auslciseknopf in halb ge-
       sen.                                          dalJ das griine Licht aufleuchtet.            drrickter Stellung dm gewrinschte Bild-
      I  l eentrer le sujet dans le cadre de mise   2) Enfoncer le poussoir du d6clencheur        feld auswiihlen und dann auslosen.      au polnt automatlque.         Q a micourse afin que le voyant   3l Garder le poussoir du dEclencheur  i
   1I Komnonera bilden med motivet mltl   I       vert s'allume dans le viseur.             mi+ourse, composer I'image dans le
      ramen for autofokusering.              2) Tryck ned avtryckarknappen Q till      viseur et prendre la photographie.
    1 ) Ajuste la composici6n en el marco del        hrilften sa att den grdna lampan lyser   3) Kompon-ra om bilden med motivet
      autoenloque.                       med fast sken  i siikaren.               inom bildfiiltsramen med avtryckar-
    1 ) Fissare il soggetto nel. quadro della   2) Presione a la mitad el disparador Q     knappen  till hiilften nedtryckt och ta
      messa a luoco automatlca.               de manera que aparezca la luz verde       bilden.
                                                                                                                           presionado,                                                                                             medio                                                                     Con el disparador                                                                                     3l                                            en                                                              el visor.
                                                                                                        en                                                                                                                                   el visor y                                                                                                                 la fotografia                                                                        componga    1 l l4 B AiE RtEtt itrL&I&.Ftlt *.        2)                                                         a meti  il pulsante di scattoO                                             P..-.rc
                                                      in modo che la spia verde si accenda.       disDare.
                                                                                                                                         a                                         2) ;{:ri.Rf l &tfl O*tiT- +, I*t*rf E,r:"  3) Conmeti, ilcomoprrcpulsante I'immaginedi scatto premutonel rtqua-
                                                                                        dro e scattare.
                                                                                3) {*ffier-+s!* a, ttgibEh4                                                                                                       Tt I&F2    al MI*Fzxi e'fn+Effi l!                                                                         "26                                                            *,  &621*1rt1frR18fF.,"
View original page 27Page 28 · Read text
www.butkus.us

*  If you remove your finger from the
   shutter release button, the focus lock
   will be released.
*  I-oslasscn des Auslciseknopfes l'rihrt
   zur Freigabe der F okusverriegelung.
* Le fait d'enlever le doigt du poussoir
  du d6ctencheur libdre le verrouillage
  de la mise au point.
* Sldpper man avtryckarknappen,   I'ri-   gors lisningen av bildskiirpan.  ili<
* Cuando saque el dedo del disparador
  desbloquear6  el enfoque.* Togliendo  il dito dal pulsante discatto, thffifr
   si libera  il blocco della messa a fuoco.
* {r   .l*f-l  ++i +iliry.+', ttnlfi4 lhiE H fti   * When to use Focus Lock.               aber lrontal davor gehalten werden
 H.^                                * Anwcndung der Fokusverriegelung:        muB.                                    * Quand utiliser le verrouillage de la   * En cas de prise de vue d'un sujet situ6
                                          mlse au polnt                                   derribre une vitre, avec I'appareil main-
                                    * Anvdndning med list bildskiirpa          tenu contre la vitre ou formant un
                                    * Cu6ndo usar el bloqueo de enfoque.        angle avec celle-ci.
                                    * Quando usare  il bloccaggio  del fuoco.   * Om motivet befinner sic bakom cn
                                  * #4tdi  tr iE F"att+)r\t  tt *. "               glasruta.trvckt mot skaglasetmaneller hlliaivinkelkamrranmot det.
                                                                         * Para l'otogral'iar una composici6n
                                                                                desde el otro lado de un panel de vi-
                                                                                          drio, dispare con la c6mara presio-
                                                                         nada contra 6l o desde cierto lngulo
                                    * To take a picture ofa subject through      con el vidrio.
                                        a glass pane. Use the focus lock with   * Per lbtogralare un soggetto all'altro
                                            the camera pressed against the glass,       lato di una lastra di vetro, tenerc la
                                     and then compose your picture.          macchina fotogral'ica contro oppurc
                                    * Frir Aul'nahmen von Objekten hinter     ad un angolo del vetro
                                              einer Glasscheibe. wobei die Kamera    * i6 jjrArHd:rl  +:*.#ir,t,  it  F.11 4li fiLK'1&'
                                        entweder direkt an die Scheibe. oder       1* fit t'rArfi *Ei 4 I,t,f* fr l{ )tTi +*i.t  "
View original page 28Page 31 · Read text
www.butkus.us
    4) Depress the shutter release button   5) [)ic Blitzbcrcitschaltslampc  wieder ein-   *  lf the red indicator flashes while thc
        further to lake the picture.                  drticken. Bitte beachtcn, dalj der Ladc-      green ind ica  t or is on.  l he su bjecl is out
    4) Zur llelichtung dcn Auslciseknopf end-     vorgang auch bci geschlossenenr       ol flash range. The shutter can still bc
         griltig dRicken.                       Ob jcktivverschlulJ weitergeht.               released, but the picture would be
   4) Enfoncer le poussoirdud6clencheurir    5) Enfoncer le voyant flash pret. A noter      under-exposed.
      fond pour prendre la photographie.      que le flash continue i se recycler   * Wcnn bci halb gedruicktem  Auslcisc-
    4) Tncl  ne(l r\ tr\ckJrknappcn  lrclrr     meme si le capuchon de I'objectil est      knopl und lcuchtendem griinem l-icht
      vAgcn 1r)r att ta bilden.                      ferm6.                                      das rote Licht blinkt. belindet sich das
   4) Presione a fondo el disparador para   5)  I rvck in laddningslampan. Kom ihiig      Aulnahnreobjekt auBerhalbdes Blitz-
        fotografiar.                                     att laddning skerliven med objekti\-       bercichcs. Es kann zu'ar ausgelajst wcr -
   4) Premcre  il pulsante di scatto contpleta-      skYddct  stiingt.                              de n..jctloch wird die Aulnahme unter-
      mentc per fotografare.                5) Empuje la luz indicadora de flash pre-       belichtct sein.
    a) F4i47:Jt' t'il,r'l+af{,  i.t 4Jrlt*.        parado. Note que la recarga conti-    r Si le royant rouge se mel i clignotcr                                            nuard aunque est6 puesta la tapa del       alors que le voyant vert est allume et
                                                       objetivo.                           que le poussoir du d6clencheur est
                                         5) Far rientrare il llash. Notare clte la      enlonc€ a mi-course, cela indique que
                                                continua anche se il coperchio dell'o-        le sujet est situ6 hors de la port€e du
   5) Return thc llash readi light to itr orig-       biettivo t chiuso.                               flash.  Il est possible de proc6der ir la
        inal position.  ll the llash ready light  is   s) t&,\f ,t,+FrFil. ttttil.iiaffi).ic         prise de vue mais elle sera sous ex-
         left up, the llash will continue charg-     € jFa i,lI A'.t:l.li,/r-.T \l'111ft.  / ;,1;., 1t        pos6e.        ing, even il the lens cover is closed.                                          * Om dcn rt)da lampan blinkar medan                                             €titlirlft+, i6itE'"
30
View original page 31Page 37 · Read text
* The flash ready light pops up when
        released, and should be returned to its
        original position.
    * The use of a tripod  is recommended  to
       prevent camera shake.
    * Die Blitzbereitschaftslampe  springt
       heraus. wenn der Finger nach erl'olg-
          ter Belichtung vom Auslcjseknopf wegge-
     nommen wird. sie muB wieder zuruick-
    *  gedrLicktZur Vcrmeidungwerden. von Verwacklungen
      wird bei Abend- oder Nachtaufnah-
     men die Verwcndung eines Stativs       Stativ rekommenderas  vid fotosral'er-   *   ll I'lash esce quando ildito d tolto dopo
       emnl'ohlcn.                             ing av kvdlls och nattbilder icir att     che I'otturatore b sbloccato. Farlo    * Le voyant flash prOt sort lorsque vous      undvika skaknins.                             rientrare.
       le relAchez et que vous relAchez le    La luz. de flash- preparado aparece   *  Per la fotogral'ia di scene la sera o di
       poussoir du d6clencheur. Le renfon-     cuando se quita el dedo de la luz de       notte, sl raccomanda I'uso di un trep-
         cer.                                           flash preparado despu6s de haber dis-      picde per impedire che I'apparccchio    * En cas de prise de vues de soir ou de      parado.                                                 sl muova.     .        nuit,                   conseill6                     il est                                d'utiliser                            un tr6-       Presi6nela                                                      de nuevo.                                                                                      * +tTi.{fl+Afn E,,U.:[ €fFzrlil,lt  f.,       pied               de              afin                  pas faire bouger                                        I'appareil.                                               Para fotografiar                                                               por la tarde o por la    * Laddningslampan skjuts upp om man      noche se recomienda el uso de un tri-    i*Att",U*, XtrIF+&El"                                                                                      * !{Ftr'€,. wR+et.t, fi{+{tH -.Err        sliipper den elter det avtryckarknap-     pode para evitar que la c6mara se
36    pen sliippts. I-ryck ned lampan igen.       mueva.                                           !"1:, t\ft.ffah"
View original page 37From the M. Butkus archive. Original publisher and archive notices are retained.
Check the model and edition against your equipment.
PDF verified 2026-10-10.