Film cameras
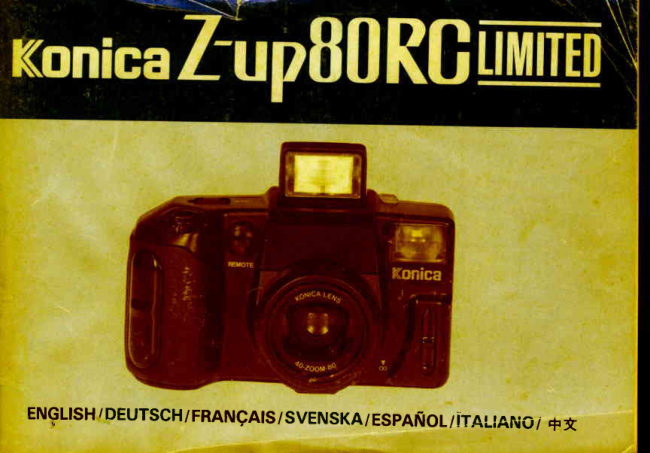
Konica Z-up 80RC Limited User manual
User manual for Konica Z-up 80RC Limited. 22 pages in German, Swedish, English. Read the original PDF, download or print a copy without registration.
22 pagesGerman, Swedish, English1.5 MB PDF
Loading your manual…Open PDF directly
Document details
- Brand
- Konica
- Model / document
- Konica Z-up 80RC Limited
- Document type
- User manual
- Language
- German, Swedish, English
- Pages
- 22
- File size
- 1.5 MB
- Category
- Film cameras
- Document date
- Not specified in catalog
Search available document text
Find a term, then jump to its page in the original PDF. Image-only pages may not be searchable; check the PDF for exact wording and diagrams.
Page 5 · Read text
F i s . 1 - 3
q (!i1-et9frame shooting),C (Continuousshooring),
O(Self+imer),R (Manual rewind indicator)                                                             Mode Button (l)
 Flash ON  (Fill-in Flash) Mode Symbol                                     Mode Buuon (2)
                                                           DATE Button
Exposure Compensation Mode
Symbol                                                        SELECT Buuon
Flash OFF Mode Symbol                                             SET Button
Standard Mode (Automatic  self
Activating  Flash) Symbol                                         FUNC Buuon

Shutter Release Symbol

Back Cover Open Symbol

Frame Counter Symbol,/                                           M_E(Multiple Exposure),
Exposure Counter                                                   TE (Time Exposure),
                                                                         INT (Interval Timer)Battery Power Symbol
                                                                                 Film AdvanceSymbol
Film Loaded Symbol                                                                Film Take-up Symbol
DatelTime Display                                                               PRINT Symbol
                                             (ln the drawingthe svmborsare shownas disprayedon the LCD dispray.)
View original page 5Page 12 · Read text
1. Checking the battery                            2) Place a new  roll  of  film  in the film  chamber.                                                                   3) Draw  out the tip  of the film,  holding the magazine in
This camera is powered by a single lithium  battery, loaded       place.
in the camera when you buy  it. Check the Battery power     4) Draw  the film  tip as far as the FILM  TIP mark  inside
supply as follows:                                               the camera. Bg sure the film  is straight and the holes in
 l) Slide the Power Switch O O^N. (Fig. 3l                      the edge of the film  fit on the teeth of the Film Sprocket.
2)  If the Battery Power Symbol @) is black, the power supply       {Fig. 4l
    is full.                                                                      * Do not set the tip  of the film  too  far to the right  of the
3)' The Information  Displav oanel will  also show Frame      FILM  TIP mark.
   Countel@,  Auto-flash slrniUotO,  and'S'(single  frame    5) Close the back cover firmly. The film  will be wound auto-
  mode) (9 and the Auto-date  display (D.  (Fig. 2l              matically  to the first frame, and the Frame Counter  will
                                                                                            ttltt.                                                       sh o w
When   to  Replace  the  Battery                                     * The Film Advance Symbol @ will blink while the film  is
 * When the battery begins to wear out, the Battery Power       advancing.
   Symbol @  will 6tran-gefrom black to half blaci<. After      *  Display will disappear for approximately one second after
    further  power  consumption,   the symbol  will  begin  to       the Power Switch has been turned off, but will reappear
   blink. At this time, the battery should be replaced with      when the Power Switch is turned on again.
   a new battery.                                                            *   If  the  film  has not been correctly  loaded, the Film
 * When the Battery Power symbol begins to blink,  there      Advance Symbol  will disappear, the Fraqle Count  will
    is still enough power to finish a roll of film.  Replace the      show "0",  the Baqk Cover Open Symbol Q) and the Film
   battery after shooting the current  roll  of  film.             Loaded Symbol ($  will blink. Open the back cover and
 *   If the battery is not replaced, the Battery Power Symbol       reload the film.
                                            release                                                                     will                                                               lock.    will                         and                                  the shutter        eventually                  disappear,
                                                the                                                            film                                                                re-  3. Using the Viewfinder   Manual           rewind              may then                         be used                                          to remove
   maining  in the camera.
2. Loading the film                                   Picture  frame
This camera uses standard 35 mm (135 size) roll film maga-   Close-up compensation  (parallax
zines with DX coding. The film speed (ISO 50-3200) is set  mark  (at 60 cm)
automatically  when the  film  is loaded  in the camera.
 *  In case non-DX  film  is used, the film speed is set to ISO   Auto-focus  frame
   100.
 *  For color reversal pictures (transparencies), use film  of                                                           Flash Symbol   ISO 50, 100, 200 or 400 speed.
 l) Push down the Back Covei Lock  I  and open the Back
   Cover.                                           Zone Focus Lights
l 2
View original page 12Page 13 · Read text
c,t
                            (also     Zone Focus                    Lights                                 indicates                                   Focus                                        and AE                                                       Lock,                                                     and         off.                                                                              At  this                                                                                     time                                                                                             the lens                                                                                                               retracts automatically   to the                                                       ..ON"     warning           when                 camera                                    is too                                 close to                                             subject):                                              Turns                                                        minimum                                                                         wide                                                                                                    position.                                                                                 angle
     when shutter release button  is pressed halfway down   if    3) Point the camera so the subject you want to focus on is
     camera is ready to shoot. Approximate  distance from camera        in the center of the viewfinder (Auto-focus  Frame).
       to the subject at the center of the picture (Auto-focus  frame)    4) Press the Shutter Release Button @ halfway down. bne
       is shown by the different Zone Focus Lights.                     of the Zone Focus Lights will turn on to show approxi-
     The closest Zone Focus Light  ( r?) blinks  if the camera is     mate focal range. (Fig. 6)
      too close to the subject (less than 60 cm), and the shutter    5) Press the shutter release button  all the way down to take
      release locks to prevent an out-of-focus   picture.                 the picture. The  film  will advance one frame.
     Flash Symbol:                                      Camera to Subject Range: 0.6 m (1.2 ft)-oo
     Turns ON  if there is not enough  light  (or very strong con-     * When you're finished taking pictures, press the Flash Unit
                                                                down. This turns off the power and closes the lens cover.r  trast) when the shutter  release button  is pressed halfway
     down.  Indicates flash  will operate. Flash will charge auto-      *   If the ($)  (Zone Focus Light)  blinks when the shutter
      matically. Lights while flash is recharging, then turns off.       release is pressed halfway down, the camera is too close
      (In Flash ON mode, Flash Symbol remains ON.) BLINKS        to focus.
       in Flash OFF mode if there is not enough light for a correct     *   If  the  ( I  ) Flash Mark  turns ON when the shutter is
     exposure.                                                  pressed_ha]{yay  down,  there  is not enough   light,  or
                                                                         strong backlighting  (high contrast), and the Autb-flash
    Adjusting Finder Visibility                       w i l l o p e r a t e .
    Personswho are near-sishtedor farsiehtedmav raise                               e 4 X      u 1 . r ,
    or lower the Finder Adiustment Knoa G forbetter   Long-distance   photography
    findervisibility.(0.5- -2.5 D.)                  When tak-ing pictures of very distant objects (landscape,
i    4. Taking Pictures                        downscenery)whileslide.pressingthe  Infinitythe ShutterSwitch ReleaseO  aoi"nButtonana @.notAfnisii
          l) Turn the Power Switch @ ON. The flash Unit  will swing    wlll rnsure sharp tbcusing at very long range.
       up and the built-in  lens cover will open automatically.      * The EME/Infinity  Switch will return to its original posi_
      2) Look through the Finder Eyepiece O and press rhe Zoom        tion when  it is released.
        Switch  I   to adjust the lens.
       Press the "T"  side of the Zoom Switch and the lens will   Holding  the camera
      zoom towards telephoto (80 mm maximum).  Press the   Hold  the camera at both sides, using the Grip.  (Fig. 7l
       "W"  side of the same switch to zoom towards wide an-     * Be careful not to cover the Auto-focus  Win-dow  f    , tire
        gle (40 mm min.).  (Fig. 5)                         AE  Sensor Window Q  or the Flash Unit  with- your
       * The field of view in the viewfinder  changes automatical-        fingers.
           ly as the lens is zoomed in or out.
       *  Press down the Flash Unit  to turn the camera's power
                                                                                                                                                                                                 t 3
View original page 13Page 14 · Read text
the                                                                                      OFF,                                                                                                                             to indicate                                                                              Mark                                                                                                       turns                                                                                           until                                                                                                                             ) Flash                                                                               the ( I5. Unloading the Film                                2) Wait                                                                                                    press                                                                               (about                                                                                   Then                                                                                                                 the shut-                                                                                 3                                                                                      seconds.)                                                                      flash                                                                                           is charging
l) When the last frame of the roll has been exposed, the film         ter all the way down. The flash will operate for a correct
    will be automatically rewound by the camera.              exposure.
2) When the film  is fully rewouqd, the motor stops and the     * The shutter and zoom will lock while the flash is charging.
  Back Cover Open Symbol @ blinks  for approxim3tely      *   If several pictures are taken with flash in rapid succes-
    l0 seconds. Thtn the "0"  of the Frame Counter (B) and       sion, flash recharging will take more than 3 seconds.
   the Film Loaded Symbol @  will be displayed together    Flash Photography  Range
   to  tell you to unload the film.
3) Open the Back Cover and remove the film.                  ISO 100   0.6 m (2 ft)-5 m (16 f0
 * The shutter will lock while the film  is rewound.      w                                                     ISO 400   0.6 m (2 ft)-  l0 m (33 ft) *  Film  is rewound automatically  only at the end of the roll.
   (To rewind before the end of the roll, use Manual Re-         ISO 100   0.6 m (2 ft)-3 m (10 ft)
   wind Mode.)                                   T                                                         rso 400   0.6 m (2 ft)-6 m (20 ft)
                                              3. Focus Lock;flSi";d;
 1. Close-upphotography                        2)1) AimPressthethe cameraShutter atReleasethe subjectSutto; you@ halfwaywant to down.focus on.One
This camera can focus down to as close as 60 cm.                of the Zone Focus Lights  will turn ON. As long as the
 l) The Zone Focus Lieht  (r?)  will  light when camera is       shutter is held halfway down, the camera's Auto-focus
   aimed at an object  in close-up range and the Shutter         will lock at that distance, even if the camera is pointed
   Release Button @  is pressed half-way down. The .red     elsewhere (Fig. 8l
   Close-up Compensation  Mark  (inside the viewfinder     3) Compose the picture you want to take, and press the
   frame) will also light up. Be sure the subject is within the       Shutter Release Button  all the way down. The subject you
   area shown by Close-up Compensation mark.               want  will be in focus even if  it's outside the central Auto-
 2)  If the (*)  Zone Focus Light blinks when the shutter is      focus Frame.  (Fig. 9)
   pressed halfway down, the camera is closer than 60 cm,     *  Focus Lock  will be released if the finger is removed from
   and the shutter locks to prevent an out-of-focus  picture.       the Shutter Release Button before taking the picture.
2. Using Auto-flash                                         *  AutomaticFocus Lock.Exposure (AE)  is locked  at the same time as
 l) When  the Shutter Release Button  is pressed halfway      *  Focus Lock may not operate properly  with some kinds
   down, the ( I  ) Flash Mark  inside the viewfinder  will turn        of dark or grey objects, reflective or light-emitting  ob-
  ON  if there is not enough light for a correct exposure,       jects, or very small objects. In such cases, set the Focus
    or  if the contrast  (backlighting)   is very strong.             Lock by aiming the camera at another object of similar
 t 4
View original page 14Page 15 · Read text
-                                                             I',tt!|ffi        il

   brightness at about the same distance.                      hind the camera. In this case, the Transmitter is effective
* When taking pictures through a glass window, either hold      up to about 0.7 meter from the camera. (Fig. 121
   the camera directly against the glass or at an angle to the    4) After  taking the picture, replace the Remote Control
   glass; otherwise the camera will focus on the window       Transmitter and the camera will return to standard mode.
   itself.                                                                      * A seriesof remote control photos may be taken as long
4. Remote Control Photography              as the Remote Control Sensor is blinking. Focus remains
                                                              locked at the same distance for all pictures, however. So
This camera allows you to take photographs by remote con-           if the camera to object distance changes, replace the
trol. Use this feature for group photographs, slow-shutter     Transmitter and repeat the procedure above.
synch photos, evening or night-time shots with AE, and time     * Use either a tripod or the built-in  Tilt Stand to support
exposures, etc.                                                the camera when taking remote control photos.
 i) Press the lower part of the Remote Control Transmitter     * Remote control photos may be taken in different mode
 @  to detach it Trom the camera. The Remote Control       settings (using the Mode set buttons).
  Sensor @ on the front of the camera will start to blink.
     ( Fig. 101                                                      Using  the  Tilt  Stand
  The Remote Control Sensor will blink slowlv for about
   five minutes, then will blink quickly for 30-seconds. It   Raise the Tilt Stand @ on the bottom of the camera and
   will then go out. (Fig. 111 Remote Control photos can   place the camera on a firm base or surface, for remote con-
  be taken during the first five minutes. You can re-enter    trol and self-timer photography.
  remote control mode by pressing the Transmission Button
  Q  during the 30 second period the Sensor is blinking
   quickly. After  the Sensor stops blinking, the Remote
   Control  Sensor must be reattached to the camera and
  detached once again to take remote control photos.
2) After  removing the Transmitter, compose the picture
   through the finder, and press the Shutter Release Button
   half-way down. There will be a mechanical click as the
   focus is locked.
*  Note that the shutter will be releasedif the Shutter Release
   Button is pressed all the way down at this point.
3) Move away from the camera, aim the Remote Control
   Transmitter  at the camera, and press the Transmitter
  Button  !   to take the picture. The Transmiter  is effec-
   tive up to about 5 meters from the camera. There is also
  a Remote Control Sensor Q on the back of the camera
  so that pictures can be taken by remote control from be-
View original page 15Page 18 · Read text
flash), Flash ON  (Fill-in  Flash), Flash OFF and Exposure
 Advanced lnstruction$: Multiple;     Compensation Modes. These modes may be changed after
 Exposures, Time Exposures,      ,      settingposures,theandnumberwill  notof multiplereset automaticallyexposures, tobetweenStandardex-
 Interval Timer for Time-lapse         3) ModePress theduringSET multipleButton  toexposureset the numbershooting.of multiple ex-                                                                         i     posures (from 2 to 39) desired. Number  of exposures is Photography                                 shown in Frame Counter (blinking number).
                                                                  4) Next press the SELECT Button. Frame Counter number
Press the FUNC (Function) Button to set the  )  symbol to        will stop blinking, and the $  (shutter releasesymbol) will
the mode desired. Then use SET and SELECT Buttons to      appear on the information  display panel. Now press the
set the timer, number of frames, etc. (Fig. 15)                 shutter release button.
                                                                                 *  Shutter will lock while flash is recharging.
                                                                                 *  In Multiple  Exposure Mode., you may switch from Single
                                                       Frame to Continuous Shooting only before taking the first
                                                                    multiple                                                                     exposure,                                                                                                                                                         if desired.         Multiple  Exposure Modeo fie'                                                                                 *                                                             During multiple                                                                            exposure,                                                                                            the Frame Counter will count\4  ITE: Time Exposure Mode                           down to show how many exposures have been taken.
     t                                                                           *  After completing one series of multiple exposures, camera
@  ttrtt: Interval Timer Mode                                   returns to Standard Mode and frame counter shows to-                                                                                    tal number of frames taken.
 * Camera returns to Standard Mode automatically.             *   If you wish to cancel the multiple exposure setting, press
 * Mode cannot be switched while flash is recharging.        down the Flash Unit  to turn  off camera power.
                                          2. MultipleExposureswith Continuous1. Multipte ExposureMode with                                    Shooting Mode
  Single-FrameMode                     A series of multiple exposures on a single frame may also
Multiple  exposures (two  or more exposures on the same   be made in the continuous Shooting Mode. This is useful
frame) may be taken for special effects.                         for sequential photography of a moving subject, for exam-
l) Make sure the Mode Button  (2) @ is set at S (single frame    ple (Jse brightly   lit subject against dark background  for best
   shooting).                                                       results. )
2) Press the FUNC Button once. The  )  symbol will point       l) Press the Mode Button  (2) @ once to set the  )  symbol
   to ME (Multiple Exposure), and "2"   will begin blinking        at the C mark  (for Continuous Shooting).
   in the Frame Counter on the Information  display panel.    2) Press the FUNC Button once to set the  )  symbol at ME
*  Multiple exposures may be taken in the Standard (Auto-        for Multiple Exposures. Use the SET and SELECT But-
t 8                                                             tons to  set the number  of exposures (see explanation
View original page 18Page 19 · Read text
B'..il+!tlEl|,S,n
  above for Multiple  Exposures with Single Frame Mode).          will  appear  in  the  DatelTime   display,  with   'hours'
*  Continuous  multiple exposures may be taken in Standard        blinking.
   (Auto-flash),  Flash ON  (Fill-in  Flash). Flash OFF and    2) Each  time  the SELECT  Button   is pressed, 'hours,'
                                                                    'minutes' or 'seconds' will blink to indicate units for set-  Exposure Compensation modes.
3) Press the SET Button to set the number of multiple ex-       ting time exposure duration.  Select the desired units.
  posures (from 2 to 39) desired.                             3) Press the SET Button to set the desired number of units.
4) Then press the SELECT Button. The $  (shutter release     Numbers will increase by one unit each time the button
  symbol) will  light at the same time.                                   is pressed. Hold the button down for continuous increase.
5) Press the shutter release button once. The shutter will be      Set the numbers to any period from 2 seconds to 99 hours.
   continuously released for the set number of times to take    4) Then press the SELECT Button again.  r\ (shutter release
   the multiple exposure.                                    symbol)  will appear on the information  display panel.
* When flash is used for Multiple  Exposures with continu-      *   If you make a setting mistake, press the SELECT Button
  ous shooting, flash will operate only for the first exposure;      once again to return to  l), and redo the settings.
   following  exposures will be taken with available light  (to     * When the time exposure is finished, the camera will return
   prevent over-exposure).                                           to Standard Mode, and Auto-date display will reappear.
*  Since any number of multiple exposures can be made for      *  With Time Exposure, the   I OFF and S (single frame
   the same frame with multiple  exposure photography,  the       shooting)  setting will be automatically  made irrespective
   conditions for lighting will vary greatly with the subject.       of the mode.
* Camera automatically  returns to the Standard Mode once     *  Set the camera on a tripod  or steady surface for time ex-
   multi-exposure photography has finished.                   posures. Use of remote control transmitter  is advisable.
* The indicator  for the number of exposures will decrement     *  Press down the Flash Unit  to cancel settings if desired.
                                is released.             the                  shutter  each        time
  Press               the                  Flash Unit                                  to cancel settings, if desired.   4. Interval Time Mode    .- '       down*
 *  Try to choose bright  subjects against either light or dark    This camera has a built-in  interval timer allow for a series
  backgrounds.                                                      of exposures at a preset interval.  This feature can be used
 *  In daylight photography,  this function  can be effectively     to record the growth of plants, gradual changes in the sky,
  used when photographing sports. From 5 to l0 exposures   etc.
    is standard. The use of a tripod  is recommended.               l) Press the FUNC  Button  three times so the   )  symbol
3. Time Exposures                            moves00(seconds)"to the lNwill(Interval)appear mark.in the "00(hours):00(minutes):Auto-date  display,  with
                                                                       'hours'   blinking.  The  Frame  Counter  shows  "2"The Time Exposure Mode  is provided  for  taking  photo-
graphs under poor light with the shutter held open for long       blinking.
intervals (2 seconds or more.) Photos of the night sky, fire-    2) Press the SET Button to set the total number of exposures
works displays, etc. may be taken with time exposures.         to be taken.
l) Press the FUNC Button twice so the D symbol moves    3) Press the SELECT Button to select the desired units for
   to the TE mark.  "00(hours):00(minutes):00(seconds)"        intervals on the Auto-date  (Interval  timer)  display.
                                                                                                                                                                                                                        t 9
View original page 19Page 20 · Read text
4) Press SET Button  again to set the number  of units  for    4) Press the SELECT  button again to return to  start po-
   the interval.                                                            sition.
5) Press the SELECT Button again. The number of units     *  Since the Auto-date  calendar,/clock runs on the same bat-
    will stop blinking, indicating the set interval, and the $        tery as the camera, please reset date/time  after replacing
   (shutter release symbol) appears on the information  dis-      the battery.
   play panel.                                                               *  Note that the dateltime may not be clearly visible in the
 *   If you make a setting mistake, press the SELECT Button       picture  if that part of the photograph has a very light
   once again to return to  l), and redo the settings.          background.
                       press        the                 and                               the                                  Shutter                                      Release                                                   Button.6) Aim          camera
   After        a delay                    of                    about                        one                              second,                                          the                                                                first frame                                                                            will  Manual Rewind                                                                         (to rewind  film before the end of the  rolll   be exposed. The shutter will continue to release automat-
    ically  at the set interval  for the set number  of frames.
 * Minimum  interval is l0 seconds (even if the timer is set     l)  First press the Mode Button  (2) @ once, to set the)
    for a shorter interval.)                                  symbol at the C (Continuous Shooting) mark. Then re-
 *  Set the camera on a tripod or steady surface for interval     move your finger from  the Mode Button  (2).
   timer exposures.                                             2) Press the Mode Button  (2) again to move the  )  symbol
 * Camera  returns  to Standard Mode  automatically   after       to R (Rewind) mark. The g  (shutter release symbol) will
   interval timer exposures are completed.                    appear on the information  display panel.                                                                                                    press                                                                                                         (2)                                                                                       and                                                                                                                 the shut-                                               Now                                                                     hold the                                                            Mode                                                                                 Button                                                                            down                                                                  3)           Timer                                    when Battery    Interval              Mode                        should                                 not be used *                                                                                                                              (Fig.                                                                                                                    will                                                                                                      rewind.                                                                                                                  17)                                                                   release                                                                               button.                                                                                  Film                                                                                         begin                                                                                                                 to                                                                             ter                        is                                      low power   Power         Symbol                      blinking                                 to indicate                                                    supply.
 *  Press down the Flash Unit to cancel settings or interrupt      * Once forced rewinding begins, finger may be removed
    Interval Timer Mode between exposures.                   from  the Mode Button  (2).
Auto-date                            Using the Mode Fixed Switch
This camera has a quartz-controlled   auto-date mechanism   To Prevent user error, this camera is designed to reset itself
(clock/calendar)   that  is programmed  through  to December    to the Standard Mode automatically,  after shutter release
3t.20t9.                                                                  is completed. A Mode Fixed Switch is provided to prevent
                                                           automatic  resetting,  if a number of pictures modes. This
Changing the Display Mode                                switch is inside the Back Cover, and so must be set before
Press the DATE button and select either date or time. (Fig.   loading  film.
16t                                                                                              l) Slide the Mode Fixed Switch to the left.  (Fig. 181
Adjusting Date and Time                                      2) Load the film. The camera will be in the Standard Mode.
 l) Pressthe DATE button and the date or time will be dis-    Use the Mode Buttons  (l) or (2) to set the speical mode,
   played.                                                  as desired. After each shot, the camera will remain in the
2) Pressthe SELECTbutton so that the dateor time blinks.    mode selected for that shot.
3) Pressthe SET button to set the date or time.             3) The mode may be changed by pressing Mode Buttons (l)
20
View original page 20Page 21 · Read text
&*il
       (2).   or
   After *         the roll is finished, the Mode Fixed Switch mav be  Liquid Crystal Display
             to              the right                            for automatic resetting to Standard   _setqack
            (to                                                   The LCD  display darkens at high temperatures, and the  Mode            save                   the battery).
 * The mode cannot be changed while flash is recharging.   response is slower at low temperatures. The LCD  returns
 * When the camera power is turned  off,  the cameriwill       to correct operating characteristics at normal temperatures.
   return  to Standard Mode,  regardless of Mode  Fixed
   Switch position.
How to Replace the Battery
R.eplacethe battery when the Battery power Symbol is half
blank or has begun to blink.  Wait-until  the i:nd of a roll
of film before replacing battery, (or use Manual Rewind to
rewind the filr,r,r.)Use a 2CR5:6V lithium  battery. One bat_
tery powers all the camera functions.
 l) Turn the camera's Power Switch on.
2) Use atallpoint  pen o! other fine-tipped object.to press
   the release button  inside the small-hole in-the Baltery
  Chamber Cover Q. The Battery Chamber Cover can then
  be removed by sliding it while pressing this button.  lFig.
   1 9 1
3) Remove the old  battery.  Wait  about   I minute  for  the
   Battery Power Symbol to disappear fully, and then in_
   sert the new battery.  (Fig. 20)
* The Auto-date display will appear on the back panel of
   the camera when the battery is set in the proper fosition.
* Do not remove the Remote Control  Tfansmitier  while
   replacing the battery.
* The lens cover will operate when the new battery is in_
   serted. (Re-insert the battery in the correct positioir  if the
   lens cover does not operate.)
* NOTE:  Set the camera to Auto mode after the battery
  has been replaced.


                                                                                            2 l
View original page 21Page 22 · Read text
SPECIFICATIONS
 Tvpe               @hutter                                 camera with  built-in zoom lens
 lormat             24 x 36mm
 Len               40-rnmT3.8=0mm    F7.2 focal length Konica zoom lens (7 groups-U  eleTgnqL  tocal  orstance.oucm-r
 Shutl                  Eiectronii  procrammad  ahutter,  lsec. to  l/500sec., Electromagnettc release
 Power Swlt          Flash swings up, lens cover opens ano snuller
 Finder            @Auto-focusframe;Parallaxcompensationmarks(atU.6m);ZoneIocusllgnI
                           ligh-ts to measure distance (:?light  blinks when subject less than 0.6m); Flash symbol lights when changrng.
                   m-ode and when in Flash ON riode  (blinks  in Flash OFF mode when available light  is insufficient);  Visibility
                   comDensation function 0.5 -  -2.5  diopters included
 Focusing      @ s s y S t e m ; e f f e c t i v e r a n g e 0 ' 6 m ( 2 . 0 t 1 ) t o i n t l n l t y ; | o c u s l o c l ( w l t n
                       shutter releasehalf stroke
 AE adjustment    @l;Center.Weighted;+EVl.5exposurecornpensatlonlunctlonano
                        backlieht detection functions
 Ab. coupllng range   O - l O e  f - 4 0 m m E V 4 ( F 3 . 8 o l ) t o E V l E ( F 2 2 o l / 5 t n ) ,   l = U O m m E v ) . o ( r t . z . t ) r o    t v r d ( r r u . r / r r u ,
 Film speed          with  DX  film, Auto  settrng lso  )0 to  lsu  Jzw,  wltn
 Flash                                                    maticflashwithinsufficientavailablelight;coupllngrange(|5U|W)
                   0.6m (2.6fr) tJSm(tO.+ft);  Flash recycle time about 4 sec., Flash ON and Flash OFF modes in addition to
                     Auto  Flash
 Remote Lontrol                                                e r r e l e a s e f r o m u p t o 5 m ( l 6 . 4 f t ) f r o m l r o n t o l c a m e r a ' 0 . / m
                            (2.3ft) from back of camera (shorter effectiue ra
  film  transpoft                                                     closed;auto-returnatfilmend;auto.stopattertllmrewlnd;
                     Forced rewind feature; Frame counter Display on LCD,  incremental type                                                                ,
  5ell-trmer                                                                                                                r f i r s t 7 s e c . a n d l i t f o r r e m a i n i n g 3 s e c . ; C a n c e l
                       function provided
  Settlngs                                                     OFF + Exposure Compensation  ( + Ev l'5)
                  Mode 2.Single-Continuous-Self+imer-(Forced       Rewind); Mode  fixing possible (Mode   I' Mode  2)
                  Mode  3.Muitiple  exposures-Time  exposure photography-lnterval    time photography                               ..
  Atuo-date                                                                                                                                      t h e y e a r 2 0 l 9 ; s e t t i n g s f o r d a t e o r t i m e r e c o r d l n g '
                         or cancel for no imprinting;  adjustable to nearest second.
  Battery life                                                                          fitm)
  tsower source
  Size and weight     133.Jx 85 x 73mm {5.5 x3.4x2.9"   )    4)ug (l).voz)  (              v,
 rspecifications and design subject to change without  notice.   *Above  data based on manufacture's  tests.
 22
View original page 22Related documents and language editions
From the M. Butkus archive. Original publisher and archive notices are retained.
Check the model and edition against your equipment.
PDF verified 2026-10-10.