Film cameras
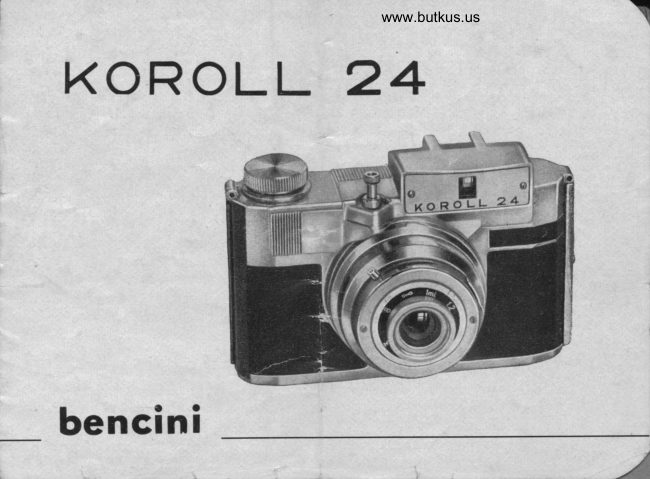
KOROLL 24 (Bencini) User manual
User manual for KOROLL 24 (Bencini). 11 pages in English. Read the original PDF, download or print a copy without registration.
11 pagesEnglish5.1 MB PDF
Loading your manual…Open PDF directly
Document details
- Brand
- Bencini
- Model / document
- KOROLL 24 (Bencini)
- Document type
- User manual
- Language
- English
- Pages
- 11
- File size
- 5.1 MB
- Category
- Film cameras
- Document date
- Not specified in catalog
Search available document text
Find a term, then jump to its page in the original PDF. Image-only pages may not be searchable; check the PDF for exact wording and diagrams.
Page 2 · Read text
lf pregio del KOROLL 24 b doio dollo focilitd con lo quole il  lotogrofo principionte pub
  usorlo; b infotti ossodoto che lo persono poco esperto troe migliori risultoti con opporecchi
  semplici e di bosso costo onzichd con opporecchi complessi e costosi, purchb lo semplicitd
  sio, come nel coso del KOROLL 24, lo risultonte di un occuroto studio delle porti ottiche e
  mecconiche.
    ll KOROLL 24 d l'opporecchio di costo bossissimo di rendimento eccellente, di elegonte presen-
   tozione.


 The porticulor of the KOROLL 24 is thot o beginner con use it  efficiently. lts hos long been
  estoblished thot with comeros of simple construction ond low cost better result ore obtined,
  rother thon with complex ond costly mochines, provided their simplicity  it the result, os in the
  KOROLL 24, of coreful study ond monufocture of its opticol ond mechonicol ports.
 The KOROLL 24 is o comero of very low cost giving excellen results, ond is of elegont
  oppeorqnce.


. L'ovontoge de l'opporeil KOROLL 24 est lo focilit6 ovec loquelle l'omoteur peut l'utiliser. M6me
 en ne poss6dont pos des grondes connoissonces en motibre photogrophique, on obtiendro ovec
  le KOROLL 24 de trds bons r6sultois.
  Le KoRoLL 24 esl l'opporeil bconomique, d'excellente pr6sentotion.

                                                                      ^/
View original page 2Page 3 · Read text
7                                                   www.butkus.us


       LE PARTI PRINCIPALI DEL KOROLL 24           PARTTES PRINCIPALES DU KOROLL 24
            I Bottone di owolgimento dello pellicolo                I Bouton d'enroulement du fllm
       2 Pulsonie di scotto dell'otturotore            2 Poussoir de d6clonchement
                                                                                       synchroflosh       3 Contotto lompo                         3 Prise de
       4 Messo o fuoco                         4 Bogue de mise ou point de l'obyectiv
                                                                                                  pose       5 Levo per fotcarofore con mezzo poso       5 [-evier pcur prhctogrophier en
       6 Serroturo dell'opporecchio                  6 V6rrouilloge de l'opporeil
       7 Mirino                                 7 Viseur
       8 Guida d'innestc flosh.                    8 Supoo't de flosh.


       MAIN PARTS OF THE KOROLL 24

       1 Film winder
       2 Shutter releose
       3 Flosh contoct
       4 Focusing lens
       5 Time exposure chotch
        6 Body cotch
                                                                                                                                                                                                                                                                           DN:ou=butkus.org,Date:cn=Mike2022.03.06signedButkus,email=mike@butkus.org,by23:49:07Mikeo=ButkusButkus-05'00'camera manuals,c=US        7 Viewfinder                                 Mike Butkus  Digitally
        8 Flosh gun shoe.
View original page 3Page 5 · Read text
COME INTRODURRE LA PEttI.
                      COLA

                          A,prire l'opporecchio come in-
                       dicoto nello figuro 1  focendo
                           scorrere lo serroturo.
                           Introdurre lo bobino nell'oppo-
                          sito sede libero, ossicurondosi
www.butkus.us                    che uno bobino vuoto sio Sid
                         in  posizione di  owolgimento
                           innestoto ol bottone di  corico.
                       Prendere lo  linguetto iniziole
                       dello pellicolo e portorlo ollo
                      bobino vuoto ovendo curo di
                             infilorlo nel ioglio lungo esi-
                         stente sullo medesimo, in  po-
                        sizione centroto .in modo che
                         lo  corto si owolgo regolor-
                           mente.
                    Dore quolche giro ol  boiione
                         di  owolgimento e   richiudere
                             l'opporecchio.

                                                      -/
View original page 5Page 7 · Read text
COME USARE tA NUMERAZIONE
                                                 DELLA PELTICOLA
                                                     Girore  il  bottone di  owolgi-
                                                 mento dello pellicolo finchb  il                                                numero 'l  dello medesimo op-
                                                             porird sullo primo spio di  cel-
                                                            luloide e  quindi scottore  lo
                                                 primo fotogrofio.  - Portore suc-                                                                                                                                                                 'l   in                                                         cessivomente  il  numero
                                                        corrispondenzo dello  secondo
                                                            spio di celluloide e scottore lo
                                                   secondo foiogrofio. Quindi  il                                                   numero 2  dello pellicolo nello
      www.butkus.us                                 primo spio per lo terzo foto-
                                                                  grofio e poi il numero 2 nello
                                                             secondo spio per lo quorto foto-
                                                                  grofio e cosi vio fino o quondo
                                                           ovrete esourito i dodici numeri
                                            deUo oellicolo e  scottoto 24
                                                                            fotogrofie.
HINTS ON HOW TO WIND ON FILM - Turn the film-winders knob until the F. 1 oppeors in
                                                                                                                                                  1the left-hond celloloid window, ond toke the first, exposure. Then ogoin ind on until F.oppeors in the right-hond window ond toke second exposure. Then F. 2 wind hove to oppeor
 in' tne left-hond iindow for the third exposure ond in the righi-hond window for the fourth exposure ond so on until the twelwe nu-bers hove oppeored successively in both windws, thus
 completing 24 pictures.
DEROUTEMENT DU FILM - Tourner le bouton d'enroulement du film iusqu'd ce que le num6ro
1 opporoisse dons le premier voyont rouge post6rieur. Prendre lo premibre_ photo. Porter
 ensu'ite le num6ro I  sur le deuxidme voyont rouge et prendre lo seconde photo. Puis
 le N. 2 sur le premier voyont pour lo troisidme photo et ensuit le N. 2 le deuxieme voyont
"pour lo quotribme photo Operer oinsi de suit iusqu'd 6puissement des l2 num6ros. A ce moment
 les 24 photos sont prises.

                                                                                       -/
View original page 7Page 8 · Read text
www.butkus.us7
         PER FOTOGRAFARE

             Mettere. o fuoco l'obiettivo col-
          colondo lo distonzo che inter-
          corre tro  l'opporecchio e     il
          soggefto, girondo l'indicotore
         posto sull'obiettivo sino  ollo
          distonzo corrispondente inciso
            sullo scolo.


         HINTS ON TAKING EXPOSURES
         The first thing to be done is to focus the lens. This  is done by colculoting the distqnce
          between the comero ond the ob[ect to be photogrofed,   turning the lens mount corresponds
            with ihe indicqtor pointer.


           PRISES DE VUES
          Avont l'uiilisotion de l'opporeil controller lo distonce du  suiet d photogrophier et  reporter
              celle-ci ou rneyen du borillet de mise ou point.
View original page 8Page 9 · Read text
\


     LA MEZZA POSA
      Per prender fotogrofie di  interni o in condizioni di scorso luminositd ombientole, odottore
        l'opporecchio per fotogrofore con lo mezze poso. Sollevore lo levetto o fionco dell'otturotore
     e fissore l'opporecchio su un treppiede o oltro supporto fermo; inquodrore  il soggetto e scottore
 tr      possibilmente col flessibile; l'otturotore rimorrd operto  il tempo che si ritiene nesessorio per
      uno buono esposizione e per cui sord montenuto lo pressione sullo scotto.
     I
     I
     I      BRIEF TIME EXPOSURE


         I     When thoking exposures indoors or when the light is poor, prepore the comero for toking
,l    o brief time exposure. Move time exposure lever to B position moking sure thot the cqmero
    I        is ploced on o tripod or other firm support, frome the Picture io be token ond releothe shutter,
            if possible using o flexible coble-releose; the shutier will reomin open for the time considered
       necessory for o good Picture to be token, i.e. os long os the shutter-releose is held open
      by pressure mointoined on the lever.


                                                             POSE
                                           En cos d'utilisotion en  pose
                                                                      (conditions de lumibre insuffi-
                                                                      sonte)  il est n6cessoire de sou-
                                                                       lever le petii levier se trouvont
                                                         sur le cot6 de l'obturoteur.   ll
                                                           est recommond6 de fixer l'op-
                                                                   poreil sur un pied et de d6-
                                                                    cloncher, si  possible ovec un
                                                                             flexible. L'obturoteur reste ou-
                                                                  vert tont que l'on mointient lo
                                                                    pression sur le levier.
                        www.butkus.us
                                                                            ^/
View original page 9Page 10 · Read text
/                                                 www.butkus.us


          SCELTA DEL LAMPEGGIATORE
            Si consiglio per comoditd un lompeggiotore che obbio l'ottocco odotto ollo guido esistente  sul
             vostro opporecchio. Possibilmente scegliere un lompeggiotore munito di condensotore: vi dord
              migliori risultoti. E'indispensobile che lo preso di contotto sio del tipo internozionole do 3 mm.


          CHOICE OF THE FLASH.GUN
                 It  is odvisoble to use o  flosh-gun  thot hos o shoe-ottochment suitoble for fixing to  the
             corresponding thoe of your comero.  Choose if  possibJe o flosh-gun thot hos o  condenser
             incorporoted: ihis for best results.  lt  is essentiol thot the diometer of the flosh-contoct be
            of the internotionol type of 3 mm.


           SYNCHRO-FIASH

        Une prise de synchro-flosh  est
           prevue sur votre opporeil pour
           les prises de vues por temps
          sombre ou d  l'int6rieur d  lo
            lumibre ortificielle. Cette prise
             doit 6tre de type 3 mm.
View original page 10From the M. Butkus archive. Original publisher and archive notices are retained.
Check the model and edition against your equipment.
PDF verified 2026-10-10.