Film cameras
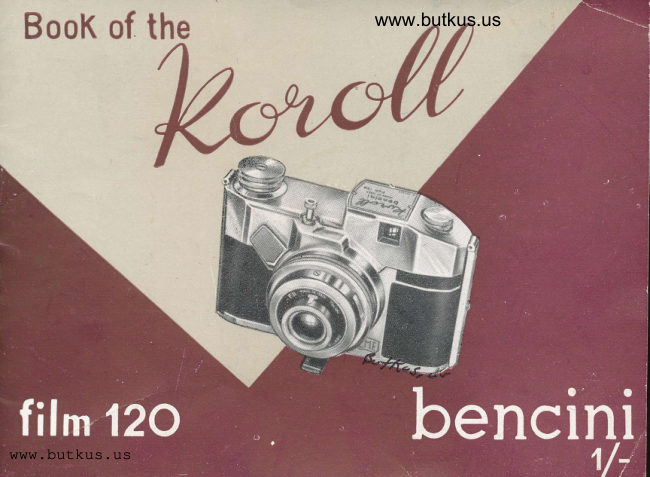
Koroll Bencini User manual
User manual for Koroll Bencini. 13 pages in English. Read the original PDF, download or print a copy without registration.
13 pagesEnglish5.8 MB PDF
Loading your manual…Open PDF directly
Document details
- Brand
- Bencini
- Model / document
- Koroll Bencini
- Document type
- User manual
- Language
- English
- Pages
- 13
- File size
- 5.8 MB
- Category
- Film cameras
- Document date
- Not specified in catalog
Search available document text
Find a term, then jump to its page in the original PDF. Image-only pages may not be searchable; check the PDF for exact wording and diagrams.
Page 3 · Read text
Your KoRoLL camera is of precision manufacture,
        and will take superb photogrdphs. please spdre
          the t:me to read through these simple in_
                structions so that ycu may get the best
              out of your camera. !t is worth  it!
           BOOTS THE CHEMISTS

Your KOROLL t,lkes the popular 120 size  f ilm, anct by means of ingenious
internal masks ycu have the choice of taking twelve 2-1/4,,square pictures
oi sixteen 1-3/4" X 2-1/4".
Ihe lens has an aperture of f:11, and the shutter operates at 1/501h sec.
View original page 3Page 5 · Read text
Before loadimg the camera
  Slide down the body catch ds shovrrn, ancl
gently open the camera. Before loading, it  is
necessary to der:ide whether you are going to
take the lwelve tdrge or sixteen smal.ler pictures
on your filrn. lf you are going to take twelve
pictures, then you need to remove the two small
masks on either side of the picture opening.


                                                                                cn=mike butkus,               mike                       DigitallyDN:o=orphancameras,signed by mike butkus                                                                                                  ou=29,
                butkus             email=mike@butkus.org,Date: 2019.09.01 18:12:52c=US-04'00'
                                          These masks simply pull out. Keep
                                    them safely ! Leave ilrem in if you
                                        want to take sixteen smaller pictures.
                                   You cannot change from one size  tct
                                         the other once yor-J have the film in
                                                the camera.
View original page 5Page 6 · Read text
www.butkus.us
 Ioading  the  carnera
Pull up the film retaining plunger (7) and
give it a quarter of a iurn. insert tire roli oi
flim (it is 120 size rememberl)  v"'hilst hoid ng
o..ri tire lower plunger (7). When ihe rcii of
riim is iir place, release boih the plungors
Breai< the parer band round the fiim, ond
using your thumb as o brake to prevent  i,
rirwinding toc mucn, lead the end oi the
D.rrer carefully over the two rollers anci
i;rsert ii in the wider slot of the take-up
s;:ocl. V/ind cn the fiim one vrrhole iurn oi
ihe winding knob, and make sure the          pdpe r is running, evenly and snugly
                                            over the rollers (see the illustration).
                                                 Close the back of the cdmerd.
                            For best  results
                                                  Load indoors, or at ledst in the shade.
                                           Take care the film does not become
                                                      u;-rwound as ycu are loading it. In the
                                                                 illustraiion. see lrotv the thurnb is i<eot
                                        on the film to prevent this happeninE.
                                                 Befcre you close the back of the ca-
                                                           me!'a, make sure that th-^ film is winding
                                                             u.verrly on the take up spool and the
                                            paper is lyinq snugly over the rollers,
                                             as shown in the illustratiorr
                   www.butkus.us
View original page 6Page 7 · Read text
For Best results
                                              Wind on to the next number immedia-
                                                       tely after you have taken the picture'
                                       When you hove taken the last one/ un'
                                                   load the camera indoors or in the sha-
                                               de. Seal the iilm immediately you take
                                                                        it from the camera, and make sure  it
                                          does not come unwound as you are
   sj                                                    taking it out.

Winding  on
  You now need to adiust the indicator
window at the back of your camera ac-
cording to the size of the picture you
are going to take. lllustration (1) shows
it with the aperture correctly placed
for taking twelve ?-1/4" square pictu-
res. lf you dre taking sixteen pictures,
rotate the whole disc until the aoeriure
                                                       (2).ls at the boitom as in illustraticn
Wind on the film until the No. 1 appears
:rr the window.
View original page 7Page 9 · Read text
Taking your  picture   (2)
  See how edsy and comf ortable it is 1o hold your
KOROLL camera quite still when you take a picture.
  Hold the viewfinder to your eye, compose the picture,
and then gently squeeze the shutter release. Wind on
to the next number straight awar,z.

Iarge  or small  pictures?
   lf yc.ru have tal<en the masks out of your camerd so
that you a'e using the larger picture size,  l-ltlthen everything you see in the view-finder l>     <l
will be included in your picture.                                              l_l
 On the other hand, if yoLt have left the rnasks in order to take
sixteen smaller pictures, then your camerd will record everyihing that
appears between the tivp srnoll arrows in your viewfinder,                           _1.
View original page 9
Page 10 · Read text
www.butkus.us
Brief  time  exposure
 When ihe "time exoosure" catch  is
lrulleC out, as shown ln the illustration,
yor-rr camera will take "brief time expo-
!'rfes". The shutter remains open as longl
as you hold down the shutter release. A
"brlef time" exposure is necessary for
iaking pictures when the light is poor.
For examcle, indoors, but it is essential
to have the camera on a firm support,
otherwise your pictures will be blurred.
  This guide to exposure times is re-
produced,            ,"by p ernrlssion of Messrs.
KODAK and refers to Verichrome film.
 Amount of light in room   Sunshine Outside Cloudy bright Or.rtsictc Cloudy dull Outside
         Plentif  Lrl              't-sec.           2-secs.        4-secs.
      Average           2-secs.          4.-secs.        B-secs.
          Little             B   secs.        16 -- se:s.       52 __ secs.                                -
    The < brief time > lever elso enables you to take flash photographs in your homr In a
darkened room you put your camerd on a firm support, open the siiutter on "brief time,,,
 fire off flashbulb, and then let the shutter close.  lt is ds easy as that. lnexpensive devices are
available for firing the flashbulbs. (You catr,  if you wish, improvise one )/ourself from a torch).
More inlormation on flash photography'is available from branches of BocTS THE cHEMlsTs.
View original page 10Page 11 · Read text
About deve!oping  and printing


  When you have laken all your pic-
 lures you will need to have the film "developed and printed" and Bools
specialize in this work. Developing the
film gives "negatives", and from thesenegalives you can have any number
of prints. You can have prinls which
6re the same size as lhe negalive
("conlaclpr.ints") oryou can hove prints
which are bigger ("enlargements" )  -"EN-prints" are specially economical
enlargemenls  - they cosl sixpence.
  From the 2-l14" square negalive they
        would be this size.
  They would be slightly larger from
lhe reclanguler negalive 1-314"x2-114"
  Your more success[ul KOROI-L pic-
tures will enlarge much bigger than
the "EN.print,, size (you will need lo
have focused correclly and to have
held the camera quite still, of course).
Ask the.assislant in Boots aboul posl-
card enlargemen ls at nine-pence    f rom
your reclangular negatives, or,,4-squa-
re" enlargemenls at lhe some price                                         www.butkus.us
from your square negalives. lf you
wanl somelhing even larger. lhere is
lhe whole-plale anlargemenl
               16-l |2"x8.1 12" I at 2|6dl.
View original page 11Page 12 · Read text
www.butkus.us
For  best    results
   Keep your KOROLL clean and free  f rom dust - in a case if possible. Please do not
try taking it to pieces.
   The lens of your KOROT-L is bloomed, which is one reason for the exceptional
pictures il takes. Clean it only with the softest materiai - a well-washed handkerchiel
or a very, very soft brush.
    Take great care o{ your negatives - tirey scratch easily, and the scratches are likely
to show on any further prints you have made.
   Remember the safety precaution which is built into your camerd - the shutter wil'
not operate unless the, lens tube has been locked into position.
    There are some accessories which will help you to take even betier pictures with
your KOROLL camera - a lens hood to keep ou1 the stray lighi - a filter to bring out
those billowy white clouds and, of course, a case to preserve your KOROLL in tip-top
condition.

   Ask at your local branch of Boots.
View original page 12From the M. Butkus archive. Original publisher and archive notices are retained.
Check the model and edition against your equipment.
PDF verified 2026-10-10.