Light meters
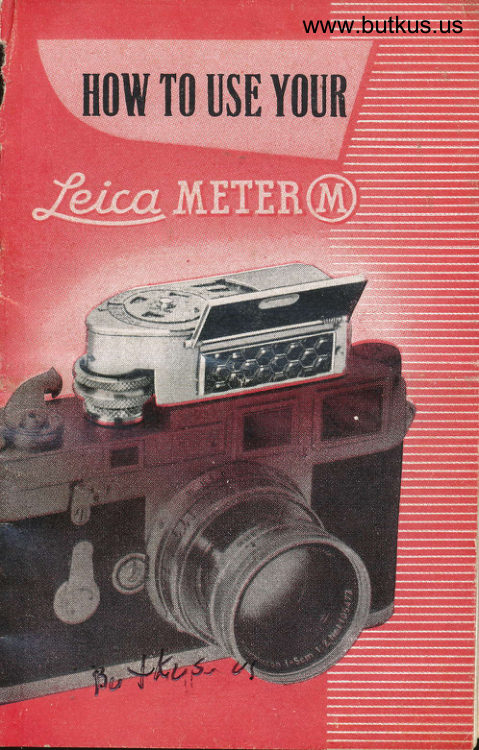
Leica meter User manual
User manual for Leica meter. 17 pages in English. Read the original PDF, download or print a copy without registration.
17 pagesEnglish1.4 MB PDF
Loading your manual…Open PDF directly
Document details
- Brand
- Leica
- Model / document
- Leica meter
- Document type
- User manual
- Language
- English
- Pages
- 17
- File size
- 1.4 MB
- Category
- Light meters
- Document date
- Not specified in catalog
Search available document text
Find a term, then jump to its page in the original PDF. Image-only pages may not be searchable; check the PDF for exact wording and diagrams.
Page 3 · Read text
,lfrow to ude !4our
        2eicawteter'?ft
     with the Qeica'W(. S
The unique Leica Meter M is made-
especially for the new Leica M 3. It
couples with the shutter speed dial
and solves your exposure problems
almost automatically  faster than
any other meter can. Here is how easy
it is to get perfect exposures every                                                       l
time:
                                                                                                                                                                                                                     I
/lftountins                                                                                                          I           th, 4eica 7fteter ryn
on Qeica'/4 S.                              J
To mount the Leica Meter, first set the
shutter speed dial on the camera  to
"8", Turn the knurled ring of  the
View original page 3Page 4 · Read text
www.butkus.us
1   exposure meter in the direction of thc
    arrow as far as it will go. The index
    line on top of the knurled ring will
    then face the index mark at the Leica
   Meter ltousing. With the knuried ring


    thus set, push up on it and turn it in
   the direction of the arrow a  litile
    further. The triangular pointer on top
    of the meter will now point at one of
    the figures from 4 to I20.
View original page 4Page 5 · Read text
Now slide the Meter, hinged baffle to
 the front, into the accessory clip of
the camera. Turn the knurled ring
back until it drops and clicks into the
 shutter speed dial of the camera. Now
camera and exposure meter are coup-
 Ied.


                         www.butkus.us


To take the Leica-Meter M off the
camera, turn the knurled knob in the
direction of the arrow as far as it will
go. The triangular pointer then points
at B-2. Lift the knob and continue
rotating in the direction of the arrow
until the triangle is opposite any of
the numbers from 4-120. Now you can
slide the meter out of the accessory
clip.
{
View original page 5Page 6 · Read text
www.butkus.us
                          Sy,eed. ,.Sca/, cSettins o{ th, fiilwt
        (€xpoaure /Weter an Ca*er,r)
You can set your film speed in either
ASA or DIN ratings. The three
scaies appear on the inner dial. Set
the dial when you put a new   f ilm
in the camerar then just forget it until
you switch to film with another rating.


Beeause the adjustment for film spee<l
is continuous, you can even correct
for differences in the actual sensitivity
of the film within the rating given by
the manufacturer. This is paiticularly
valuable for color films.
View original page 6Page 7 · Read text
Operation o{ the ?ft,eter
You can work in one of two ways.
You can choose a given lens aperture,
or you can choose a given shutter
speed for your particular subject.
'l.For a precle{ermined  lenrt dla:1t,
   With a slight rotation of the knur-
   Ied knob, you can set your chosen
   Iens opening opposite the channel


   into which the indicator needle has
  come to rest. This automh,tically
   adjusts the camera shutter dial for
  the correct speed. The black
   triangle shows the shutter speed
  which is set.
View original page 7Page 8 · Read text
www.butkus.us
                                        dpeecl.2. For a predeterwinecl uhutter
   Rotate the linurled ring until black
   triangle points at selected speed.
   Then. set your lens at stop which
   is opposite channel in which the
   indicator needle rests.
   Between rlsa and t/rooo cf a second
   you can set all intermediate shutter
   speeds continuously. For instance,
    Lli:, th  is set halfway between
     1/,;o th and 1/roo th. At speeds slower
   than rlso of a  second, let  the
   shutter speed dial click into the
.  marked positions.
The knurled ring couples to  the
shutter speed dial of the Leica M 3
for all speeds from 1/rooo to 1 of a
second. For exposures longer than
1 second, uncouple the exposure meter
and camera .by ,lifting the knurledring. You can then set the exposure
meter dial independently of the ca-
mera to indicate exposure times up to
120 seconds.
View original page 8Page 9 · Read text
r)'/\eaaurina           Rangt,
Range No. 1 runs from l/rooo to t/r of
a second. For this range keep the
 hinged baffle closed. Use it for bright
 subjects. The small slit in the hinged
 baffle lets only a small portion of the
 light fall on the photo-electric cell.
Use black aperture numbers for this
 range.


Range No. 2 goes from t/r o1 a second
to 15 seconds. For this range, open
the hinged baffle by pushing sligtly
against the hinged shaft in the direc-
tion of the red arrow. Use red aper-
ture figures for the measuring range
No. 2.


                                                                                                                                   Digitally signed by mike butkus
                                                                                                  DN: cn=mike butkus,
                                                                                                      o=orphancameras, ou=29,                      mike butkus  email=mike@butkus.org, c=US
-8                                                                                                              Date: 2019.08.19 16:16:16 -04'00'
View original page 9Page 10 · Read text
www.butkus.us
    Range No. 3 reads up to 60 seconds.
    You need to attach the accessory ele-
    ment to the Leica Meter M for this
     range. Use red aperture figures and
    multiply the results by four. That is,
    use either the second larger lens stop
                   longer exposure or canI   or four times    be read off the shutter speeds on theI   mark F

    The above figures are based on a film
          of 25 ASA and a aperture of    1aling     F/8. Since all measuring ranges over-
     lap,_ you will always get accurate
     readings
   The measuring range expressed in
    lqx  (meter dandle$ extends from    +,+LUX with the hinged baffle open up
    to 71600 LUX with-the baffle itosed.
   With the su_persensitive element, you
    can read as low as 1,1 LUX.
View original page 10Page 11 · Read text
,S u pe, - rS e n d it  i ue-€  I e men t
You can get a super-sensitive ele-
 ment for the Leica Meter M as well
 as for all other Leica-Meters. This fits
 into the contact railing at the side of
the Leica Meter M. You should press
down the small red knob when vou
put it on.


                  .rG-f

The additionai element increases sen-
sitivity four times and permits exact
measurements even in  extremely
weak light. It gives the new exposure
meter an extremely wide range.


JO
View original page 11Page 12 · Read text
.T                      www.butkus.us
    ehree 7/leaau,ina 'Vllethocla
II   You can use any of three methods to '  determine the exposure with the
    Leica Meter M
       I. Wleaaurins Briqbtneda at tbe Obiect
       This is the most popular way. It is
       convenient and can be used at
       various distances as long as there
        is not too much contrast in bright-
      ness between subject, background
      and surroundings. Hold the meter
       with the honeycomb window facing
      the object and measure the light
        reflected from the object.


                               -    I


                                                                   tl
View original page 12Page 14 · Read text
www.butkus.us
     If these two methods are not sufficient,
   yoLl can also use:

                       mertdw'ement    III. Jncirlent liqbt
    Use it when contrast within the
I      picture background and surround-
     ings is great and You can't gel      close-up readings. This method
       measttr-es the actual light falling
    on the subject. For this tIPe of    r  measlrremenl, insert the small opal
        clisc suppiied with the meter into
      the track on the honeYcomb win-


            z---------


                                                         l3
View original page 14Page 15 · Read text
t
                                  then  dow. The measurement is   carried out in reverse, i. c. Yott
   point the meter away from the       I   subject and towards the camera.


                                .l,\


rftate
             '
Use the opal disc onlY for incident
                                             offlight measurements. Be sure it is
ttie meter when You use methods I
and II. Incident tight measurements
without the opal disc and reflected
light readings with the opal disc inposition (by mistake) will result in
exposure errors.
 t4
View original page 15Page 16 · Read text
www.butkus.us
  Adiuatment
    If the indicator needle (with the honey-
  comb window completely closed) does
  not point exactly at the "0" marking,
  the "0" position can be adjusted with
  a small screw driver. This adjusting
ll screw is set at the lower side of the
  exposure meter; it is marked "0".

I
  G uarantee
  Your Leica Meter M is guaranteed
  for two years. During this time, if
  anything goes wrong (provided you
   haven't misused your meter), we wiil
   fix it for you free. Just bring or send
  your Leica Meter M back to us or to
  your Franchised Dealer with its seal
   unbroken.

   Calibration
  When working for the first time with
   colotir film, especially reversible co-
   lour film with a very narrow exposure
   range, it  is recommended to gauge
   the film together with the carnera anci
   the meter. This is suitablv obtained
                                                       l5
View original page 16Page 17 · Read text
by making several trial shots with
the aperture valttes read off the meter,
as w-ett as the next higher and the
next lower value. The best Picture
will then provide the reference values
for the future as regards the set'ting
of the film sensitivity at the exposure
meter, whereby the sensitivity value
may in some cases differ from the
value printed on the film's wrapping.
                                 e x tIn case pictures with the n
lower  aperture value B have come
out much better than those with theindicated aperture value 11 it will be
necessary, in future, to set the value
I o w e r by 1/s DIN than that Printed
                                                  g.on the film's wraPPing. Thus e.12iro DIN only instead of  1;,/ro DIN.
Corresponding ASA values can' be
read off the meter, e. g. in this parti-
cular case 20 ASA instead of 10 ASA


MEIRAWATT AG NURNBERG


 engl.
View original page 17From the M. Butkus archive. Original publisher and archive notices are retained.
Check the model and edition against your equipment.
PDF verified 2026-10-10.