Film cameras
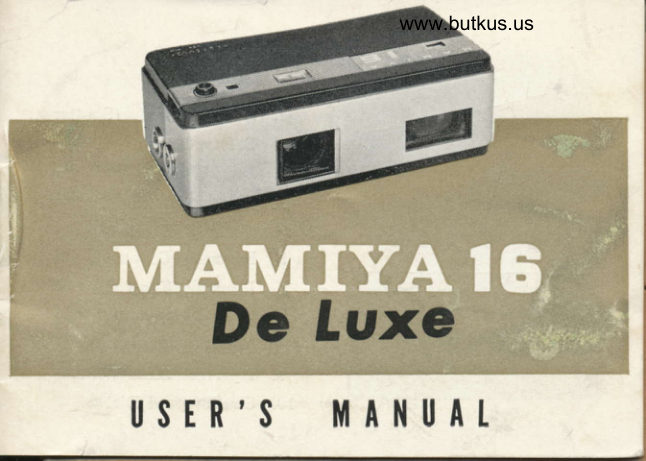
Mamiya 16 De Luxe User manual
User manual for Mamiya 16 De Luxe. 17 pages in English. Read the original PDF, download or print a copy without registration.
17 pagesEnglish1.7 MB PDF
Loading your manual…Open PDF directly
Document details
- Brand
- Mamiya
- Model / document
- Mamiya 16 De Luxe
- Document type
- User manual
- Language
- English
- Pages
- 17
- File size
- 1.7 MB
- Category
- Film cameras
- Document date
- Not specified in catalog
Search available document text
Find a term, then jump to its page in the original PDF. Image-only pages may not be searchable; check the PDF for exact wording and diagrams.
Page 3 · Read text
www.butkus.us
11. Eyepiece
L2. Viewfinder Window
13. Backlid Catch Button
14. Backlid
15. Film Cartridge Chamber
16. Exposure Counter Reset
    Wheel
17. Filter Positioner
18. Filter Change Slit
19. Synchroflash Terminal
20. Wristband Socket
27. Tripod Socket
22. Focal Plane Mark
View original page 3Page 5 · Read text
FIIM TOADING
  The MAMIYA 16 De Luxe is designed to take any type of
l6-millirneter negative film, monochrome or color, perforated
or non-perforated. Film, cut to a length of .5 meter (approxi-
mately 20 inches), is darkroom preloaded in the special safety
cartridge, of either the single or double type. Loaded single
or double cartridges are available.
  When loading safety cartridge in your MAMIYA 16 De Luxe,
do so in subdued light, carefully avoiding direct sunlight.
 When first loading empty MAMIYA 16 De Luxe, open lens
cover (1), and turn cocking wheel ( ) in direction indicated by
arrow. If cocking wheel will not move, press shutter button
(3) to release shutter.  Next turn cocking wheel slowly, and
bring red dot on wheel into alignment with red dot on camera
body.  In this position, the exposure counter reset wheel
View original page 5
Page 6 · Read text
www.butkus.us
                      (16) is free to turn in clockwise direc-
                     tion. Turn this wheel until exposure
                    counter (5) indicates "S"  (start), then
                      turn cocking wheel (4) fully to the right.
                  Close lens cover (1) to lock shutter
btrtton (3).
  Next, open backlid (14) by pushing backlid catch button (13)
in direction indicated by arrow, and pressing
down to release backlid catch. Backlid (14)          ll.f>-
can then be swrng open on its hi'ges.           ,lirl-
(Fig' 1'
  locdlng Double Sofery CorrrldgeGatrtrAaa              -ffi1t, nf\               "ararv                         r   l.  Insert preloaded clotrble safety cartridge  'r --ZlA          t
in filrrr cartridge chanrber (15), with direction                                                                      ,lf               tof arrows on cartridge and canlera nratched.   ItE              \
If the dotrble cartriclge does not sink down ilfo\>
View original page 6Page 7 · Read text
www.butkus.us
 snugly, turn the spool of the take-trp side (cocking wheel side)
slightly with fingertip. when spool catches take-up spindle.
the safety cartridge will sink flush with a distinct click.
 (Fig. 2)
  2. close backlid (14) and snap shut.  open rens cover (l),
and take three blank shots while keeping the lens window (2)
covered with thunrb. Exposure counter (s) will indicate  ,, 1,,,
and the cantera is ready for the first shot.
  Note 1.  If, when loading dotrble cartridge, the backlid catch
button (13) is kept depressed, insertion of the filnr between
the gate and presstrre plate is facilitated becatrse spring pres-
View original page 7
Page 8 · Read text
www.butkus.us
sure is reduced.
  Note 2.  If, after the camera is readied for picture-taking,
there is an interval before the first shot, close lens cover (1)
to lock shutter button (3).
  Note 3. After setting exposure counter upon reloading, do
not touch exposure counter reset wheel (16). Also make sure
that the cocking wheel (4) is always turned fully until it
comes to a stop. Make it a habit to close lens cover (l)
when not shooting.
  loodlng Slngle Sofety Cortrldgcr
  1. Have on hand an empty single-type safety cartridge.
Open up and take out the spool. Pull out a short length
(about two inches) of film from the preloaded safety cartridge,
and secure end of film to spool of the take-up cartridge by
means of the spring clip provided, seeing that nib (B) presses
fllm into slot (A) of the spool. (Fig. 3)
View original page 8
Page 9 · Read text
2. Insert spool and film into casing of take-up cartridge, fit
cover piece, and secure by means of a small piece of
cellotape.
  3. Open backlid of the camera. Place single safety car-
tridges, now joined by film, in the film cartridge chambers
 (15), the take-up cartridge going into the chamber on the
cocking ring (4) side. (Fig. 4)
  4. See that take-up cartridge fits snugly, turning spool
slightly if necessary to obtain proper coupling with the take-up
spindle, then snap backlid (14) shut.
  5. Proceed from this step on in the same way as when
using preloaded double safety cartridge.
                FOCUSING
 When picture-taking, judge or measure  distance to subject,
and turn focusing knob (6) so that this distance is indicated
View original page 9Page 10 · Read text
www.butkus.us
 in the distance scale window (z). After setting the shutter-
speed dial (10) and the aperture control (g), sight subject
through eyepiece (11) and compose picture.
  The lens of the MAMIYA 16 De Luxe is a newly designed
MAMIYA-SEKOR anastigmat of F 2.8, f          rating, giving                          -21mmextreme speed and resolving power in conjunction with great
depth of field (focusing tolerance). Therefore, when photo-
graphirrg at distances of more than six feet, errors in judging
distance are relatively unimportant. At closer distances, how-
ever, it  is desirable to obtain the range as precisely as is
practicirble.
 when the subject is less than I rl, f.oot from the camera, use
tape measure to find distance, i:sing the focal plane mark (22)
as the starting point.
 The circled dot mark on the distance scale between 2 m
and oa is the fixed focus point (about 12 f.eet). with the
View original page 10
Page 13 · Read text
The use of a filter is called for by some subjects. When the
filter (self-contained) must be brought into position in front of
the lens, merely push the filter positioner (17) in the direction
indicated by the arrow.  Reverse this procedure to clear lens
of filter. To remove filter for changing or cleaning, open filter
change slit (18) and shake out.
           SHUTTER OPERATION
  1. The shutterspeed dial (10), when set at intermediate
positions will not give intermediate shutterspeeds. Always use
click stop position.
  2. Shtrtterspeed changes may be effected at any time, either
before or after cocking (filmwind).
  3. The aperture control, on the other hand, regulates lens
opening continuously. Intermediate steps can be used.
  4. The screw socket at center of the shutter button (3) is
View original page 13Page 14 · Read text
www.butkus.us
for fitting self-timer or cable release.
             CAMERA GRIP
  The camera may be held in any steady, comfortable way.
Be sure that fingers do not obstruct lens.
  After focusing and setting the shutterspeed dial and aperture
control, sight subject through viewfinder, compose picture, and
gently press down upon the shutter button (3).  Camera jerk
must be avoided at all cost. When pressing shutter button,
grip camera firmly, with elbows propped up against your body.
Hold breath momentarily for added steadiness.
  The illustrations show suitable ways of holding the camera
for horizontal and vertical picture positions.
  Utmost steadiness of grip can be achieved by using the
special grip holder. This accessory is essential for synchro-
flash photography, while the grip handle is a convenient
View original page 14Page 15 · Read text
\                                                www.butkus.us F{                        tbl
  rcccl;tuck for spare clorrltle safe'ty cartriclge.
        SYNCHROFTASH PHOTOGRAPHY
   \Vhcn :rtt;rchirrg the grip holcler, intcr'ltose tht'speciul flashgrrn
  llr';rcket. Morrnt fluslrgun oi) :lccessory clilt  of the bracket,
    t hetr cotutect corcl of  fllrshgrrn to sync:hroflush terrrrinlrl  ( l9)  .
  Colttl-llt:tt' synchr<lnizlrtion clf shtrttcr :rction and flzrsh cillt be
  irclrievccl at all shtrttersDeeds not irr excess of 1'25 sec<lnd.
View original page 15Page 16 · Read text
www.butkus.us
   TOADING SAFETY CARTRIDGE WITH FILM
  This operation must be done in complete darkness by feel,
or under a dark green light. On empty spool, secure end of
film, emulsion side downward, with small piece of Scoth tape,
and wind on to spool. Place spool-wound film in cassette, with
about an inch of the film protruding through the slit. When
loading the double cartridge, next secure free end of  film,
emulsion side downward, to take-up spool, again using Scotch
tape, and insert spool in take-up side of cartridge. Replace
cartridge covers, and secure with bits of Scotch tape.
 When loading single cartridge, using spool provided with
spring clip, do not secure end of film by means of pip on clip
and g:roove cut on spool. Merely slip end of film, emulsion
side downward, under clip, then wind. Place in cartridge, re'
place cover, and secure with Scotch tape.
View original page 16
From the M. Butkus archive. Original publisher and archive notices are retained.
Check the model and edition against your equipment.
PDF verified 2026-10-10.