Film cameras
Mamiya 500 TL User manual
User manual for Mamiya 500 TL. 15 pages in English. Read the original PDF, download or print a copy without registration.
15 pagesEnglish0.7 MB PDF
Loading your manual…Open PDF directly
Document details
- Brand
- Mamiya
- Model / document
- Mamiya 500 TL
- Document type
- User manual
- Language
- English
- Pages
- 15
- File size
- 0.7 MB
- Category
- Film cameras
- Document date
- Not specified in catalog
Search available document text
Find a term, then jump to its page in the original PDF. Image-only pages may not be searchable; check the PDF for exact wording and diagrams.
Page 2 · Read text
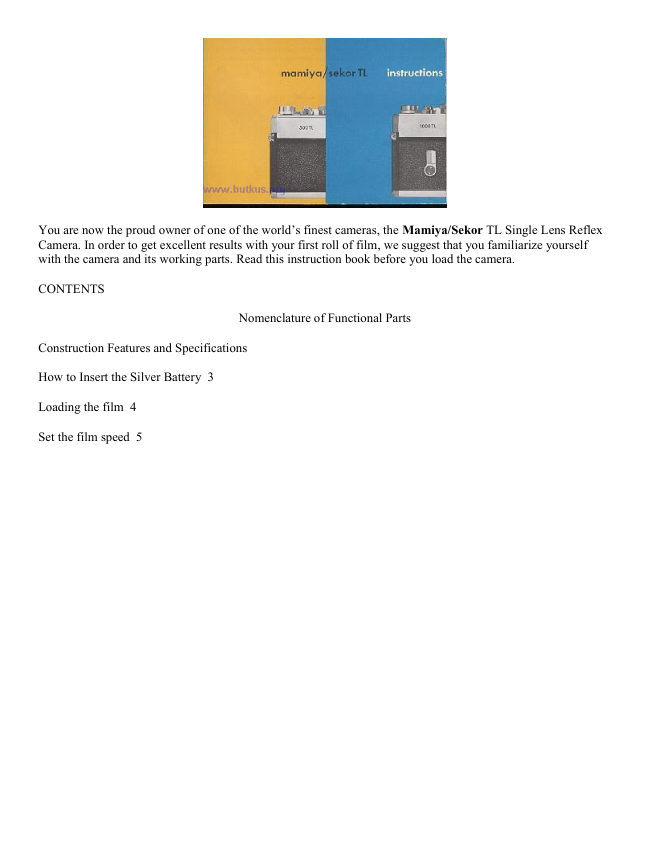
You are now the proud owner of one of the world’s finest cameras, the Mamiya/Sekor TL Single Lens Reflex
Camera. In order to get excellent results with your first roll of film, we suggest that you familiarize yourself
with the camera and its working parts. Read this instruction book before you load the camera.

CONTENTS

                                 Nomenclature of Functional Parts

Construction Features and Specifications

How to Insert the Silver Battery 3

Loading the film 4

Set the film speed 5
View original page 2Page 4 · Read text
20. Mirror-Matic
Spot Meter

21. FP & X Flash
Terminals

22. ASA Film
Speed Setting

23. Neck Strap
Eyelets

24. Tripod Socket

25. Battery Cover

26. Back Cover
View original page 4
Page 5 · Read text
SPECIFICATIONS


               35mm Single Lens Reflex with Built-in behind the lens Light
TYPE:
                    Meter

FILM &
               35mm (20 or 36 exposures); 24x36mm.
THREADING SIZE:

                  Mamiya/Sekor : f/l.4 - 55mm, 7 elements in 5 groups, angle 43
                      degrees
STANDARD LENS-
---1000 TL
                  Mamiya/Sekor : f/1.8--55mm, 6 elements in 4 groups, angle 43
                      degrees

STANDARD LENS-  Mamiya/Sekor : f/2.0----5Omm, 6 elements in 4 groups, angle
---500 TL           47 degrees

LENS MOUNT       Threaded Praktica/Pentax type mount, 42mm

SHUTTER           Focal plane shutter

                   1000 TL- B to 1--1/1000th second, with Self-timer 500TL- B to 1
SPEEDS
                      1/500th second, without Self-timer

                     Highly sensitive CdS Meter positioned on the back of the mirror.
                        Internally coupled to both shutter speed and lens diaphragm of all
                  Mamiya/Sekor Lenses and Praktica-Pentax type lenses. Needle
EXPOSURE
                       point indicator visible in viewfinder. Operating range EV-2 to
CONTROL
                    EV-18, with an ASA 100 film, and f/1.4 lens; EV-2.7 to EV-18,
                     with an ASA 100 film, and f 1.8 lens; EV.3 to EV-17, with an
              ASA 100 film, and f/2.0 lens.

ASA RANGE        25 to 800 : DIN 15 to 30

                     Penta-Prism finder with micro diaprism fresnel lens for instant
                       focusing. Finder ratio: 0.95 magnification for f/1.4 and f/1.8 lens
FINDER                at infinity. 0.86 magnification for f/2.O at infinity. Brackets
                         visible in the viewfinder indicate location of meter and facilitate
                     use as a true spot meter.

REFLEX MIRROR    Instant return type.

                   160 degrees, single-stroke, advances film, winds shutter
FILM ADVANCE:   mechanism as well as advancing exposure counter. Built-in
                    On/Off switch for the exposure meter.

EXPOSURE          Automatically returns to pre-zero position when camera back
COUNTER           cover is opened.
View original page 5Page 6 · Read text
DIMENSIONS       Width: 5.8 inches (148mm)

                      Height: 3.7 inches (95mm)

                      Thickness: 2 inches (51mm) (without lens)

                  Body only: 1 lb. .5 ozs. (600 grams)
WEIGHT
                      Lens: 1000 TL with f/b.8 lens: 2 lbs.-2-1/2 ozs. (980 grams)


Before using the camera, be sure that the silver battery is installed in compartment on the bottom of the camera.


1. HOW TO INSERT THE SILVER
BATTERY

To open the battery cover 25) use a coin in slot on
base of camera body, turning the cover counter-
clockwise. Then insert the battery, with its
negative ( -- ) side down. The battery will last
approximately one year, depending upon the
frequency of use. For replacement, use one of the
following: Eveready 76, Mallory MS-675, Ray-O-
Vac RS-76.

You need a Wein Air Battery as a
replacement. Get a few, they only last 3 -6
months. Recovering the air holes will make them
last longer when not used.
View original page 6Page 7 · Read text
2. FILM LOADING

Do not load in bright light. Open back cover of
camera by pulling out the slide lock (14). Pull up the
rewind crank knob (15) and place the film cassette
into the cassette chamber (16). Return the rewind
crank to its former position. Draw out the film leader
and insert it in the slit of the take-up spool. If the slit
is not in the proper position to insert the film leader,
turn the take-up spool.
   Turn the rapid wind lever and make sure that both
sprockets have properly engaged the film
perforations. Close and lock the back cover.
  The letter "S" appears opposite the triangle mark
in the exposure counter window (5). Advance film a
single stroke and depress shutter button after each
stroke. Continue this until the figure "1" appears
opposite the triangle mark. The camera is now ready
for the first picture.
   Each time the film is advanced the rewind crank
(15) will turn. This assures proper film action in the
camera.
  The shutter is automatically wound when film is
advanced next frame can only be advanced after
shutter is released.
View original page 7
Page 8 · Read text
3. SET FILM SPEED

                                         Lift the outer ring of the shutter speed dial, and set the ASA
                              number of the film to correspond to the small white index which
                                   appears above the letter "S" on the ASA window (22). Dots in-
                                 between stipulated numbers represent the following ASA
                                   Speeds:


4. SELECT THE SHUTTER SPEED

At shutter speeds slower than 1/30th of a
second support your camera rigidly or use
a tripod to prevent movement.

  With the shutter speed dial set on B
(bulb), the shutter will stay open as long as
you depress the shutter button. When you
release the shutter button, the shutter
closes. When a long exposure is desired
use the "B" setting and attach a shutter
release cable with a locking device to the
shutter button. This will permit a time
exposure.

To protect the shutter mechanism, trip the
shutter release before storing the camera
for an extended period.
View original page 8Page 9 · Read text
5. ADJUST EXPOSURE METER
When the film advance lever (1) is pushed
toward the camera body to its full stop, the
exposure meter switch is 'on", and at the
same time, the lens diaphragm closes down
to its preselected aperture. (The shutter
button may be operated while the film
advance lever is in this position).
   Correct exposure can be determined by
turning the aperture ring (8), until the
needle, visible at the right side in the
viewfinder is positioned between the
exposure index mark. If the f/stop was first
determined, then the shutter speed has to
be adjusted. In the event the needle does
not center properly, adjust the lens aperture
as mentioned above.


6. THE EXPOSURE METER

One of the most advanced features of your
mamiya/sekor TL Camera is the Mirror-
Matic behind the lens meter system. With
the CdS cell (positioned on the back of the
mirror) you may take a spot meter reading
(covering about 10% of your picture area).
The meter is clearly outlined by the two
engraved brackets located in the bottom of
the viewfinder. Meter readings can be
taken from the camera position and will
work with any lens. In using the Mirror-
Matic system, it is not necessary to figure
exposure factors, regardless of lenses or
filters used.
  When using extension tubes, bellows
units, and/or microscope attachments, take
the exposure reading after focusing, as in
macro photography the exposure varies as
the lens barrel rotates.
View original page 9
Page 10 · Read text
7. FOCUSING AND VIEWING

The Mamiya/Sekor TL Camera is a Single
Lens Reflex. You view and take the picture
through the same lens.
  What you see in the viewfinder you will
see on the film. Parallax problems are
completely eliminated. And you may
check the depth of field at any time before
releasing the shutter.


8. FOCUSING

The Focusing Ring (7) is turned in either direction until the image in the small circle of
the viewfinder becomes sharp. The microdiaprism then disappears, indicating the
sharpest point of focus. It reappears when out of focus.
View original page 10
Page 11 · Read text
9. DEPTH OF FIELD

The Depth of field of a lens is the
area between the farthest and
nearest point in focus. The shorter
the focusing length of the lens and
the smaller the lens opening, the
more depth of field. To see the
depth of field push the lens
preview lever (9 to the right. Due
to the unique Mirror Matic behind
the lens meter system, you can
even more conveniently check
Depth of field by pushing in fully
the film advance lever. This action
automatically closes down the lens
aperture to the pre-selected setting.
  When using a pre-set lens,
close pre-set ring manually down
to the pre-selected aperture to see
the effect of the depth of field.
   Depth of field can also be
determined by consulting the scale
on the ring (13). This is helpful
when the lens is stopped down,
admitting less light. For example,
with the standard lens aperture set
at f/11 and focused at 30 feet, the f
11 on the depth of field ring (13)
will indicate a depth of field from
15 feet to infinity. This indicates
the area within which all will be in
focus.
View original page 11
Page 12 · Read text
10. HOLDING THE CAMERA
                                                                11. CHANGING LENSES
Lightly support the bottom of the camera with the palm of the
left hand; adjust the position of the camera so that the thumb                                                To remove the lens, turn the barrel
and forefinger of the left hand can reach the focusing ring (7).                                                               counter clock-wise.
Place the palm of the right hand against the end of the camera                                                   To insert the lens, turn the barrel
body. Then the forefinger of the right hand will automatically                                                              clock-wise until it stops firmly.
be near the shutter release button (2) and the thumb will be on                                             When pressure is necessary to
the film advance lever (1). Bring the finder window (6) to the                                                      remove the lens or to screw in the
level of the eyes and rest against the forehead. This will help                                                                   lens tightly, grasp the lens as near
steady the camera.                                                                     to the camera body as possible to
   For vertical pictures, the camera should be held with the film                                                            avoid accidents. Do not touch the
advance lever up. Procedure is the same as for horizontal                                                               mirror after removing the lens. If
pictures. Hold the camera with the left elbow as close to the                                                                   there are any dust particles on the
body as possible.                                                                   mirror, brush them away with a
  The above camera positions are the same when other lenses                                                          camels hair brush.
are used. When taking pictures with speeds slower than 1/30th
of a second, or when using the self-timer. Use a tripod, or rest
the camera on a steady supporting base to prevent movement
when the shutter is released.


12. SELF--TIMER

Mamiya/Sekor 1000 TL Cameras have a built-in adjustable self-timer
(10). This feature makes it possible for the photographer to be in his own
picture. It is also good practice 'to use the self-timer for slow speed shutter
release to avoid vibration even if the camera is mounted on a tripod.
  When the self-timer lever is turned clock-wise approximately 180
degrees, the timer allows about ten seconds before it releases the shutter.
Time allowance is adjustable freely by turning the lever within a range of
90 degrees to 180 degrees.
  To operate the self-timer, just depress the 'self-timer actuating button
(11). Even after the self-timer has been set, you can release the shutter
release button without affecting self-timer operation.
   Before actuating the self-timer, the shutter must first be wound. When
releasing the shutter with the self-timer, the automatic aperture control
mechanism works in the same way as when the shutter is released by
depressing the shutter release button.
View original page 12Page 13 · Read text
13. FLASH PHOTOGRAPHY

The Mamiya/Sekor TL has two sets of terminals
FP and X (21). The table below shows flash
contact, shutter speed, and flash bulb to be
combined for maximum lamp efficiency. Unless
these combinations are rigidly followed, there will
be a failure in flash synchronization. Note that
160th of a second is marked in red on the shutter
speed dial. This indicates the highest shutter speed
at which electronic flash units may be used.


14. INFRA RED PHOTOGRAPHY

When infra-red film is used, a red dot on the depth
of field scale ring(13) should be used as an index for
the distance. Adjust the distance indicator to match
the red dot by turning the distance scale ring (12
after focusing through the viewfinder. This is
necessary because the film is only sensitive to infra-
red rays which focus slightly behind the film plane
for ordinary light rays.

15. REWIND THE FILM

After you shoot 20 or 36 exposures, rewind the film
into its original cartridge as follows:
   Push the film rewind release button (19) of the
camera. Then turn the film rewind crank (15) in the
direction of the arrow. You will feel the tension on
the rewind crank lessen as the leader end of the film
slips off the take-up spool. Stop rewinding when
you feel this happen.

AVOID DIRECT SUNLIGHT WHEN
UNLOADING YOUR FILM.
View original page 13
Page 14 · Read text
16. PLACING THE CAMERA INTO CASE

When placing the camera into the leather case or when you are through using the camera,
push the film advance housing button (4) so that the rapid film advance lever returns
automatically to its original position flush to the camera body.
  The button (4) pops up when the rapid film advance lever is pulled out approximately
15 degrees.
  Be sure the film advance housing button (4) is pushed down if the camera is to be
stored for a long period of time.
17. HELPFUL HINTS

Storage (When camera will not be used for a long period of time
· Store without winding the shutter. This relieves spring tension.
·Push the film advance housing button 4).
·Remove silver battery. This is very important.
18. CARE AND CLEANING

· Never expose the camera to direct sunlight for an extended period of time.
· When any abnormality is found in the camera, do not attempt to disassemble or
lubricate. Contact the camera shop where you purchased the camera, or a service division
of this company.
· CAUTION ! High temperatures of over 100 degrees F and low temperatures of less
than freezing, moisture and salty atmosphere are injurious to ANY camera.
View original page 14
Page 15 · Read text
1. SET FILM SPEED.

   Lift the outer ring of the shutter speed dial, turn it
around and set the same number as the ASA number of the
loaded film to the small white index which appears
alongside the ASA window. Then advance the rapid wind
lever.


2. SET SHUTTER SPEED.

   Turn the shutter speed dial and set the speed you wish
to use to the index. When outdoors, set the speed at 1/125
sec. or faster, depending upon the lighting. When outdoors,
set it at 1/30, or in its neighborhood. Change the shutter
speed later, when necessary. (Refer to item 5, page 16.)

3. COMPOSE AND FOCUS.
   While viewing through the viewfinder, turn the distance
scale ring with your thumb and index finger until you get
the sharpest image of your subject at the micro prism
centre of the finder.


4. TURN ON LIGHT METER SWITCH.

Push the rapid film advance lever (1) toward the camera
body with your thumb. Thought the viewfinder, you will
observe the movement of the right side of the ground.

5. ROTATE DIAPHRAGM RING.

The needle moves up and down with the turn of the
diaphragm ring. When the needle rests at the centre, you
will get correct exposure. If the needle does not come to
the centre no matter how far you turn the diaphragm ring,
change the shutter speed When the needle is off centre and
close to the (+) mark, you will get over-exposure: change
the shutter speed to a faster setting. If the needle is closer
to the (--) mark, you will get under-exposure change the
shutter speed to a slower setting.

6. RELEASE SHUTTER.

Hold your camera firmly and trip the shutter. Wind the
rapid wind lever for the next picture. (When taking a series
of pictures under the same lighting conditions, it is not
necessary to repeat instructions 4 and 5).
View original page 15
From the M. Butkus Camera Manual Library. Original publisher and archive notices are retained.
Check the model and edition against your equipment.
PDF verified 2026-10-10.