Film cameras
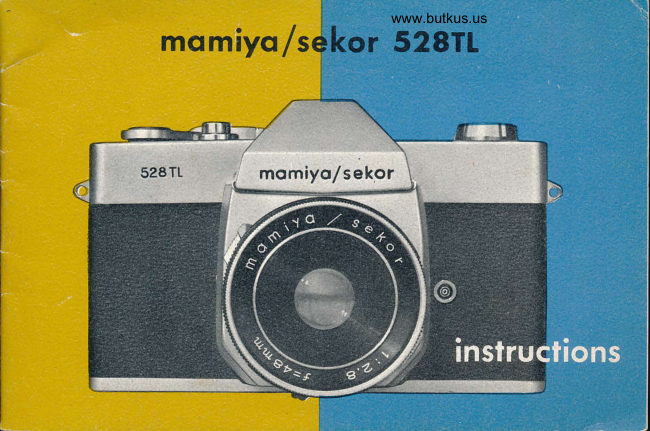
MAMIYA 528 TL User manual
User manual for MAMIYA 528 TL. 21 pages in English. Read the original PDF, download or print a copy without registration.
21 pagesEnglish4.7 MB PDF
Loading your manual…Open PDF directly
Document details
- Brand
- Mamiya
- Model / document
- MAMIYA 528 TL
- Document type
- User manual
- Language
- English
- Pages
- 21
- File size
- 4.7 MB
- Category
- Film cameras
- Document date
- Not specified in catalog
Search available document text
Find a term, then jump to its page in the original PDF. Image-only pages may not be searchable; check the PDF for exact wording and diagrams.
Page 5 · Read text
NOMENCLATURE OF
#  1)  Rapid Film Advance
 **  2)  Shutter Release Button (with
       cable release socket)
   3) Automatic Reset Exposure
        Counter
il 4) Focusing Ring
# 5) Depth of Field Scale
                                                                                                                   Mike Butkus  DigitallyDN:org,Date:cn=Mikeemail=mike@butkus.org,2026.01.08signedButkus,by20:36:52Mikeo, ou=Butkus.Butkus-05'00'c=US# 6) Shutter Speed Ring
il 7) Aperture Adjusting Knob
il 8\  Diaphragm Ring
          (Bulb) Setting Leveril 9) B
# 10) Flash Terminal
fl 11) Rewinding Crank
# t2)  Film Plane lndicator
g 13) Battery Compartment Cover
t 14) ASA Film Speed Setting Lever
View original page 5Page 7 · Read text
SPECIFICATIONS OF

TYPE:                35mm Single Lens Reflex with built-in behind the lens light
                             meter
FILM AND THREADING SIZE: 35mm (20 or 36 exposures) 24x36mm
LENS:                MAMIYA/SEKOR t/2.8----48mm, 3 elements in 3groups,
                             angle 48', filter size 52 mm
SHUTTER:             Between the lens shutter
SPEED:               1/15-tl5OO Second; and B (bulb)
EXPOSURE CONTROL:   Highly sensitive CdS meter tocated on the back of the          '
                            mirror. Accurately measures light intensity. By pre-select-
                           ing a shutter speed and turning the diaphragm ring to
                                " A "   (Automatic), the meter provides fully automatic
                             exposure. Can also be operated manually. Operating range:
                      EV 7 to EV t7 with an ASA 1OO film.
View original page 7Page 8 · Read text
www.butkus.us
momiyo /sekor 528 TL
   ASA RANGE:      10 to 4OO: DIN 1L to 27
   FINDER:            Pentaprism finder with micro-diaprism Fresnel lens for instant
                          focusing. Aperture scale visible in the viewfinder, a needle
                               indicates the aperture at which the photograph is being taken.
   REFLEX MIRROR:   lnstant return type
    FILM ADVANCE:   180" single stroke: advances film, cocks shutter, and advances
                          the exposure counter
   EXPOSURE COUN1ER: Automatically returns when camera back is opened.
  DIMENSIONS:   Width:    5.5 inches
                     Height:   3.5 inches
                         Thickness: 3   inches
                    Weight:  1 pound 7 ounces
View original page 8Page 9 · Read text
IMPOR.TANT
     , Before using the camera, put silver battery in the compartment on the bottom of
the camera.
I  How lo tnsert the Silver Botiery Ir   To open battery cover (# 13), use a coin in slot
on base of camera body, turning it counter-clockwise.
Then insert battery, with negative (-)  side down.
  The battery will last approximately one year, depending
upon the frequency of use. For replacement, we recom-  www.butkus.us
mend the Eveready S 76 or equivalent. When you are
not using the camera for an extended period of time,
remove the silver battery.
View original page 9Page 10 · Read text
www.butkus.us
 c,   Film looding  t
                             Open back cover of -     Do not load in bright light.
 camera by sliding back cover lock (# I7).  Pull up the
 rewind crank knob (f 11), and put the film cartridge
 into the film chamber (#23). Return the rewind crank
'to its former position. Draw out film leader and insert
 into take-up spool.  lf the slit is not in proper position
 to insert the film leader, turn the take-up spool.
   Turn the rapid film advance lever, and make sure that
 both sprockets properly engage film perforations. Take
 up film slack by turning rewind crank in direction of
 arrow until film is taut. Close and lock back cover.
  The letter " S " appears opposite the mark in the ex-
 posure counter window (# 3),  Advance film a single
 stroke and depress shutter button after each stroke. Con-
 tinue this until the figure " 1 " appears opposite the
View original page 10Page 11 · Read text
mark. The camera is now ready for the
 first picture.
  Each time the film  is  advanced, the
 rewind crank (# 11) will  turn slightly.
 This assures proper film  action in the
 camera.
  The shutter is automatically cocked when
 film is advanced: the next frame can only
be advanced after the shutter is released.
         Fitm Speedrf2   Ser
-      Press the ASA film speed setting lever (f 14), and
move it until it is lined up with the desired ASA number.
The ASA scale has click stops for accurate setting.
        (r2) (20) (32)(40)(50) (80) (125)(t60) (zso)(320)
ASA 10 . 16 . 25 .  .   . 64 . 100 .  . 200.  . 400
DIN 11  13.15...19.2i         ..24    ..27
       (12) (11) (t6)(l7Xl8) (20) (22r\23) (2s)\26)
View original page 11Page 12 · Read text
www.butkus.us

    Automotic Exposure Phorogrophy4
                                A) Turn the diaphragrn ring  (fl 8) until
                         A (Automatic) is aligned with the orienta-
                                                tion dot w 26).
                                B) Turn the shutter speed ring (f 6)
                                                     until the desired shutter speed is aligned
                                           with the orientation dot.
                              A shutter speed ol t/L25th of a second
                                           is recommended for most photographic
                                           requirements; however, you may need a                             Micro-diaprism                                               higher shutter speed for fast moving ob-
                        Warning mark       jects or unusually bright surroundings.
                            (under-exposure)     Where less light is available, use a slower
                                               shutter speed.                         Meter pointer
                               Do not attempt to turn the shutter                        Warning mark                             (over-exposure)      speed ring while the shutter release button

                                               10
View original page 12Page 13 · Read text
is depressed.
  C) The exposure meter pointer can be seen in the viewfinder on the right side. When
the pointer is between the upper and lower warning marks, the picture will be properly
exposed at the aperture indicated.
   lf the meter pointer is at the warning mark at the top of the viewfinder, move the
shutter speed ring to a slower speed. When it is at the lower warnin'g mark, move the
shutter speed ring to a higher speed.
{   Exposure MeierJ    One of the most advanced features of your momiyo/sekor 528 TL camera is a
built-in, behind the lens spot meter (covering about LOfu of the picture area). The unique
advantage of a spot meter (and the reason it is used by most professional photographers)
is that you can expose for the most important subject in your picture. The meter is not
affected by unimportant large, bright areas such as sky, beach or snow-
  ln using this system, it is not necessary to figure exposure factors, regardless of
auxiliary lenses or filters used.
                                                         ll
View original page 13Page 14 · Read text
www.butkus.us
    Composing the PictureAtY      The momiyof sekor 528 TL camera is a single lens reflex.  You view and take the
picture through the same lens. What you see in the viewfinder, you see on the film.
7   TurnFocusingthe focusing ring
 (f 4) in either direction until
the image in the small circle
of the viewfinder becomes
sharp. The momiyo/sekor
micro-diaprism facilitates fast,
critical focusing.


                                              t2
View original page 14Page 15 · Read text
O  Deoth of Field
O    n o"ptf, of field scale (#5) tells you how much
of your picture will be in focus at different taking aper-
tures. By using a smaller lens opening you can increase
the area between the farthest and nearest point that will
remain in focus.                                                    www.butkus.us
  For example, with the aperture set at tllL and focused at 15 feet, the depth of field
ring (# 5) indicates your subject will be in focus from 7 feet to infinity.

               ComeroO  Holding the       Holding the camera steady is very important in obtaining sharp photographs.  '
Lightly support the bottom of the camera with the palm of the left hand; adjust the
position of the camera so that the thumb and forefinger of the left hand can reach the
focusing ring (# 4).  Place the palm of the right hand against the end of the camera
body. Then the forefinger of the right hand will automatically be near the shutter release
button (il2), and the thumb will be on the film advance lever (f 1).  Bring the viewfinder

                                                13
View original page 15Page 16 · Read text
www.butkus.us
window 11 19) to the level of the eyes and rest against the forehead. This will help
steady the camera.
  For vertical pictures, the camera should be held with the film advance lever up.  Pro-
cedure is the same as for horizontal pictures. Keep the left elbow as close to the body
View original page 16
Page 17 · Read text
Operotion     Non-Automoticln f ly      When manual operation                              of the camera is desired, thediaphragm  ring t#8) should
be turned until the desired aperture is aligned with the orientation dot. This method is
used for both flash and time-exposure photography. Film advance and other operations
are the same as in the case of automatic exposure photography.
  The exposure pointer in the viewfinder now functions independently and is used in setting
the correct aperture. However, this pointer has no relationship to time exposure photo
graphy.
I I   Flosh Phorosrophy I  I     ln flash photography, the aperture is determined by the guide number of the flash
bulb, and the aperture is set manually.
  Slide the flash unit into the accessory shoe, and connect the cord to the flash terminal
1p 10)
  1) The accessory shoe is provided with a special contact point for a cordless flash
attachment.

                                               15
View original page 17Page 18 · Read text
www.butkus.us
  2)  The aperture is determined by dividing the guide number of the flash bulb by the
distance to the subject.
                              Aperture :  Guide number                                              Distance
  The camera is equipped with X contact flash circuit. M & F class bulbs and electronic
flash units may be used.

                  Type of Flash Bulb    Synchronization Range
            M class         L/3o L/L5
                 F class           t/60 1/3O t/L5
                         Electronic flash      For all shutter speeds

                                l,   Time Exposure Photogrqphy                                           |                                   -    Set shutter speed ring on B (bulb) by depressing
                                 bulb setting lever (# 9).  The shutter will remain open
                                 as long as the shutter release button (il2) is depressed,
                              depending on the length of exposure desired.

                                               16
View original page 18Page 19 · Read text
When making time exposures, use a tripod or rest the camera on a steady supporting
 base. For extremely long exposures, a cable release with locking mechanism is recommended.

 I ?  Infrcr-Red Photogrophy  f V   lnfra-red rays focus slightly behind the film plane
 normally used for ordinary light rays. This, therefore, re-
 quires a modification of normal focusing procedures. First,
 focus in a normal manner. Then move the focusing ring
'from the orientation dot to the infra'red dot (# 25) on the
 depth of field scale ring.                                                         www.butkus.us
t4 R,ewindingRewind the film intotheits originalFilm  cartridge as follows:
 Push the film rewind release button 1g 15) of the camera.
 Then turn the film rewind crank (# 11) in the direction of
 the arrow. Stop rewinding when you feel the tension on

                                                  T7
View original page 19Page 20 · Read text
www.butkus.us
                           the rewind crank lessen as the leader enO of the film
                                    slips off the take-up spool.  Avoid direct sunlight when
                                unloading your film,


t {  Helpfui Hinrs  J      Storage: lWhen the camera will not be used for a long period of time.; '
     . Store without cocking the shutter. This relieves spring tension.
    . Remove silver battery.
    - Store the camera where it wilt not be subject to extremes in temperature. High
temperatures of over lOOoF,and low temperatures of less than freezing, moisture and salty
atmosphere are injurious to any camera.
  When the camera does not function properly, do not lubricate or attempt home repairs.
Contact the camera shop where the camera was purchased, or an authorized momiyo/
sekor repair station.
                                            18
View original page 20Related documents and language editions

From the M. Butkus archive. Original publisher and archive notices are retained.
Check the model and edition against your equipment.
PDF verified 2026-10-10.