Lenses & filters
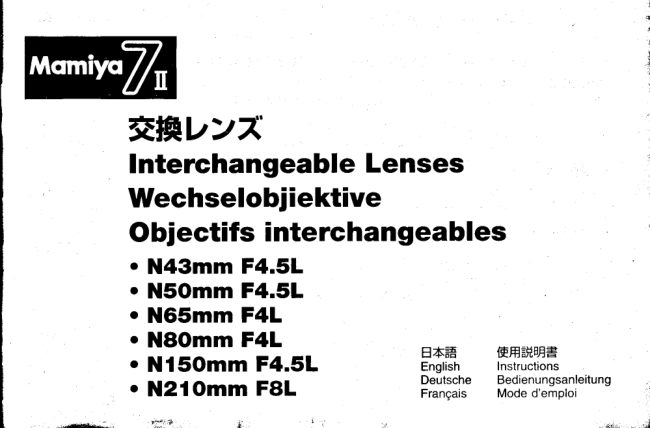
MAMIYA 7II LENS User manual
User manual for MAMIYA 7II LENS. 65 pages in German, French, English. Read the original PDF, download or print a copy without registration.
65 pagesGerman, French, English3.9 MB PDF
Loading your manual…Open PDF directly
Document details
- Brand
- Mamiya
- Model / document
- MAMIYA 7II LENS
- Document type
- User manual
- Language
- German, French, English
- Pages
- 65
- File size
- 3.9 MB
- Category
- Lenses & filters
- Document date
- Not specified in catalog
Search available document text
Find a term, then jump to its page in the original PDF. Image-only pages may not be searchable; check the PDF for exact wording and diagrams.
Page 3 · Read text
o N43mm tl4.5L
           o        NSOmm ll4.5l
           o         N65mm tl4L
           o NSOmm tlfiL
           o          Nl5omm  tl4.5L
           o N2lOmm ilAL
www.butkus.us
View original page 3Page 4 · Read text
lntruduction

Mamiya is famous for its world-class lens quality and is the only dedicated manufacturer
of medium format cameras that maintains its own modern optical engineering and man-
ufacturing facility. Utilizing computer aided design, the latest optical glass and multi-
coating technology and quality assurance controls at every step, Mamiya lives up to its
reputation. Mamiya's optical perfection is matched by the extremely precise mechanical
tolerancesunder which all which all Mamiyacamerasystems are produced.
Designinglenses for a rangefindercamera like the MamiyaTlI  , permits Mamiya'stalent-
ed optical engineers even a greater opportunity to excel. Freed from the lens design lim-
itations that the mirror in single lens reflex cameras imposes and being able to design
lenses with very short flange focal distances, they can place the rear element of Mamiya
7lI lenses very close to the film plane, a particular advantagefor wide angle lenses. This
makes an outstanding lens, such as the ultra-wide angle 43mm possible. (Wide angle
lenses for SLR cameras require retrofocus designs.)
View original page 4
Page 6 · Read text
Mounting/Removing  Lenses

Confirm the following two points:
1. The film advance lever of the camera body is set.
2. The light shield curtain in the camera body is closed.
Mounting lens                      3. To open the light shield curtain,  Removing lens
1. Cock the shutter and close the      s l i d e t h e  l i g h t s h i e l d c u r t a i n    1. Cock the shutter and close the
   light shield curtain.                  release lever along to follow the       light shield curtain.
                                 arrow " l*    " down and right.
2. Align Lens Alignment Dot 6  with                                             2. While pressingthe lens releasing                                    This will cause curtain to snap
  the Camera Alignment Dot @.                                                                    button O, turn the lens in the                                  open.
  Insert the lens into the camera                                       a r r o w d i r e c t i o n u n t i l t h e  l e n s
  body. Then turn the lens in the                                     alignment dot @ lined up with
  direction of the arrow (clockwise)                                          the alignmentdot @ on the cam-
   until it clicks and locks into olace.                                        era body, and pull out the lens.


                                   3
View original page 6Page 8 · Read text
How to use Viewfinder FVTOiIFVTO3

The detachable viewfinder is essential when using the Ultra-wideangle lens N43mm f/4.5L and wide-
angfe lens N50mm tl4.5L.
How to attach the viewfind-  How to adjust diopter to  How to focus:
er to a camera:              your eyesight:                    1) First determineyour composition
Slide the Viewfinder into the hot   Rotate the diopter adjusting ring     throughthe viewfinder.
s h o e o n  t o p o f  t h e c a m e r a a n d    until you can clearly see the sub-                                                                    2 ) A d j u s t t h e  l e n s f o c u s i n g r i n g
tighten it by rotatingthe lock ring.      ject. lf you wear spectacles, fold                                                                   through the Rangefinderof the
                                    the rubber eye-cupforward.                                                              camera in the same way as with
                                                                           the other three lenses.
                                     Diopter adjusting      Spirit level       o When N43mm tl4.5L lens and
                                                   N50mm t/4.5L lens is mount-
                                                                             ed, the bright frame of N65mm
                                                                             f/4L lens is indicated in the
                                                                                    finder.
                                                                               3) After focusing, check the photo-
                                                                     graphic area again through the
                                                                       Viewfinderand then shoot.


                                       5
View original page 8Page 9 · Read text
Viewfinderarea covered:       For 135                          Spirit level:
1) The view area covered is indi-       \                           ". distance    A spiritlevel,visiblein the viewfind-
  cated by the visiblebrightframe.                                      € r ,  i s v e r y u s e f u l f o r w i d e a n g l e
                                                                   photography.The spirit level is also2) The compositionwill be within
                                                                              visible on the exteriorof the cam-     t h e  i n s i d e o f  t h e b r i g h t f r a m e
                                                                            era.   line.                                                         1 m
3) Actual range to be photographed                          distance
   c ha n g e s as  f o cu sin g d is tance
  becomes closer due to influence
   of parallax.
  For example,short distancemark
   is to be applied at the focusing
  distanceof 1m.
4) The bright frame for panoramic
  photographyis only for long dis-
  tance.


                              www.butkus.us6
View original page 9Page 10 · Read text
For optical reasons the N21Ommf/8L lens cannot be coupled with the camera's range finder.
Determine the distance from the camera to your subject by eye and set the lens focus ring accordingly.

1. The 21Ommlens cannot be cou-          b. When using this lens, always
  p l e d w i t h t h e c a m e r a ' s r a n g e         use the includedviewfinder.
    f i n d e r. D e t e rmin et h e distance         T h e   l e n s h a s a m a x i m u m
  from the camera to your subject          apertureof f/8, respectively,all
  by eye and set the focus accord-          o b j e c t s  l o c a t e d w i t h i n t h e
  ingly.                                depth of field range shown in
                                         the illustrationsbelow will be2.For correct composition,parallax                                              s harp.   is corrected when the focus dis-
  tance from camera to subject is                                                      11 16 2232  s e t o n  t h e  f i n d e r ' s c o r r e c t i o n
  ring.The insideset of brightlines
  s e e n t hro u g h t h e f in d er repre-
  s e n t s t he a re a o f  t h e 21Omm
  lens angle of view.  a. This productis a telephotolens          ffi    for use with the Mamiya 7 n .                lirril
   Determinethe distance f rom         20   30  40 slo zlo                                             7 8 I 1 0 1 2 1 5    subject to camera by eye and          210mm  32   '16.r+i
    set the lens focus ring accord-
    ingly.


                                       7
View original page 10Page 11 · Read text
The detachable viewfinder is essential when using the Telephoto lens N21Ommf/gL.
How  to attach  the viewfinder  to a camera:      Viewfinder area covered:Insert      the         Viewfinder                      into the hot shoe and slide for-   1. This representsthe area of the 21Omm lens angle ofward      until                 it           stops.
                                                    view when the parallax correction ring is set to the
How to adjust diopter to your eyesight:           focus distanceset on the lens.
Rotate the diopter adjusting ring until you .un clearly    2. The shooting range is the inner side of the fierd of
see the subject. lf you wear spectacles,fold the rubber      brightframe visiblein the viewfinder.
eye-cup forward.
                                                                           For 150mm
          Parallax              Eyecup
        compensationring

                                                                               For 135mmformat         Diopter         ,,,0,
         adjusting ring
                                     --\                               /.

                                                               For 210mm
                                                                                                     .
                                              The vieMinder FV704, can also be appliedto N150mm
                                                             tl4.5L lens.

                             www.butkus.usB
View original page 11Page 14 · Read text
When using infraredfilm, it is nec-                         P r e c a u t i o n s   f o r  U s i n g
essary to make a focusing adjust-                              PolarizedLight Filter (PL)
ment in order to achieve accurate                                                           As this camera is the rangefinderfocus. This is because the focus                                                                                                                                        t y p e ,  i t  i s  i m p o s s i b l et o c h e c kposition of the image deviates from                                                                    p o l a r i z e d  l i g h t e f f e c t   i n   t h enormal since the infrared ray wave-                                                                          becomeslength is longer. After focusing in          i  rp 1s30i                viewfinder. However, it                                                                       possibleto use the filter by meansthe usual manner, check the dis-                                                                                  of followingprocedures.
tance on the distance scale that is          ??to'd"I"6'1'622      B e s u r e t o m a k e p r i o r t e s t a n daligned with the center reference                                                                  check the effect beforehand.
m a r k 6  o f  t h e  l e n s . M a k e t h e                                       (Refer to page 33 in the instruction
focusing adjustment by turning the                                            * Wtren using infrared film, be   manual of MAMIYA 7ll  for more
focusing ring in the directionof the      sure to read the instructions   information.)
arrow in the accompanying photo-      with the film.                A l s o , u s e  t h e P o l a r i z i n g F i l t e r
g r a p h s o  t h a t t h e d i s t a n c e j u s t                                                      ZE702 which is available as an
o b s e r v e d  i s a l i g n e d w i t h  t h e                                                                           option.
infrared mark.


                                        t1
View original page 14Page 15 · Read text
Mounting bayonet type lens hood

Align Mark  !*  on the hood with   When the Lens Hood is not used    The hood for N150mm f/4.5L lens
the Indicator Line @ on the lens,   As shown, fit the back side of the   may be fitted at any position.
and fit the hood to the lens front   Lens Hood to the lens. This will
ring.                                protectthe lens.
Fix the Lens Hood by rotating it in   (The hood illustrated above is for
the directionof the arrow.             the N80mm f/4L lens)
         H


                             www.butkus.us1 2
View original page 15Page 18 · Read text
Maintenance,and,lESFGGtion of Lens

o A frequently used professional product should be    o Always test your equipment after long periods of not
 inspectedperiodicallyat your nearest Mamiya service     being used to make sure that it functionsnormally.In
 center.                                          case of a problem,have your nearest Mamiya service
                                                      center inspectthe equipment.o Handle the lens carefully, taking care not to drop it or
  hit it againstan object.                              o When the equipmentwill not be used for a long peri-
                                                  od of time, remove the batteriesto prevent damage too The lens is not waterproof. When  it is moistened,                                                        the camera. wipe with a clean, dry cloth. lf it is exposed to a salt
  breeze, moisten a clean cloth, wring it well and wipe
  the lens with it.
o To prevent affectingthe mechanism and film, do not
  leave the equipmentin a place where chemicalgas of
 naphthalene,formalin, etc. is produced.The surface
  finish may deteriorateit it comes in contact with any
  solvents.
o When the lens surface or viewfinder is stained with
  dirt or dust, remove it with a blower or sweep gently
  with a lens brush.
o When the lens surface of Viewfinderis stained with a
  fingerprintor greasy object, wipe it gently with a
  clean, soft lens cloth or tissue. lf you cannot remove
  the stain please consult your nearest Mamiya service
  center.

                                        t5
View original page 18Page 20 · Read text
ffi

 Mamiya ist bekannt fUr die Spitzenleistungseiner Objektive.Als einzigerHerstellervon
  Mittelformatkameraskonstruiert und baut Mamiya seine Objektive selbst-
 computergestUtzt,mit den modernsten Sondergidsern,Mehrschichtenvergiitungund
 strengsten Qualitiitskontrollenin jeder Phase der Fertigung.So werden Mamiya
  Spitzenobjektivezur perfekten Ergdnzung der mit engsten Toleranzengefertigten
 Mamiya Kameras.
  Bei der Konstruktion von Objektiven ftir eine MeBsucherkamerawie die MamiyaTfr
 haben die Mamiya Konstrukteure noch wesentlich griiBere Freiheit als bei den optischen
 Systemen f ti r ei ndug i ge Spiegelref lexkameras.
 Denn durch den Wegfall eines Spiegelkastenslassen sich Systeme mit sehr kurzer
 Schnittweite schaffen, bei denen das Hintergliedsehr nah an die FilmebeneheranrUckt.
 Dies macht sich besonders bei Weitwinkelobjektivenbemerkbar.
 Bei SLR-Kamerassind dagegen aufwendige Retrofokus-Konstruktionenerforderlich.
 So wurde die Schaffung eines Spezialobjektivswie des Ultraweitwinkels1:4,5/43mm
  moglich.
View original page 20
Page 22 · Read text
' Ansetzen und Abnehmen des Obiektivs

Ausgangsstellung:
1. DerFilmmuBtransportiertsein.
2. Der HilfsverschluB muB geschlossen sern.                 Abnehmen
                                                                   1.TransporthebelspannenundAnsetzen                         3. Zum Offnendes Hilfsverschlusses
1. Transporthebelspannen und         schiebenSiedie Entriegelungin        HilfsverschluB schlieBen
  HilfsverschluBschlieBen            der BodenplatteunterDrucknach      VerfahrenSie wie beim Ansetzen
  VerfahrenSie wie beim Ansetzen      rechts(Pfeilin Abbildung).Der        des Objektivs.
  des Objektivs.                  VerschluBspringtauf.                2. VerfahrenSie wie beim Abnehmen
                                                                   des Gehausedckels.DrehenSie
2. RichtenSie die Tastkuppe@ am                                      das Objektivnuter Druckauf die
  Objektivauf den Index @. an der                                          ObjektiventriegelungO entgegen
  Kamera aus, und setzen Sie das                                dem Uhrzeigersinn(Pfeilrichtung),
  Objektivan. Drehen Sie es dann                                               bis seineTastkuppe6 dem Index
  im Uhrzeigersinn(Pfeilrichtung),                     @ am Gehdusegegen0bersteht
  bis es einrastet.                                                  und nehmenSie das Objektivab.
View original page 22Page 30 · Read text
lnffarctauffiahmen

Bei Verwendungvon Infrarotfilmist                           Verwendeneines
eine gewisse Fokuskorrektur                                         Polarisationsfilters
erforderlich.Dies ist der Tatsache                                                                    Die polarisierendenEigenschaften
zuzuschreiben,daB lnfrarotstrahlen                                                               des Filtersk6nnen bei einer
ldngerwelligsind als normale                                                             Sucherkameranicht unmittelbarim
Lichtstrahlen.FokussierenSie                                                                 Sucher beurteiltwerden. Trotzdem
zundchstwie ublich. Lesen Sie                                                                kann ein Polarisationsfilter
dann die Einstellentfernungam                                                           Verwendungfinden,wenn Sie
Objektivindex6  ab, und drehen Sie               1 6 8 4 8 1             folgendeEmpfehlungenbeachten.
den Entfernungsringweiter, bis sich                                    Fuhren Sie vorab einen Test durch
die abgeleseneEntfernung                                                   um die gewunschteWirkung
gegenuberdem Infrarotindex                                            *  BeachtenSie bei Veruvendung  beurteilenzu k6nnen.
befindet.                         von lnfrarotfilmunbedingtdie    (Weitere Informationensind der
                              Anweisungendes Herstellers.   Seite 33 der Bedienungsanleitung
                                                                                    fur die MAMIYA 7lI zu entnehmen.)
                                                               Es wird ebenso der Polarisationsfilter
                                                         ZE7O2empfohlen,der als
                                                                 Sondezubehor erhaltlichist.


                                                        tt
View original page 30Page 31 · Read text
RichtenSie die Pfeilmarkierungauf   Umsttilpenzum Transport        Der Decketfur das ObjektivN
    derGegenlichtblendeauf den      Zum Transportkanndie            1:4,5/150mm kannin beliebiger'''    Einstellindex@ odes objektivs      Gegenlichtblendeumgestulpt        position
    aus,und setzensie die Blendean    aufgesetztwerden,so daB sie als                 "rtg"r"iti;";;;.
    das objektivan.                    zusdtzlicherobjektivschutzdient.
    SichernSie die Blendedurch        (AbgebildeteGegenlichtblendeist'
   Drehenin Pfeilrichtung.              fur Objektiv1:4/8bmm)


                               www.butkus.us12
View original page 31Page 33 · Read text
OptischerSucherFV701    OptischerSucherFV703     OptischerSucherFV704 Aufstecksucher
                           (N1:4,5/43mmL)         (N1:4,5/50mmL)           (N1:8/210mmL)
 SuchervergrriBerung            0,34fach                 0,4fach                   0,89fach
 Dioptrieneinstellung           -0,8+2dpt              -0,8512dpt                  -0,8t2dpt
 Sucherbild               aufrechtstehend,seitenrichtigaufrechtstehend,seitenrichtig aufrechtstehend,seitenrichtig
 Suchergesichtsfeld         87o/obei unendlich      83.5% bei unendlich      80% bei unendlich
 Parallaxenausgleich                                                manuellerAusgleichdurch
                                                                     Entfernungsringam Sucher
 Gewicht                       ca.749                ca.70g                  c a . 1 1 5 9
. DerSucherFV7O4kannebensobeimObjektivN 1:4,5/150mm verwendetwerden.


                            www.butkus.us1 4
View original page 33Page 34 · Read text
o BehandelnSie lhre AusrtlstungsachgemdBund       o BeildngererNichtbenutzungoderLagerungentnehmen
 schutzenSie sie vor Schldgenund StUrzen.            Siegrundsdtzlichdie Batterien.
o Objektivesind nichtwasserfest.WischenSie
  Feuchtigkeitmit einemweichentrockenenTuchab.
  Solltees sich um Salzwasserspritzerhandeln,
 venryendenSie ein leichtfeuchtesTuchzum
 Abwischen.
o LagernSie das Objektivnichtbei hoherFeuchtigkeit,
  in der Ndhevon SalzwasseroderflUchtigen
 Chemikalien(2.8.Formalino.d.).
o EntfemenSie Staubund Fusselnauf den
 Linsenfldchenmit einemPinseloder Blasepinsel.
o VermeidenSie jede Bertihrungder Glasfldchen.
 EntfernenSie Fingerabdruckemit einemweichen
 TuchoderOptikpapier.
o UnterziehenSie lhre Ausrustungvor wichtigen
 AufnahmenstetseinergrUndlichenPrufung.Bei
 ProblemenwendenSie sich an den Mamiya
 Kundendienst.
o LassenSie lhr Profi-Equipmentin regelmdBigen
 Abstdndenvom MamiyaKundendienstuberprufen.

                                                                                                l 5
View original page 34Page 36 · Read text
llltHoDUGTtot{

Mamiya a une r6putation mondiale en matidre de qualit6 optique et est la seule marque
en moyen format i innover en permanenceen technologie optique et fabrication.
Utilisant au maximum I'informatique,les dernidres g6n6rationsde verres optiques, de
traitement optique et le contr6le qualit6 i chaque stade de la fabrication.
La perfection optique Mamiya est atteinte par le peu de tol6rance que Mamiya admet
dans l'6laboration de ses produits.
La conception d'optiques d'un boitier ir t6l6m6tre comme le MAMIYA7II, permet aux
talentueux ing6nieurs optiques de MAMIYA d'exceller dans ce domaine. Lib6r6s du fait
qu'il n'y a pas de miroir comme les reflex ils peuvent concevoir la partie arriErede
l'6l6ment optique d'un objectif MAMIYA 7II trbs prds du film, avantage interessant pour
les grands anguiaires.
 ll en d6coule que la construction d'objectifs prestigieux tels I'ultra-grandangulaire
43mm soit possible (les grands angles pour boitier reflex exigent une conception
 r6trofocus).
View original page 36Page 38 · Read text
ID'O8., ECTIF CTIfiNGEHEI'I T
S'assurerdes 2 pointssuivants:
1. Que le levier d'avancementest bien positionn6.
2. Que le rideau du boitier soit bien ferm6.
MONTAGE DE L'OBJECTIF      3. Pourouvrirle rideaud'obturation, DEMONTAGEDE L'OBJECTIF
1. ArmerI'obturateuret fermerle          ilfautactionnerla commande     1.ArmerI'obturateuret fermerle
  voletd'obturation.            commeillustr6par la fl6che.           volet d'obturation.
2. Le bouchonarridrepeut6treot6                                              2. Tandis que I'on appuie sur la
  par rotation.Alignerle repdre                                   commande de d6verrouillage@,
  d'alignementde I'objectif6 sur                                            tourner I'objectifdans le sens de
   le repdred'alignementdu boitier                                                  la flOchejusqu'd ce que le Point
  @. PuistournerI'objectifdansla                                          blanc @ Oe I'objectifsoit align6
  directionde la fldche(sensdes                                      au point blanc 6 Ou boitier,puis
  aiguillesd'unemontre)jusqu'au                                                   retirer I'objectif.
  blocage.


                                       3
View original page 38Page 39 · Read text
CHAMP COUVERT

*  tte jamais toucher le rideau         Le champ couvertest d6limit6par    N 65mm/F4 L
   car cela pourrait entrainer un         les lignesbrillantesdu cadre dans                                                                        -r                                                le viseur. La parallaxe                                                              est   mauvais fonctionnement du                                                             r|-                                   automatiquement                                                       corrig6e                                                        en                      I   boitier.                                                                       "-"'"'{                                        fonctionde la mise au point. Le          I  rl'
*  Quand on enldve un objectif        cadrage 6 en format 6X7 et @ en   60l  du boitier et qu'il y a un film,        format 135 panoramique.83% du              ---'---"{   ne pas bouger le levier du         champ est visiblea I'infiniet 100%      l|'r-   volet d'obturation. Si I'on         A la mise au point minimum.Le      LI           J
   touche  i ce levier, le film            cadre collimat6 appropri6 apparait    N 80 mm/F4 L
   pourrait 6tre expos6  i  la           automatiquementen fonctionde
   lumiire.                               I'optiqueutilis6.
*  Si I'on a enlev6 I'objectif,            6  taitte de I'imager6elle.
   6viter d'exposer le boitier au     @ f a i l l e  d e  I ' i m a g e e n  f o r m a t
   soleil.                             panoramrque.
*  Pour enlever I'objectif le faire       Quand I'objectifgrand angle
   tourner de sorte que sa partie      N43mm t|4.5 L,I'objectifgrand
  a inserer se trouve vers le           angle N50mm t/4.5 L ou le tele
   haut.                     N21Ommf/8L est en place, un
                                    cadre lumineuxindiquele champ*  Mettre les bouchons avant et                                  de prise de vue dans le viseur.   arridre sur I'objectif dds qu'il                                   La mise au point s'effectuetoujours   a 6t6 enlev6.                                     a I'aidedu telemetre.(Voir en
                                 pages 9, 10)

                            www.butkus.us4
View original page 39Page 40 · Read text
Gomment UTILISER le VISEUR FUTOi lFlITOg

Le viseur d6tachableest essentiel lorsque I'on utilise I'ultra grand angulaire43 mm/F4,5et Grand
angulaire 50 mm/F4,5.

FIXATIONdu VISEUR      AJUSTEMENTDIOPTRIQUE Comment faire la mise au
Glisser le viseur dans la griffe porte-   Tourner la bague dioptriquejusqu'd   point:
accessoiresen haut du boitieret le     ce que le sujet apparaisse            1) D6terminerla compositionde
verrouilleren place par rotationde      clairement.Si vous portezdes           I'imagei traversle viseur.
la bague de verrouillage.             lunettes,replierI'oeilletonvers
                                        I'avant.                               2) Faie la mise au point d travers
                                                                                          le viseur t6l6m6triquedu boitier
                             Bague de r6glage Niveaui bulles     comme pour les trois autres
                                        dioptrique  _--q1-                     optiques.
                                                                      o Quand un objectifN43mm
                                                                                    t/4.5L ou N50mm f/4.5 L est
                                                                monte sur le boitier,le cadre
                                                                     lumineuxvisibledans le viseur
                                                                               est celui de I'objectifN65mm
                                                                                                   il4L.
                                                                                 3) Aprds la mise au point, recontroler
  Bague de verrouillage                                                                                               le cadrage et d6clencher.
View original page 40Related documents and language editions
From the M. Butkus archive. Original publisher and archive notices are retained.
Check the model and edition against your equipment.
PDF verified 2026-10-10.