Film cameras
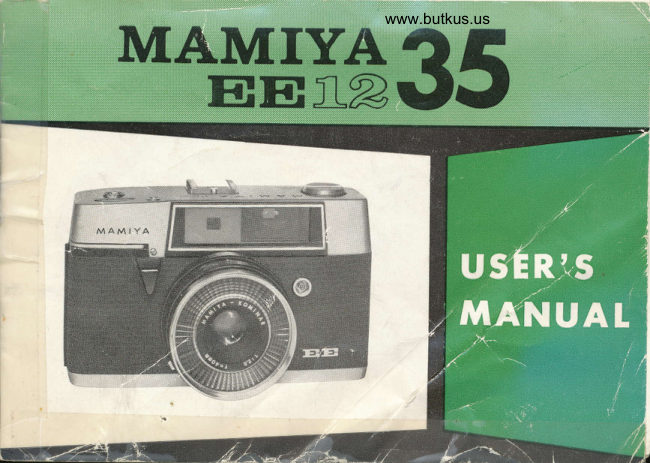
Mamiya EE 12 User manual
User manual for Mamiya EE 12. 17 pages in English. Read the original PDF, download or print a copy without registration.
17 pagesEnglish6.0 MB PDF
Loading your manual…Open PDF directly
Document details
- Brand
- Mamiya
- Model / document
- Mamiya EE 12
- Document type
- User manual
- Language
- English
- Pages
- 17
- File size
- 6.0 MB
- Category
- Film cameras
- Document date
- Not specified in catalog
Search available document text
Find a term, then jump to its page in the original PDF. Image-only pages may not be searchable; check the PDF for exact wording and diagrams.
Page 5 · Read text
INTRODUCTION
  Your new camera is an autom"ri"               i*nt,  sensitive photocell regulating the                                                 "                                          ";;";;;;;                                                     to obtain perfectly expose pictures,                                   the shutter releaseaperture size. All you do is press
in color or black and white. In your viewfinder field can be seen a scale indicating the
aperture size at the instant of shooting. This scale also shows whether your subject is
bright enough for automatic exposure control. A built-in coupled rangefinder permits you
to focus accurately by means of a double-image focusing spot at the center of the view-
finder field. Viewfinder parallax is eliminated by automatic compensation, and an indica-
tion appears in the viewfinder field when the end of your film is reached.
  Operation of this superb camera is simplicity itself, but since it is a precision instrument,
read these instructions carefully before actual picture-taking.
 TWO INPORTANT POINTS TO REMEMBER
  1. To avoid damage to your camera, neaer turn the aperture ring (7) or the filmspeed
(ASA) lever (8) while pressing the shutter release (2).
  2. While the shutter release (2) is in operation, the automatic aperture control is
momentarily disengaged. Therefore, do not press down the shutter release (2) until the
very instant of picture-taking
                   LOADING WITH FILM
 When loading o. ,rnlouding film, always avoid direct sunlight. Work under subdued light,
using your own body to snield camera and film if no other shade is available. Your camera
View original page 5Page 6 · Read text
www.butkus.us


will accept any type of 3S-millimeter film, either color or black and white, preloaded in
standard cassettes.
 TO LOAD YOUR GAMERA
  1. Pull down the camera back latch (14). This will release the camera back, which can
then be swung open to the right.
  2. Pull out the rewind crank (13) as far as possible (Fig. 1).
  3. Place a cassette containing film in the film cassette chamber (15) with the knob end
toward the bottom of the camera. Push down the rewind crank (13) so that its spindle
engages the cassette, making certain that the crank hub is fully seated. If the spindle fails to
engage properly, turn the crank slightly. Pull out about four inches of film. Fold about a
quarter-inch of the end inward, toward the dull emulsion side, with the crease formed at
one of the perforations (Fig. 2).
  4. Turn the film take-up spool (17) with your thumb so that the grooved portion faces
toward you. Hook the folded end of the film in this recess, with the perforation at the
View original page 6
Page 7 · Read text
a
crease engaging the little metal tab on the spool. While holding the hooked end of the
film securely against the take-up spool, operate the cocking lever (1) so that the film winds
onto the spool for about one turn (Fig. 3).
  5. Next, while holding the cassette in position, turn the rewind crank (13) in the direc-
tion of the arrow to take up all slack inside the cassette (Fig. a).
  6. Opearte the cocking lever (1) or turn the take-up spool (17) with your thumb, taking
up a little of the film. This will show you whether or not the sprocket (16) is engaging the
perforations on the lower side of the film. The rewind crank (13) should turn counterclock-
wise against the arrow mark, and the film should play smoothly out of its cassette. Close
the camera back, and press down to lock.
  7. Next, apply the tip of your thumb to the film counter adjustment (4), and turn
in the direction indicated by the arrow to set the film counter at one of the two " S "
marks. With a 20-exposure roll of film, use the " S " three steps ahead of the numeral
20. With 36-exposure film, use the starting mark three steps ahead of numeral 36.
  8. Cover the lens with the lens cap. Operate both the cocking lever (1) and the shutter
release (2) three times so that the film counter (3) indicates either number 20 or 36, the
number of exposures available on your roll of film.
  POINTS TO NOTE
    1) The film counter is numbered in reverse sequence, and indicates the number of
  exposures remaining on your roll of film.
    2) Toward the end of its stroke, the cocking lever (1) will become slightly harder
  to move. At this points the film is being advanced one frame. Continue operation
View original page 7Page 8 · Read text
www.butkus.us
          to the end of tfre fuit stroke. The lever will then return to its starting position.
           3) When the full stroke of the cocking lever (1) has been completed, the film has  .s        been advanced one frame, and the shutter has been cocked. Normally, the cocking
       r->\    lever will remain locked until the shutter release (2) is pressed. But on rare occasions     .JA          the cocking lever may become unlocked by partial operation of the shutter release. In
           this case a frame of film will be wasted  if the cocking lever is operated. This is not a
  G     malfunction of your camera.
                                      your camera, the cocking lever can be operated repeated-     " "t,v     4) When there is no film in
    ."t     ly without releasing the shutter mechanism.
    d.      5)  If when operating the cocking lever (1) the rewind crank (13) fails to turn    'f^,
                                                                                                        properly.                                                                       being taken                                                              up                                                                              is not                                                        the film                                                       that                                 the arrow                            against           counterclockwise                                                                     it means    s..'s                                                                                                        repeat                                                                (as                                                                                             later),                                                                  and                                                                     explained                            rewind                                               into                                                               its cassete                                   the film       When this happenes,
     rvr     (o     the loading operation. Once your camera is properly loaded, do not turn the rewind
                                   camera contains film can be checked by gently moving   ..ss'    crank. Whether or not your
    S     the rewind crank (13) in the direction of the arrow. A slight resistance indicates the
          presence of film. Do not wind any further.
                                                                                        you\JI    so     9. Finally, set the filmspeed (ASA) lever (8) at the ASA number of the film,}\U, .{   have loaded. To set the lever, gently press downward, and shift to the desired ASA        setting. Do not press the shutter release (2) when making this adjustment. Once.      -6'.\   the filmspeed (ASA) lever is properly set, it serves as a reminder of the ASA rating of
       your film. Do not move the lever unless you have reloaded your camera with film of akrki   5\    different ASA rating.
View original page 8Page 9 · Read text
FIOLDING YOUR CAMERA
  Your camera may be used in either a horizontal or vertical position. Any comfortable grip
will do as long as the camera is kept steady when the shutter is released.
  Normally, the hand that is not operating the shutter release should act as the main
support, and camera movement, and make certain that the lens and photocell (9) are not
obstructed by your fingers or the cover of the camera case.
          AUTOMATIC PICTURE-TAKING BY ETECTRIC EYE
  First adjust the AUTO-Manual aperture ring (?) so that " AUTO " is squarely against
View original page 9Page 10 · Read text
www.butkus.us
 the red index mark.
   Next, make a choice of ashutterspeed, and set this selected speed against the red index
 mark by turning the shutterspeed dial (6).  There are four shutterspeeds  available :  250
 Q1250 second), 125 (lll25 second), 60 (1/60 second), and 30 (1/30 second). Shutterspeed
 is governed by the conditions presented by your subject. Generally speaking, the brighter
 the subject and the higher your filmspeed (ASA rating), the faster shoule be your shutter-
 speed. Also, if your subject is in motion, it is wise to use a fast shutterspeed.
 FOCUSING
  To focus your camera accurately on your subject, sight your subject and bring some easily
. distinguishable portion in the area of the center focusing spot of the viewfinder field. You will
 see a double image in this focusing spot. By turning the focusing ring (10) it is possible to
 obtain a single image. When a sharp and clear single image is obtained, the subject is in correct
 focus, and   the
 distance from the
 camera (focal plane
 mark) to the sub-
 ject  is   indicated
 on  the  distance
 scal.  By  noting
 this distance, and
 the aperture size
 indicated in   the
View original page 10
Page 11 · Read text
viewfinder field, you can learn the available depth of field (focusing tolerance) by refering
to the depth of field table.
 When focusing, take note of the following points:
  1) Point your camera so that the principal subject is seen inside the center focusing
spot, particularly when shooting at close range.
  2) Make use of verticals for focus adjustments. Such objects as poles, window frames
(uprights), the nose and cheek lines of human subjects, or their eyeglass frames present
targets for easy adjustment.
  3) When taking vertical pictures, it is easier to focus first in horizontal position.
  Parallax is automatically eliminated Your camera is provided with automatic parallax     J
compensation. The focusing mechanism automatically shifts the viewfinder frame so that
your subject is always properly centered in the camera field. There is no fear of lopping off
portions of your subject.
 WHEN PRESSING THE SHUTTER RETEASE NOTE THE VISUAT INDICATIONS IN YOUR VIEWFINDER
 Your camera will visually inform you of focus setting (by center focusing spot),
aperturesizejustpriortoexposure,andtheendofyourfilmwhenthelastexposure
has been made. The lower side of the bright gold frame of the viewfinder is broadened        I
to form a scale traversed by a moving marker. The scale is graduated in aperture sizes,
or f/ stops : 22, L6, 11, 8, 5.6, 4 and 2.8, so you can see what aperture size is used when                                                                             ':
you make your exposure.
  TV'hen the moving marker is ofi-scale to the the right, your subject is not bright enough
to register distinctly on the film. In this case, you must either 'set your shutter-


                                                                                                                                                                                                                                                                                     I
View original page 11Page 13 · Read text
flashSpeed dial for a slower speed, use a film with a higher ASA rating, or use a
unit.
  '[V'hen the moving marker is ofr-scale to the left, your subject is too bright. Your picture
                                                                                           ais likely to be over-exposed. In this case, you must use a faster shutterspeed, or use
                                                                                          befilter to reduce the intensity of the light which reaches your film. A slower film may
used if desired.
   Note: Checking of the aperture scale indication must be done before you press the
  shutter release. Once pressure is applied to the shutter release, the automatic exposure
  mechanism becoms locked. Do not press until the very instant of shooting, making
  certain that the marker is " on-scale."
                                                                                            exposed. When " END " appears in the viewfinder field, your entire roll of film has been
Cease taking pictures, and rewind film back into its cassette.
                              WHEN USING FILTERS
                                  For certain subjects and lighting conditions you may
                                   wish to use filters. With your camera there is no need
                                   to worry about filter factors because both the lens and
                                   the photocell (electric eye) are covered by the same
                                                  filter, and automatic exposure control remains effective.
                             Your camera will accept Toshiba 49'mm screw-in
                                                    filters, available in light yellow, light orange and ultra-
                                        violet (haze filter).  It will also take a 49-mm special
                                      lens hood which should be used whenever possible to
View original page 13Page 14 · Read text
www.butkus.us

                                                                          a
       guard against off-angle rays and reflections that might cause ffare in your pictures.
                        SPECIAT IIGT{TING CONDITIONS
           BAGKI.IGHTING
       When the light source is behind your subject, the electric eye will sense more light than
         is actually being reflected by the subject, and the result will be underexposure. When you
       wish to obtain detail in the shadows of a backlighted subject, shift to manual control (de-
        scribed later). The use of a lens hood is strongly recommended when photographing back-
        lighted subjects so that direct rays from the light source do not strike the lens.
         FIASH PHOTOGRAPHYi       When your subject is too dark for automatic electric-eye shooting, a flash unit may be
      used. A compact BC unit will attach directly to the camera's accessory clip (20). Plug
       the connecting cord into the synchroflash terminal (19), and adjust focus by turning the
        focusing ring (10) while sighting through the viewfinder.
        Your camera has a built-in synchronizing mechanism designed for X setting (no delayed
        action of the shutter), so the shutterspeeds should be as follows  :
         1/30 second fo: class M flashbulbs
         1/30 or 1/60 second for class F flashbulbs
        any of the four speeds for electronic flash
       The proper aperture size for correct exposure depends on the light output of the flash, and
        the distance between the flash and the subject. The light output of the flash is indicated by the
       guide number given in the instructions accompanying your flashbulbs or electronic flash unit.
View original page 14Page 15 · Read text
Read the distance on the distance scale of your camera after focusing. Obtain the proper aper-
ture value by dividing the guide number by the distance, and set this aperture value on the
AUTO-Manual aperture ring (7), ignoring the aperture indication in the viewfinder field.
  NON-AUTOilATIG OPERATION
 By shifting the AUTO-Manual aperture ring (7) from " AUTO " to the click-stop aperture
scale, your camera can be made to function as a normal 35-millimeter camera, with manual
setting of shutterspeed and aperture controls. In this case, the aperture scale indication
inside the viewfinder has no bearing on the aperture value as set by hand. However, the
correct f/ stop for the shutterspeed selected will be indicated, so that in effect you have a
built-in exposure meter for your guidance.
 When shooting a subject silhouetted against a bright background, and you wish to capture
                            shadow detail, set the AUTO-Manual aperture ring (7) by hand
                                 at a setting a step or two higher (bigger opening) than the value
                               indicated by the aperture scale marker in the viefinder.
                        REWINDING AND UNTOADING FIIM
                       When the film counter (3) indicates " o " and the indication
                                     " END " appears in the viewinder, you have exposed the full
                                roll of film. Stop taking pictures, and rewind the film into
                                   its cassette in the following manner:
                         1. Return the cocking lever (1) to its original position; then
                       move the rewind button (18) in the direction indicated by the
View original page 15Page 16 · Read text
j                                          www.butkus.us

                                                                                                                               ,,,-\
 arrow.
  2- Unfold the rewind crank (13), and turn it clockwise as indicated by the arrow. This
action will wind the exposed film back into its cassette.
  3. When the end of the film becomes detached from the take-up spool (12), you will feel it.
Stop turning the rewind crank, open the camera back, pull out the rewind crank, and withdraw
the cassette.
    CAUTION
      If too much film is wound onto the take-up spool at the time of loading, the end of the roll
  of film will be reached before the film counter indicates " o " and " END " appears in the
  viewfinder. In this case the action of the cocking lever will become sluggish. Complete the
  strok to permit the lever to return to its original position ; then stop shooting, and rewind.
   The rewind button (18) will automatically return to proper position upon operation of
  the cocking lever (1).
                           AccEssoRlES
  tENs HooD for shielding the lens and photocell from extraneous light and reflections,
will fit snugly over filter.
  FfLTERS (by Toshiba) 49 mm diameter, screw-in type, fits over both photocell and lens.
Available in the following types: UV ultraviolet (x 0),Y 2 yellow (x2), YG yellow green
(x 2) , O 2 orange (x 2), and sunlite  ( x 0).
  ilAMlYA B'C FtAsH ATTAGHIIENT  efficient pocketable flashgun operating on the battery-
capacitor principle for accurate and depeudable action.
                                             #'*',s.
View original page 16From the M. Butkus archive. Original publisher and archive notices are retained.
Check the model and edition against your equipment.
PDF verified 2026-10-10.