Film cameras
Mamiya M645 CdS Finder User manual
User manual for Mamiya M645 CdS Finder. 27 pages in English. Read the original PDF, download or print a copy without registration.
27 pagesEnglish3.1 MB PDF
Loading your manual…Open PDF directly
Document details
- Brand
- Mamiya
- Model / document
- Mamiya M645 CdS Finder
- Document type
- User manual
- Language
- English
- Pages
- 27
- File size
- 3.1 MB
- Category
- Film cameras
- Document date
- Not specified in catalog
Search available document text
Find a term, then jump to its page in the original PDF. Image-only pages may not be searchable; check the PDF for exact wording and diagrams.
Page 3 · Read text
© Special Features

‘The CdS Prism Finder is an eye-level finder with a
exposure meter for accurate exposure measurement.
It-couples to the aperture when attached to the camer
‘An exposure meter indicator needle is visible in the view-finder
to indicate correct exposure.

© Specifications

Viewfinder: Unreversed, laterally correct image; 0.74 x magnifica-
‘tion with standard 80 mm lens at infinity; builtin hot shoe and
equipped with an eyecup.

Metering System: Center-weight TTL full-aperture, zero-method via
indicator needle.

‘Meter Coupling Range: (with f/1.9 lens and 100 ASA film)
EV2.85 — 17 (f/1.9, 1/2 sec. ~ f/11, 1/1000 sec.)
(with £/2.8 lens and 100 ASA film)
EV4 — 18 (f/28, 1/2 sec. — #/16, 1/1000 sec.)

‘Shutter Speed Range: 1/1000 ~ 1 sec.

ASA Ringe: 25 — 6400
(Aperture coupling in the entire range)

Power Source: One 1.5 V silver oxide battery

‘The figure numbers throughout the text refer to pictures on
the fold-out pages at the back.

Names of Parts (Fig. 1)

1. Aperture ring coupling pin 6. Eyepiece
2. Horshoe 7. Finder release button
3. Battery chamber cover, 8. Shutter speed di
4, Eyecup 9. ASA window
5. Diopter correction lens retainer 10. ASA dial

ing 11. Power switch

www.orphancameras.com

Inserting the Battery

This finder utilizes a 1.5 V silver
oxide battery (Eveready $-76,
Mallory MS-76 or equivalent) as the
power source.

1. Remove the battery chamber
cover by rotating it counterclock-
wise with the aid of a coin. (Fig. 2)
2. The underside of the battery
‘chamber cover bears a + mark.
Be sure to have the + marks of
battery and chamber cover face
‘each other as the battery is in
serted. Then securely  retighten
battery chamber cover.

© Wipe battery with a soft cloth
before inserting into battery cham-
ber, 28 a soiled battery may fail to
make, or maintain, proper con-
tact.

There are four electrical contacts
fon the upper, rear plane of the
camera body ‘and on the bottom
plane of the finder. Oil or finger-

prints on the contacts will result
in faulty power conduction.

Always completely wipe off oil or
dust with a clean cloth before
attaching the finder.
'® When the finder is not used for
2 long period of time, remove the
battery and store it in a cool, dry

‘© Never throw used batteries
into a fire, or attempt to charge
a battery.

Method of Use

Prior to attaching the finder to
‘the camera, confirm that the
white dot on the finder release
‘button is pointing upward.

If the white dot on the button is
aligned with the white dot on the
finder, by depressing the button
‘and removing your finger from it,
the white dot on the button will
‘automatically point upward. In
this condition, the button cannot

be depressed; consequently, the
finder will not be accidentally
detached from the camera

4 ©

m
4
“3
View original page 3
Related documents and language editions
MamiyaPDF
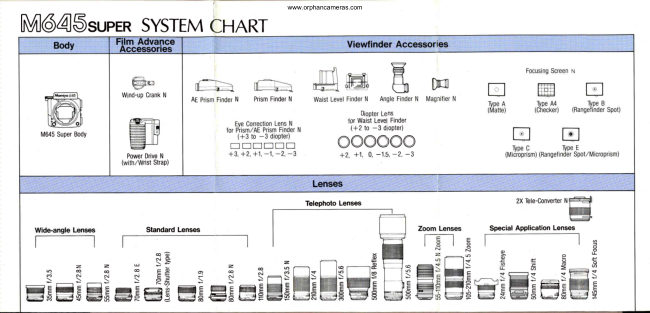
Mamiya Super System Chart
Reference guide
2 pages · EnglishRead →
MamiyaPDF
Mamiya M645 PD Prism Finder S
User manual
14 pages · French, EnglishRead →
MamiyaPDF
Mamiya RZ67 AE Prism Finder
User manual
19 pages · German, French, Spanish, EnglishRead →

MamiyaPDF
Mamiya RZ PD Finder
User manual
14 pages · German, French, Spanish, Italian, EnglishRead →
From the M. Butkus archive. Original publisher and archive notices are retained.
Check the model and edition against your equipment.
PDF verified 2026-10-10.