Film cameras
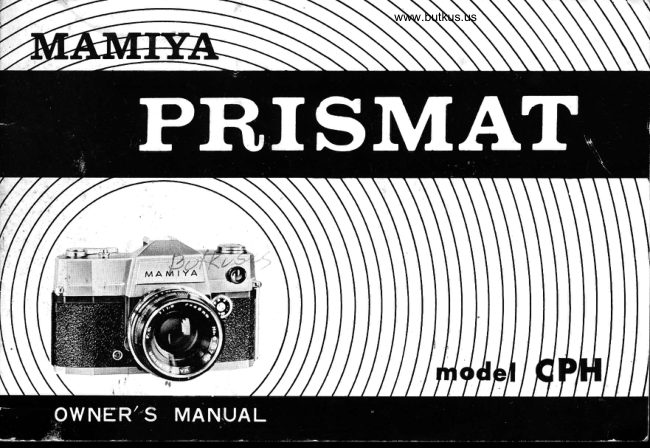
Mamiya Prismat CHP User manual
User manual for Mamiya Prismat CHP. 25 pages in English. Read the original PDF, download or print a copy without registration.
25 pagesEnglish7.2 MB PDF
Loading your manual…Open PDF directly
Document details
- Brand
- Mamiya
- Model / document
- Mamiya Prismat CHP
- Document type
- User manual
- Language
- English
- Pages
- 25
- File size
- 7.2 MB
- Category
- Film cameras
- Document date
- Not specified in catalog
Search available document text
Find a term, then jump to its page in the original PDF. Image-only pages may not be searchable; check the PDF for exact wording and diagrams.
Page 3 · Read text
www.butkus.us


@ Upper synchro contoct
@ Accessory shoe
@ Neck strop loops (teft ond right)
@ Tripod socket
@ Time releose button
@ t-tshr bofite
@ Bottery cover


                       www.butkus.us
View original page 3Page 4 · Read text
PRECAUTIONS
This comero is o  precision instrument built with greot core.  By reoding the instructions
corefully before using the comero ond heeding o few precoutions you will be ossured of
trouble-free yeors of fine picture toking.
       l.  Do not touch or press the light bofrle @ when the bqck cover is open.
    2. Do not touch the mirror s smudges will offect the clority of the viewing.
    3. When the comero is not to be used for o long time
             mercury boitery should be removed.       -the
                shutter should not be kept in the wound position.       -the
    4. Do not use chemicqls to cleon the exposure meter window.
View original page 4Page 5 · Read text
www.butkus.us
                    TOADING FIIM
            l.  Use 35 mm film in either blqck ond white or color, in 20 or 36 exposure cortridges.
             Pull out the slide lock @ to open the bock cover.
          2.   Pull out the film rewind knob @, insert the film coriridge in the chomber @ ond ther
          push in the rewind knob @.
          3.   lnsert the end of the film into the toke-up spool @; turn the spool in the direction
          of the orrow qnd wind the film on the spool one full turn.
         4.  Roise the film rewinding cronk @; while holding the film corlridge, slowly turn the
          cronk in the direction of the orrow ond toke the slqck out of the film. After moking
          sure the perforotions of the film engoge the sprocket teeth @, close the bock cover.

           €*      $


::*'*,,gcrlr*ii                iti::;*rt0s'
View original page 5Page 7 · Read text
5.  Next, odvonce the film until it stops ond press the shulter button. Repeot this procedure
   o second time. During this time, wotch the film rewind cronk @ : if  it turns in reverse,
      it indicotes thot the film is properly inserted qnd is being qdvonced.
6.  At third odvonce, the ftgure I  will be shown in the outomotic exposure counter @.
   The comerq is now reody to toke pictures.

               SETTING THE FIIM SPEED

                        When the film hos been looded, be sure to set the
                                   proper fllm speed. To do this, turn the film speed diol
               @ ond set its indicotor on the number corresponding
                                  to the fllm speed (ASA volue). The scole reodings with
                                 red circles indicote ASA 32 ond 160.
View original page 7Page 8 · Read text
www.butkus.us
                    FILM WINDING
                                The fflm qdvonce lever @ hos o l5o oction posi
                                             lion. When using the comero, it is more convenient
                                                      f the lever is plo'ced in this position os shown in
                                   the diogrom. With q single stroke, qdvonce the
                                    lever os for os  it  will go : one frome is now
                                      positioned ond ihe shutter is cocked.  Anolher
                                  frome connot be odvonced until the shutter is
                                    releosed. Double exPosure is impossible.

          INSERTING THE MERCURY BATTER.Y

l.  Turn the bottery cover @ counterclockwise with
   o coin.
     lnsert the bottery into the chomber, negotive side
          f orwo rd.
3.  Reploce cover @.
View original page 8Page 9 · Read text
o                 ConcerningThe exposurethe mercurymeter's bottery:efiectiveness depends on lhe
                                        condition of the botteryr which con be cliecked with
                      -a-                 o voltmeter of high internol resistonce, or ot your     \-T,
     @                     locol photogrophy shop.

Use one of the following 1.3 Volt botteries :   Toshibo TH-MC
                                           Notionql M-D
                                         Mollory RM 625

     PRECAUTION IN HANDTING MERCURY BATTERY
O The bottery must be inserted perfectly cleon ond dry. Wipe corefully.
j  Avoid shorting out of the positive ond negotive sides with ony metollic tool such os
   tweezers.
O Avoid excessive heot ond humidity. Store in cool ond dry ploce.
O When discording the bottery do not throw into o fire. Do not ottempt to disossemble.
View original page 9Page 10 · Read text
www.butkus.us
            PROCEDUR.E FOR. PHOTOGRAPHING
Since the Momiyo Prismot is o single  lens reflex, everything you see through the viewfinder
will be on the film. Composing your  picture is simpliffed.
              l.  Apply principles of good  composition.
        2.  Determine the exposure.
        3.  Focus.
        4.  Finolly, press the shutter bution to toke the picture.

                DETERMINING EXPOSURE
o;  Selecting the shutter speed
        Turn the shutter speed ring @ ond bring the
         selected speed opposite the red triongulor
       mork. The shutter speeds ore indicoted by
        T, 1, 2,4,9,  15,30, 60, 125,250,500.
      T indicotes "Time" (to be exploined loter).
View original page 10Page 11 · Read text
b.  Viewing the obiect to be photogrophed
       The exposure meter pcinter @ will indicote the brightness of the obiect, os seen
         through the viewfinder.

                             The operture ring @ moves the blue trocking indicotor
                @ t when the trocking ond the exposure pointers coincide,
                                the exposure is perfecf.   lf the trocking ond exposure
                               meter pointers do not coincide when the operture ring
                                     is turned, chonge the shutter speed ond repeot the @                     procedure.
                          Note l.  The numbers indicoting the operture opening moy
                                not olwoys oppeor in the center of the operture ring
                     @.  This does not, however, ofrect the picture foking
                                     procedure.
                           Note 2. The exposure meter ot ASA 100 hos o working
                               ronge from EV4 to EVl7.  This ronge is indicoted by
                                the oronge plote (working ronge indicotor @) which is
                               seen inside the finder.    lf the exposure meter pointer @                                     is within the oronge section ot the lower side, the
                                     oblect to be photogrophed is too dork ond the exposure
                               meter will not work.
View original page 11Page 12 · Read text
www.butkus.us
              USING THE EXPOSURE METER
The exposure meter is o refected light type; used properly, excellenf exposures con be
expected every time. Here ore some helpful hints on exposure   :
      Since this type expo3ure meter meo3ure3 the light reflected from the obiect olo
     be photogrophed, it is necessory to toke o meter reoding os neor to the obiect os
       possible ond ihereby exclude extroneous light which con qffect the exposure. The
       pointers ore motched in this position ond the picture is token os for bock os good
      composition demonds. Thus when the shulter is releosed lhe pointers inside the finder
     do not necessorily hove to be in motching position.
Portroits
      Approoch the subject ond toke o meler reoding off the foce.   lf port of the foce
        is dorker, meosure both light ond dork oreqs ond use the overoge.
Londscopes
     To expose properly for londscopes,  tilt the comero slightly downword, thereby restrict-
       ing the omount of light from the sky offecting the meter reoding.
Bocklighring photogrophy
     When moking o silhouette of on obiect, meosure the light from the bright port of
      the bockground ond expose. When on obiect is to be photogrophed by bocklighting,
      meosure the light from the obiect ot close ronge so thot the light from the bockground
View original page 12Page 13 · Read text
will not influence the meter reoding. When the obiect ond the bockground ore to
     be photogrophed ot the some time, first meosure the dork port of the obiect, then
      meosure the light from the bockground ond use the overoge volue.

                    FOCUSING

This comerq hos on qutomqtic pre-set type lens ond on
instont-return mirror system which permits continuous
viewing of the subiect before ond ofter toking the
picture. Focusing is done by turning the focusing ring
@ right or left until the screen imoge becomes shorp
ond cleqr. The center of the ground gloss screen con-
                                                                                                                                                                                                                                                                                                                                          !: ,i :toins o microdiomond prism ronge finder. When your                                     !ee*qfi+$+!9
subiect is in focus, the imoge in the microprism will be
shorp ond perfectly cleor.  lf your subiect is not  in
focus, the microprism will breok the imoge up into mony
smoll diomonds, much like on engrover's screen. You con
focus on your subiect ot ony portion of the ground
gloss. This system permits ropid ond precise focusing
of oll distonces ond cqn be used with normol, wide
ongle ond telephoto lenses.                                              www.butkus.us
View original page 13Page 14 · Read text
www.butkus.us

                DEPTH OF FIETD SCATE

 The moximum shorpness of o lens lies in o plone ot the
distonce to which the lens hos been set. The shorpness
 decreoses to the foreground ond to the bockground. This
 ronge of shorpness  is colled the "depth of field" ond depends
 on the operture setting ond distonce to subiect focused on.

 The smoller the operture setting the greoter will be the depth of field ond the neorer the
 dislonce the smqller the depth of field.

       To reod the depth of field scole @, ossume thqt the operture of your stondord lens
           is set ot F-l I ond focused ot 5 m. You will notice thot F-l I  is opposite the infinity
          setting on the right side ond opproximotely 2.5 m on the left.  Everything from
          2.5 m to infinity will be in shorp focus.
        The depth of field toble is o reody reference for other settings.
View original page 14Page 18 · Read text
www.butkus.us
          ADJUSTING DISTANCE FOR, INFRA.RED FILM
    The lens is first focused in the usuil monner so thot the distonce focused on  (i. e. oo) is
    opposite the oronge triongle on the distonce scole. Now, simply rotote the focusing ring
    so thot the selected distonce is opposite the red R. Distonce is now odiusted for infro-red
      film.

                    PHOTOGR.APHING
    Hold the comero firmly with both honds, pressing it ogoinst your cheek. Focusing con be
    done with the left hond, the right-hond thumb on the film odvonce lever qnd the index
     finger on the shutter releose bufton. ln this position, squeeze the shutter releose button
I  @ gently. When using the exposure meter, moke sure thot the meter window is not
     obslructed by your fingers.

           MAKING TIME EXPOSUR.ES
    With the shutter speed ring @ set on "T",  pressing of the
      shutter releose button @ opens the shutter which will remoin open
       until the time releose button @ is pressed. The operture con be
     set for ony volue in this instonce.
View original page 18Page 19 · Read text
USING SELF-TIMER.
When the MXV selector @ is set to V, the self-timer  i;
engoged. Pressing of the shutter releose button octuotes the
self-timer ond qfter o ten-second deloy, the shutter is outo.
moticolly releosed. The self-timer con be engoged before
or ofter film winding.
The threqded hole in the cenler of the shutter button is used
for o coble releose.
                FIASH PHOTOGR.APHY
Chonging of the MXV selector lever @ to M or X, the respective contoct is mode. lf  this
lever is set on V (self-timer), the contoct is X.
  Function of M contoct  3
   M closs (time log within 20 milli seconds) flosh bulbs con be used most efficiently on
        this contoct; the exposure synchronizes perfectly ,p to l/500 second.
  Function of X contoct:
        This contoct is used when photogrophing with on electronic speedlight or when photo-
      grophing ot l/30 second or longer, using F closs (time log within l0 milti second)
       flosh bulbs.
View original page 19Page 20 · Read text
www.butkus.us

When photogrophing with flosh bulbs, the synchronizing exposure time ronge is determined
by the kind of flosh bulb ond the kind of contoct (M or X).  The operture opening  is
determined by the distonce between the obiect to be photogrophed ond the guide number
of the porticulor flqsh bulb. For selection of the exposure time ond operture opening refer
to the instruction monuo! for flosh bulbs.  ln this cose, the exposure time qnd operture
opening ore determined without reference to the exposure meter.
Besides the synchro socket (Germon typ.) @ on the front of the comero, on upper synchro
contoct @ is locoted on the occessory shoe. Use whichever is most suited for the type of
flosh equipment used.

          ATTACHING OR DETACHING LENSES

                                   Thiee kinds of lenses-stqndord  (F-1.9, 48 mm), wide
                                    ongle (F-3.5, 38 mm) ond telephoto (F-3.5, 100 mm)-
                               con be used with this comero.
                         Detoching the lens:
                                                             l.  Turn the lens lock lever @ in opposite direction
                                            indicoted by the LOCK <lrrow.
View original page 20Page 21 · Read text
2.  Hold the comerq body in your left hond ; turn
        the lens counterclockwise holding the depth of
         field ring until the red dot on the lens cylinder
        motches the red triongle on the shutter speed
         ring. Remove the lens.

Attoching fhe lens:
       l.  Ascertoin thqt the lens lock lever @ is in the
        opposite direction to LOCK orrow mork.
    2.  Hold the comero in your left hond ; motch the
       red triongle on the depth of  field scole with
        the red dot on the lens cylinder.  lnsert the
        lens ond rotqte it clockwise until seoted.
    3. Lock the lens by sliding the lock lever @ in
       the direction indicqted by the orrow,
    4.  Turn the operture ring @.  The spring @ of
       the operture will ftt into the slot of the oper-
        ture ring @ to complete the lens qttochment.
View original page 21Page 22 · Read text
www.butkus.us

         When lens is detoched, never touch the lens i  never
            octuote the shutter' by toying with the operture con-
            nector lever @.
          Never touch the mirror : if  it  is dusty, use o rubber
            bulbtype blower to cleon.

,                       FILM REWINDING

    When every frome of o film cortridge hos been exposed, rewind the film before opening
     the bock coYer.
                      l.  Depress the rewinding button @.
             2.  Rqise the ftlm rewinding crqnk @, turn in the direction of  the        qnd
                 rewind the exposed film into the cortridge.
             3. When the film is in the cortridge, the rewinding button @ stops rototing.
             4. Open the bock cover ond remove film cortridge.
             5. By turning the film odvqnce lever @ once, ihe rewinding button
                     positioned.
View original page 22Page 25 · Read text
MAMIYA CAMERA GO., LTD.
NO. 7, t-CHOilE, HONOO, BUNKYO-KU,
            IOKYO, JAPAN
View original page 25From the M. Butkus archive. Original publisher and archive notices are retained.
Check the model and edition against your equipment.
PDF verified 2026-10-10.