Film cameras
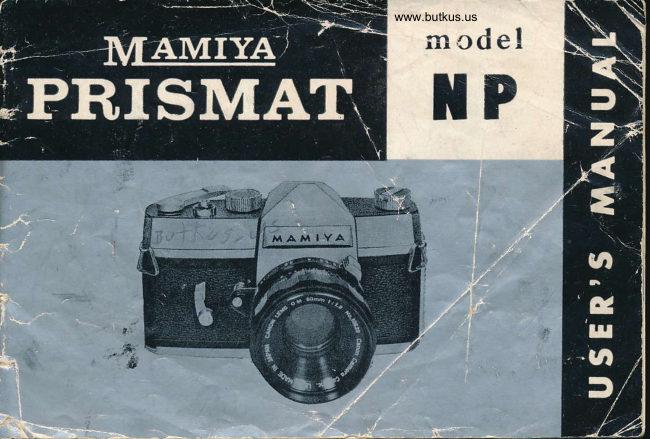
Mamiya PRISMAT model NP User manual
User manual for Mamiya PRISMAT model NP. 15 pages in English. Read the original PDF, download or print a copy without registration.
15 pagesEnglish4.6 MB PDF
Loading your manual…Open PDF directly
Document details
- Brand
- Mamiya
- Model / document
- Mamiya PRISMAT model NP
- Document type
- User manual
- Language
- English
- Pages
- 15
- File size
- 4.6 MB
- Category
- Film cameras
- Document date
- Not specified in catalog
Search available document text
Find a term, then jump to its page in the original PDF. Image-only pages may not be searchable; check the PDF for exact wording and diagrams.
Page 3 · Read text
www.butkus.us

12. Selflimer Set Lever                19. Sprocket
13. Selftimer Button                   20. Take-Up Spool
14. Distance Scale                         2I.  Sprocket Release Button
15. Depth of Field Scale               22. Lens Barrel Catch
16. Backlid Catch                    23. Synchroflash Sockets
17. Rewind Crank                    24. Filmspeed (ASA) Indicator
18. Film Chamber                    25. Strap Eyelets
                                   26. Tripod Socket
View original page 3Page 4 · Read text
T
                 BEFORE LOADTNG WITH Fttm
    Film is loaded in very much the same way as with other 35-millimeter miniature
cameras. However, it  will be well to understand the special features of this camera,
a single-lens reflex camera of advanced design.
            PIGTURES EXACTTY AS SEEN TI{ROUGH VIEWFINDER
    Because the sighting and focusing image is provided by the main lens through a
mirror and pentaprism, the subject-matter is always seen in proper orientation without
parallax regardless of distance and the focal length of the lens in use.
   The shutter button functions in two steps : hatf depression releases full aperture,
reducing the iris opening to predetermined setting  ; full depression actuates the shutter
and quick-return mirror. Consequently, there is momentary blackout of the viewing
image while the shutter is functioning.
                                                                                              lens   Focusing is accomplished by sight upon turning the focusing ring ( 8 ) of the
barrel to obtain maximum sharpness of the viewing image. Depth of field can be judged
by sight, while the viewing image is life size when using the standard lens set at
infinity (-).
   Quick Return Mechanism ensures continued viewing of the subject-matter af.ter                                                          +shutter action. The mirror flicks up when th.e focal plane shutter is in action, so the
View original page 4Page 5 · Read text
www.butkus.us

viewing image is blacked out only momentarily.
               TAXI TUM BRIGHTNESS AT WIt! FOR VIEWINO AND FOCUSTNG
    Because the main lens is used for sighting and focusing, the viewing image will be
dark when the aperture setting (f/value) is low. Provision is therefore made to use
full aperture when sighting and focusing.
    Automatic Aperture, s€t at full aperture for sight-
ing and focusing by full aperture lever (7), closes
down automatically to predetermined setting when
shutter button(2) is depressed. Presetting of aperture is
done by pushing the ap:rture ring (9)towards the camera
body to turn the aperture ring. If  it is desired to check,                                       l...Ei. ffi$.*G,il1
through the viewfinder, the actual effect of the prede'
termined aperture setting, operating the full aperture
release (10) wiil close down the iris diaphragm quite
independent of shutter button operation.
   COCKING N.EVER ADVANCES FIIM AND SETS SI{UTTER
    Operation of the cocking lever advances the film
by one frame and winds up the shutter mechanism.
Once the camera is cocked, the film cannot be ad-
View original page 5Page 7 · Read text
vanced. Filni waste and double exposure are positively prevented.
            Shutterstreed Ei"f (g) is non-revolving (during shutter action) and is equidistantly
        graduated in multiples of 2 (from 1 second to 1/1000 second). Click stop is provided at
        each shutterspeed setting.
         When shutterspeed dial (3) is set at "B", the shutter will remain open while the
         shutter button(2)is kept depressed. When set at "T", the shutter will remain open even
       when the shutter button is released, and will close only when the shutterspeed dial (l)
          is turned toward "Il". Shutter will also close when the dial (3) is turned toward "1000",
        but turning toward "B" is preferable.
                 COUPLING OF SHUTTERSPEED DIA! WITH SPEGIAT EXPOSURE TETER
             Special exposure meter is mounted on the camera by loosening eyepiece (6) flange
       and securing mounting fork of the exposure meter. The shutterspeed dial of the exposure
       meter is coupled to the camera shutterspeed dial by means of an inverted cup piece
       which engages the coupling pin (4). Adjust exposure meter filmspeed setting to match
      ASA rating of film in use. Turn exposure meter shutterspeed dial to desired shutterspeed
          setting. Train camera on subject-matter, and note exposure meter needle indication which
         gives the correct aperture setting. Adjust camera aperture accordingly to obtain correct
         exposure.
         When fitting special exposure meter to the catrrera, make sure that the exposure

'-          :
View original page 7Page 8 · Read text
www.butkus.us
meter shutterspeed dial indication matches that of the c mera shutterspeed dial.
           SELF-PHOTOGRAPHY
    This carnera has a built-in selftimer adjustable for time lag.
   When the seiftimer set lever (12) is turned counterclockwise about L80o a delay of
about ten seconds is obtained. The delay time can be changed by setting the selftimer
set lever anywhere between about 20" and 180o.
   The selftimer is actuated by pressing selftimer button(13). Consequently, the shutter
can be operated by the shutter button (2) even after the selftimer has been set. The
selftimer will operate even though the camera is not cocked. When using selftimer,
make sure shutter is cocked to avoid mistakes.
                        FIIM LOADING
    Regular 3S-millimeter film, monochrome or color, 20- or g6-exposure may be used.
Use film preloaded in safety cartridge. When loading film, avoid direct lighting, work in
subdued light to prevent fogging.
   1.  Pull up backlid catch (f0), and swing backlid fully open. Fully pull out rewind
crank (17). (Fig. 1)
   2.  Insert safety cartridge containing unexposed film in film chamber (18). Lock in
position by pushing in rewind crank fully. If rewind crank does not sink down fully,
View original page 8Page 9 · Read text
turn slightly until it engages safety cartridge with a dis-
tinct click. Pull out about four inches of film, and fold about
a quarter inch of the end of the film outward (toward glossy
film base side) at one of the perforations. (Fig. 2)
    3. Turn take-up spool (ZO) wittr thumb, in direction of film
gate (sprocket (19) will turn in opposite direction), to bring slit
of spool into a position convenient for attaching end of film.
Insert creased end of film into slit, hold lightly with fingertip,
then wind film onto spool, seeing that lower edge of film is in
contact with spool flange, and the perforations properly engage
the sprocket teeth. (Fig. 3)
    4. While holding down the film, turn rewind crank in
direction of arrow to take up all slack. (Fig. a)
   5. Next turn take-up spool (20) aeain with thumb to check
free advance of film, with sprocket teeth engaging the perfora-
tions, and with film playing out of the safety cartridge to turn
rewind crank (17) counterclockwise.  . Close backlid. If when
closing backlid, perforations on both sides of the film are
engaged by the sprocket, the full number of exposures may not
View original page 9Page 10 · Read text
www.butkus.us

be available for picture-taking.
    6. Exposure counter (5) will indicate "S" (start). Keeping
lens covered, operate cocking lever (1) and release shutter until
exposure counter indicates "1". You are now ready for picture-
taking.
    7.  Finally, turn filmspeed indicator (24) to set at ASA
rating of the film in use. The dots on the ASA scale between
50 and 100, and 100 and 200 indicate ASA 80 and 160 respectively.
The number of exposures available is indicated on red back-
ground for color, black for monochrome.
           CAMERA GRIP
   Any comfortable method of holding the camera wilt do
provided steadiness is assured. It is suggested, however, that
the weight of the camera be supported by the palm of the left
hand, while .the index finger and thumb are applied to the
focusing ring (8), The right hand lightly but firmly grips the
right end, with the index finger falling naturally on the shutter
button (2). The right thumb is hooked lightly on the cocking
View original page 10Page 11 · Read text
lever (1). (Cut A)
   When using the camera to take vertical pictures, essentially
the same grip can be used rn,hen the cocking lever side is
upmost. In this case, keep left elbow up against the body. (Cut
B) When the cocking lever side is lowered, nestle camera in
palm of right hand, and operate shutter button with thumb.
Left hand is free to operate the focusing ring. (Cut C)
                 FOCUSING
    After operating the cocking lever (1) to advance film and set
the shutter mechanism, push full aperture lever (7) downw-ard
to obtain maximum image brightness. Sieht subject through
eyepiece (g).
   Turn focusing ring (8) to obtain maximum sharpness of
image. Full aperture is not always necessary for focusing, but
added brightness and reduced depth of field aid judgment of
maximum sharpness.
   By using fuii aperture release (10), the pre-selected aperture
setting is obtaine d for visual check of depth of field an<l


                                                           L
View original page 11Page 13 · Read text
brightness of exposure.                                                                                           .
   When viewing image is too dark to permit visual checking of depth of field, make
                                                      When moreuse of the depth of field scale (15) adjacent to the distance scale (14).
precise checking of available depth of field is necessary, refer to the depth of field                                                                                                         a
table.
   When using infra-red film, in conjunction with red filters, certain corrections must
be made in focus because of the shorter wave-length of infra-red rays. First focus in
                                                                                       setting sothe usual manner, then note distance on the distance scale (14). Shift focus
that distance noted comes into alignment with the red infra-red index mark to the right
of the regular index mark.
                    UIITOADING FIIM
   When available number of exposures (ZO or 36) have been made, do not attempt to
take any more pictures.
                                                 remains depressed. Erect rewind   1. Press sprocket release button (Zt) so that it
crank(17), and turn in direction of arrow to return exposed film to safety cartridge.
                                                                       becomes   2. When end of film is reached, slight resistance will be felt when end
detached from take-up spool. Leave end of film protruding from safety cartridge. Open            'i-
backlid and remove. Depressed sprocket release button (21) will return automatically to
View original page 13Page 14 · Read text
T                                                                       www.butkus.us
         original position when cocking lever (1) is operated.
          CAUTION If, at end of roll of film, the cocking lever jams part way through its
         stroke, do not force. Push in the sprocket release button (2L) to free the cocking
       lever so its stroke can be completed. If jammed cocking lever is forced, the film may
+       break or become detached from the feed spool. Then camera cannot be opened except
         in a darkroom if film is to be saved.
                    SYNCHROFLASH PHOTOGRAPHY
        The term "synchroflash" is applied to synchronization of shutter action with the
         firing of a flashbulb or electronic flash.
       Two synchroflash sockets (23) are provided. One socket is for FP (focal plane)
         flashbulbs, while the other is for electronic flash. The sockets are designed to take the
                               SYNCHRONIZATION TABIE


                                                            FP                       Il     Synchroflosh Socket
                        ShutterspeedCL--g^---         ^ ^  -l             1/60 to l/tooo Sec.      1 to 1/30 Sec.
                                                                                                                I Electronic flash, Type tI                 Type of flosh         Type FP flashbulb  F and M flashbulbs


          I
 d
View original page 14From the M. Butkus archive. Original publisher and archive notices are retained.
Check the model and edition against your equipment.
PDF verified 2026-10-10.