Film cameras
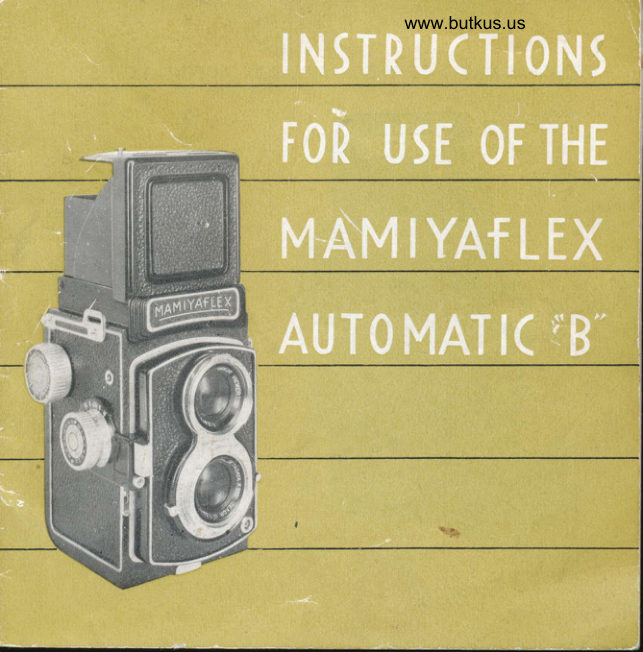
Mamiyaflex Automatic "B" User manual
User manual for Mamiyaflex Automatic "B". 21 pages in English. Read the original PDF, download or print a copy without registration.
21 pagesEnglish3.9 MB PDF
Loading your manual…Open PDF directly
Document details
- Brand
- Mamiya
- Model / document
- Mamiyaflex Automatic "B"
- Document type
- User manual
- Language
- English
- Pages
- 21
- File size
- 3.9 MB
- Category
- Film cameras
- Document date
- Not specified in catalog
Search available document text
Find a term, then jump to its page in the original PDF. Image-only pages may not be searchable; check the PDF for exact wording and diagrams.
Page 3 · Read text
www.butkus.us

            18.  Film Pressure Plote                           22.  Tripod Screw Socket
           19.  Exposed Film Toke-Up Spool              23.  Looded Film Type Reminder
           Chomber                                        24.  Film Speed (ASA-DtN) Com-
             Film Looding Chomber                       porison Scole ond Reminder
          21.  Stort Morks (yellow dots on                Attochments Socket
            both sides of film gote)                        " Sports  ,, Finder Reor peephole


Mike Butkus        Digitally                                                   DN:ou=butkus.org,Date:cn=Mike2023.12.31signedButkus,email=mike@butkus.org,by21:43:06Mikeo=ButkusButkus-05'00'camera manuals,c=US


                                                    ( Fig.                                          ( Fig.
View original page 3Page 5 · Read text
GENERAT INFORMATION
  Your MAMIYAFLEX AUTOMATIC '( B "  is o rwin lens,
outomotic, reflex comero of the highest quolity, developed
ofter yeors of experimentotion with MAMIyA'S suoerb
MAMIYAFLEX AUTOMATIC "A" which is widely occloimed
os the finest comero in its closs. The best feotures o{ this
distinguished instrument hove been incorporoted in the
Model B which, becouse of improved design ond produc-
tion techniques, is ovoiloble to o wider public.
  The MAMIYAFLEX AUTOMATIC "B" rokes twelve 21/rttx
,t1ort (6 cm X 6 cm) pictures on eoch roll of I20-size film,
either block-ond-white or color.  lts unique construction
permits you to see o full picture-size view o{ your shot,
right side up, before, while, ond of ter you moke the
exposure. The mognifier permits you to moke pin-point
odiustments in focusing. The comero is fully outomotic in
winding ond shutter cocking oction once the film is set
when looding. All you hove to do is wind then press the
shutter button for the next shot.  lt is impossible to moke
double or blonk exposures.
  All controls ore so orronged thot the MAMIYAFLEX
View original page 5Page 6 · Read text
www.butkus.us

AUTOMATIC  'f B " con be held ond monipuroted noturoily
with the leost efiort. The le{t hond is completely free to
hold the comerc comfortobly ond firmly. The fingers of
the right hond foll eosily into position on the controis-film
wind knob; focusing knob; ond shutter button. Everything
 is so eosy thot instruction moy be superfluous; but in oroer
to ovoid mistokes ond to moke the best use of the.mony
ingenious feoiures built into this precision instrument,  it  is
suggested thot this monuol be given coreful ottention.
            FAMILIARIZING YOURSELF WITH
           MAMIYAFLEX " B" FEATURES
  Before ottempting to toke pictures, try out lhe comero
un looded.
Opening ond Closins the Focusinq Hood
    l.  The Focusing Hood snops up into position when the
Snop-Up Top (1) is swung up (Fig. 4).
  2.  lf you wish to use the lmoge Mognifier (2), poke in
your index finger ond hook button with tip.  The Mogni-
fier will spring up into position.
  3.  For using Focusing Hood os " sports " finder, depress
View original page 6Page 7 · Read text
www.butkus.us
             Fig. 4                            Fis. 5
center ponel of Snop-Up Top (l ).  To return center ponel
to originol position, push Snop-Up Top (l ) bock slightly,
center ponel will spring bock (Fig.5).
  4. To fold Focusing Hood, push down lmoge Mognifier
(2) before closing Snop-Up Top (l).
To Focus your MAMIYAFLEX " B "
   l.  Remove Lens Cover.
View original page 7Page 8 · Read text
www.butkus.us
   2. Open Focusing Hood, ond while peering down on  .
 lh" imoge screen point comero ot whotever yi,  wish to bring into focus.
  3. Grip Focusing Knob (6) with thunrb ond middle finger,
 turn bock ond forth until imoge is shorp ond unbluried.
The imoge on the ground gloss screen is identicol in oll
 respects, except inte nsity
ond durotion, with the
imoge thot is proiected
on the film whe n  the
comero is looded. The
index finger folls noturolly
on the Shutter Button (7),
reody to press ot the right
instont (Fig. 6). However,
when toking pictures, the
Shutter Button Sofetv
Cotch (8) m ust first be
pulled do.arn.
  4.  For extro-shoro fo-
cusing, use lmoge Mogni-
fier (2), bringing your
eye quite close to the
gloss, ond using its center
oortion.                                        Fi9. 6
View original page 8
Page 9 · Read text
Using the Depth of Field Scole
  Depth of Field is the distonce, toword ond owoy from
the comero, within wh ch everything will be in shorp focus,
depending on how much the lens operture is opened up
or stopped down, ond on the distonce set on the focusing
scole. The Depth of Field decreoses the wider the lens
is opened up ond the closer the subiect to be ohotogroph-
ed is brought to the comero, ond vice verso. This relo-
tionship con be better understood,  if you will octuolly toke
reodings of the Depth of Field Scole (S). Assuming thqt
your lens opening is set ot f/B ond your comero is focused
on the tip of somebody's nose exoctly five feet owoy, then
everything not more thon 6 feet owoy or not closer thon
obout 4.3 feet from the comero will be in shorp focus, ono
the Depth of Field (permissible toleronce) will be qbour
1.7 fi.  With your comero in focus ot the some distonce
but with your lens opened up fully (fi3.S) you hove bur
0.7 Il. or so leewoy to get o shorp picture. Conversely,
with your lens stopped down to  Ill l obout 2.4ft.leewoy
is ovoiloble. The blqck scole with white figures (two                  ,'t
lines eoch for f/3.5 ; ll8; ond f/1 1) gives the depth ovoil-
oble which should be reod ofi the bright scole with block
View original page 9
Page 11 · Read text
Shulter Speeds qnd lens Openings
  Adiustment of shutter speed ond lens iris stop con be
done without chonging your left-hond grip on the comero.
    l.   Shutter Speeds The SEIKOSHA RApID shutter incor-
poroted in the MAMIYAFLEX AUTOMATIC  ,'B', gives vorious
shutter speeds ronging from I second to 1i500 of o second.
Bulb (press button to open shutter, releose to close) is olso
ovqiloble. The vorious settings ore obtoined by turning
the shutter Speed Lever (.|0) to the desired position on
the scole. (N.B. With the  I i500 sefting it is beiler ro
moke the od[ustment before the shutter hos been cocked,
thot is, ihe Film Wind Knob hos not yet been turned ofter
on exposure or on unlooded releose.) The coble Releose
socket (9) directly under the shuter Bufion (7) enobles you
to use o coble releose or o self-timer.
  2.  . Lens Aperture Stops Jhs lehs opening iris is operoted
by the Lens Stop Adiusrment Lever (l  I )   Lens speeds
(brightness of the imoge proiecred on the film) con be
voried from f 3.5 (fully open) to {122 (tully sropped down).
    LOADING THE MAMIYAFLEX " B " WITH FILM
  N.B. LOADING ond UNLOADTNG should nor be done in
bright sunlight.
View original page 11Page 12 · Read text
www.butkus.us
                 l.  Check to see thot Film Frome lnd;cotor (4) shows 0  ,
              if not, turn Film Wind Knob ond releose shutter.
          2. Open up bock (17) by turning Bottom Knob to
         disengoge Bock Lid Cotch (12) (Fig. 7).
          3.  Releose empty spool by pulling out Spool Stud (.|4)
       ond giving it holf o turn. Stud will cotch ond remoin
         pulled out.
          4.  Insert empty spool in Toke-Up position (19) by pulling
         out toke-Up Spool Stud (13) ond releosing ofter spool is
         snugly fitted.
I


                          Fis. 7                              Fis. 8

                                      {
View original page 12Page 13 · Read text
www.butkus.us

                                                Fis.  I 0

  5. Toke new spool of film, ond insert in  Looding
Chomber (20) so thot the metol stud engoges end of the
spool. Allow spool to foll into position, releose Spool
stud (.|4), ond check to see thot film is snugly inserted
ond will turn freely (Fig. 8).
  6. Remove gummed poper seol from film roll ond dis-
cord. Toke end of poper leoder, ond pull out iust
enough to reoch Toke-Up Spool (19). The block side of
View original page 13Page 14 · Read text
www.butkus.us

the poper should foce interior of the comero. Adiust
Toke-Up Spool by turning Film Wind Knob (3) so thot rhe
longer slit on spool foces up; fit topered end of poper
leoder securely in spool slit. Turn Film Wind Konb o little
to see thot film will be token up properly.
  7.  Continue turning Film Wind Knob until stort mork
oppeors on leoder poper. Motch the orrow points or
trionglei occurotely with the yellow stort dots (21) on the
comero (Fig. l0).
  8.  Close Bock Lid ond lock securely. Keep turning Film
Wind Knob until it stops. The first frome is in position
for picture-toking, ond the Film Frome Indicotor (4) should
show number l.
  9. Once the shutter hos been releosed, the Film Wind
Knob will be free to turn to bring the next frome into
position ond to reset the shutter.
   .|0.     When putting owoy the comero with film looded,  it
is better not to wind next frome ond keep shutter cocked.
Film Looded Indicotor (16) shows yellow dot when comero
contoins film.
View original page 14
Page 15 · Read text
UNLOADING FIIM
    l  When l2 pictures hove been token, thus exposing
the entire roll of film, the Film Wind Knob is freed. Keep
winding until oll of the poper leoder is token up.
  2. Open up Bock Lid, fold bock o little of the poper
leoder ond secure with the gummed poper seol. Pull out
Spool Stud (,|9) to remove exposed roll of film. Keep
exposed roll owoy from light'
  3.  Tronsfer empty spool to toke-up position (Cf. 3 ond 4
o bove).
  4. Relood comero.  lf comero is to be kept empty,
close Bock Lid, lock, ond releose shutter.
                                                    ..HOLDING THE MAMIYAFLEX   B '' FOR PICTURE.TAKING                                                                                                                       i
    l.  The MAMIYAFLEX con be held ot either woist-height
or eye-level (Figs. ll ond l2)
  2.  For eye-level photogrphy, using the " sports "  finder,
focusing must first be done with the ground-gloss imoge
viewer or by estimoting the distonce to preset the footoge
on the Focusing Knob diol. Bring your eye up os close os
                                                                                                                                            f rome forpossible to the Peephole (26) ond use the {ront
proper verticol or horizontol olignment.
View original page 15Page 16 · Read text
www.butkus.us

  FLASH PHOTOGRAPHY WITH THE MAMIYAFLEX " B ''
  The MAMIYAFLEX AUTOMATIC " B "  is equipped with
o precision, built-in, flosh synchronizotion mechonism. There-
fore no extroneous synchronizer ottochment need be used,
When the comero is operoted in coniunction with the
MAMIYA FLASH EQUIPMENT (Fig. l3), first ossemble FLASH
EQUIPMENT, ottoch comero bv meons of screw which fits


              Fis. 11
View original page 16Page 17 · Read text
Tripod Socket (22), using the hole neorest the end of the
long orm of the ongle brocket. Plug connecting cord in
the Flosh Socket (.|5). See thot direct light   f rom flosh
bulb will not strike lens.
  With proper modificotion of the  connecting cord plug,
                                       flosh ottochments other
                                thon the MAMIYA con
                         be used if desireq.
                         The synchronizotion
                                mechonism built into the
                        MAMIYAFLEX AUTO-
                         MATIC " B" is so oo-
                                     iusted os to moke con-
                                 toct ond fire the bulb
                       o smoll froction of o
                              second before the shut-
                                 ter reoches moximum
                                  opening. ConsequentlY,
                                                                                 t'                                   with on                                              F " closs flosh
                                   bulb (time log not more
                            thon l0  milliseconds.),
                 Fis. l3                    sh utte r  sp eeds of  u p
View original page 17Page 18 · Read text
www.butkus.us

 to  I /50 con be used ; while with  (' M "  closs flosh bulbs
 (time log obut 20 milliseconds), the shutter shourd be set
ot not more thon 1125 second. Experiments hove shown
thot shutter speeds foster thon  I /.|00 ore possible when
 using the MAMIYA FLASH EQUIPMENT, bur until improve-
ments ore mode on flosh bulbs it will be sofer not to
exceed the speeds mentioned obove.
   Before octuolly using the FLASH EaulpMENT it is odvis-
oble to test it out with the comero unlooded, inserting the
test lomp in ploce of o flosh bulb. When mony flosh ex-
posures ore to be token in ropid succession, or when one
or more extension flosh bulbs ore to be used, on exrro
bottery, odded by meons of on extension tube on the
bottery holder, will give more dependobilitv.
         WHEN NOT IN ACTUAL USE
  1. Before closing cover of leother FIELD CASE, olwoys
withdrow lens-shutter ossembly into comero body bv turn-
ing Focusing Knob (5) to infinity (co), ond return Sofety
Cotch (8) to lock position. Reploce double lens cop ro
protect cooted lens surfoces from scrotches, dust ond
moisture.
View original page 18Page 19 · Read text
lenses  2.   lt is good proctice, ofter use, to wipe off the
gently with cleoir tissure; then, ofter fitting lens coP, to
remove dust ond grime from the vorious ports of the
comero with o  soft-hoired brush. When puiting the
                                                                                                                                            f unctions,MAMIYAFLEX AUTOMATIC " B " owoy, check oll
ond keep owoy from excessive chonges in lemperoture
ond humidity

                    ACCESSORIES
  The following occessories ore ovoiloble to moke photo-
grophy with the MAMIYAFLEX AUTOMATIC " B " completely
enioyoble
    l. De  ' Luxe, Genuine Leother Field Cose    Provides                                                                                          '       perfect protection   f rom weor ond possible iniury ond
       permits instont use of the MAMIYAFLEX " B "  without
      removing comero from cose.
  2. MAMIYA SYNCHRO-FLASH EAUIPMFNT
  3, MAMIYA FLASH EXTENSION EAUIPMENT (with four
     yords of cord): These units con be ottoched so
        quickly, so eosily ond yet so firmly, ond enoble you
      to toke good picture onywhere-onytime.
View original page 19Page 20 · Read text
www.butkus.us

         4.  Filters, oll types  MAMIYA yellow ond other color                                                          '                   fllters ore mode of the finest opticol gloss, precision
           ground. For use, they ore mounted on the inner
            rim of the boyonet ring of toking lens by turniirg
                until they soring into position. The outer boyonet
             ring tokes the hood independently of the filter or
                portro it ottoch me nt.
        5.  Lens Hood, with spec:ol leother cose
I        6.  Portroit Attochme nts
l.I                   No. I (40 to 20 in.)
                    No. 2 (20 to 13 in.)
I
        7.  Focusing Hood Attochment ,   Fits snugly over the
             focusing hood, kills ground gloss glore, ond folds
                flot when not in use
        8.  Self -Timer
                          *

      MAMIYA CAMERA COMPANY LTD.
                 Hongo l-Chome, Bunkyo-ku, Tokyo, Jopon
View original page 20From the M. Butkus archive. Original publisher and archive notices are retained.
Check the model and edition against your equipment.
PDF verified 2026-10-10.