Film cameras
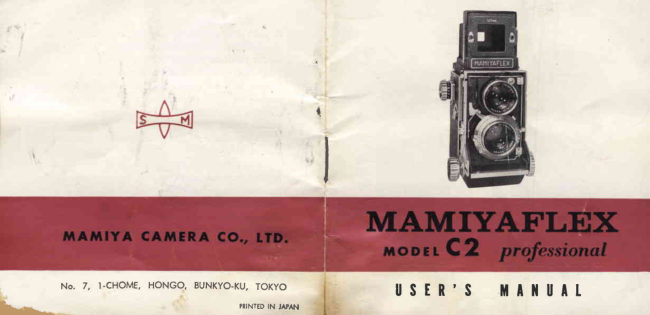
Mamiyaflex C2 Professional User manual
User manual for Mamiyaflex C2 Professional. 11 pages in English. Read the original PDF, download or print a copy without registration.
11 pagesEnglish1.4 MB PDF
Loading your manual…Open PDF directly
Document details
- Brand
- Mamiya
- Model / document
- Mamiyaflex C2 Professional
- Document type
- User manual
- Language
- English
- Pages
- 11
- File size
- 1.4 MB
- Category
- Film cameras
- Document date
- Not specified in catalog
Search available document text
Find a term, then jump to its page in the original PDF. Image-only pages may not be searchable; check the PDF for exact wording and diagrams.
Page 6 · Read text
glass.  This  indicates  that  no
                                            secure end of paper leader to  take-up  spool, then  wind light can  strike  the emulsion
                                                          until  start mark on paper leader matches start mark  (24)su rface and no pictu re can be
                                                                              ( Fig. 7 ) .  Close backlid, and snap shut.taken.
                                                           4.  Operate filmstop  release (6) once then turn filmwind
    TOADING AND                   knob until  it stops, with exposure counter showing numeral
    UNLOADING FILM                    1.  The  first frame  is then  in position, ready  for exposure.
                                                           5.  After  taking a picture,  operate  filmstop  release  to   1.  The procedure is the same
                                               permit advancing of film by one frame.  To prevent doubleas with any other twin-lens re-
                                            exposures, always advance film immediately  after  takingflex camera, only easier because
                                              a prcture.
the 90  bend is eliminated. Us-
                                                         6.  A  red window  (rT )  is provided so that a check caning  the  filmstop release  (6),
                                          be made to see whether  or not the camera contains film.operate filmwind knob (5) until
it turns  free.                          PICTURETAKING WITH
   2.  Open   bacl<lid   ( 15)  by                 THE frIAMIYAFTEX TIODET C2
pushing  backlid  catch  button                                   TISEOF THE EXPOSURECORRECTIONSCALE ( 161 to right.
                                                         1.  Because the amount  of  light impinging on the emul-   3.  Place u nexposed  roll  of
                                                 sion surface varies with  the extension of the bellows andfilm  in film spool chanrber ( 20),
                                                 the distance of the lens from the film, the exposure correc-
View original page 6Page 7 · Read text
www.orphancameras.com

                                                 tion   scale   (25)                   glass, referring  to the exposure correction  scale.
                                        should always be                       2. When  the exposure correction  scale (zs) indicates a
                                              carefully    noted,                    factor  of 1.5 then the upper  line defines the  upper  limit
                                              particularly when                     of  the  subject  matter  registering  on  the  film  surface.
                                        working  at  close             When exposure must be doubled,  then  parallax  is  suclr
                                       ranges  ( Fig. 8) .                      that  the lower  line defines the upper   limit.  When using
    2.  Assuming that  the 80-mm  focal  length  lens  is  in                   the 80-mm focal length  lens at ranges closer than 2.T feet,
 use,  if on obtaining clearcut focus on the ground glass the                  the upper  limit  of the subject matter  lies  at  about  half
 exposure correction scale reads as shown  in  Fig. 8, it will               way down the ground  glass.
 be necessary to increase exposure to twice normal.  This                        3. When using a tripod, the PARAMENDER   parallax
would be equivalent of using a filter with a factor of x2;                    correction device  will  permit  a full  and  correct  view  of
and  if  the exposure meter  reading  indicates  the  correct         {         the subject matter on the ground  glass.
exposure to be  t /u,, sec. at  f lg, then the corrected settings               TO FIND  AVAILABLE  DEPTH  OF FIELD
should be either   t /r,, at  tl8  or   , /u,, at  f 15.6.                              on  right-hand  supporting  member  of  the  lens-shutter
  CORRECTION  FOR PARALLAX                                            holder  are affixed different  distance scales (one  for  each
   1. when  working  at close range, care must be taken to                   focal length)  (29) .
allow  for parallax, since the  viewing  and  picture-taking                   Wlren desirous of knowing  the available depth  of  field,
lenses are not one and the same.  For corrections, use the                  focus carlrera then  read  distance on  the  distance  scale
clear  lines drawn  across the upper  part  of  the  grounu                 corresponding  to  the  lens  in  use,  or  actually  measure


                                                                              .t-i.-i.{.tL
View original page 7Page 8 · Read text
distance between subject and back of camera  (surface of
film)  with  a tape measure.  After  obtaining  the distance,
consult depth  of  field  table  to  ascertain  available  depth
of  field for  the aperture setting used.              @
    CHANGING THE FOCUSING HOOD
   1.  Loosen focusing hood lock screw  (18)  and   lift  up                 ends of  the  backlid  hinge  pivots  (287.  Lock  pivots by
rear end of folded focusing hood while exerting pull. The                    turning up  into  the  slots.  Backlid  ( 15) then will  slide
focusing hood will  readily disengage and slide off (Fig. 9).                        off easily   ( Figs. 10 and 1 1 ) .
   2.  Slip on the interchangeable mirror-finder, and tighten                          2.  Remove film  spool, then reversing the removal pro-
lock  screw   ( 18) .   This  completes  the  hood changing                   cedure, attach the special single-exposure back attachment.
                                                          When  the plate or  cut-film  holder  is  positioned in  theoperation.
                                                                         grooves of the back attachment  (Fig.  I2), and  is secured
  SINGLE EXPOSUREPHOTOGRAPHY                           by  the  spring  catch, the camera  is ready  for  making
                                           1. Remove stand'..d                   a s,ngle exposure.
                                      backlid   by   releas'   ':
                                               SYNCHROFTASHPHOTOGRAPHY
                                      backlid  catch  but'on        il                                                                                               1.  The simplest  arrangement   for  synchroflash  photo-                                                           ( 16)  then  squeezing
                                                                       graphy  is obtained by mounting  the collapsible MAMIYA                                   inward  the protruding
View original page 8Page 9 · Read text
www.orphancameras.com

                                     B.C  FLASH   AT-                      junction  with  stroboflash  (gas discharge tube),  or with  or-
                            TACHMENT   ON                    dinary flash-bulbs at shutterspeeds not exceeding  r/ro sec.
                                           the  accessory cliP                          5.  When   not  using  synchroflash,  keep  synchroflash
                                            (26) and  securing                   adjustment  (11)  at position  " X ".
                                           the  connector   to
                                            the    synchroflash                       SPECIAL ACCESSORIES
                                                     tip  (L2).   In  this                TNTERCHANGEABLErENS ASSEmBUES (MAMIYA-SEKOR
                                      case  it  is conveni-                   lenses and SEIKOSHA  shutter)
                                           ent   to   use  the                    Wide-Angle  (F  3.5,  f - 65 Dffi,  63-degree picture  angle)
                                          eye-level   mirror-                    6-element, S-group, fully  corrected  anastigmat  with  retro-
                                           finder  (Fig. 9).                     focusarrangement.   Unsurpassed for  brilliance, sharpness
   2.  Set the synchroflash adjustment  (11) for the type of                  and  color  fidelity.   Wide-angle   in  conjunction  with  large
flash used.  This may be done after  the shutter has been                    negative  size  permits  extreme   versatility   in  news  and
cocked.                                                                      candid photography.   Also extremely  convenient  for  close
   3.  Position  " M  " gives the correct  time  lag  for  class                  range  work   such  as  copying  because  lens-to-subject
M flash-bulbs (time  to peak intensity, about 20 milliseconds)                       dist'ng.  can be as small as 4 inches.
and  will  give accurate synchronization  at all shutt                                       Focal  Length   (F  2.8,   f - 80 ffiD,   S02/r-degree
including  t/rro sec.                                                                                          angle) 4-element,  3-group,  fully  corrected, general
   4.  Position  " X " allows  for no  l"g, and  is used in con-                  nurpose  anastigmat.   Close-range  photography   possible
View original page 9Page 11 · Read text
www.orphancameras.com

                                                                                                          to  main  lens  position  for  focusing  and  picture  composi-
        resolving  power  comparable   to  that  of the 135-mm  lens'                        tion  for complete  elimination  of parallax.
        Useful  for stage action  photography,  portrait  work,  candid                 SINGTE EXPOSUREATTACHfrIENT
        shots  and  other  situations  where  subject  cannot  be  ap-                    By  using  the  special  single  exposure  backlid   in  con-
        proached.                                                                                junction   with  the  special  plate  or  cut-film   holders    it   is
       IENS HOODS                                                                       possible   to  make  single-frame   negatives  which  are  so
          Four  types  available,   for  wide-angle,   for  80-mm  and                      useful  in professional  and advanced  amateur  work.
        standard  lenses,  for  135-mm  long  focal  length,  and  for               MIRROR FINDER
       180-mm  telephoto.                                                                   This attachment  permits  eyelevel  focusing  and sighting.
        FltTERs (made by TOSHIBA)                                         GRIP HOTDER
            In  all  varieties   in  three  size  to   fit  (screw-in  type)  the                       Special grip-form  handle  is particularly  handy  for carry-
       80-mm  and standard  lens (40.5 mm diameter),  the 135-mm                       ing  and  steady camera  grip  during   picture-taking.    Will
         long  focal  length  lens  (46 mm  diameter)  and  the  wide-                      also take  flashgun.
        angle  and  telephoto  lenses (49 mm  diameter)'   y  2, Y G,                SPECIAL LEATHERGADGEI BAG
        o 2 colol  filters,  and  ultraviolet  and  neutral  density  types                     Designed  for compact  stowing  and  carrying   of camera,
         available.  When   fitting    filter   to 180-mm  telephoto  lens,                    interchangeable  lenses and other  accessories.
             first  remove  guard  ring  affixed  to end  of  lens  barrel;     .                        I4AiIIYA  FII.M CUTTER
       PARAfrIENDERPcrollox  Correcilon  Attochmenf                                Use  for  preparing  single  exposure  cut  film  by  quarter-
           Interposed  between  the  camera  and  tripod   or  stand,                        ing,  in  the darkroom,  of standard  octavo  size sheet  film.
         the PARAMENDER    permits  lowering   of  viewfinder   lens
,*   ..#r"-* .,gju,-.-;,sM.,ed&*a,                             b-
View original page 11From the M. Butkus archive. Original publisher and archive notices are retained.
Check the model and edition against your equipment.
PDF verified 2026-10-10.