Film cameras
Metz Mecablitz 28 AF 4M User manual
User manual for Metz Mecablitz 28 AF 4M. 43 pages in German, French, Dutch. Read the original PDF, download or print a copy without registration.
43 pagesGerman, French, Dutch3.7 MB PDF
Loading your manual…Open PDF directly
Document details
- Brand
- Metz
- Model / document
- Metz Mecablitz 28 AF 4M
- Document type
- User manual
- Language
- German, French, Dutch
- Pages
- 43
- File size
- 3.7 MB
- Category
- Film cameras
- Document date
- Not specified in catalog
Search available document text
Find a term, then jump to its page in the original PDF. Image-only pages may not be searchable; check the PDF for exact wording and diagrams.
Page 1 · Read text
www.butkus.us
 Millionen METZ-Geriite bei zufriedenen Kunden.
  METZ FARBFERNSEH G E RAT E                                                                    TV . VIDEO  . CAMCORDER  . MECABLITZ
                                 -komfortobel und zukunftssicher
 METZ VIDEORECORDER
          -perfekte Au sstottung mit hohem Bedienkomfort
 METZ CAMCORDER
            - brillont in Aufnohme und Wiedergobe
 METZ BLITZGTNATT
                               -fiir Amoteure und Profis


METZ-Perfektion in Technik & Design

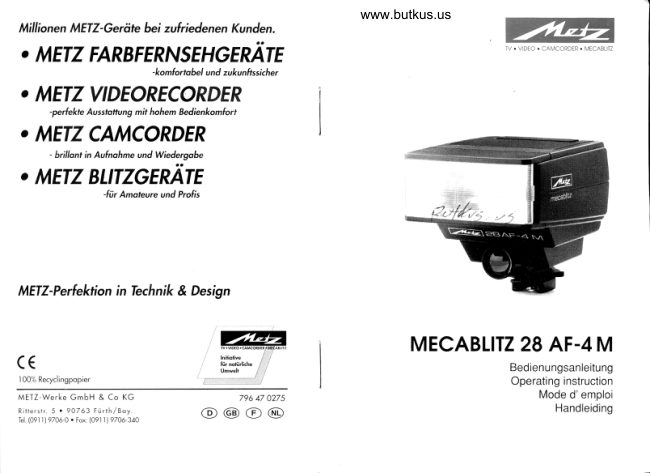
                                  MECABLITZ 28 AF.4 M
C€                                                                                           Bedienungsanleitung
 lVVTo KeC/cllngpoplert.                                                                                  Operating instruction
METZ-Werke GmbH & Co KG                        796 47 0275                                      Mode d'emploi
Ritterstr. 5 . 90763 Fiirth/Boy.                                                                                   HandleidingTel. (091  I J 9706'0. Fox: (091 ll9706-340   @@@@
View original page 1Page 4 · Read text
www.butkus.us
                                                                                                                                                                              \::,


                                                                                                                                                                                                                                                                                                                                                                                                                                                                                                                  lrrl-r,,                                                                                      2. Vorbereiten Oes mectniit                 1 . Sicherheitshinweise                                                                                                                      l'ri'
. Nicht aus sehr kurzer Entfernung direkt in die Augen blitzen! Direk'
  tes Blitzen in die Augen von Personen und Tieren kann zu Netzhaut-
  schddigungen  fiihren und schwere Sehstiirungen verursachen - bis
  hin zur Blindheit!
o Verbrauchte Batterien sofort aus dem Geriit entnehmen! Aus ver-                                                  --
  brauchten Batterien kiinnen Ghemikalien austreten (sogenanntes                                \9w"$".,-
  "Auslaufen") und zur Beschddigung des Gerdtes fiihren!
. Akkus nicht kurzschlieRen! Explosionsgefahr!. Batterien/Akkus keinesfalls hohen Temperaturen wie intensiver  w
  Sonneneinstrahlung,  Feuer oder dergleichen aussetzen!
                                                                                                                                                                                            ;                Bild  1. : V erwendb ar e B att erietyp en. Verbrauchte Batterien nicht ins Feuer werfen!
. Das Blitzgerdt nicht Tropf- oder Spritzwasser aussetzen!     #           2.1 Stromversorgung                   W
. Das Blitzgerdt vor groRer Hitze und hoher Luftfeuchtigkeit              Das Blitzgerat kann wahlweise betrieben werden mit:
  schiitzen! Bewahren Sie es z.B. nicht im Handschuhfach lhres
                                                                           o 4 NC-Akkus Typ IEC KR 15/51. Sie bieten sehr kurze Blitzfolgezeiten  Autos aut.
. Das Blitzgerdt in den Blitzschuh der Kamera einschieben und                 und sind aufladbar.
  mit der Rdndelscheibe so festdrehen, daB es nicht herausrut-               o 4 Alkali-Mangan-Trockenbatterien Typ IEC LR6 (Mignon). Sie genti-
  schen und herunterfallen kann!                                              gen gemiiBigten Leistungsanforderungen.
. Bei Serienblitzaufnahmen  mit voller Lichtleistung und kurzen Blitzfol'                   . 4 Nickel-Metall-Hydrid Akkus (GroBe Mignon, M). Sie sind umwelt-
  gezeiten im N0-Akku-Betrieb nach ieweils 20 Blitzen eine Pause von                   freundlich (ohne Cadmium) und verftigen iiber besonders hohe
  mindestens 3 Minuten einhalten. Damit vermeiden Sie eine Uberla-                     Kapazitdt.
  stung des Gerdtes,
. Wenn Sie den Blitz ausliisen, darf kein lichtundurchldssiges       A  Xeine Lithium'Batterien verwenden!
  Material unmittelbar vor- oder direkt auf der Reflektorscheibe                Die Batterien sind leer bzw. verbraucht, wenn die Blitzfolgezeit  tiber
  (Blitzfenster) sein. Die Reflektorscheibe darf nicht verschmutzt              60 Sek. ansteigt oder beim Batterietest die Batterieanzeige nicht mehr
  sein. Es kann sonst wegen des hohen EnergieausstoBes zum                   aufleuchtet. Wenn Sie den mecablitz langere Zeit nicht benutzen, ent-
  Verschmoren des Materials bzw. der Reflektorscheibe kommen.                 fernen Sie bitte die Batterien aus dem Gerdt.
 . Blitzgerdt nicht zerlegen! H0GHSPANNUNG! lm Gerdteinneren
  befinden sich keine Bauteile, die von einem Laien repariert wer-
  den ktinnen.

 4
View original page 4Page 6 · Read text
www.butkus.us
                                                                                                                                                                                                                                            .        . tlw
        3. In Betrieb nehmen des mecablitz                         4. Meldungen vom Blitzgerdt an die Kamera    ,i,
3.1 Voraussetzungen                                                           Der mecablitz i.ibeilrdgt verschiedene  Signale, bzw. Meldungen an die
                                                                             Kamera, wenfl er mit der Kamera verbunden und eingeschaltet  ist:      Sie kdnnen den mecablitz grundsdtzlich nur mit TTL-Blitz-
      gesteuerten Kameras einsetzen!                                                                                    4.1 Blitzbereitschaftsanzeige
     BeiTTl-Blitzgesteuerten  Kameras miBt ein Sensor das durch das                 Bei aufgeladenem Blitzkondensator leuchtet am mecablitz die orange
     0bjektiv (Through The Lens) auf den Film auftreffende Licht und            Lampe I  l auf und zeigt damit die Blitzbereitschaft an. Das bedeutet,
     schaltet bei ausreichender Belichtung das Blitzgeriit ab (siehe              daB ftir die ndchste Aufnahme Blitzlicht venryendet werden kann. Die
    auch S.11). 0b lhre Kamera diese Funktion hat, entnehmen Sie                    Blitzbereitschaft  wird auch an die Kamera ubertragen und sorgt dorl im
      bitte der Kamera-Bedienungsanleitung.                                        Kamerasucher  frir eine entsprechende  Anzeige. Gegebenenfalls  wird
                                                                                  die Kamera (typabhdngigl) bei Erreichen der Blitzbereitschaft auf die      Bei Kameras, die nicht liber eine TTl-Blitzsteuerung  verfii-                                                                                               Blitzsynchronzeit  umgestellt. Wenn Sie die Kamera ausltisen, ohne daB      gen wird ein Vollblitz ausgeliist   !                                                                                  die Blitzbereitschaftslampe aufleuchtet, wird kein Blitz gezundet und
 Das bedeutet, der mecablitz gibt ohne TTl-Blitzsteuerung beim Auslci-                  die Aufnahme wird unter Umstdnden falsch belichtet,  falls die Kamera-
                                                                                                             bereits auf Blitzsynchronzeit umgeschaltet hat. Einzelheiten sen ungeregelt seine maximale Blitzleistung abl                                  i       steuerung                                                                                                                                             rfl                                                     |,5    lesen Sie bitte in der Kamerabedienungsanleitung nach.      \?      Bei Verwendung des mecablitz mu0 etn eventuell in der
     Kamera eingebautes Blitzgerdt ausgeschaltet, bzw. voll-                4.2 Automatische Blitzsynchronzeitsteuerung
      stdndig eingeklappt sein  !                                                                                       Bei Blitzbereitschaft  wird an den meisten Systemkameras automatisch
 3.2 Ein- und Ausschalten des Blitzgerdtes, Filmempfindlichkeit                  aus der eingestellten Betriebsart auf die Blitzsynchronzeit  umgeschal-
                                                                                                   tet. Je nach Kameratyp sind Zeiten zwischen 1/30 Sekunden und
 Ein- und Ausschalten: Schalten Sie den mecablitz mit dem Schalter   I                                                                              1/300 Sekunden tiblich. Einzelheiten entnehmen Sie bitte der Kamera-
 ein. lm eingeschalteten Zustand leuchtet die grune Betriebsanzeige.                 Bedienungsanleitung.
 Bei Erreichen der Blitzbereitschaft leuchtet zusdtzlich die orange Blitz-
 bereitschaftsanzeige. Drucken Sie zum Ausschalten den Schalter 0.             4.3 Die Belichtungs-Kontroll- Anzeige (siehe Bild 3)
 Die grtine Betriebsanzeige und die orange Bereitschaftsanzeige   verlii-                                                                Wenn Sie eine Blitzlichtaufnahme gemacht haben, leuchtet die grune schen. Verbleibt der mecablitz in diesem Zustand auf der Kamera, wird                                                                                     Belichtungs-Kontroll-Anzeige fur einen Moment auf, wenn die Belich-
 bei der ndchsten Aufnahme kein Blitz ausgeldst.                                                                           tung korrekt war, Gleichzeitig schickt der mecablitz ein Belichtungs-
 Einstellen der Filmempfindlichkeit am mecablitz: Stellen Sie an der                  Kontroll-Signal an die Kamera und sorgt dort im Kamerasucher  fiir eine
 Rrickseite des Gerdtes die Empfindlichkeit des veruvendeten Films ein,                entsprechende Anzeige.
 indem Sie mit dem Blendenschieber den gewtinschten Wert im
 ,,1S0-Fenster" wdhlen.


 8
View original page 6Page 8 · Read text
www.butkus.us
                 ifili.,li.'l:.:1r                                                                                                        7. Blitzbetrieb in den einzelnen                            lir,.              6. Blitzsynchronisation                                          il;:'    .                                                                                                                                                                   '.                                       lt\CllllttlKamerafunktionendlulllltlull
       Je nach Kameratyp sind verschiedene  Blitz-Synchronisationsarten                Blitz-Programmautomatik  (P-Funktion)
           mriglich. Wie die einzelnen Synchronisationsarten an der Kamera ein-                                                                                            Die Kamera bchaltet  in dieser Funktion bei zu geringem Umlicht selbst-
          gestellt werden, entnehmen Sie bitte der Kamera-Bedienungsanlei-                                                                                                                                tiitig den eingeschalteten Blitz bei der Aufnahme hinzu, steuert Ver-
         tung.                                                                                               schluBzeit und Blende automatisch und zi.indet beim Drticken des
         6.1 Normalsynchronisation                                                                 Ausltisers den Blitz.
        Diese Betriebsart wird von allen TTl-Kameras  ausgeftihrt und sie ist                Das Blitzgerit wird bei der Kreativ-Programmsteuerung
             fiir die meisten Blitzaufnahmen geeignet. Bei der normalen Blitzsyn-                    P/Ps nicht geztindet!
         chronisation wird automatisch auf die Kamera-Blitzsynchronzeit
         umgeschaltet. Je nach Kameratyp sind Zeiten zwischen 1/30 s und               Ztindungssteuerung
         1/300 s ublich. Einzelheiten entnehmen Sie bitte der Kamera Bedie-                        lst die Helligkeit  ftir eine Belichtung im normalen Modus ausreichend,
          nungsanleitung.                                                                 so wird bei einigen Kameras die Blitzauslosung  verhindeft Die Belich-
                                                                                   tung erfolgt dann mit der im Anzeigefeld ersichtlichen VerschluBzeit.[-*-.- 6.2 Langzeitsynchronisation                                                                                                      Einzelheiten entnehmen Sie bitte lhrer Kamera-Bedienungsanleitung.                                                                    ,*         Verschiedene Kameras krinnen bei Programm- und Zeitautomatik mit@         Langzeitsynchronisation  belichten. Blitzaufnahmen bei schwacher              Manuelles Hinzuschalten des Blitzgerdts (manueller Aufhellblitz)
         Beleuchtung fuhren mit kurzen VerschluBzeiten (normale Blitzsyn-              Obwohl die Kamera immer dann wenn die Lichtverhaltnisse es erfor-
          chronzeit) manchmal zu stark beleuchteten Aufnahmeobjekten  vor               dern automatisch den Blitz aktivieft, krinnen Sie den mecablitz auch
        einem dunklen Hintergrund. Bei Langzeitsynchronisation  steht der Ver-               manuell hinzuschalten.. Wie Sie diese Funktion einschalten. entneh-
          schluBzeitenbereich  bis hinab zu 30 s zur Verftigung, mit dem Sie den             men Sie bitte lhrer Kamera-Bedien un gsan leitung.
          Hintergrund besser zur Geltung bringen ktinnen, da bei ldngeren Ver-                                                                                              Blitzen in den Funktionen A, S und M          schluBzeiten die Grundhelligkeit durch das Umlicht deutlich erhtiht ist.
          Venruenden Sie ein Stativ, um venruackelte Aufnahmen zu vermeiden. Ein-                Bei Zeitautomatik  (A), Blendenautomatik (S) und manueller Belich-
          zelheiten entnehmen Sie bitte der Kamera-Bedienungsanleitung.                        tungseinstellung (M) wird der mecablitz bei jeder Aufnahme gezrindet,
                                                                   wenn er eingeschaltet  ist. Der Kamerabetrieb in diesen drei Belich-
                                                                                           tungsfunktionen ist der gleiche wie ohne Blitz. Einzige Ausnahme: Sie
                                                                          konnen keine krirzere VerschluBzeit als die Blitzsynchronzeit der
                                                                               Kamera venruenden.

                                                                                                     Einzelheiten lesen Sie bitte in lhrer Kamera-Bedienungsanleitung  nach.
                                                                                                                                                                                  .
                                                                                     siehe Seite  | 6


        12                                                                                                                        13
View original page 8Page 10 · Read text
www.butkus.us

       9. Blitztechniken und Blitzfunktionen                           9. Blitztechniken und Blitzfunktionen

                                                                                   9.3 Belichtungskorrektur
                                                                                 Verschiedene Kameras bieten eine Mdglichkeit, die TTl-Belichtungs-
                                                                                    steuerung zu beeinfluBen. Dabei konnen an der Kamera Korrekturwer-
                                                                                  te von bis zu +/- 3 Blendenstufen (in halben Stufen) vorgewahlt
                                                                            werden. Damit konnnen Sie die Blitzleistung des mecablitz um bis zu        W                 drei Belichtungsstufen erhohen oder verringern.
                                                  ug Vergessen Sie nicht, diese Funktion wieder abzuschalten'
                                                                                           Einzelheiten lesen Sie bitte in der Kamera-Bedienungsanleitung   nach.          f##                                                                            Funktion zur Verringerung roter Augen (Red-Eye-Reduction)
Bild 5 Aufhellblitzen bei Tngeslicht  (lirtlcs ohne, rechts mit Blitz)                                                                                 Diese Funktion wird vom mecablitz nicht unterstutzt!
9.2 Aufhellblitzen
Normalerweise wird mit der Blitzautomatik (P-Funktion) bei Gegenlii,.  -
automatisch der Blitz gezrindet, wenn Sie eine Aufnahme ausltjsen. Es
kcinnte aber auch sein, daB die Kamera genugend Umlichthelligkeit
miBt und die Zundungssteuerung (siehe Seite 13) zun r,ragen kommt
Sie haben jedoch auch dann die Mdglichkeit, den mecablitz zurAufhel-
lung manuell zu aktivieren, falls die Kamera die Aufnahme ohne Blitz
machen wrirde (siehe auch Seite 13 ,,Manuelles Hinzuschalten des
Blitzes"). Beachten Sie die entsprechenden Anzeigen im Kamerasu-
cher. Einzelheiten lesen Sie bitte in lhrer Kamera-Bedienungsanleitung
nacn.
Mit dem Aufhellblitz ktjnnen Sie lastige Schatten beseitigen und bei
Gegenlichtaufnahmen eine ausgeglichene Belichtung erreichen. Das
computergesteuefte MeBsystem der Kamera wahlt die VerschluBzeit,
die Arbeitsblende und die Blitzleistung automatisch so, daB sowohl das
Hauptobjekt als auch der Hintergrund ausgewogen belichtet wirc.


16                                                                                                                                 17
View original page 10Page 11 · Read text
l1r -                                                                                                                                                                              " "':1"'91
                                                                          11. Wartung und Pflege, Stiirungsbeseitigung          .             1 0. Ausleuchtung und Weitwinkelvorsatz                                                                         i
      Der mecablitz leuchtet normale Kleinbildaufnahmen (24x36 mm) mit                 Entfernen Sie Schmutz und Staub mit einem weichen, trockenen Tuch.
                                                                                                                                                      Kunststoffteile konnten       Objektiven ab 35 mm Brennweite oder groBer vollstiindig aus. Damit              Verwenden Sie keine Reinigungsmittel - die
       Sie auch ein Weitwinkelobjektiv von 28 mm Brennweite venruenden                   beschtidigt werden.
       ktinnen, wird ein Weitwinkelvorsatz mitgeliefeft, der die Ausleuchtung                                                                                   Formieren des Blitz-Kondensators
      so vergrriBerl, daB sie auch fur dieses 0bjektiv ausreicht.
                                                                         Aus technischen Grunden  ist es notwendig, den mecablitz in viertel-
           Beachten Sie dabei, daB sich die Reichweite des Blitzlichtes                   jiihrlichem Abstand fur ca. 10 Minuten einzuschalten  (der im mecablitz
           durch den Einsatz des Weitwinkelvorsatzes verringert!                                                                                     eingebaute Kondensator verdndert sich physikalisch, wenn das Geriit
       Montieren Sie den Weitwinkelvorsatz, indem Sie ihn uber den Reflektor                  ldngere Zeit nicht eingeschaltet  wird). Die Batterien mtissen dabei min-
       legen und andrticken, bis er seitlich einrastet.                                         destens so viel Energie liefern, daB die Blitzbereitschaftsanzeige  spdte-
                                                                                        stens 1 Minute nach dem Einschalten aufleuchtet.
                                                                                    Stdrungsbeseitigung:
                                                                                                                                                                                                 Betri ebs.                 n   :[:f  :'il i:#X',3i]8fl1?: iliJffi; Wiffi':'n# fJl;;1"'@                                6
                                                                                                        . Schalten Sie das Blitzgerat mit dem Hauptschalter  aus.
                                                                                                        . Nehmen Sie die Batterien oderAkkus kurzzeitig aus dem Blitzgerdt
                                                                                           heraus


      18                                                                                                                         19
View original page 11Page 14 · Read text
www.butkus.us
.i''               Contents                                                        1. Safety Instructions
1. Safe$instructions...                ......25              .NEVER fire a flash in the immediate vicinity of the eyes! Flash fired
2.  Preparingthemecablitzforuse ..            .......26                       directly in front of the eyes of a person or animal can damage the reti-
2.1 Power supply                                                              . . .26                 na and lead to severe visual disorders - even blindnessl
2.2 Loadingandreplacingthebatteries  ...            .....27                .Spent batteries should be immediately removed. Chemicals leaking
2.3 Batterytest                               ....28                   out of spent batteries will damage the flashgun.2.4 Automatic flashgun cut-out circuit                            . . . .28
2.5 Mounting the mecablitz on the camera                . . . . .28               .Do not shorl-circuit rechargeable batteriesl DANGER 0F EXPL0SI0N!
                                                                                                oDry-cell and rechargeable batteries should not be exposed to excessive3.   Setting the mecablitz into operation             . . . . . .29
                                                                                                heat, for instance sunshine, fire and the like!3.'l Preconditions ...                              .....29
3.2 Switching the flashgun on and off, film speed      . . . . .29              .NEVER throw spent batteries in a fire!
4.  Flashgun instructions to the camera                . . . . .30               .Do not expose the flashgun to dripping or splashing water!4.1 Flash-ready indication                                          . . .30
4.2 Automatic flash sync speed control                           . . .30                   oProtect the flashgun against excessive heat and high humidity levels!                                                                        Do not keep the flashgun in the glove compartment of a car!4.3 Correct-exposureindication.. .......30
                                                                                               base into the camera's accessory shoe and tighten4.4 Information displayed in the camera's viewfinder,  . . . . . . .31                     olnsert the flashgun
                                                                                 by turning the knurled screw so that the flashgun cannot slip and fall5. TTlflashcontrol                      ......32
                                                                                                      out!      Flash           synchronisation6.                           @     Normal                                                                                   the event of flash shots with full light output and shott recycling6.1        synchronisation..              .....33                   oln
6.2 Slow-synchronisation                 ...33                  times with a rechargeable NiCad battery, observe an interval of at
7.  Flash in the individual camera modes                 , . . .34                       least 3 minutes after a series of 20 flashes. This will protect the flash-
8. Autofocusmeasuringflash.    .......35                  gun against overload.
I     Flash techniques and flash functions .                      . . . .36              oNEVER place material that is impervious to light in front of, or directly
9.1 Bounced flash                                                           . . .36                     on, the reflector screen, The reflector screen must be perfectly clean
9.2 Fill-inflash                             ......37               when a flash is fired. The high energy of the flash light will burn the
9.3 Exposurecorrection                  ....38                    material or damage the screen if this is not observed!10. lllumination with wide-angle diffuser                . . . .39
11, Care and maintenance - Troubleshooting .......40               .NEVER dismantle the flashgun! DANGER: HIGH VOLTAGE!There are
12. Technical data                            .......41                   n0 components inside the flashgun that can be repaired by a layperson.
13. 0ptionalextras                      .......42

24                                                                                                                  25
View original page 14Page 16 · Read text
www.butkus.us
                             mecablitz for use                           3. Setting the mecablitz into operation           sr','",',:'i,,',' 2. Preparing the
       2.3 Battery test                                                                 3.1 Preconditions
                                                                      The mecablitz must only be used with TTL flash controlled       This facility is used to test alkaline-manganese dry-cell batteries (not     A                                                                                    cameras!       rechargeable batteriesl). The batteries are alright  if the battery check       lA
                                                                                                                   measures the light        light illuminates when the test button is pressed.  lf the light does not        flThe sensor of TTL flash controlled cameras
                                                                                                     the film through the camera lens and instantly cuts out        illuminate then the residual power is low and a new set of batteries            I   lreaching
                                                                                                        flash when the film has been correctly exposed (see also page       should be loaded.                                                                                                   I i  lthe
                                                                                             Please refer to the camera's operating instructions to find out                                                                                      |   132)
                                                                                               your camera features this function.                                                                                         lwhether       2.4 Automatic flashgun cut-out circuit                                      I
                                                                                                                  integrated in the camera  it musf be       To avoid accidental battery discharge and to economise on power con-     A  lf there is a flashgun                                                   lA  switched otf or completely folded down when the mecablitz       sumption, the flashgun automatically switches itself off 10 minutes                                                                                                                is used.        after it was switched on or after a flash was fired. The green operating
         light and the orange flash-ready light are then extinguished. Automatic                                                                                       3.2 Switching the flashgun on and off, film speed       flashgun cut-out can be prevented by firing a flash or by pressing the
                                                                                                           on the mecablitz with the I switch. The green        switch. The flashgun will then continue to remain operational for ano-   ).x  0N/0FF switching: Turn
        ther 5-10 minutes. Press the I button to turn on the mecablitz again.               operating light will light up. The orange flash ready light illuminates
                                                                                                                                                                                                                                                                                                                             i     when flash readiness is reached. Press the 0 switch to turn off the
                                                                                          flashgun. The green and orange lights are instantly switched off. No
                                                                                                       flash will be fired for the next shot  if the mecablitz remains in this state@   2.5 Mounting the mecablitz on the camera
                                                                              on the camera.       . Hold the flashgun securely in one hand so that the controls are
          facing you. Turn the knurled screw in the mecablitz adapter foot anti-
         clockwise to its leftmost position.                                             Setting the film speed on the mecablitz:Adjust the speed of the film
                                                                                 loaded in the camera on the back of the flashgun by selecting the       . Slide the mecablitz into the camera's accessory shoe.
        . Turn the knurled screw clockwise until the stop point is reached, the-            required value in the ,,1S0 Window" with the aperture slide.
          reby firmly securing the mecablitz onto the camera.


                                                                                                                      29
View original page 16Page 17 · Read text
l,li                    Digitally                                                                                                                  signed4. byFlashgunmike       instructions to the camera                                                                                                        butkus      4. Flashgun instructions to the camera{$.                                                                                            DN: cn=mike butkus,                     mike       o=orphancameras,The mecablitz transmits different signals and messages to the camera                 ou=29,
when it is connected to the camera and is switched on.                                  email=mike@butkus.
                                                                                                                         org, c=US                         r------Tlrflmr--]                       butkus Date: 2018.12.07
                                                                                                  rso @4.1 Flash-ready indication                                                                            09:33:16 -05'00'
                                                                                                                                                                                                                                                                                                             | 22 161 1 1 I:I5.6E2.8A|  1.4   r
The orange light I I on the mecablitz illuminates when the flash                                   0,7 11,52 3,55 710 1420304050m
capacitor is fully primed, thereby indicating flash readiness. This means               nk
that flash can be used for the next exposure, The flash readiness signal                                                 o[]o is transmitted to the camera where  it is indicated by a corresponding     -@display in the camera's viewfinder. 0n some cameras (depending on                Zt Zo I'E
the model) the shutter is automatically changed to flash sync speed
when flash readiness is reached. The flash will not be fired  if the shutter
 is released before the flash ready light illuminates with the result that             Fig.3: Exposure o.k. and maximum range
the exposure may be incorrect  if the camera control circuit has already              4.4 Information displayed in the camera's vievvfinder
changed over to flash sync speed. Please refer to the camera's                                                                                        l.x."   camera models: 8000i 1V 7000i 1)/ 700si z)/ 9xi 2)/ 7xi2)l sxi2)
operating instructions for further details.
                                                                                        Displays in vieufinder
4.2 Automatic flash sync speed control                                                                 The flashgun will be triggered as
Most system cameras automatically change to flash sync speed when
flash readiness is reached. The flash sync shutter speeds may vary                         Permanently illuminated 2)   The flashgun is primed and
between 1/30th and 1/300th second, depending on the camera model.                       or blinks slowlyt)         ready for firing
                                                                                                                              z)/blinks rapidty t)   The light output was sufficientPlease refer to the camera's operating instructions for fufther details.                  I     btint<s
                                                                                                                                         for correct exposure.
4.3 Correct-exposure indication (see fig. 3)
                                                                    Camera models 3xi lZxi / SPxi/ 5000i/ 3000i
The green correct exposure light briefly illuminates when flash exposurewas correct. At the same time the mecablitz sends an o.k. signal to the      V                                                                                                      btinks                 The flashgun is being prtmod, _
camera for display in the viewfinder.                                                                                                                       primed and ready                                                                               I     btint<s slowly            The flashgun is
                                                                                                                                                   for firing.
                                                                               I    btinks rapidly           The light output was sutficient for
                                                                                                                          correct exposure.

30                                                                                                                                         31
View original page 17Page 19 · Read text
7. Flash in the individual camera modes                               8. Autofocus measuring flash

 Auto program mode with flash (p-function)                               The integrated AF red-light beam of the mecablitz supports the auto-
 In this mode, the camera automatically activates the flash function               matic focusing'of autofocus TTL cameras. When the prevailing light is
 when the ambient light level is too low, it automatically adjusts the                  insufficient for automatic focusing, the mecablitz  will project a pattern
                                                                                             of red vertical stripes onto the subject as s00n as the camera's release aperture and shutter speed, and triggers the flash when the shutter                                                                                                     is lightly touched (or is activated by the eye-start system of cameras release is pressed.
                                                                                  of the xi series). The camera's autofocus system then focuses the
                                                                                           picture by this striped pattern.
      The flashgun is not triggered in the creative program modes
      PalPs!                                                                               Notes:
                                                                              . When the camera's autofocus system  is on, the electronic circuit will
 Triggering control                                                                      automatically activate the autofocus measuring flash whenever the
 0n some cameras the flash will not be fired when the prevailing light                    prevailing light is insufficient for the exposure.
 is sufficient for an exposure in normal mode. The exposure is then               . Depending on the prevailing ambient light, either the AF illuminator
 completed with the settings indicated in the display field. please refer                      of the camera or that of the flashgun will be activated whenever the
 to the camera's operating instructions for furlher details.                              autofocus measuring facili$ becomes necessary.
                                                                              . The range of the autofocus measuring flash depends on the speed ofActivating the flash manually (manuat  filf-in ftash)                                                                                      the lens (maximum aperture)l With an f/1.8 standard lens of 50 mmAlthough the camera automatically activates the flash whenever the                                                                                               focal length, the range is approx. 6-10 m (depending on the sensitivity prevailing light conditions make this necessary, it is still possible to                                                                                                               of the camera's AF sensor).trigger the mecablitz manually.* Please refer to the camera's operating
instructions for the description of this function.
                                                                        Low-speed lenses, e.g. with an apefture of f/5.6 or f/B (such as
                                                                    zoom lenses), significantly restrict the range of the autofo-Flash in the A, S and M modes
                                                                           cus measuring flash!With apefiure priority (A), shutter priority (S) and manual mode (M), a
flash will be fired with each shot  if the mecablitz has been switched
on. Camera operation in these three modes is the same as without
flash - with one exception: A shutter speed faster than the camera's
flash sync speed cannot be selected.
Please refer to the camera's operating instructions for further details.
*  see page 37

34                                                                                                                 35
View original page 19Page 20 · Read text
www.butkus.us
H:l    9. Flash techniques and flash functions                       9. Flash techniques and flash functions      |$

                                    'R-'r
                                                                                                          ,,}ei                                                       FI
Fig.4: Bounced flash                                                               Fig.5: Fill-in flash in daylight (left withou
9.1 Bounced flash                                                                9.2 Fill-in flash
Contrary to the dense shadows associated with full frontal flash as a                                                                                       Normally, the automatic flash function (P-function) will automatically
result of the sharp drop of light from the foreground  to the background,                                                                                                             fire the flash in daylight when shooting against the light. However, the
bounced flash will produce a soft and uniform rendition of both the                                                                    camera may well measure sufficient ambient light so that the flashsubject and the background. For this purpose the reflector can be                                                                                                         firing circuit is not activated (see page 34). The mecablitz  still enablesturned up vertically (up to B0') so that the flash is ,,bounced" back from                                                                                  the user to activate the fill-in flash function manually when the cameraa reflecting surface (e.9. white ceiling). The reflecting surface must be
neutral in colour (for colour shots), e.g. white, and it must not be             would shoot the picture without flash (see also page 34 ,,Activating the
structured as this could cast shadows.                                               flash manually"). 0bserve the corresponding displays in the camera's
                                                                                       viewfinder. Please refer to the camera's operating instructions for
                                                                                            further details.      Tilting the reflector: Hold the mecablitz firmly with one hand,
     and then pull the reflector head out to the front of the case with
     the other hand. The reflector can now be tilted upwards veftically                     Fill-in flash in daylight  will soften harsh shadows and diminish the con-
     by approx. 80".                                                                         trast, thereby producing a more balanced exposure when shooting
                                                                                   against the light. The camera's computer-controlled metering system    PLEASE NOTE: Ensure that the reflector is tilted upwards at
                                                                                     automatically selects the shutter speed, working aperture and light    a sutficiently large angle so that no direct light from the
                                                                                  output in such a manner that both the main subject in the foreground      reflector can fall upon the subject.
                                                                             as well as the background are uniformly exposed.


36                                                                                                                37
View original page 20Page 21 · Read text
9. Flash techniques and flash functions                      ,  ta!              10. lllumination with wide-angle ditfuser
                                                                                                                                                                                                ,,al$
       9.3 Exposure correction                                                 Your mecablitz provides full and even illumination of normal 24 x
                                                                          36 mm negatives when using lenses of 35 mm focal length and longer.       Various cameras enable the user to influence the TTL exposure control.                                                         A wide-angle diffuser is supplied with the flashgun to increase the        Accordingly, the camera's exposure settings can be corrected by up to
      * 3 apertures (in one-third or half f-stop settings).                                coverage  if you wish to use a 28 mm wide-angle lens.
    1g PLEASE NOTE: Do not forget to switch off this function when                PLEASE N0TE: The use of the wide-angle ditfuser diminishes
                  it is no longer required!                                                      the effective range of the flash!
       Please refer to the camera's operating instructions for further details.
                                                                      To mount the wide-angle diffuser press it onto the reflector until  it
      Red-eye reduction function                                                                                                     clicks in at the sides.
        This function is not supported by the mecablitz!                                       s                                                            '7"V/"t'v

@


      38                                                                                                                39
View original page 21Page 23 · Read text
13. 0ptional extras                                                                                                             l                          Avant-propos
      Malfunctions and damage caused to the mecablitz due to
     the use of accessories from other manufacturers are not
     covered by our guarantee!
                                                                      Cher client,
 .Mecalux 11 (0rder No: 0000001 12)                                        Nous vous felicitons de I'achat de notre flash mecablitz28 AF-4M.
  Sensitive slave triggering unit for cordless delay-free firing of auxiliary
                                                                          )      Le flash mecablitz 28 AF-4M est congu sp6cialement pour les  flashguns by a camera-linked flash. Responds to infrared light. No
  batteries required.                                                                        reflex Minolta de la gamme Dynax.  ll ne faut en aucun cas I'utiliser
                                                                        sur la griffe porte-accessoires de reflex d'autres marques sous oBounce diffuser 28-23 (0rder No: 000028232)
                                                                         peine de risquer la destruction du sabot du flash et de la gritfe .Bag T 33 (0rder No:000006331)                                                                             porte-accessoires du boitier. Les contacts sur le sabot du flash
                                                            28 AF-4M ne conviennent que pour les commandes des reflex
                                                                                 Minolta.

                                                                            Les informations reproduites dans ce mode d'emploi ont pour objet de
                                                                                                     faciliter la prise en main et I'utilisation du flash et donnent un apergu
                                                                            des opportunit6s d'emploi du flash.

                                                                                       Lisez attentivement ce mode d'emploi m6me si d'embl6e l'un ou I'au-
                                                                                      tre point vous semble moins int6ressant. A la conception, nous nous
                                                            sommes attach6s a simplifier au maximum I'utilisation de ce meca- \-/                                                                                                               blitz, mais les reflex sur lesquels  il est appel6 d etre monte offrent des
                                                                                         fonctionnalites tres diversifiees.

                                                                     Nous vous souhaitons beaucoup de plaisir avec votre nouveau flash
                                                                             Metz. En association avec votre reflex Minolta Dynax, ce mecablitz ne
                                                                             se contente pas de softir vos sujets de l'obscurit6, mais  il vous assiste
                                                                           dans votre creativitd par des traits de lumidre bien doses.


42                                                                                                                43
View original page 23Page 26 · Read text
www.butkus.us

                                        iii;l:                                                                                                                                                                                                                                                                                            €i'
                        E,i'
                      2. Pr6paratifs                                            3. Mise en fonction du flash
                                                                                                                                                                                                                                                                         grI2t  Conditions         2.3 Test des piles
       Ce dispositif permet de tester les piles sdches alcalines au mangandse                                   A Vous ne pbvez utiliser ce mecablitz qu'avec des appareils                                         a  photos avec contrOle TTL du flash.         (pas les accus). Si apres appui sur le bouton, le pictogramme de la pile
                                                                                                                                                                                                                     la         s'allume, les piles sont bonnes. Si ce n'est pas le cas, elles sont          f-lSur les appareils d controle TTL du flash, un capteur mesure
                                                                                            lumidre traversant l'objectif (TTL = Through The Lens) et venant        epuisees et  il est conseill6 de les remplacer.                                   I
                                                                                                                                           I i  trapper le film et commande la coupure de l'6clair lorsque la lumi-
                                                                                         du film est suffisante (voir aussi p. 52). Vous trouverez dans        2.4 Coupure automatique du flash                                          I   lnation        Pour emp6cher une d6charge intempestive des piles/accus, le flash se            I    le mode d'emploi de votre reflex si celui-ci possdde cette fonction.
        coupe automatiquement 10 minutes environ apres sa mise en marche                                                                               Lors de I'utilisation du mecablitz, il faut obligatoirement       ou aprds le dernier eclair. Le t6moin de fonctionnement  (vert) et le       6                                                                                   /:\ mettre hors service un 6ventuel flash inttigre ou le rentrer  !        temoin de recyclage (orange) s'eteignent. Vous pouvez empdcher cette
        coupure automatique en donnant un coup de flash 0u en appuyant sur
                                                                                         3.2 Mise en marche/coupure du flash, sensiblit6 du film          le bouton l. Le flash reste alors en service pendant 5 a 10 minutes
          suppl6mentaires. Pour remettre en marche le flash apres une coupure            Mise en marche/coupure  : la mise en marche du flash s'obtient avec
        automatique, appuyez sur le bouton  l.                                                     le bouton  l. Lorsque le flash est en fonction, le tdmoin vert est allum6.
                                                                                La disponibilite du flash est signal6e en plus par l'allumage du t6moin
        2.5 Fixation du flash sur I'appareil photo                                     orange de recyclage. Pour couper le flash, appuyez sur le bouton 0. Les
          a Tenez le flash en main de faqon a regarder sur les 6l6ments de com-            t6moins veft de fonctionnement et orange de recyclage s'6teignent. Si
@,"'       mande. Tournez I'ecrou molete dans le sens anti-horaire jusqu'a I'a-                  le flash reste sur le boitier dans cet 6tat, aucun 6clair ne sera declenche
 \-/   o Engagezmener contrele mecablitzle corps dansdu flash.la griffe porte-accessoires de l'appareil                 lorsReglagede la deprisela sensiblitede vue suivante.du film : au dos du flash, r6glez la sensibi- d'
            photo.                                                                                                         lit6 du film utilis6 en affichant la valeur voulue dans la fen6tre ,,1S0" au
         a Tournez l'6crou molet6 dans le sens des aiguilles d'une montre d           moyen du curseur de sdlection de l'ouverture du diaphragme.
          fond contre le boitier de I'appareil photo pour bloquer le flash.


      48                                                                                                               49
View original page 26Page 27 · Read text
4. Signalisations du flash au boitier                           4. Signalisations du flash au boitier
       Le mecablitz transmet diff6rents signaux et signalisations au reflex
            lorsqu'il est mont6 sur le boitier et en marche,
                                                                                                       r----TmmT------l
                                                   so@
         4.1 Disponibilit6 du flash                                                                                                                                                                                                                          | 22 AEI 11 t:15.6!t2.8111.4    |
        Lorsque le condensateur de flash est charg6, le t6moin de recyclage                                 0,7 11,52 3,55 71014 20304060m
        orange E I s'allume pour signaler la disponibilit6 du flash, c.-ir-d. que             nk             la prise de vue suivante peut 6tre faite au flash. La disponibilite du flash                      o[]o                   -@
          est 6galement transmise au boitier ou elle est affichee dans le viseur.                                     12Zo E'E
        Le cas 6ch6ant (cela d6pend du type d'appareil), la transmission du
          signal de disponibilite de flash s'accompagne automatiquement de la
        commutation sur la vitesse de synchro X. Si vous appuyez sur le             Fig. 3 : Tdmoin de bonne d'exposition et portde maximale
         d6clencheur lorsque le t6moin de recyclage n'est pas allum6,  il ne se          4.4 Affichages dans le viseur
          produit pas d'6clair et la photo risque d'6tre mal expos6e si la commu-           Pour les reflex 8000i 1y 7000i t)/ 700si 2)l gxi2)l 7xi2ll sxi2l
          tation sur la vitesse de synchro a deja eu lieu. Pour plus de ddtails,
           pridre de vous reporter au mode d'emploi de l'appareil.             F  allume en oermanence      L action sur le d6clencheur  fait

                                                                                                                                                                                       2)    Le flash est chargd et disponible.         4.2 Reglage automatique de la vitesse de synchro                             I    allum6 en oermanence
                                                                                                                                                                                      1)&%.  Lorsque le flash est disponible,  il se produit sur la plupaft des reflex                  ou clignotement lent
 (D  une commutation sur la vitesse de synchro                                                                                                                                                                                2)/)                               l- 6clairage 6tait suffisant                                                            flash. Suivant le type              I    clignote
          d'appareil, celle-ci peut varier de 1/30 s a 1/300 s. Pour plus de d6tails,                    clignotement rapide  t     our une exposition correcte.
           pridre de vous reporter au mode d'emploi de I'appareil.
                                                                                   Pour les reflex 3xi I 2xi lSPxi / 5000i / 3000i

                                                                                                                                                           qoq_rs                                                                                                                                                       49!ecyr!999._                                                                                                             rlislqte _                !q f_!as!$! q         4.3 Signalisation de bonne exposition (voir Fig. 3)            _ L
        Lorsque vous avez pris une photo au flash, le temoin vert de bonne              I    clignotement lent         Le flash est charge et disponible.
         d'exposition s'allume passagdrement si les conditions d'exposition
          6taient correctes. Le signal de bonne exposition est 6galement trans-                                                  l-6clairage 6tait suffisant pour
        mis par le flash au boitier pour son affichage dans le viseur.                                                  une exposition correcte.

       50                                                                                                                                       51
View original page 27Page 28 · Read text
www.butkus.us
                                                                                                                                                    $i'"'"
                                                                                              6. Synchronisation                            re TTL au flash

                                                                                          Suivant le type de boitier, diff6rents modes de synchronisation du flash
        l-l--lt_e                                                                                     sont possibles. Le reglage des modes de synchronisation du flash sur        I r  lcontrOlemecablitzTTL dune flash.peut recevoir d'informations que de boitiers avec                                                                                                              le boitier est expliqud dans le mode d'emploi du boitier.
       O.ans ce mode, la mesure de I'exposition est effectu6e par la cellule
      dans le reflex. Cette cellule mesure la lumidre p6n6trant par I'objectif
          fl-l-L = Through The Lens) et qui vient frapper la surface du film. Lors-             6.1 Synchronisation normale
      que la quantite de lumidre n6cessaire pgur une lumination correcte du          Ce mode existe sur tous les boitiers d mesure TTL et convient pour la
       film est atteinte, l'electronique de I'appareil reflex commande I'inter-             plupart des prises de vue au flash. En synchronisation normale,  il se
       ruption imm6diate de l'6clair, f avantage du mode TTL r6side dans le             produit une commutation automatique sur la vitesse de synchro X du
         fait que tous les facteurs exerEant une influence sur I'exposition sont                boitier. Suivant le reflex, cette vitesse peut aller de'1/30 s a 1/300  s.
      automatiquement  pris en compte, tels les filtres, les modifications            Pour plus de d6tails, priere de vous reporter au mode d'emploi de I'ap-
       d'ouvefture et de couverlure des z00ms, etc. Vous n'avez pas besgin de              pareil photo.
      vgus gccuper de regler le flash, l'electronique du reflex se charge du
      dosage exact de l'6clair.                                                                                      6.2 Synchronisation en vitesse lente
       La portee maximale pour l'ouverture s6lectionn6e peut Qtre relev6e sur             Certains appareils peuvent r6aliser une synchronisation en vitesse lente
        le flash, sur l'6chelle des mdtres sous I'indice d'ouverture. Exemple:           dans les modes Programme et priorit6 a I'ouvefture. Les prises de vue au
       pour lS0 '100 et une ouverture de 4, la por16e maximale est de 7 m (voir              flash en faible lumiere ambiante et avec des vitesses d'obturation rapides
       Fig.3).La distance minimale est d'environ 15 % de la poft6e maximale.                (vitesse de synchro X normale) se traduisent paffois par une surexposition
           Les sujets se trouvant plus pris que la distance minimale          du sujet principal devant un arridre-plan sombre. En synchronisation en
             risquent d'6tre surexPos6s                                                   vitesse lente, on peut exposer jusqu'a 30 s pour mettre mieux en 6vidence
           Pour le mode TTL au flash, les films utilis6s doivent avoir              I'arriere-plan par la lumidre ambiante, Utilisez un tr6pied pour 6viter le@A           une sensibilit6 comprise entre lS0 25115'* et lS0 1000/31'.            boug6. Pour plus de ddtails, pridre de vous repofter au mode d'emploi de
          Pour des sensibilit6s hors de cette plage, I'exposition              I'appareil photo.
             correcte ne peut pas 6tre garantie.
       Pour faire des essais en mesure TTL au flash,  il faut qu'un bout de film
         soit place dans le boitier. Pour v6rifier la port6e de l'6clair d l'appui du
      t6moin de bonne exposition,  il faut d6clencher l'6clair au moyen du
       dfclencheur du boitier et pas au mgyen du bouton de test sur le flash'
        *          avec rdglage automatique de ta sensibilite du film (DX) : lS0 32/16'

                                                                                                                     53
      52
View original page 28Page 29 · Read text
T.Fonctionff##rr#JtrJ dans    ffii
     Mode Programme au flash (mode P)                                          Avec son illuminateurAF  integ16, le mecablitz assiste les reflex autofocus
                                                                               TTL dans la mise.au point automatique. Lorsque la lumidre ambiante est
      Dans ce mode, le boitier aSSure la mise en fonction automatique du                                                                                                       insuffisante pour permettre une mise au point automatique, le mecablitz
       flash en faible lumidre, selectionne automatiquement I'ouverture et la                projette des bandes rouges vefticales sur le sujet lorsqu'on appuie 169ere-
       vitesse d'obturation et d6clenche l'6clair lorsque vgus appuyez sur le                                                                              ment sur le declencheur du boitier ou lors de I'activation par le systdme
       d6clencheur.                                                                                                          ,,Eye-start" (sur les appareils de la s6rie xi). Le systdme autofocus du
         Dans les modes Programmes crdatifs Pq/Ps, le flash n'est                 boitier utilise ces bandes pour rdaliser la mise au point.
          pas d6clench6.
                                                                            Remarques    :
       Inhibition de I'amorgage                                                    . Si le systdme autofocus du boitier est activ6, I'illuminateur AF sera
        Si l'6clairage ambiant est suffisant pgur une exposition en mode normal,              automatiquement activ6 par l'6lectronique du boitier en situation de
        certains boitiers empOchent le d6clenchement de l'6clair. Lexposition se                                                                                                         faible lumidre.
         fait alors avec la vitesse d'obturation  affich6e sur le boitier. Pour plus de                                                          e Si une assistance est n6cessaire pour la mise au point, ce sera soit         d6tails, pridre de vous reporter au mode d'emploi de I'appareil photo.
                                                                                                         I'illuminateur AF du boitier ou celui du flash qui sera activ6 suivant le       Flash d'appoint manuel (fill-in manuel)                                                                                           niveau de lumidre ambiante.
       Bien que l'appareil active automatiquement le flash  it chaque fois que                                                                                 . La port6e de I'illuminateur AF d6pend de la luminosit6 de I'cbjectif        la situation d'6clairage I'impose, vgus avez la possibilit6 d'imposer                                                                                            (ouverture maximale). Pour un objectif standard F 1,8/50 mm, la                                                         . Lutilisation de cette      manuellement le d6clenchement d'un 6clair.
       fonction est ddcrite dans le mode d'emploi de I'appareil photo.                         port6e est d'environ 6 a 10 m suivant la sensibilit6 du capteurAF du
                                                                                                                       boitier.
      En mode priorit6 a l'ouvefture (A), priorite d la vitesse (s) et semi-auto-     A  Les obiectifs peu lumineux, par ex. avec ouverture maximale Ot @@                                         a   5,6 ou B (t6l6zo0ms par exemple), r6duisent sensiblement la       matique (M), le flash est d6clench6 a chaque prise de vue s'il est
       allum6. Dans ces trois modes, l'appareil fonctionne de la m6me fagon                 port6e de l'illuminateur  AF.
      que Sans flash. Seule restriction  : vgus ne p0UVez pas s6lectionner de
       vitesse d'obturation sup6rieure d la vitesse de synchronisation  du
          boitier.
      Pour plus de d6tails, pridre de vous reporter au mode d'emploi de
         I'appareil photo.
        . voir page 57

                                                                                                                       55
      54
View original page 29Page 30 · Read text
r                                               www.butkus.us
 9. Techniques d'6clairage et fonctions du flash               9. Techniques d'6clairage et fonctions du flash  :


                                                                                                           \
                                                                  b
                                                                                                                                                       re                                                                                                                                                       Ki
                                                                                                                                                                                                                              r"j                                                                                                                                                                                                  ry,.  =d.s-'\il
                                                                                                                                                                                                                                                                                                                                                          fl!                                             t'{d droite aaec)Fig.4 : Flash indirect                                                                            Fig. 5 : Fill-in au flnsh (i gauche sans dclnir d'appoint,
9.1 Eclairage indirect au flash                                                   9.2 Fill-in au flash
Les photos prises au flash direct sont presque toutes caract6ris6es par           En mode automatique B le flash est d6clench6 automatiquement en
des ombres port6es souvent inesth6tiques. Ce ph6nomdne pourra 0tre               situation de contre-jour. Mais  il se peut que la lumidre ambiante
6vit6 par l'dclairage indirect qui donne une lumidre diffuse pour un             mesur6e par le boitier soit suffisante pour inhiber l'amorqage du flash
6clairage doux et r6gulier du sujet et de l'arridre-plan, Pour le coup de                  (voir page 54). Dans ces situations ou le boitier ne d6clencherait pas le
flash indirect, le r6flecteur peut 6tre bascu16 sur 80' dans le sens vertical                  flash, vous avez la possibilit6 d'activer le flash manuellement (voir aussi
pour le diriger vers une surface r6fl6chissante  (p. ex. le plafond). Pour la            page 54, ,,Flash d'appoint manuel"). Tenez compte des indications
photo couleur, la surface r6fl6chissante devra Otre de teinte neutre ou            dans le viseur. Pour plus de d6tails, pridre de vous repofter au mode
blanche pour 6viter des retours de couleurs et ne pas 6tre structur6e.                 d'emploi de I'appareil photo.
                                                                 : tenir le mecablitz d'une main, de             La technique du ,,fill in", c'est-d-dire le d6clenchement en plein jour fi  Basculement du r6flecteur
       I'autre tirer le r6flecteur a fond vers I'avant pour le sortir de la               d'un 6clair d'appoint, permet de d6boucher  les ombres et d'obtenir un
       t6te du flash. A pr6sent, le r6flecteur peut Otre bascu16 vers le                 eclairage plus 6quilibr6 dans les contre-jours. Le systdme de mesure du
      haut sur environ 80".                                                          boitier s6lectionne automatiquement  la vitesse d'obturation et
                                                                                          l'ouverture et dose la puissance du flash afin d'obtenir un 6clairage[g  0n veillera i basculer le r6flecteur d'un angle suffisant pour
    emp6cher que de la lumiire directe ne vienne frapper le               6quilibr6 du sujet principal et de I'arriere-plan.
      sujet.


56                                                                                                               57
View original page 30Page 31 · Read text
||:i'::],.|]:].::]ii
  9. Techniques d'6clairage et fonctions du flash                  10. Eclairage avec diffuseur grand angle
9.3 Gorrection d'exposition                                                 Le mecablitz emet un faisceau lumineux de section rectangulaire avec
Certains reflex offrent la possibilite de corriger I'exposition TTL au              une ouverture assurant la couverture integrale du format 24 x 36 avec
flash. lls permettent de pr6s6lectionner sur le boitier des valeurs de              des objectifs de focale 6gale ou supdrieure d 35 mm. Le diffuseur
correction de +/- 3 divisions de diaphragme (par demi-valeurs). Ceci              grand angle livre avec le flash permet d'6largir le champ d'eclairage
permet d'augmenter ou de diminuer la puissance lumineuse du flash               pour I'adapter aux objectifs grand angulaires de 28 mm.
de trois indices de lumination lL.                                                              llutilisation du diffuseur grand angle se traduit par une
             pas de red6sactiver cette fonction aprds usage.                       r6duction de la port6e de l'6clair.lg N'oubliez
Pour plus de d6tails, pridre de vous reporter au mode d'emploi de              Pour monter le diffuseur, placez-le sur le r6flecteur et appliquez-le
                                                                                                                                qu'il s'encliqudte sur les c0t6s.I'appareil photo.                                                   {.    contre luijusqu'ir ce


Fonction anti-yeux rouges
Le mecablitz n'offre pas cette fonction.


58                                                                                                                59
View original page 31Page 34 · Read text
www.butkus.us

               InhoudsoPgaue                                                       1 . Veiligheidsinstructies

                                                                                                . . .65                  .Niet vanaf zeer korte afstand rechtstreeks in de ogen flitsen! Rechts-1.  Veiligheidsinstructies
                                                                                             treeks flitsen'in de ogen van personen en dieren kan tot beschadiging2.  Voorbereidenvandemecablitz...   ...66                                                                          .66              van het netvlies leiden en zware zichtstoringen veroorzaken - tot                                                                                                     .                                             "2.1 Voeding
2.2  lnleggen en venruisselen van de batterijen of de accu's  '  ' . ' .67                    blindheid  toe!.
                                                                                   .Verbruikte batterijen meteen uit het apparaat halen! Uit lege batte-2.3 Batterijtest                             '...'..68
                                                                                                                                                              ,,uitlopen  ,, )2.4  Automatische uitschakelingvan hetapparaat  '.  ' '       '..68                    rijen kunnen chemicalidn lekken ( het zogenaamde                                                                     .68               wat tot beschadiging van het apparaat kan leiden!2.5  Bevestigen van de mecablitz op de camera    .'  . . .'  .
                                                                                                         . .69               .Accn's niet kortsluiten! Gevaar voor explosie!3.   De mecablitz in gebruik nemen                            . . .
                                                                              geen geval blootstellen aan hoge temperaturen3.1  Voonruaarden ...                            ...'...69               .Batterijen in
3.2   In- en uitschakelen van de flitser, filmgevoeligheid  . . '69                 zoals intensieve zonnestraling, vuur of dergelijke!
                                                                     .70                .Verbruikte batterijen niet in het vuur gooien!4.   Meldingen van de flitser aan de camera              . . '
4.1  Aanduiding van flitsparaatheid                                   ' ' '70               .Het apparaat niet blootstellen aan drup- of spatwater!
4.2  Automatische omschakeling naar de flitssynchronisatietijd  . .70             oDe flitser beschermen tegen hoge luchtvochtigheid! Bewaar hem
                                                                     .704.3  De belichtings-0.k. aanduiding                                      '  '                                                                                  bijvoorbeeld niet in het handschoenenvak  van uw auto.
4.4  Dezoekeraanduidingen indecamera..  ' '                                                                                               . ' ' '71             .De flitser in de flitsschoen van de camera schuiven en met de kartel-5.   fiL-flitsregeling .                             ......72                  schroef zo vastdraaien, dat hij er niet uit kan glijden en naar beneden
6.  Flitssynchronisatie                    .....73                     vallen!
 6.1 Normalesynchronisatie...       "."73                   .Bii flitsseries met vol vermogen en korte flitsvolgtijden en accuvoe- 6.2  Synchronisatie metlangetijden                                                                                         . ' '... '73                  ding, telkens na 20 flitsen een pauze van minstens 3 minuten aan-7    Ffitsen in de verschillende camerafuncties .        .. ....74                 houden. Daarmee voorkomt u overbelasting van het apparaat.
 8.  Autofocus-meetflits                           .. ..75              .Wanneer u een flits ontsteekt, mag er geen lichtabsorberend mate- 9.   Flitstechniekenenflitsfuncties  ...'           ....."76                     riaal voor- of direct op de ruit van de reflector  ( het flitsvenster) lig- 9.1  lndirectflitsen                                  '..  ' '76               gen. De ruit van de reflector mag niet vuil zijn, anders kan het ry
 9.2  Automatisch invulflitsen                                                                                                  . ' '77                materiaal van de reflectorruit vervormen of smelten wegens de ts_7tvt     I
 9.3 Belichtingscorrectie                        '.  ' '. '78               hoge uitstoot van energie.
 10  Uitlichtingengroothoekvoorzetstuk..  ..."79             .De flitser niet uit elkaar halen. HOOGSPANNING   ! ln het apparaat
 11  0nderhoud en verzorging, opheffen van storingen  . . . . ' '80               bevinden zich geen onderdelen die door een leek kunnen worden
                                                                                  gerepareerd. 12 Technischegegevens             .......  '81
 13. Accessoires.,..                      .......82

 64                                                                                                                65
View original page 34From the M. Butkus archive. Original publisher and archive notices are retained.
Check the model and edition against your equipment.
PDF verified 2026-10-10.