Film cameras
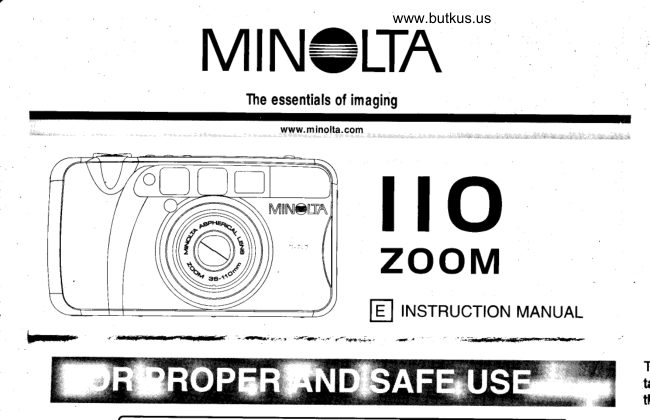
Minolta 110 Zoom (135mm film) User manual
User manual for Minolta 110 Zoom (135mm film). 19 pages in English. Read the original PDF, download or print a copy without registration.
19 pagesEnglish5.5 MB PDF
Loading your manual…Open PDF directly
Document details
- Brand
- Minolta
- Model / document
- Minolta 110 Zoom (135mm film)
- Document type
- User manual
- Language
- English
- Pages
- 19
- File size
- 5.5 MB
- Category
- Film cameras
- Document date
- Not specified in catalog
Search available document text
Find a term, then jump to its page in the original PDF. Image-only pages may not be searchable; check the PDF for exact wording and diagrams.
Page 1 · Read text
MIN+LTNwww.butkus.us
      The essentials of imaging

                  tArww.m inolta,com
     ilo      zooM

                             MANUAL                     []  tr.rsrRucloN
View original page 1Page 2 · Read text
NAME OF PARTS
CAMERA BODY

                        AF windows*     Viewfinder window*
            Meter window*
                                                             Flash.

                                                      Lens* (Lens barrel)
 Self-timer/Red-eye
 reduction lamp*

                                            Mike Butkus              Digitally                                                                                                                                                                                                                                                              DN:email=mike@butkus.org,Date:cn=Mike2024.03.10signedButkus,by10:06:58Mikeo=ButkusButkusc=US-04'00'camera manuals, ou=butkus.org,
       Strap eyelet

         Tripod socket

                      Date button (Quartz-date model only)
                                                 Shutter-release button
                Self-timer/Adjust button            Zoom lever
     Flash-mode/Select  button                          Manual-rewind  button
          Data panel
     Main switch

    Indicator lamp
    Viewfinder*                                           Battery-chamber  door
   Back-cover                                         Film window
   release

                                Back cover
*Keep      these surfaces clean. Please read the care and storage section in this manual.
rrATA DAr\,rEr                                   \fltrl ttrlNntra
View original page 2Page 4 · Read text
Venmo @mike-butkus-camera  Ph. 2083
PayPal Name  Lynn@butkus.org      www.PayPal.me/lynnbutkus
View original page 4
Page 5 · Read text
INSERTING THE BATTERY
 Your camera uses one 3-volt CR123A or DL123A lithium battery.
                               1. Using a coin or similar object, open the battery
                       chamber door.
                                          . When changing batteries, make sure the camera is off.


                             2. Insert the battery with the positive terminal up
                        as illustrated inside the battery-chamber.


www.butkus.us                  3. Snap the battery-chamber door shut.
                                        . Quaftz-date model: the date and time must be set.

 BATTERY CONDITION INDICATOR
 Each time the camera is turned on, an icon will appear on the data panel to indi-
 cate the power status of the battery.
                    The battery condition indicator briefly appears:
                     power is sufficient for all camera operations.

                    The battery condition indicator blinks: power is
                            sufficient for operation, but the battery must be
                        replaced as soon as possible.
                  :- qzE-                                                                  l-\    The battery condition indicator blinks, no other                                          -f
                         icons are displayed on the data panel: the battery
                     must be replaced. The shutter will not release.
View original page 5Page 6 · Read text
LOADING THE FILM  www.butkus.us
            Only use 35mm, DX-coded negative film. ISO 400 speed film is
           recommended  for best results.
                    . The use of slide film is not recommended.
                  . Do not use Polaroid instant 35mm film. Winding problems may occur.
                              1. Slide the back-cover release down to open the
                       back cover.
                                      . Always load and unload film in subdued light.


                             2. Place the film cartridge into the film chamber.
                         Extend the film leader to the film-tip mark. Make
                         sure the film lays flat.
                                     .  lf the film tip extends beyond the film-tip mark, push the
                             excess film back into the cartridge.
                    ffiffi


                              3. Close the back cover.
                                        . The film automatically advances to the first frame and o--i
                           appears on the data panel.
                                   .  lf the film has been loaded improperly, --E will blink on the
                             data panel and the shutter will remain locked. Open the
                            back cover and repeat the loading procedure.


 This camera has a safety lock feature that prevents the camera from being opened
  accidentally when film is loaded. The film-chamber lock should automatically
  release when the film is rewound.
.  lf the back cover does not open when no film is in the camera, turn the main switch off
 and on to release the film chamber lock.
View original page 6Page 7 · Read text
BASIC OPERATION
                              1. Press the main switch to turn the camera on.
                                      . To conserve power, the camera automatically turns off if an
                              operation is not made within eight minutes.


             ONIOFF


                            2. Hold the camera steady making sure not cover
                          the flash, lens, or AF windows with your
                             fingers.
                                    . For vertical pictures, turn the camera so the flash is posi-
                              tioned above the lens as illustrated.


                            3. Look through the viewfinder and press the T
                          side of the zoom lever to zoom in or the W side
                           to zoom out.
                          T = telephoto: zoom in
                 W = wide angle: zoom out

                            4. Place the focus frames on the subject and
            down.press the shutter-release button partway
                                     l4E-

                             5. When the indicator lamp glows, press the
                           shutter-release button all the way down to take
                          the picture.
                                  . Press the shutter-release button with slow, steady pres-
                                 sure.
                                     . The film automatically advances to the next frame.
                                      . After use, press the main switch to turn the camera of{.
                                        . The flash willfire automatically in low-light.
View original page 7Page 8 · Read text
www.butkus.us
FOCUS LOCK
Subjects outside the focus frame may not be in focus. Use focus lock to ensure
sharp pictures.
                              1. Place the focus frame on your subject.


                            2. Press and hold the shutter-release
                           button partway down; the indicator lamp
                         should glow to indicate focus lock.
                                        . The indicator lamp confirms focus lock. lf the lamp
                          does not glow, repeat steps 1 and 2.


                              3. Without lifting your finger, recompose the
                              picture. Press the shutter-release button all the
                     way down to take the picture.
                                        . The focus lock is canceled when the shutter but-
                              ton is released.


FOR CLOSE SUBJECT
lf the indicator lamp blinks rapidly, the subject is too close; the shutter cannot be
released. Make sure the camera-to-subject distance is at least 70cm (2.3ft) at
the wide-angle setting or 80cm (2.6ft.) at the telephoto setting.
. When taking pictures at extremely close distances, the indicator lamp may blink slowly
  and the shutter can be released, but the focus may not be accurate.
When taking pictures with subjects closer than 1.5m (4.9ft), the viewfinder image
and the actual film image will be different. The difference increases as the sub-
ject becomes closer, especially when using the telephoto setting. At the closest
focusing distance, the top and left side of the actual film image is indicated by
the close-framing guides.
View original page 8Page 9 · Read text
I                          nctual image
    Close-framing guides-Mil-W
           1. Place the focus frame on the subject and press
           the shutter-release button partway down. The
            indicator lamp will glow to indicate focus lock.

           2. While pressing the shutter-release button
          partway down, recompose the picture so that
           the top and left edge of the area in the picture is
           aligned with the guides. Press the shutter-
           release button all the way down to take the
          photograph.
View original page 9Page 10 · Read text
SELECTING THE FLASH.MODEwww.butkus.us
The camera has five flash-modes. Press the flash-mode button until the corre-
 sponding indicator is displayed on the data panel. Each time the flash-mode but-
ton is pressed the mode cycles as shown. When the camera is turned off, the
mode is reset to autoflash.
                                        fro Autoftasn

                                                             flash

                                                                                                                                    I                                           t
                                                  Flash;h cancel                o
                                              +I
                                                    Nightrt portrait               'o*'.*        qEI          tEi   'j                                              + **-'lsy.I3.-.j-!                                              Lan dscape / Night view        n      o .1


RED.EYE REDUCTION
When the shutter-release button is pressed partway
down, the self-timer/red-eye reduction lamp on the
front of the camera will automatically glow to reduce
the red-eye effect in portraits. Press the shutter-release
button part way down for a few seconds before taking
pictures. This function is active with all flash modes
View original page 10Page 11 · Read text
FLASH RANGE
The flash range depends on the film speed and focal length in use. To ensure
proper exposure, the subject must be within the flash range.
                  38mm         11Omm -Kn"     W    WE     Film speed \         W(ide-angle)            T(elephoto)
                        0.7- 5.3m          0.8- 2.0m      lso100
                       2.3- 17.4ft.        2.6- 6.6ft.
                       0.7- 10.6m         0.8- 4.0m      rso400
                        2.3- 34.8f t.       2.6- 13.1f t.
      . Flash ranges apply to color negative film only.

The flash will fire automatically in low-light. This is the default flash mode.
                               . The flash charges when the shutter-release button  is
                                                                                                                                                                                                                            l     pres-sed partway down. When the indicator lamp glows,
                                                    is charged and ready to fire.
              -\Y     the flash  mx
View original page 11Page 12 · Read text
SELF-TIMER                  www.butkus.us
The self-timer delays release of the shutter for approximately 10 seconds after
the shutter-release button is pressed.
                              1. Place the camera on a tripod. Press the self-
                          timer button until the self-timer indicator 0
                        appears on the data panel.
                             2. Place the subject in the focus frames and press
                           the shutter-release button partway down to lock
                           the focus and charge the flash.
                                      . When the indicator lamp glows, the focus is locked; the
                                   picture can be recomposed.
                            3. Press the shutter-release button all the way
                     down to start the self-timer countdown.
                                . U will blink on the data panel. The self-timer lamp on the
                                   front of the camera will blink slowly during the countdown,
                             then rapidly just before the shutter is released.
                                      . The autofocus and exposure is locked when the shutter-
                                release button is pressed. Do not stand in front of the cam-
                               era when starting the self-timer.
                                        . To cancel the self{imer, press the self-timer button or turn
                              the camera off.
                                        . The self-timer is automaticallv canceled after the shutter
                                 releases.
View original page 12Page 13 · Read text
FILL FLASH
                       The flash will fire when the shutter is released regard-
                             less of lighting. Use  fill flash to reduce harsh shadows
                       on your subject's face, or in back-lit situations.


                        Press the flash-mode button until the fill-flash
                            indicator  ( t  ) appears on the data panel. Take the
                           picture as described in the basic operation
                           section.


 FLASH CANCEL
                      The flash will not fire. Use flash cancel when flash
                        photograph is prohibited, the subject is beyond the
                             flash range, or to preserve the natural lighting.
                        Press the flash-mode button until the flash-cancel
                            indicator  ( €t ) appears on the data panel. Take the
                           picture as described in the basic operation
www.butkus.us               section.                                       . Shutter speed may be slow. The use of a tripod is recom-
                            mended.
View original page 13Page 14 · Read text
NIGHT PORTRAIT                            www.butkus.us
                                In the night portrait mode, the camera balances the
                            flash and existing light exposures for pictures of peo-
                           ple in front of a sunset or night scene.


                       Press the flash-mode button until the night-
                             portrait indicator  ( f e 1 appears on the data panel.
                      Take the picture as described in the basic
                        operation section.
                                      . Shutter speed may be slow. The use of a tripod is recom-
                           mended. Warn your subject not to move after the flash
                                  burst as the shutter may still be open for the background
                              exposure.

LANDSCAPE / NIGHT VIEW
                      The flash will not fire in this mode and the focus is set
                           to infinity. For photographs or landscapes, night
                          scenery, or other distant subjects. This mode is espe-
                                cially useful when photographing landscapes through
                        windows.

                       Press the flash-mode button until the
                        landscape/night view indicator (o .^ ) appears on
                        the data panel. Take the picture as described in
                        the basic operation section.
                                      . Shutter speed may be slow. Use of the tripod is recom-
                           mended.
View original page 14Page 15 · Read text
REWINDING THE FILM
Your camera automatically rewinds the film after the last exposure is taken.
              When @ blinks on the data panel, open the
                  back cover and remove the film.

. Do not open the back cover until the rewind motor stops. Never use force.
.  lf the rewind motor stops before the film has been completely rewound,  all the indica-
  tors will blink. Remove ancj insert the battery or press the manual-rewind  button.
.  lf the back cover does not open, turn the main switch off and on to release the film
 chamber lock.
. Although more pictures than specified on the roll may be taken, the film processor may
  not print more than the number specified on the film cassette.

                 MANUAL REWIND
                     To rewind the film before finishing the roll, turn the
                     camera on and gently press the manual rewind but-
                         ton using the button key on the strap.
View original page 15Page 16 · Read text
www.butkus.us
 FOR OWNERS OF THE QUARTZ.DATE MODEL
 IMPRINTING THE DATE OR TIME
 The imprinting feature enables the date or time to be printed onto the lower-right
 portion of the picture. The calendar is programmed through the year 2099.

                                                Date button
                 SEL  ADJ
                                                                just button
                                        DATE                  S
                                                   Select button
  'ffi                                              Turn the camera on, then        i  .T -*    flifl:ilfl +   -    +      5.E t
Date imprinting Day/Time  (No imprinting) Set mode press the date bUttOn tO
           tmprintins                  choose the date imprinting  A                      1    mode.     I                                             I
 .  lf the datetime display blinks, the clock and calendar must be set. Only the no imprinting
  and set mode options are available.
 . Since the date is recorded when the film is advanced to the next frame, the last frame of
  the roll rnay not have the date or time imprinted.
View original page 16Page 17 · Read text
SETTING THE DATE OR TIME
The date and time must be reset each time the battery is replaced.
                           1. Turn the camera on. Press the date button until
                     "SEt" appears on the data panel.
         C) Q     s;F,:I.OOA[)J   btl            I]AII:        W ]T-

                        2. Press the select button until the item to be adjusted
                          blinks.
                                             ' The clock and calendar iterns cvcle in the followino order:
                                             DATE
            YEAR+AJ   MONTH +              IV                  stops +   MINUTES <-   HOURS
                          blinking
                        3. Press the adjust button or zoom lever to change the
                       blinking item.
                                . The numerals continues to change as long as the button is held
                        down.           f![1..O                          Pressing the W side of the zoom lever counts                         I]ATEo  W      .     ?    C)*
                      down, the T side counts up.
www.butkus.us

                        4. Repeat steps 2 and 3 until the clock and calendar
                      display is correct.
                        5. Press the date button until the display stops
                       blinking to set the clock and calendar.
                                  . The camera will return to the shooting mode automatically after
                              five seconds. Pressing the select button again or pressing the
                           shutter-release button partway down will also return the camera
                              to the shooting mode.
                               . Pressing the select button until the date/time display stops
                              blinking will also set the calendar and clock.
View original page 17Page 19 · Read text
TECH NICAL SPECI FICATIONS
Camera Type: 35mm lens-shutter camera
Lens:        38-110mm f/5.4 - 10.5 zoom lens
               4 elements in 4 groups
Viewfinder: Magnification: 0.4X - 1.02X
                     Field of View : 86% at 3m (9.8ft.)
                      Eye-relief: 20.3mm from the eyepiece
                     18mm from the eyepiece    f rame
                                           (2.3ft. - -)Focusing Range: (W): O.Zm - -                       (T): 0.8m--(2.6ft.--)
Film Speed: Settings  Automatic for DX-coded negative film
                       Non-DX coded film set to lSO100.
       Range    ISO 25 to 3200
Metering Range (lSO 100):Ev 6 - 16
Shutter Speed range:  4 - 1/500 s.
Battery:   One 3V CR123A lithium battery
                 Battery performance: approx. 13 rolls based on
                 Minolta's standard test method using 24-exposure
                     rolls with flash for 50% of the exposures.
Dimensions(WxHxD):
               114 x 62.5 x 46mm (4.5 x 2.5 x 1.8in)
Weight:        1859 (6.5o2.) without batteries

Specifications are based on the latest information available at the time of printing and
are subject to change without notice.
View original page 19From the M. Butkus archive. Original publisher and archive notices are retained.
Check the model and edition against your equipment.
PDF verified 2026-10-10.