Flashes & lighting
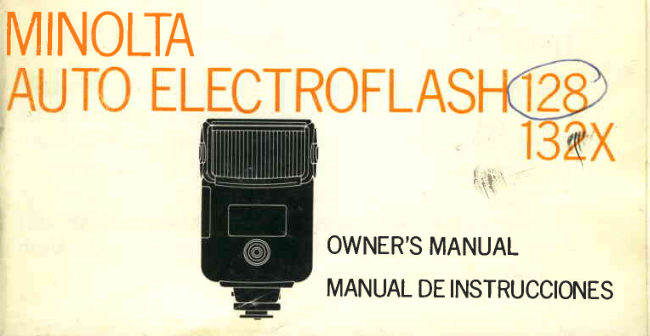
Minolta Auto electronic flash 128 / 132 User manual
User manual for Minolta Auto electronic flash 128 / 132. 53 pages in English. Read the original PDF, download or print a copy without registration.
53 pagesEnglish1.8 MB PDF
Loading your manual…Open PDF directly
Document details
- Brand
- Minolta
- Model / document
- Minolta Auto electronic flash 128 / 132
- Document type
- User manual
- Language
- English
- Pages
- 53
- File size
- 1.8 MB
- Category
- Flashes & lighting
- Document date
- Not specified in catalog
Search available document text
Find a term, then jump to its page in the original PDF. Image-only pages may not be searchable; check the PDF for exact wording and diagrams.
Page 2 · Read text
. .Your Minolta Auto Electroflash 128 or 132X is a compact, versatileunit that will make
pre'cise flash exposures automatically over a wide range or can be used manually.  lts
movable flash head swings upward for automatic bounce flash, as well as direct. A special
check lamp indicateswhen reflected flash brightnessis enough for correct exposure. Each
unit attaches cordlessly with  a hot shoe or with  its attachable sync. cord. Coverage is
sufficient for lensesdown to 28mm wideangle on full-frame 35mm cameras;an optional
diffuser extends coverage to 24mm  lenses. To these basic features, the Auto  Electroflash
132X adds greater power, selection of two aperturesfor auto operation and LED indicators
that light behind applicableautoflash f-numbers on the unit's  illuminated computer dial.
Whenever mounted on a Minolta XD  or XG camera and charged, a signal to the camera
through a specialcontact on the 132X's mounting bracket starts an LED flash-readysignal
blinking in the viewfinder and electronically sets the camera for X-sync, speed when the
shutter is released.
View original page 2
Page 3 · Read text
Su Minolta Auto  Electroflash 128, o el 132X, es una compacta y vers6til unidad que
hace exactas exposiciones de flash automSticamente dentro de una ampl ia gama, o que
puede usarse tambi6n manualmente. Su cabezal m6vil se orienta hacia arriba para flash de
rebote automdtico, e igual para flash directo. Una lSmpara especial de chequeo indica
cu5ndo la luz reflejada del flash es suficiente para una exposici6n correcta. Cada unidad se
acopfa sin cord6n a una zapata directa, o con su cord6n de sincornizaci6n acoplable. La
cobertura es suficiente para objetivos gran-angularesde hasta 28mm con c5marasde 35mm
de formato entero; un difusor opcional amplia la cobertura hasta objetivos de 24mm. A
estascaracteristicasbSsicasel Auto Electroflash 132X afiadegran potencia, selecci6nde dos
aberturas para operaci6n automStica, e indicadores LED que se encienden detr5s de los
n0meros-f del autoflash apl icable en el dial computador ilumir::do de la unidad. Cuando se
monta en una c5mara Minolta XD 6 XG, y se carga, una sefrala la c5mara a trav6s de un
contacto especialen el soporte de montaje del 132X, hace que un LED de "f lash a punto"
parpadeeen el visor y electr6nicamenteponga la c6mara para velocidad sincro.-X cuando el
obtu rador es liberado.
View original page 3
Page 6 · Read text
/
NOTES ON THIS MANUAL      NOTASSOBREESTEMANUAL
   This  is a combined instruction manual       Este es un manual de instruccionescom-
for use with the Auto Electroflash 128 and    binado para uso con  los modelos Auto
132X. For  this reason some illustrations   Electroflash 128 V 132X. Por  tal  raz6n,
may  show  features dif ferent from  your    algunas ilustraciones puede que muestren
model, and some sections may not apply to    caracteristicasdiferentes a las del modelo
thg  one you  own.  Proper operation  is   que usted posee,y algunasseccionespueden
indicated for  both  models, however, and   no ser aplicablesa dicho modelo. Sin embar-
differences between them are clearly indi-    go,  la operaci6n apropiada est6 indicada
cated in instructions and specifications.       para ambos modelos, y las difbrencias entre
   Unless otherwise indicated, illustrations   ellos estdn claramente expuestas en  las
in this booklet show the Auto Electroflash   instruccionesy especificaciones.
132X, the model with the full complement     A  menos gue se diga otra  cosa, las
of features,with appropriate notes to adapt    ilustracionesen el folleto muestran el Auto
them  for use with  the Auto E lectroflash    Electroflash 132X (que es el modelo que
128.                                         refne la totalidad de las caracteristicas),con
                                           notas apropiadas para adaptarlas al Auto
                                            Electroflash128.
View original page 6Page 7 · Read text
NAMES OF PARTS
  NOMBRE DE LAS PARTES

@Ftash tube and reflector   CTubo-ftash y reflector
   with guard window         con ventanilla protectora
@Flash head             @Cabezal del flash
@ Battery-chambe r cover   @Tapa del alojamiento de
                                                                          l a p i l a
@Sensor window          @Ventanilladel sensor
@Open-f lash/test button    @Bot6n flash-
                            abierto/comprobaci6n
@Bracket clamp          @Sujetador del soporte
@Sync. contact           @Contacto sincro.
@Camera-controlcon tact   @Contacto c6mara-control
    ( 1 3 2 X o n l y )                (s6lo 132X)
€)Attaching bracket       @Acoplamiento del soporte
View original page 7Page 8 · Read text
@ Auto aperture/range  @ | ndicadores abertu ra-
      i nd icato rs               auto/gama
@Distance scale        @Escalade distancia
@Aperture scale        @Escalade abertura
@Computer dial         @Dial computador
e  Fi lm-speedsetting grip  @una de puesta
                            sensibilidadpelicula
@Film-speedindicator   @l ndicadorsensibilidad
                             pelicula
@Flash-distancecheck   @L6mpara comprobaci6n
  lamp                                          f lash-distancia
@ M o n i t o r l a m p        @L6mpara monitor
@Power switch         @Conmutador de energia
@Mode selector         @Selector de modalidad
@Sync.-cord socket       (]Enchufe cord6n
                           sincronizaci6n
View original page 8Page 9 · Read text
1o SUMMARY OF OPERATION (fordirectautoflash)
   SUMARIO DE OPERACION (paraautoflashdirecto)
     1. With  serviceable bat-      usando cord6n de sin-     3. Make sure camera is set
        teries   installed  (see       cronizaci6n, si es nece-         for  proper sync. and
        pp. 12 and 50), attach      sano.                         shutter speed (p.20).
      and   lock   unit  on
      camera  (P. 17),  using    2. Set   applicable  film       Aseg0rese de  que   la
       sync. cord  if necessary.     speed on computer dial       c5mara est6 puesta para
      Con las pilas en buen       o f f l a s hu n i t ( p . 1 9 ) .          sincronizaci6n y  velo-                                                                                      ap-                                                                  de                                                                          obturador       estado de servicio (ver       Ajuste la sensibilidadde        cidad                                                                          (p69.                                                                                    20).                                                              ropiadas       p5gs. 12 y 5Ol, acoPle       pelicula aplicableen el
         la unidad a la c5mara Y         dial  computador  del
       bloqu6ela lp6g. 17l            flash (p5g. 19).
View original page 9Page 10 · Read text
4. Move power switch to     5. Set camera lens aper-    6 . With   monitor  lamp
   "oN"    lP' 22l. and set        ture to f-number oppo-        glowing and flash head
  mode selector to red or        s i t e      t h e  m a t c h i n g -       facing straight forward,
   yellow "AUTO"   posi-       colored arrow.               push shutter releaseto
    tion (p. 26).                                                p h o t o g r a p h    s u b j e c t
                                                                  with in the   f lash range
   Mueva a "ON"   el con-                                                               ( p . 2 8 ) .   mutador  de  energia      Ponga la abertura del
    (pils.22l   y  ponga  el       objetivo de la c5mara al      Con la l5mparamonitor
   selector de modalidad      n0mero-f opuesto a  la       encendida y  la cabeza
   en  "AUTO",   rojo  o              f lecha  coloreada  de         del flash encaradahacia
   amarillo (p69.26).            coincidencia.                 adelante, aPriete el dis-
                                                              parador para fotograf i ar
                                                                              el sujeto dentro de  la
                                                 gama del flash (p6g, 28).
View original page 10Page 11 · Read text
1 2 BATTER I ES
   PILAS

        Your  Auto  Electroflash  128 or 132X  is      Su Auto  Electroflash 128 6 132X fue
    designed   to   be  powered   by   four  AA    disefrado para ser alimentado por cuatro
     (penlight)-size  batteries. These may  be  of     pilas "pen-light" tamafio AA. Estas pueden
          t h e  non-re c h a r g e a b l e c a r b o n -zin c,  a lka lin e -    ser de carb6n-cinc no-recargables,alcalino-
        - m anganese  ( " A M "   o r   " a l k alin e ")  typ e  o r   manganeas("AM" o "alkaline"), o baterias
          t h e  re c h a r g e a b l e n i c k e l - c a d m iu m  ("Ni-Cd "    de  niquel-cadmio ("Ni-Cd"  o  "nicad").
     or  "n ic ad" )     t y p e ,     i n f o r m a t io n  o n  lo a d in g   Damos aqui informaci6n del primer tipo y
    and  the  former   type   is given  here.  For    su carga.Para Ni-Cd y carga,ver pdg. 50.
      in f o rma t ion  o n  N i - C d 's  a n d  ch a rg in g , se e
    p. 50.
View original page 11Page 12 · Read text
2 . After wiping terminalswith a clean, dry  1 3
                                                   cloth, insertf ou r carbon-zinc,alkalineor
                                            Ni-Cd batteries as specified on p.50,Installing                                m a k i n g s u r e t h a t p l u s ( + ) a n d m i n u s ( - )Instalacion
                                          ends are positioned as indicated inside
1. Remove  the  battery-chamber  cover  by        the chamber.    s l i d i n g     i t  o f f     i n    t h e  d i r e c t i o n  o f    t h e
   arrow toward  the front  of the unit.            Tras de limpiar los terminalescon un
                                                 pafio seco y limpio, insertecuatro pilas
                                           de carb6n-cinc,o alcalinas,o bateriasde
                                               n iquel-cadmio,como se especifica en la
                                               p5g. 50, asegurdndosede que los signos
   Saque  la tapa  del alojamiento  de  pilas       "m5s"  (+) y "menos"  (-)  est5n puestos
   deslizdndola hacia afuera en direccion de      como se indica en el interior del aloja-
         l a f l e c h a h a c i a e l  f r e n t e d e   l a u n i d a d .        m iento.
View original page 12Page 13 · Read text
3 . C l o s e t h e c h a m b e r b y a l i g n i n g  t h e c o v e r    Cold-weather  operat ion
    carefully,  depressing ends  of  batteries        Batteries generally tend  to  decrease in
    s l i g h t l y w i t h    i t , a n d s l i d i n g  i t  t o w a r d   t h e     capacity  as  the  temperatu re  goes down.
    rear of the unit  until   it snaps securely in    Though   considerably   better   than   the
   p l a c e .                                        ordinary  or sealed carbon-zinc  type  in this
                                                  respect, alkaline batteries are no exception.   Cierre el alojamiento  alineando con  cui-                                                                                  It   is thus recommended  that  batteries be   dado  la tapa, apretando  los bordes de las                                                     fresh   if  they  are  to  be used  in  the  Auto   p i l a s   l i g e r a m e n t e c o n e l l a y d e s l i z 5 n d o l a                                                    Electroflash  128  or  132X  in cold  weather   hacia  la parte trasera de  la unidad, hasta                                             and  that  you  carry  fresh spares in a warm   que quede bien emplazada y segura.                                                    inside  coat  pocket   for   replacement     if
                                             necessary during such operation.
                                                  With  Ni-fr  batteries, p. 50, no particular
                                                 care is necessary in cold weather.
View original page 13Page 14 · Read text
l ,
    Operaci6n con tiempo-frio                C A U T I O N
       Las pilas generalmente tienden a  dis-    o When  replacing batteries, be sure  to

    temperatura clim5tica se hace m6s baja.      exhausted batteries are used with freshl   minuir su capacidad de acci6n conforme la      change all four batteriesat one time, lf
   Aunque considerablementemejores que las      ones, or if different types of batteriesare
    de carb6n-cinc blindadas, las alcalinas no      used together, these is a possibility of
    son una excepci6n a este respecto. Por lo      leakageor explosion.
    que recomendamos que las pilas sean fres-    o Do  not attempt to charge alkaline or
    cas, si han de  ser usadas con  el  Auto       carbon-zincbatteriesas this could cause
    Electroflash 128 6 132X en tiempo  frio,       leakageor explosion.
    aconsejando adem6s llevar pilas frescas de    o   lf the flash unit is not to be used for two
    repuestoen el bolsillo, al calor del cuerpo,     weeks or more, batteries should be re-III    por si se necesitandurante la operaci6n.         moved.
      Con  baterias Ni-Cd  (pr5g.50), no  es
    necesario ning0n  cuidado  especial con
    tiempo frio.
View original page 14Page 15 · Read text
P RE C A U C I O N
o Cuando cambie las pilas, aseg0resede
   cambiar las cuatro a la vez. Si se usan
   pilas   f rescas mezcladas con  pilas ex-
   haustas, o de diferentes tipos, hay posi-
   bilidad de derrame o exPlosi6n.
 o No intente cargar las pilas alcalinaso las
   de carb6n-cinc;podria tambi6n ser moti-
   vo de derrameo explosi6n.
 o  Si el flash no va a usarse durante dos
   semanaso m6s, deberia quitar las pilas.
View original page 15
Page 16 · Read text
ATTACHINGTO CAMERA
ACOPLAMIENTOA LA CAMARA

   With  cameras wired  for  cordless flash,    de  f a c6mara,y gire el acoplamiento, seg0n
simply  slide  the  attaching  bracket  of  the    se muestra, para asegurarlobien.
f l a s h u n i t a s f a r a s i t w i l l g o     i n t o  t h e c a m e r a      Con otras c6maras, asegure el soporte en
hot  shoe  and  tu rn  the  bracket  clamp  as     la zapata de accesorios o del flash de  la
shown to secure  it there.                  misma manera; ajuste la clavija de un solo
   With  other  cameras, secure the  bracket    v5stago de uno de los extremos del cord6n
in  the  accessory  or  flashgun  shoe  in  the    de  sincronizaci6n acoplable suministrado
same way;  insert the  single-prong plug on    hasta que quede bien emplazado; y enchufe
one end  of  the  attachable  sync.-cord  pro-      la conexi6n PC del otro extremo en  el
vided   into   the   electroflash's  sync.-cord    terminal                                                de  la camara para sincronizaci6n
                                                                                                                                                           t t x r r .socket  until   it snaps in place; and plug the
PC connectlon  on  the  other  end  into  the
camera  terminal  for  "X"   synchronization.

   Con  cdmaras preparadas  para  flash  sin
cord6n,  simplemente  deslice  a  fondo   el
soporte de acoplamiento  en la zapata directa
View original page 16Page 17 · Read text
N O T E
                                   Whenever the  sync. cord  is used to
                                    connect the  Auto  Electroflash 132X  to
                                         either a Minol ta XD  or XG camera, the
                                         correct shutter speed for flash must be set
                                   manually as the flash'scamera-controlcon-
                                           tact will be disconnected.

                              NOTA:
                                  Cuando se usa el cord6n de sincroniza-
                                        ci6n  para conectar el  Auto  Electroflash
                                 132X a cualquiera de las c5marasXD 6 XG,
                                                 la velocidad de obturador correcta para flash
                                  debe ser puesta manualmente y desconecta-
                                   do el contacto cdmara-controldel flash.


*:*"'t
View original page 17Page 18 · Read text
S E T T I N GF I L M S P E E D
PUESTADE LA SENSIBILIDADDE LA PELICULA

   B y means o f  t h e g r i p p r o v i d e d , mo ve th e
film -s p e e d s ca l e u n t i l   t h e   i n d i c a tio n  fo r th e
fi lm  in  us e c l i c k s    i n t o  p l a c e o p p o site  th e
tr ian g u lar  in d e x . M a r k s  b e t w e e n  th o se fo r
num b e rs o n  th e s c a l e i n d i c a t e  f ilm sp e e d s a s
follo w s :

    Por medio  del mando  aprop6sito, mueva
la  e s c a la d e  s e n s i b i l i d a d d e l  film  h a sta  la
indic ac i6 n ,  p a r a  q u e  e l   f i l m  e n  u so  h a g a
" clic"   e n  e l     l u g a r  o p u e s t o  a l  in d ica d o r
triangular.  Las marcas entre  los n0meros en
la es c a la, in d i c a n s e n s i b i l i d a d e s , co mo  sig u e :
View original page 18Page 19 · Read text
20 SETTING SYNC. AND SHUTTER
  PUESTA SINCRO Y OBTURADOR

       With  either the Minolta XD and XG      With the Auto Electroflash 132X or 128
    cameras at any electronic setting, the Auto    on all other cameras:
     Electroflash 132X  starts  the    f lash-ready
    signal in the camera's viewfinder blinking     Con el Auto  Electroflash 132X 6 el128
    and automatically sets the camera's shutter   en todas las dem5s c5maras:
     for X sync. whenever the unit is chargedand
    ready to fire.
      Con  las c5maras Minolta XD Y XG a     1. Make sure that the camera is set for X
    cualquier puesta electr6nica, el Auto  Elec-      synchronization and/or that the flash is
     troffash 132X  inicia  el parpadeo-sefial de       properly  connected with  the  X-sync.
    "flash-a-punto" en el visor de la c5mara y       terminal of the camera.
    automSticamente pone  el obturador para
    sincronizaci6nX, si la unidad est6 cargaday       Aseg0rese de que la c5mara est6 puesta
      lista para actuar.                               para sincronizaci6n X Vlo que el flash
                                                      est6 conectado apropiadamente al termi-
                                                        nal sincro. X de la c5mara.
View original page 19Page 20 · Read text
setting or  1/60 sec. or slower for  full-
                                            frame 35mm camerashaving horizontal-
                                                run    f ocal-plane shutters; between-the-
                                                 lens shutters with X-sync. can be used at
                                                                 all speeds).

                                           Tambi6,n aseg0resede que la c6mara no
                                               est6 puesta para una velocidad de obtura-
                                               dor m6s r5pida de lo que recomienda el
                                                 fabricante para flash elect16nico (corri-
                                          entemente la sincronizaci6n "X"  6 1160
                                           de seg., o m5s baja, para c5maras de
                                  35mm formato entero, con obturador de
2. Also make sure that the camera is not set       plano-focal y  recorrido horizontal; los
    for  a  shutter speed faster than  the       obturadores centrales con sincronizaci6n
   manufacturer's  recommendation   for       X, pueden usarse a todas las velocida-
   electronic flash (usually the special"X"        des.)
View original page 20Page 22 · Read text
:  . 9                        23
        Recycling time will increaseas batteries    When the  Auto  Electroflash 132X  is
     are discharged.When the monitor lamp fails   used with  either a  Minolta XD  or XG
      to  light within 30 secondswith the power   camera, a flash-readysignal in the camera's
     switch on, carbon-zincor al kaline batteries   viewfinder will  blink to indicate that the
     should be replacedwith fresh ones (all four    flash has recycled. After  it flashesthe 132X
      at the same time). Ni-Cd batteriesshould be     will switch the camera back to the previous-
     rechargedif the lamp fails to light after 15     ly  set mode  until   it has recycled and the
                                                           starts                                                                     to blin                                                                          k                                                                   again.{    seconds.                                    signal                                                    you                                       When                                                                   not                                                             are                                                                       taking flash pictures,
I        El tiempo de reciclo aumentar6 a medida    the  power  switch  should be moved  to
    que  las  pilas se descarguen. Cuando  la    :'OFF." This turns the unit completely off
    15mparamonitor  falle su luz durante 30    so that  it will not  fl ash when the camera's
    segundos con  el conmutador de energia   shutter is released.The camera may then be
     abierto, las pilas de carb6n-cinco alcalinas  used in normal, metered operation without
    deber5n ser reemplazadascon pilas frescas   removing the  flash. With the 132X on a
      (las cuatro al mismo tiempo). Las baterias   Minolta XD or XG, cameraoperationwill be
     Ni-Cd deberian recargarse,si la lSmparafalla    returned to the electronic mode previously
     su luz despu6sde 15 segundos.                  set.
View original page 22Page 23 · Read text
24    Cuando el Auto  Electroflash 132X es   Dial illumination
   usado con una cilmara Minolta XD 6 XG,   and auto f-number indication
   una sefial de "flash-a-punto" parpadearSen      With  the  Auto  Electroflash 132X, a
     el visor de la c5marapara indicar que el flash   green dial illuminator will come on when
   ha reciclado. Despu6s que ha actuado, el    the power switch is on to facilitate using the
   132X conmutard atr6s la cdmara a la moda-   unit  in dark places. The dial will glow as
    lidad previamente puesta,y la sefialempeza-   long as the power switch  is left on with
    16de nuevo a parpadear.                     serviceablebatteries.
      Cuando no est6 tomando fotos con flash,       Also, when the mode selector is at either
     el conmutador de energia deberd moverse a    of itstwo automatic settings,a red lamp will
    "OFF", de modo que no dar5 flash cuando    light behind the computer dial to indicate
     el obturador de la cdmara sea liberado. Y la   the applicable f-number for correct auto-
   c6mara podrd usarse en operaci6n normal    flash exposure'
    medida, sin sacar el flash. Con el 132X en
   una c6mara Minolta XD 6 XG, la operaci6n
    volveria a  la modalidad electr6nica previa-
   mente Puesta.
View original page 23Page 24 · Read text
llluminaci6n Dial e Indicador Autom5tico   NOTE
Nirmero-f                             When recycling time  is long with  bat-
   Con  el  Auto  Electroflash 132X, un    teries that are partially dischargedor  if the
iluminador dial verde se encender6 cuando    flash is to be fired immediately after the
el conmutador de energia estd abierto, para   monitor lamp comes on with fresh batteries
facilitar el uso de  la unidad en lugares   or fully charged Ni-Cd's,observethe respec-
oscuros. El  dial permanece15 encendido    tive  cautionary  notes  in  each  section
todo  el  tiempo  que  el conmutador de    (pp. 15 and 31)  if you are using reversal-
energia est6 abierto, con las pilas en buen   type color film (for slides).uso.
   Tambi6n, cuando el selector de moda-
lidad est6 en cualquiera de sus dos puestas  NOTA
autom6ticas, una lSmpara roja se encenderd     Cuando el tiempo de reciclo es largo por
detrds del dial computador, para indicar el    estar las pilas o baterias parcialmente des-
nrimero-f aplicable para exposici6n correcta   cargadas, o   si  el  flash va  a dispararse
autom6tica.                               inmediatamente despu6s de encenderse la
                                         l6mpara monitor, con pilas frescaso baterias
                                          Ni-Cd totalmente cargadas,observe las res-
                                               pectivas notas precautorias en cada secci6n
                                           (pags,16V 321,si estd usted usandopelicula
                                                   tipo reversible(para diapositivas).
View original page 24From the M. Butkus archive. Original publisher and archive notices are retained.
Check the model and edition against your equipment.
PDF verified 2026-10-10.