Flashes & lighting
Minolta Auto electronic flash 22 User manual
User manual for Minolta Auto electronic flash 22. 15 pages in English. Read the original PDF, download or print a copy without registration.
15 pagesEnglish0.8 MB PDF
Loading your manual…Open PDF directly
Document details
- Brand
- Minolta
- Model / document
- Minolta Auto electronic flash 22
- Document type
- User manual
- Language
- English
- Pages
- 15
- File size
- 0.8 MB
- Category
- Flashes & lighting
- Document date
- Not specified in catalog
Search available document text
Find a term, then jump to its page in the original PDF. Image-only pages may not be searchable; check the PDF for exact wording and diagrams.
Page 2 · Read text
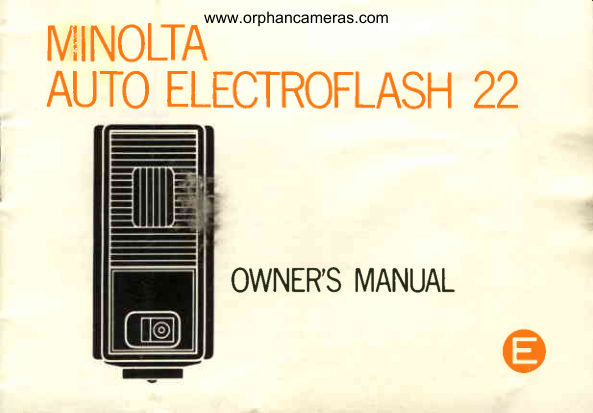
MINOLTAwww.orphancameras.com
AUTOELECTROFLASH22


        OWNER'SMANUAL
         e
View original page 2Page 3 · Read text
www.orphancameras.com

     This compact, easy-to-use unit make perfect automatic  flash exposures
     over a considerable range and  is also usable as a conventional  non-auto
     flashgun,     lt  can  be  attached   cordlessly  on  cameras  having  a
     direct-contact   "hot  shoe"  or by means  of  an attachable  cord  with
     conventional brackets and terminals.


*;,-.-i.ai&.*.-           ..,- r;d;e-,r
View original page 3Page 4 · Read text
www.orphancameras.com
      SPECIFICATIONS                         -*
                   Type: Clip-on automatic/manual   electronic flash unit fort                            cordless/corded  use
           Guide number: Up  to 22  for calculations  in meters  at ASA  iOO,
                               3 7   i n  f ee t a t A S A  2 5 ,o r  1 6 fo r me te rs a t DIN 1g
             A ut o w o r k i n g  O . 5  t o  4 m   (' l' 8 "  to  1 3 ,)  (a p e rtu re F5 .6 a t  film
                       range: speed ASA 1OO)                                                **'/             F fash dura_tion:  1 /4O,OOO  to  1/2,OOO  sec.  in  auto  operation,
                               1 /2,OOO in manual (non-automatic)  operation
            Sensor angle of
                acceptance: A p p r o x . 2 O off             Power source: D C o n l y fro m fo u r 1 .5 v A A (p e n lig h t)-size a lkaline-
                         manganese or sealed carbon-zinc cel ls
         Number  of  f lashes A p p r o x .  3 OO with  a lka lin e ce lls. a p p ro x. B O with
          per set of batteries: sealed carbon-zinc cel ls
          R e c y c l i n g t i m e : Approx.  5 sec. with fresh batteries
         Color temperature:  B a l a n c e d fo r d a ylig h t-typ e co lo r film
                 Coverage: 6 5 0  h o rizo n ta lly  a n d  ve rtica lly  (su fficie nt  for
                            wideangle  lenses down  to 35mm  focal  length on
                                full-frame 35mm  cameras)
            Sync. contacts:  Direct  contacts  for  hot  shoe, jack  for  attaching
                            separate sync. cord that  is included with  unit
          S iz e a n d w e i g h t : 3 5 x 7 0 x 8 8 mm  (1 3 1 xZ3 7 /a x3 7 r(6 inn.)o t in cl uding
                              attaching bracket; 14Og (4ffio2.) without  batteriei
                                                                                                                                                      I
          ,,i*r;ri:.at                                                                                                                                                                                                             ,i'iX
View original page 4Page 5 · Read text
www.orphancameras.com
NAMES OF PARTS


or Flash tube and reflector
  with guard window
@ Auto/manual  switch
@ Sensor
@ Open-flash/test  button
O Attaching  bracket
@ Cordless contact
View original page 5
Page 6 · Read text
www.orphancameras.com


O Battery compartment  cover
@ Film-speed scale
O Computer  dial
@ Aperture  scale
@ Power switch
@ Distance scale
@ Sync. cord socket
@ Monitor lamp
View original page 6
Page 7 · Read text
www.orphancameras.com
B A T T E R   I E S
1 . T o     i n s t a l l , o p e n    t h e  battery      2. Insert four  batteries (see specs
  compartment  cover by  s l i d i n g       p . 1 ) , m a k i n g s u r e t h a t p l u s ( + )
     it  off   in the direction  of  the       a n d m i n u s    ( - )   e n d s  o f  b a t -
   arrow  toward  the  top  of  the        teries  are positioned  as  indi-
   u n i t .                                 cated  inside the  battery  com-
                                         partment.
View original page 7Page 9 · Read text
www.orphancameras.com
ATTACHING  TO CAMERA
With  cameras wired  tor  cordless    end  into  the  "X"-synchroniza-
flash, simply  slide the attaching     tion terminal on the camera.
bracket  of  the  flashgun  all the
way  into the camera hot shoe.
For   other   cameras,  slide  the
bracket   into  the  accessorY  or
flashgun  shoe,  insert  the  single-
prong  plug  end   of  attachable
q/nc.  cord   into  the  sync.-cord
socket  until    it catches, and plug
the PC conneCtion on the other
View original page 9
Page 10 · Read text
S E T T I N G S Y N C . D E L Awww.orphancameras.comY  A N D
S H U T T E R S P E E D                 S E T T I N G  F I L M S P E E D
1. Make  sure "that the camera  is    Turn  the computer  dial  to align
   set for X sync. and/or  that  the     the  exposure-rating  number   of
  flqshgun  is properly connected     the  film  you  are using with  the
   with  the  X  sync. terminal  of     triangular white  index. (Dots be-
   the camera.                       tweerT numbers on the film-speed
2. Also  make   sure   that   the     scale  represent  ASA   ratings  of
  camera  is not  set for  a shutter     32,  40,  64,  80,  125, 160, 250  ,
  speed faster than  the manufac-     32O, 5OO, and 640  or D lN  in-
   turer's   recommendation     for     d e x e s o f  1 6 , 1 7 , 1 9 , 2 0 , 2 2 , 2 3 ,
   efectronic  flash  (usually 1/60     25,  26,  28, and  29, respectively
   or slower for  full-f rame 35mm     from  left to right.)
  cameras   having   focal-plane
  sh u tters)  .
View original page 10
Page 11 · Read text
www.orphancameras.com
POWE R SWITCH

To  turn  the  unit  on and charge
the  capacitor,  move  the  Power
switch as far as  it will go toward
the  red  dot. When You  are not
tak ing   pictures,    the    switch
should  be  kept   in the  off  Posi-
tion as far as it will go away from
the red dot.
View original page 11
Page 12 · Read text
www.orphancameras.com
AUTOMATIC  OPERATION

1. Make   sure  that   the  auto/-     3. With   the   flash-ready  lamp
  manual switch  is all the way to       glowing,   release  the  camera
   the  left  so that  the red guard       shutter. The flashgun will vary
  and  sensor opening  are  fully        the      f lash  duration   between
   v i s i b l e .                                1 /2 ,OOO and 1 / 40 ,OOO sec.  f o r
2. For  proper  exposure  under       proper  exposure   at    f lash-to-
   usual conditions,  set the  lens      sub ject   d istances     f rom   50
   aperture on the camera to the       centimeters   (t   ft.   I   in.)  to  4
  F-number  that  appears oppo-     m e t e r s ( a p p r o x . 1 3 f t . ) . N o r m a l
   site the red  " ^"  index on the       subjects  closer than  th is will
  computer  dial  of the flashgun       be overexposed  and those  far-
   (e.9., F 5.6 with   f ilm-speed set-       ther away  u nderexposed  with
     t i n g o f A S A  1 O O o r D  l N  2 1 1 .       the aperture set as in 2 above.
                                H owever,   satisfactory   expo-
                                        sure for subjects somewhat  be-
                                     yond 4m  can be obtained  by
                                      opening  the  camera  aperture
                                                 to  the  F-number   that  results
                                          b y   d i v i d i n g      t h e  m a x i m u m
                                       guide number  Q2  for meters,
                                      72   for  feet)  by  the  flash-to-
                                          subject  distance  with  unit  on
                                               eith er auto  or  manual  mode.
View original page 12Page 13 · Read text
www.orphancameras.com
M A N U A L  O P E R A T I O N

1. Make   sure   that   the   auto/     2. For  proper  exposure  under
  manual switch  is all the way  to       usual  conditions,   set the  lens
   the   right  so  that  the   letter       aperture on the camera to  the
  "M"    is  fully   visible  in  the      F-number   that  appears oppo-
  center of the black area.                site  the   flash-to-subject   dis-
                                       tance on the computer  dial  of
                                           the flashgun  (e.9., between F2
                                          a n d  F 2 . 8   f o r  1 O m o r  3 3   f t . ,
                                          a b o u t F 8  f o r 3 m o r 1 O f t . . F 1 6
                                                for 1.5m  or 5  ft., etc., at ASA
                                          1 O Oo r D I N 2 1 1 .
                                             3. With   the   flash-ready   lamp
                                         glowing,   release  the  camera
                                            shutter.   Flash   duration    re-
                                     mains  f ixed at 1/2,OOO sec.
View original page 13Page 14 · Read text
www.orphancameras.com
    REC Y C L I N G
      With   f resh batteries,  the monitor       of time, say 30 seconds, with  the
     lamp should come on to indicate    power  switch  on, replace all four
      recycling  within  about  five  sec-    batteries  with   fresh  ones  at  the
      onds.  Do  not  attempt   to  take    same time.
       flash pictures when  the monitor
     lam p is n o t g l o w i n g . l         lf the flash is to be fired immedi-
       ately   after   the  monitor   lamp   OPEN FLASH
     comes  on  with      f resh  batteriesn  and wh e n  re c y c l i n g   t i m e     i s  l on g    Non-synchronized    "open-flash"
      with   older  batteries,  the  maxi-     pictures can be made bY discon-
    mum   f lash-to-subject distance for     necting  the camera and flashgun
      normal  auto operation  should be    and  using  them   separatelY.  In
     con s idere d  t o  b e 3 m   ( 1 O  f t ') .  In     this case the   f lash is triggered bY
                                                                                  but-                                          pushing                                                        the                                                            oPen-flash/test                                  in                                    thls  case,               operation     manualI                                                                                                         still                                                                       fla                                                        sh d u ra tio n  is           lens               should  be                        opened                                 one     to                                                n .  Sin ce      the
       half  to one  stop more  than  the     controlled  bY the sensor in auto-
      aperture  indicated  (e.9., set at F4     matic   operation   and  remains
       or  between  F4  and F5,6  rather     fixed   at  maximum   Power  on
            t ha n F 5 . 6 ).                    ma n u a l,  e xp o su re P ro d u ce d  will
    Wh e n   t h e m o n i t o r      l a m p   f a i l s to    be as indicated  in those  respec-
        light  within  a reasonable period      tive sections,
                                                                   t                                                     1 1
                                                          *du....:,'--1  ffi*i.                      '
View original page 14Page 15 · Read text
www.orphancameras.comFIL L .IN OR S Y NCHRO-
NOTE:                      DA Y L IGHT   FL A S H
 For  dark  subjects  or   in  poor    Th o u g h   p rima rily   in te n d e d    f or
 reflecting   conditions   (such  as    u se  a s  th e  so le  o r ma in   light
 outdoors   at  night   or   in  dark     source  in flash Pictures, the Auto
su rro u n d in g s  i n d o o r s ) ,  i t   i s g e n e r-    Electroflash  22  can be  used  to
 ally  recommended  that  the  lens    b a la n ce o r   fill  in sh a d o ws with
be  closed down  a  half  stop  to     other  bright  light sources such as
one stop more than  indicated by     d a ylig h t  u n d e r  a p p ro p ria te con-
 the computer  dial  in auto opera-     ditions.   Suitable  ones  to  start
 tion  or opened a half stop to one     with  o n  e ith e r  a u to  o r m anual
 stop more than  indicated by  the    mode  are those  in which ambient
 dial  o n m a n u a l  m o d e ,    t h o u g h     a n d   f la sh in d ica tio n s ca ll for the
 indiv idual  c o n d i t i o n s w i l l  d e te r-    same exposure  settings. Then the
 mine   tfie exact  setting  in  either     indicated  shutter  speed  is used,
 mode.                                  b u t  th e  le n s is clo se d d o wn one
                                             half  to one stop  from  that  indi-
                                      cated  (e.g., for  1/60  sec. at  be-
                                   tween  F4  and  F5.6,  shutter   is
                                                        left  at 1 /60  but  the  lens  is set at
                                  F5 .6  o r b e twe e n F5 .6  a n d F 8) .
                                 From  th is starting  point, settings
                                    can  be  further  adjusted  toward
                                        obtain ing  effects  desired  under
                                     va rio u s co n d itio n s.
1 2
                                                   ,&*,
View original page 15From the M. Butkus archive. Original publisher and archive notices are retained.
Check the model and edition against your equipment.
PDF verified 2026-10-10.