Film cameras
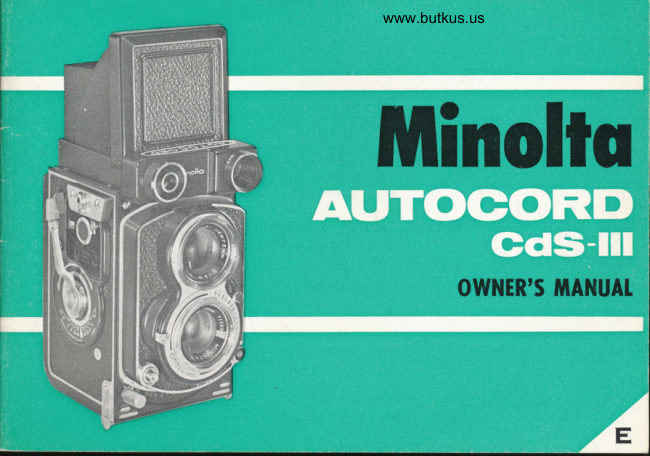
Minolta Autocord III Cds User manual
User manual for Minolta Autocord III Cds. 56 pages in English. Read the original PDF, download or print a copy without registration.
56 pagesEnglish15.8 MB PDF
Loading your manual…Open PDF directly
Document details
- Brand
- Minolta
- Model / document
- Minolta Autocord III Cds
- Document type
- User manual
- Language
- English
- Pages
- 56
- File size
- 15.8 MB
- Category
- Film cameras
- Document date
- Not specified in catalog
Search available document text
Find a term, then jump to its page in the original PDF. Image-only pages may not be searchable; check the PDF for exact wording and diagrams.
Page 2 · Read text
The Minohcr AUTOCORD CdS lll
        CONCEIVED FROM ADVANCED IDEAS IN CAMERA DESIGN
    The world fomous Minolfo Autocord CdS lll comero is not only equipped with o highly occurote
CdS exposure meler,  il now incorporotes on exclusive pressure plote (Pot. Pend.) ond frome counling                                                                                 ,l20mechonism for the new 22C ltln (24 exposures) os well os the ordinory      film (12 exposures).
Slots in the pressure plote, o Minolto exclusive, ollow the plote to be chonged in seconds ond the
frome counling mechonism chogeover is o simple lurn of o seleclor.
      lls exclusive Helicoid focusing lever provides fost eosy focusing wilh the index finger of your
hond holding the comero, permitting you one hond operotion. Your olher hond is left free for holding
on off-the-comero flosh gun for beller flosh photogrophy. The focusing lever is locoled underneoth
ihe lens mount ond sweeps ihe focus from 3.3-ft. 1o infinity in one orc-like movement ocross lhe
bottom of the comero.
    The brilliont imoge on lhe viewing screen wilh "Fresnel Lens" provided by the fost, fully cooled
F 3.2 Rokkor 75mm viewing lens provides quick, occuroie focusing ond composing for better pictures.
      Its Rokkor F 3.5-75 mm 4-element cooted loking lens is well recognized for its crilicol shorpness
ond high resolving power.
View original page 2Page 4 · Read text
Venmo @mike-butkus-camera  Ph. 2083
PayPal Name  Lynn@butkus.org      www.PayPal.me/lynnbutkus
View original page 4
Page 7 · Read text
Specificollons


Type:                 Twin lens reflex comero with builf-in CdS exposure meler, tokes ,|20 ond 220 filn.
                            Piclure size 6 x 6 cm. (2% x2/a in.).
Lens:                  Rokkor F/3.5-75mm,4 elemenfs in 3 groups.
Shutter :                CITIZEN MVL, B, I    f o l/500 sec. ond built-in self-timer.
Flosh synchronizolion: M ond X conloct poinl.
Viewfinder :              Cleor ground gloss wiih Fresnel lens.
                       Outer circle indicotes the light occeplonce ongle of exposure meter.
Focusing:             Helicoid focusing lever on the bottom   f ront of the comero. Minimum focus dislonce;
                                     I m. (3.3 ft.)
Exposure meter:           Built-in highly occurote CdS exposure meter wilh high, low, off switch.
Merer working ronge:   EV3-17, ASA l0O film. (On high ronge: EVIO-17. On low ronge: EV3-10)
Film speed ronge:      ASA 6-25,000, DIN 9-45
Film winding:        One stroke film odvonce lever. Film is wound from lop to boflom.
Others feotures:       Aulomotic reseiling film counler.
                       Double exposure prevenlion. (lnlentionol double exposure is permitted.)
Accessoriel :               Boyonet type lens shode (28.5 /).
                        Boyonel type filter (28.5 il.
                         Close-up lenses.
                                Porodluster.
                           Ponoromo-heod.
                            Autopole.
Size ond Weisht:     l44xl05xl00mm (5.63x4.14x3.94 in.) 1,1259 (39.6o2.)
View original page 7Page 8 · Read text
www.butkus.us
Attaching rhe Neck Strop


                                   To ottoch the neck slrop
 This new, improved locking neck
 slrop is guoronteed lo hold your
 Autocord CdS lll in perfect sofety.
  ll connol slio or releose occidentol-
  ly.
 To ottoch lhe neck sfrop
 1. Depress the upper bulton of the
    slrop-cotch. Keeping  it depress-
    ed, push the lower button lo-
    words lhe upper butfon.    # 2. Hold the sf rop cotch verticolly     To remove the neck slrop
    ond inserl lhe stud inio the hole
    of  ihe  locking grip on  lhe
     comero.
 3. Pull the slrop-cotch unlil You
    heor it click into locked posilion.
 To remove the neck strop
 4. Depress the upper button.
 5. Keeping it depressed, push the
     strop-colch downword. When  it
     stops, simply lift off lhe slroP-
      cotch.
View original page 8Page 11 · Read text
l. Finder


                                      www.butkus.us

I .  Toke off the lens cop, lifting     2.  Gently roise the  viewflnder     3. To use lhe mognifier. push the
       it up by ihe lower secrron,          hood, os shown in the picture.           sports finder flop by its upper
    lhen twisting to the right.                          ll  oulomolicolly snops inio        edge. Then the mognifier  will
                                                     posiiion.                                  spilng up.
View original page 11Page 12 · Read text
www.butkus.us
2. Focusing


   When ihe focussing lever is moved, the lenses           The composition lines on ihe ground gloss ore drown
    move bock ond forth. When lhe imoge looks             in proportion to the dimension of prinling poper.
     shorp on the ground gloss, it is in focus. To           Keeping in mind the print, compose ihe picture wilh
    focus more precisely, roise the mognifier up, ond              in the limil of horizontol lines for horizonlol po-
    focus through ihe mognifier.                                     silion, ond wilhin lhe limit of verticol lines for
                                                                       veriicol posilion.

                                                                                                                            t0
View original page 12Page 13 · Read text
3. For Sports Finder


   Push ihe sports finder flop oll      2.  The obiect os seen within ihe     3.  Press the flop releose button
   lhe woy down.   lt  will  foll          froni  of  lhe  frome when          to return the flop in o normol
  downword ond stop with o        viewed through ihe  direct             position,
   click, providing the  sports         viewer is lhe some os the lens
    finder.                                                             " se es,"
View original page 13Page 14 · Read text
www.butkus.us
4. Meosuring Exposure


I .  Sei ihe exposure meter with          Poinl lhe comero ot lhe sub             In order to obioin the proper
    the correcl film speed (ASA                  iF.t    ThF   naF.lla   nf  the  oy-          exposure volue (EV) number,
    or DIN).                            posure meter will indicoie on                  il is necessory to odiusl both
                                        exposure volue (EV) number.         the shuiter speed ond dio-
                                                                     phrogm opening. (See poge
                                                                       25-30 for full detoils).
View original page 14Page 15 · Read text
5. Shulter Speed ond Diophrogm


                                                                                  www.butkus.us

 l.  When lhe shuiler lever is moved up onC down, shutler speeds B, l,      2. To cock the shuiter, move lhe
    2,4,8,15,30, 60, 125, 500 oppeor in fhe Sec.-window on the lop             film winding lever forword  until                                                                                                                                 it stops. (Note ,  lf comero  is    of the viewing lens. B slonds for Bulb exposure, ond on ihis seliing         not looded with film, lhe iever
     lhe shuiter stoy open os long os the shutter releose button is depressed.              will not stop.) Reiurn the lever
    The flgures 1,2, 4....500 indicote the shutter speeds of l, 1/2 1/4         rock. Shutter con be chonged                                                                        before or ofter cocking the      ..... l/500 second.                                                                         shuiter.
 l3
View original page 15Page 16 · Read text
www.butkus.us


3.  when the diophrogm lever is moved up ond down, F srop numbers 3.s, 4, s.6,8,  ll,  16, 22 opoeor in the
    f-window on the lop of the viewing lens.
   As lhe diophrogm lever is moved, the exposure volue (EV) is outomoticolly indicoted ond con be utilizeo
    when using the Exposure Volue System.


                                                                                                                   14
View original page 16Page 17 · Read text
6. Relotion between Diophrogm ond Amount of Light


l|iaphragm                             B          3.5   4   5.6                                              ll    r6   22
                   (:)                            {;}                {:}    gF                    {F     {F       $Amount of light          1                              L/                                                                                       ,/32      1.3   %  %  %  %

The diophrogm indicofor, 3.5, 4, 5.6,8, ll,  16, 22, shows lhe size of fhe operture opening. lts figures indicote
the omounl of light thol reoches the fllm through the operture in the proportion os drowing.
When the shutter is releosed ol the speed of l/250 second wif h f 4 diophrogm opening, or exposed with f 5.6
ot 1/125 second, lhe omount of light reoching the film resulls the some.
Besides controlling the omount of light enlering lhrough the lens, the diophrogm olso delermines the depth-of-field.
 (See poge 41 for the depth-of-field.)


l5
View original page 17Page 18 · Read text
www.butkus.us
7. Toking the Picture


Focus ond frome your subject on lhe viewfinder.
Determine exposure, then sei both ciiophrogm ond
shutter speed.
Select oppropriole F number depending on your suo-
jecl. Remember diophrogm determines lhe depth-of-
fleld. (For exomple, set ciiophrogm io  f 8 or f   I  I
for o subiect lhot need deeper depf h-of -field.)
View original page 18
Page 19 · Read text
Before looding film, it is necessory to odiust your comero for 120 film  (12
                                                                        youexposures) or 220 filn (24 exposures) depending which type of film
ore using. You musl set both film counter ond film pressure plole.
                                  The position of the pressure plote
                                          determines which type of film con
                             be used. To remove pressure
                                         plole, simply press do.wn ond
                                     toword comero. When the retoin-
                                               ing keys ore disengoged from their
                                                  slots, lift pressure plote off.
View original page 19Page 21 · Read text
Use 120 or 220 filn. (NOTE, 620 film spool will
nol fit on this comero.)
I ,  Pull the bock cover opening knob. Then lhe
    bock cover will snop ouf,
View original page 21Page 22 · Read text
www.butkus.us


2,  Pull ond turn the toke-up spool knob. The knob         3.  Remove lhe film winding spool (empty spool)
     will stoy oul.                                          from lhe upper film chomber. Fil it in lhe pivol
                                                   on lhe right side of lhe lower film chomber ond
                                                             secure it with lhe left side knob. This knob stoys
                                                             out if oulled ond lurned-
View original page 22Page 23 · Read text
www.butkus.us


4.   Insert o fresh roll of film in the     5.  Pull out lhe film leoder ond      6.  Wind the film winding lever
    upper film chomber, pushing  il            insert  il in the longer groove            untii the (fr) mork oppeors on    genlly loword the knob side.                                            the bolh sides of the poper     Fit the pivol of the knob in          of the empty spool.                  leoder. Molch ihose morks
    the fllm spool.  Like lower                                              with ihe film slort mork (red
     knob, this knob sloys oui too,                                             dot) seen ot ihe center of the
   when pulled ond iurned.                                            both side film roils of  the
   Then turn bock both knobs.                                          comero. Then close the bock
    They reiurn 1o proper position.                                              of the comero.
2l
View original page 23Page 24 · Read text
www.butkus.us


7 .  When the comero bock is closed,
   mork (V)  oppeors in the film
    counter window. Turn the wind-
    ing lever clock-wise uniil  the
    lever stops winding. Al   this
     point, lhe shutter is cocked. ond
    the lever will nol move forword
    ony furlher. Turn bock the wind-
    ing lever into lhe lever rock.          Note :  When lhe shuller  is
   The number (l)  oppeors in the         cocked by turning the lever, o
     film counter window.                    red color mork will oppeor in
   You ore reody for the first ex-          the shuller set worning mor k
    oosure.  For the second ex-        window io  show thot  the
    posure, iurn the winding lever            shuiter is cocked.
    forword until  il stops, ond then
     lurn the lever bock into the rock
     ogoin.


                                                                       22
View original page 24Page 26 · Read text
www.butkus.us
Unlooding Film


    Pull oul ihe bock cover opening knob. This will         2.   Shifl ihe emply spool to the lower film chomber.
   open lhe bock cover.  Pull out the film spool           See "Looding Film" os lo the proper procedure.
    knob ond remove the roll of film. Fold ond seol
    tho lonrler orlno nf lha rall 6f  fi16.
   CAUTfON: After removing the exposed film, especiolly 220 filn, roll tighlly the leoder poper ond seol  it not
               1o permit the inirusion of lighi.
View original page 26Page 29 · Read text
l. Set Film Speed         2. Set rhe High-Low       3. Aim the Comero
                                 Scole


Sel the exposure meter on the     The exposure meter should be od-     Aim lhe comero ol the subjecl ond
proper film speed by lurning the       iusted properly to the lighting condi-       toke o reoding with lhe light meter.
                                                                                                                    reodselector knob until lhe correct      tions. The high scole is used for    When using lhe High Scole,
                                          brighl light conditions ond the low      the while numbers on lhe exposureASA/DIN number oppeors in the                                       scole is used for dim or ovoiloble      meler ond for the Low Scole reoofilm speed window.                                                       light.                                 lhe red numbers,
                                     Note  :  Switch lhe meter off when nol usino over o week.

27
View original page 29Page 31 · Read text
6. Coution on Meosuring


                                                     see           For exomple, when o   filf er wilh on exposureo  When looking into the viewfinder you con
                                                                                                               .l00    lwo circles in the cenler of the ground gloss.              foclor of 2X is used wilh ASA       film, the film
    The outer circle represents the exoct occepfonce             speed to be set on fhe exposure meter is ASA
    oreo of the built-in CdS exposure meter. There-           50.  This is obtoined by dividing the foctor of
    fore, when loking o meter reoding, ploce the          2 into 100. After removing the filter re-set ihe
     subiect in this circle so you con obloin o proper             proper ASA number.

                                                                                                                                                          indi-    reoding. When toking close-up reodings, simply     o  When shuller speed "8"  is used, the figure     poini the meter window ot the subiect.                                                           coied by the exposure meter connot be useo.
                 coution, when using filters.  Mosto A word of
      filters cuf down the omount of light thot posses
    through the lens. This requires o lorger lens
    opening or slower shulter speed in order to
    compensote.
   To utilize the pxposure meter you simply odiusi
    lhe ASA/DIN number to ollow for the odiuslmenl.
View original page 31From the M. Butkus archive. Original publisher and archive notices are retained.
Check the model and edition against your equipment.
PDF verified 2026-10-10.