Film cameras
Minolta Autopack 450-430 User manual
User manual for Minolta Autopack 450-430. 33 pages in English. Read the original PDF, download or print a copy without registration.
33 pagesEnglish5.1 MB PDF
Loading your manual…Open PDF directly
Document details
- Brand
- Minolta
- Model / document
- Minolta Autopack 450-430
- Document type
- User manual
- Language
- English
- Pages
- 33
- File size
- 5.1 MB
- Category
- Film cameras
- Document date
- Not specified in catalog
Search available document text
Find a term, then jump to its page in the original PDF. Image-only pages may not be searchable; check the PDF for exact wording and diagrams.
Page 1 · Read text
www.butkus.us
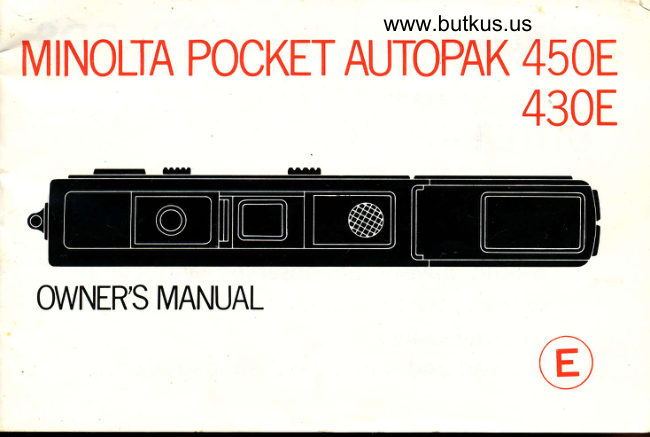
- MINOLTA POCKETAUTOPAK 45OE
                      430E


  OWNER'S MANUAL
View original page 1Page 3 · Read text
IMPORTANT SAFEGUARDS
                                                                       /FOR USING      THE
BUILT-IN FLASH
                                   .,
    When using the  f lash u nit, the specif ic
   cautionary notices in th is owner's manual
                                                                                                                         ;   shou ld a lways be observed and compl ied
   with, dS well as basic precautions, including
   the following:
    1. Read and understand all instructions.
View original page 3Page 4 · Read text
www.butkus.us{r  2. Do not operate the flash unit if the
    camera has been dropped or damaged - -
     until it has been examined by an author-
     ized M  i no lta se rv ice  f ac  i I ity
  3. To protect against electrical shock haz-
    ards, do not immerse camera and/or
          f lash unit in water or other liquids.
 4.To avoid electric shock hazards, do not
    disassemble the un it, but take it to an
    auth orized M ino lta service facil ity when
    service or repair work is required. Incor-
View original page 4Page 5 · Read text
rect reassembly can cause electric shock
       hazard when the un it is used subse-
        Quently.
          SAVE THESE
           INSTRUCTIONS
    Your Minolta Pocket Autopak 45OE or 430E with its tiny built-in
    electronic  f lash is one of the most convenient and easiest-to-use cameras avail-
    able. No. 110 cartridges make film handling effortless, and setting film speed is
    unnecessary. A genuine coated all-glass Rokkor lens has simple, handy zone
2  focusing. The camera tells you when to adjust exposure or pop out the flash if
View original page 5Page 6 · Read text
www.butkus.us
 there is notenough light. Besidesthese main features, the 450E model offersa
 faster lens, a flashmatic system that automatically adjusts lens aperture with
 distance focused, and unusual handy close-up capability.
   Pp.6 and 7 tell briefly how to load and take pictures with your Pocket
Autopak, but for best results and longest service, please read this manual
carefully all the way through and follow the simple instructions. Then keep it
for reference later as needed.

NOTES ON THIS MANUAL
  As this is a combined instruction manual for use with the Pocket Autopak
430E and 450E, some sections may not apply to your model and some
illustrations may show features different from the camera you own. Proper
operation is indicated for both models, however, and differences between
them are clearly indicated throughout.
   Unless otherwise mentioned, illustrations in this booklet show the Pocket
Autopak 450E, the model with the full complement of features, with
appropriate notes to adapt them for use with the model 430E.
View original page 6
Page 8 · Read text
www.butkus.us


            Flash-range table
   Ff ash-monitor lamp lp.22
Battery-chamber cover (p. 8)
  Focus-symbol table (p. 16)
                Serial number
       Film advancb (p. 1O)
   Film-data window (p. 1 1)
        Cord eyelet $. 121
    Back-cover latch (p. 10)
                  Eyepiece
View original page 8Page 9 · Read text
FOLLOW THESE SIMPLE STEPS TO USE
YOUR POCKET AUTOPAK
1. After installing and checking bat-      3. Slide lens cover open (p. 13) and   tery (see          & p.                        9), insert              p. 8                                     film        set focus for your subject $. 1 l.   cartridge          and                  latch                    back                             cover.
2. Operate film advance repeatedly
   until first exposure locks in place    450E
  and advance will not move (more
  on p. 10).


                                430E
View original page 9Page 10 · Read text
www.butkus.us
 4. Look through eyepiece and com-      symbol on 450E, slide control left
   pose subject in viewfinder (p. 1S).       to cloud symbol. lf it lights at sun
   Depress shutter release slightty; it      symbol on 430E or cloud symbol
   red lamp in finder lights at sun    on 450E, slide control left to
                                          flash symbol to pop out strobe.
450E                          Then take picture within flash
                                          range when lamp begins to pulsate
                                       lp.22l. Always sgueeze shutter
                                                release smoothly.
                       NEVER FORCE ANY PAR.T OF
430E                       CAMERA; CONTINUE READING
                        FOR DETAILED INSTRUCTIONS:
View original page 10Page 11 · Read text
INSTALLING BATTERY
  Your camera's built-in strobe and    alkaline-manganese (Eveready E 91
exposure warning system are power-    br equivalent), sealed carbon-zinc or
ed by one 1.5v AA-size (pen-light)     nickel-cadm ium battery.

To install this:                           2. Insert a battery as specified with
1. Open the batterychamber  cover     the plus end out as indicated
  by sliding it down and lifting  it as       inside the chamber, then close
   shown.                             and latch the cover.


 ;;*ffi
View original page 11
Page 12 · Read text
www.butkus.usCHECKING THE BATTERY
  The battery should be checked
immediately after inserting and from
time to time thereafter. especially
before starting on trips or taking
espec ial ly important pictures.
To do this:
1. Slide the lens cover open.
2. Covering the sensor with your
  finger (being careful not to leave
   finger print on the glass), depress
  the shutter release slightly. lf the
  red signal in the finder lights, the   NOTE
  battery is serviceable. lf not, the  o To avoid the possibility of exces-
  battery should be replaced.               sive battery drain from the finder
                                    lamp, keep the lens cover closed
                                 when not taking pictures.
                        o For taking pictures without bat-
                                                tery, see the note on page 21.
View original page 12Page 13 · Read text
LOADING AND ADVANCING FILM
1. Slide the latch toward the finder    2. Insert the film cartridge into the
  eyepiece and open the back cover.      camera as shown.
                                      3. Latch the cover shut.
View original page 13Page 14 · Read text
rr
                                 www.butkus.us
       4. Use your right thumb to operate   NOTE
          the film advance repeatedly until      . The shutter release cannot be
               it locks (about 3 strokes). A series       depressed unless the film advance
        of 1's should be visible in the       has been operated until it locks.
          film-data window to indicate the     . Your camera is designed to use
             first exposure.                           films with speed ratings from 80
                                         to 400 ASA in normat daylight
                                                conditions. However use of high
                                   speed  f ilms under extremely
                                                     bright conditions such as beach or
                                        snow scenes is not recommended.
View original page 14Page 15 · Read text
CAMERA CORD
  A handy cord is furnished with
your Pocket Autopak. Attached to
 the cord eyelet on the camera, this
 provides carrying convenience and
 safety. lt can, for example, be placed
around your neck to keep the cam_
era handy or to prevent its falling
from a shirt pocket. Be careful to
keep the cord behind the front of
the camera when taking pictures.
  This cord atso has an important
use in taking close-ups with the
Pocket Autopak 4SOE. For details,
see p.24.
View original page 15
Page 17 · Read text
FOCUS ING
                                                                            \
     A slide with zone symbols simpli-    Pocket Autopak 4SOE
      fies setting focus with your pocket
     Autopak. For sharpest pictures, sim-
     ply move this slide so that the index
     points to the symbol for your sub.
       ject.
     A distance-symbol table is located      With the Pocket Autopak 450E,
    on the bottom of each pocket Auto-    set the pointer to the mountain
     pak model for ready reference.         symbol farthest left for scenics and
                                          other pictures at distances of about
                               5.5m (18 .ft.) or more from the
                                      camera at the cloud symbol; 3.Sm
                                          (11 ft.) or more at the sun symbol.


14
View original page 17Page 20 · Read text
www.butkus.us

      Pocket Autopak 43OE
.D,I       With the Pocket Autopak 430E,     With the ooindex set at the right
     set the pointer to the left-hand    hand symbol, the lens is focused for
      mountain symbol for subjects about     portraits or other subjects at 1.5m (5
     4.5m (15 ft.) or more from the     tt.) from the camera. At this dis-
       camera.                                 tance, from the top of the head to
      At the central framed symbol,    the elbows of a standing adult can
       subjects between about 2.5 and 5m    generally be seen in the finder with
      (8 and 16 ft.) from the camera will     the camera held horizontally.
     be in focus. Most "peoplelcicture"
      snapshots will probably be taken at
        this click-stop setting.                                                           17
View original page 20Page 21 · Read text
VIEWFINDE R

                                           Looking into the eyepiece of your
                                      450E, you will see the bright frame,
                                A, and the focus-symbol setting
                                     above it. What you can see inside
                                                       this  f rame is the approximate subject
                                          area at the three farther focus-slide
                                                settings. Pictures at the two closer
                                              settings and with the close-up lens
                                       should be framed within the two
                                           short parallax-correction marks near
                                           the right corners of the frame.
                                          With the model 430E, the approx-
                                       lmate subject area can be observed
                              by looking through the viewfinder
                                      with your eye centered in the eye-
                                                  piece.

18
View original page 21Page 22 · Read text
www.butkus.us

        With both models, if the finder    warning (see p. 21l., and pulsates to
      appears black with only a small     indicate recycling when the unit is
       circular image area visible in the    used in flash operation lp.22l.
      center, B, the lens-cover slide  is      With the model 450E, appearance
       closed, and pictures cannot be taken     of a red flag in the position shown in
         (see p. 13).                 D indicates that the close-up lens is
a        The red lamp at the right side of    in position for use and you should   II
q     the finder, C, lights for low-light    take pictures as explained on p. 24.

                                           D
       cT          lrd       lil
View original page 22Page 23 · Read text
TAKING PICTURES (WITH EXISTING LIGHT)
      1. Make sure the film is advanced      take the picture. Both hands and
     and the lens-cover slide is com-      the camera cord should be kept
         pletely open.                      behind the front edge of the
     2. Set focus for the proper subject       camera.
        distance.                              4. Compose your picture within the
     3. Hold the camera horizontally or       bright frame with the 450E or in
        vertically in a comfortable way in     the viewfinder frame with the
      which it is steadied against your      430E.
       face and will not move when you


                                                                   "l'
                                L-",
20                                          r::4
View original page 23Page 24 · Read text
www.butkus.us

5. When not taking flash pictures,    proceed as explained on the next
   start with the exposu re/f unction     page.
   control set at the -1.: sun symbol.      With the 430E, if the red lamp at
6. Depress the shutter release slight-    the right in the finder comes on,
   ly. lf the red lamp at the right in     existing light is insufficient, and you
   the  f inder does not come on, hold    should move the control to the left
  the camera steady and continue     for flash pictures as explained on the
  to squeeze the release all the way     next page.
  down to make the exposure.        NOTE
  With the 450E, if the red lamp at          lf the battery is unserviceable or
the right in the finder comes on,    completely lacking, the red lamp in
move the exposure/function control    finder will not come on and the
to the    cloud symbol. lf the lamp     built-in strobe will not charge. In     ^0still comes on when the shutter    this case, however, you can take
release is depressed slightly, existing    pictures by setting the exposure/-
light is too low for proper exposure,     function control to the sun symbol
and you should move the control    for subjects in bright sun, to the
feft to the     flash symbol and    cloud symbol for cloudy-bright con-                 /                                                                21                                                ditions.
View original page 24
Page 25 · Read text
FLASH PICTURES

1. Slide the exposure/function con-      2. At the flash symbol, the red lamp
   trol to the t  flash symbol. The      at the right in the finder will
   built-in electronic flash will pop      come on when the shutter release
  out from the end of the camera        is depressed slightly. When this
  and start charging if a serviceable       and/or the flash monitor lamp on
   battery is installed.                   the back of the camera starts to
                                           pulsate, the camera is ready to
                                          take flash pictures.
View original page 25From the M. Butkus archive. Original publisher and archive notices are retained.
Check the model and edition against your equipment.
PDF verified 2026-10-10.