Film cameras
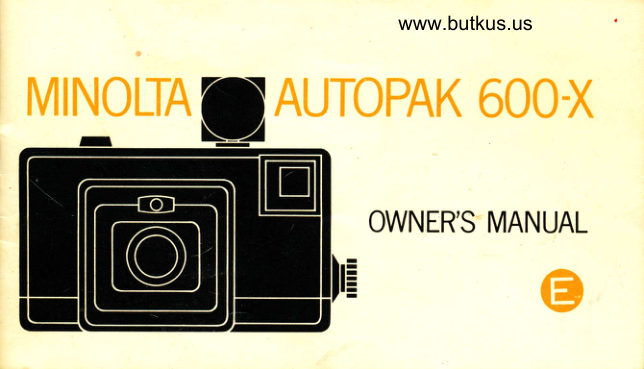
Minolta Autopak 600-X User manual
User manual for Minolta Autopak 600-X. 24 pages in English. Read the original PDF, download or print a copy without registration.
24 pagesEnglish2.8 MB PDF
Loading your manual…Open PDF directly
Document details
- Brand
- Minolta
- Model / document
- Minolta Autopak 600-X
- Document type
- User manual
- Language
- English
- Pages
- 24
- File size
- 2.8 MB
- Category
- Film cameras
- Document date
- Not specified in catalog
Search available document text
Find a term, then jump to its page in the original PDF. Image-only pages may not be searchable; check the PDF for exact wording and diagrams.
Page 2 · Read text
WELCOME TO THE MINOLTA FAMILY OF FINE CAMERAS
Your new Minolta Autopak 6oo-x will give you maximum operating speed and out-
standing ease of operation. And your pictures will have the sharpness and  f idelity
that you'd normally expect only  f rom cameras costing many times more.
The Minolta Autopak 6OO-X uses 126-size film cartridges for easy, instant drop-in
loading. lt uses modern Magicubes for fast, sure  f lash photography without
batteries. The camera's sensitive CdS exposure meter is set automatically with
the  f ilm's ASA rating and will choose the correct setting   f or regular or  f lash photo-
graphy.

     U
View original page 2Page 3 · Read text
www.butkus.us


                                    3
                                    5

How to install battery


How to hold your camera                16
Composing your pictures                L7
View original page 3Page 4 · Read text
Venmo @mike-butkus-camera  Ph. 2083
PayPal Name  Lynn@butkus.org      www.PayPal.me/lynnbutkus
View original page 4
Page 5 · Read text
MAJOR FEATURES
EASY AND FAST: The Autopak 6OO-X was created for fun-and with simple drop-in
126'size   f ilm cartridges plus batteryless 4-shot Magicubes,  all you have to concen-
trate on is the  f un.
AUTOMATIC FLASH: The camera decides when to use flash. You can leave a
Magicube in place all the time-the camera will  f ire it only when needed.  lf there's
no Magicube in place and one is needed, a red signal in tlre viewfinder  tells you to
install one. The red signal also warns you when the Magicube is used up. And you
never have to worry about flash batteries. Focusing the camera adjusts lens for
correct flash exposure.                                                                                                  .   :.
PERFECT EXPOSURES EVERY TIME: A fully automatic CdS electric eye sets the                   i
camera for you. No worries, nothing to do.
AUTOMATIC SHUTTER SETTINGS: Your camera will select shutter speed settings
(1/9O and l/45 sec.) for normal picture-taking, a low speed (1/45 sec.) for flash
photography. You just snap the shutter!
SIMPLE AND EASY FOCUSING: Focusing is so easy: Just turn a little knob to align
needle with one of the four symbols in the viewf inder.
View original page 5
Page 6 · Read text
www.butkus.us

SPECIFICATIONS
     Picture size: 28.5x28.5mm with 12- or 20-exposure cartridges
           Lens: Rokkor 38mm F2.8,4 elements in 3 groups
  Shutter speed: 1/9O and L/45 sec. for normal photography; lens aperture is set
                 automatically. When subject is insufficienily lighted for EE expo-
                   sure, shutter speed is automatically reduced to I/45 sec. for  f lash
     Viewf inder: Tinted bright-frame viewfinder with parallax correction guides,
             zone focus, flash range marks, and illuminated ,.use.flash,"
                 "replace Magicube," and "f lash go ahead" signal
      Focusing: 4 zone-focusing click stops  f rom 3.3 feet to inf inity
Exposure meter:  Built-in CdS cell above lens, coupled to aperture, powered by one
              1.4v Mallory RM-64O or equivalent mercury battery
               Your Minolta Autopak 6OO-X is factory-set for correct exposure
               with Kodacolor-X, Ektachrome-X, and certain other films rated
                                       f rom ASA 50 to ASA125.
  Film advance: 2-stroke winding mechanism
          Flash: Built-in socket for Magicube with auto-turn mechanism
       ,      Size: 4%' (L 18mm) wide,2%, (71mm) high, 2y'(, (6O.5mm) thick
        Weight: LL.6 oz. (33O g.i including battery and wrist strap
View original page 6Page 8 · Read text
www.butkus.us


            Film window
          Finder eyepiece
      Film advance lever
               Film stoo
Back cover release button
           Wrist strap lug
    Battery compartment
View original page 8Page 9 · Read text
Your Minolta Autopak 6OO-X uses only one
1.4 volt (Mallory RM-64O or equivalent) mer-
cury battery, which comes with the camera.
Before installing battery, always use a clean
rough cloth to clean the terminals.
The battery compartment is on the bottom of
the camera. Move the slide to "OPEN" posi-
tion and open the cover.
Insert battery as shown, making sure plus (*)
and minus (-)ends are in the right position.
Hold the battery compartment cover closed
and move the slide to "CLOSE" position.
To remove battery, open cover, push plus
(+) spring tab toward diagram;, and let
battery drop into your hand.                 www.butkus.us
View original page 9
Page 10 · Read text
www.butkus.us


Load the camera: Snap open the   Compose your picture
camera's back; drop in a f ilm cartridge;            fi nder.
snap the back closed.
View original page 10
Page 11 · Read text
k;
Focus by turning the focusing knob    Press the shutter release. That's it-to set the          needle at the symbol for the    you've taken a  f ine picturelwkind of photograph you're taking:
"portrait," "medium,"..group,"     or.
"d istant. "
View original page 11
Page 12 · Read text
www.butkus.us


1.  Slide the back cover release button     2. Drop in a  f ilm cartridge as shown.
   up; the cover opens automatically.
View original page 12
Page 13 · Read text
Close the back cover firmly; it will    4. Advance the film lever as many
lock with a "click." Film type and       times as necessary until exposure
exposure number can be  seen       No. 1 appears in the window. Once
through the little window.                 the lever stops, do not  f orce  it. You're
                                           ready to take your  f irst picture!
View original page 13Page 14 · Read text
www.butkus.us


After taking a picture, advance the  f ilm lever
twof ull strokes in the direction shown until  it
 locks. This action advances the  f ilm and cocks
the shutter for the next exposure. lt also turns
Magicube to a  f resh lamp if needed and avail-
able.
The picture frame number appears in the
window on the back of the camera. The same
number willappear several times in a row, and
the exact placement in the window is unim-
portant, After each exposure, you must oper-
ate the  f ilm advance lever twice until it locks.
View original page 14
Page 15 · Read text
When you've taken the last exposure (No. 12
or No. 2O), advance the  f ilm lever repeatedly
until you can no longer see the film's paper
backing in the window.
Open the camera and remove the film car-
tridge. The cartridge will drop out when the
camera is turned over. Do not try to remove
the  f ilm from its cartridge.
Never open the camera or remove the film
cartridge until the  f ilm has been completely
wound through onto the take-up spool and
you can no longer see the film backing paper
through the window.
View original page 15
Page 16 · Read text
www.butkus.us

A little care in holding your camera correc|y
will assure better pictures.
The camera should not move while you're
taking a picture.
Make sure that you are standing perfecily
still and that your grip is steady.
 lt is best           hold         to                your camera                                     horizontally,                                                                                               !t!lbringing                 it                         f irmly                  against                        your face                                   to steady
it. Press the shutter gently with a slow, steady                                                                                                                                   1,,rri
squeeze.
Make sure that your fingers don't cover the
exposure meter or the lens.
View original page 16
Page 17 · Read text
COMPOSE YOUR PICTURE: Look through the
viewf inder. You'll see a bright, yellow frame.
What you see inside this frame is what you'll
get on film. Because of parallax-the differ-
ence between what the viewf inder "sees" and
what the lens "sees"-take care that your sub-
ject is entirely within the  f rame.
When camera is set at "portrait" symbol, use
the angle line in the upper left corner and the
short straight lines in the upper right and
lower left corners as guides for the edges of
your picture.

ELECTRIC EYE PHOTOGRAPHY: The lens open-
ing is automatically controlled by the amount
of light available; the precision CdS electric
eye of your camera does this for'you. You just
select the right distance for the proper focus.  www.butkus.us
View original page 17
Page 18 · Read text
www.butkus.us


FOCUS SELECTION: Focusing your camera is
as easy as can be. Simply turn the focusing
knob on the side of the camera until the
needle in the viewfinder is set at the symbol
for the type of picture you're taking.


                                        DISTANTT For taking gen-
                                                      eral scenics and far-away
                                                    views,
View original page 18Page 19 · Read text
GROUP: This setting  is for   MEDIUM: Usethis symbol   PORTRATT: Your subject
groups about 17 feet (5m)   when you can sight a full   should be at a distance ofaway or when shooting   standing figure with only  about 4 feet (1.2m) andpeopleiiiincluding scenic   a small clear area at top   should fully fill viewfind-backgrounds.              and llbottom of viewfinder.    er frame from about the
                          Focus distance is about 8   waist up.
                             feet (2.5m) from camera.
View original page 19Page 20 · Read text
www.butkus.us

   FLASH PHOTOGRAPHY
20  Flash pictures are easy to take. Your      1. To install a Magicube, align one
    camera will tell you when you don't       corner with the stud at back edge of
    have enough light for your picture      camera top and push down on the
    without using flash: A lamp will light     cube until  it. clicks. The cube will
      at the bottom of the viewf inder.  lf there       rotate automatically each time you
     is no Magicube on the camera or  if      advance film  if a fresh lamp is not
       all 4 shots have been used, the lamp        in firing position.
      will glow red, warning you to attach a           f resh cube before taking the picture. lf       At the left side of the viewfinder  is     a Magicube with afresh lamp is in place,     a heavy line with a crooked arrow
     the lamp will be green, telling you to go      symbol in it; this indicates the range    ahead and take the picture. When the       of settings for flash photography.    green lamp appears, your camera is     The lower end of this line marks
     automatically set for flash photogra-      distance for  closest flash shots     phy. All you have to do is set the proper      about 3.3 feet (1m) from camera;     focus and snap the shutter.               upper end indicates far  limit for                                                    effective flash use about 20 feet
                                             (6m) from camera.
View original page 20Page 22 · Read text
www.butkus.us

22   3. You can keep a Magicube in place at   GAUTTON: You may turn an installed
          all times. lf lieht is adeqUate for   Magicube clockwise if  necessary to
        proper exposure without flash, the    bring a fresh lamp into position, but
        cube will notf ire. This is a very handy   Magicube must never be turned coun-
        feature of your Minolta Autopak   terclockwise
        6OO-X. To check if flash is needed,
             ' depress the shutter button slightly       and look for the lamp in the view'
                   f inder.
View original page 22Page 23 · Read text
GABE AND STORAGE OF YOUR MTNOLTA AUTOPAK 6OO-X
Your Minolta is made for long, carefree service. But there are a few things that you   ?3should do.
Never touch the camera lens. Should the lens become dirty, clean it with a soft,
lint-free cloth, using a gentle motion.
lf you don't plan on using your camera for a long period of time, it is best to re.
move the battery from the camera.
Camera should never be put or left in glove compartment or other place in motor
vehicles or elsewhere in which it may be subjebt to relatively high temperatures.
Store your camera in cool, dry place away from dust or chemicals. An airtiiht
container that has a drying agent like silica gel in it would be ideal.
We hope you'll enjoy your Minolta Autopak 6OO-X camera.
View original page 23
From the M. Butkus archive. Original publisher and archive notices are retained.
Check the model and edition against your equipment.
PDF verified 2026-10-10.