Film cameras
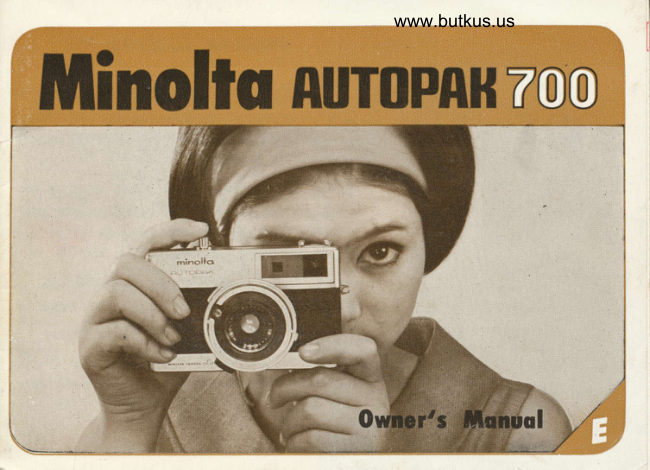
Minolta Autopak 700 User manual
User manual for Minolta Autopak 700. 31 pages in English. Read the original PDF, download or print a copy without registration.
31 pagesEnglish7.1 MB PDF
Loading your manual…Open PDF directly
Document details
- Brand
- Minolta
- Model / document
- Minolta Autopak 700
- Document type
- User manual
- Language
- English
- Pages
- 31
- File size
- 7.1 MB
- Category
- Film cameras
- Document date
- Not specified in catalog
Search available document text
Find a term, then jump to its page in the original PDF. Image-only pages may not be searchable; check the PDF for exact wording and diagrams.
Page 2 · Read text
MINOTTA AUTOPAK 7OO

                           Your new Minolta Autopak 700 camera
                              combines maximum operating simplicity
                             with performance worthy of the techni-
                                  cal equipment.

                                    the #126 type cartridge film load-d)                         withMinolta Autopak 700 is designed for use
                             ing system. #126 type cartridge has
                             the following features  :
                           1. Instant loading and unloading.
                           2. Automatic setting the exposure
                                       control for the film speed
                           3. No filrn rewinding.
View original page 2Page 3 · Read text
www.butkus.us

l.  Minolta Autopak 700 is especially designed to apply to the #126 cartridge.
   Some special features of this system are:
     (1) Instant loading and unloading
     (2) Automatic adjustment of film speed
     (3) No need of film rewinding
Z. Built in highly accurate CdS exposure meter.
   Minolta Autopak 700 is equipped with powerful, accurate CdS exposure meter just
   above the lens. It reads the light that reaches the lens.
]. Minolta Autopak 700 has three-way exposure system.
     (1) Completely automatic. Set the camera on "A" (automatic). Focus and
           shoot. That's all. The camera automatically calculates the available
            light, sets the correct aperture and shutter speed by itself.
     (2) Manual operation. You select the shutter speed and the aperture de.
          pending upon the available lieht.
     (3) Exposure value system. Exposure meter guides you to correct exposure.
[. Automatic filter compensation. The Minolta Autopak 700 automatically compen-
   sates for exposure factor.
View original page 3Page 5 · Read text
www.butkus.us


Type: Automatic ED camera with built.in CdS exposure meter and equipped with
       #126 type cartridge sYstem.
       Picture size is 28.5x28.5 mm on 72 or 20 exposures per roll.
Lens: Rokkor 38mm F /2.8, 4 elements in 3 groups.
Shutter: SEIKO LA       Automatic operation-program (EV 8 to EV 17)
       Manual operation-l730 to I/250 sec. and B (bulb), f. 2.8 to f. 22,
Flash synchronization: For flash bulbs-1/30 !9c.                     For electronic flash-all speeds.
Viewfinder:   Bright-frame viewfinder with coupled rangefinder.
            Exposure guide marks (EV number) in the viewfinder.
             Parallax correction device.
Focusing:  Minimurn focus distance is 2.6 feet (0.8m).
Exposure meter :  Ilighly accurate CdS exposure meter, completely covers the range
               from EV 8 to 17 in automatic operation.
Film speed range: ASA 25 - 400, DIN 15 - 27.
Others : Lever type film advance with one action.
         Cordless flash contact.Accessories: Lens shade 67 q).  Filter (55@)
              Exclusive flash gun with shoe contact
              Exclusive self-timer
Size and weight: 47/ex3r/Lx2:t4  in. (125x78.5x61 mm)
                     18.3 oz. (520 e)
View original page 5Page 8 · Read text
!   !x/]                                                     1 _x"r.rr!ri. 'ata)-evj     f /{,[dJI :1. To place or replace the battery,       2. When'installing th.e new battery
   unscrew the battery cover with a       (Mallory RM 625, Eveready E 625,    co.in by turning to a counterclock-       or General No. 625),be sure the plus
    wtse.                                        side is always up towards you.
Notc:  . When the carrtera is left ttnused, ii is adl'aisaltle to retn3ve the ltattery to         insure its lonser life.
              . The average iife of the battery is 14-18 months in nonnal condition.
              . The meter needle does not move without. loading cartridge
View original page 8Page 9 · Read text
www.butkus.us


                     The camera may be held horizOntally.
                                       It  is best to hold the camera firmly
                             against forehead and release the shutter
                        with a slorv pressure in order to avoicl
                                 all movements and insure sirarp nega-
                                     tives.n
                                       It is best to focus with the right eye
                             to permit free and rapid use of the filtn
                         advance lever.
                   The lever contains a double-exposure
                          prevention device; the shutter locks
                              after eacl: picture is taken.
View original page 9Page 11 · Read text
www.butkus.us

Advance lever, aim the camera    4. Compose your picture in the view-
towards subject, and look through        flnder and focus on the subject.
the viewfinder. If the meter need-lein the viewfinder is in anywherebetween red areas at the too andbottom of the scale, it meani thatthe exposure meter automatically
selects cor|ect exposure.


                                                                                        l0
View original page 11Page 13 · Read text
www.butkus.us
      TOADING

1. Push the back cover lock upwards,    2. Place a cartridgc in thc carncra, as
  and it will snaps open. 'I'lten swing        illustrated. In this case. be sure to
  out the cover as far as it will go.         place the large cylindrical end on the
                                               right side of the back of the camera.


                              bryry

                                                                                                  t2
View original page 13Page 15 · Read text
www.butkus.us


NOTE:
I  The number ttiat appears in the hlm
   counter window on the back cover
   of the camera shows the exposure
   number.
I  One or two of the same number may
   apppear in duplicate.
j  Affer each picture taken, you.must
   operate the film advance lever until
     it completely stops, disregarding the
   exposure number in tlie film counter
   window.


                                                                                           l4
View original page 15Page 16 · Read text
1. USE THE AUTOMATIC SYSTEM
  (l)  Line up the red A on the shutter speed ring with the black pointer and the
      red pointer on the diaphragm lever with the red A on the diaphragm ring.
 (2) Look through the viewfinder. The exposure meter scale in the viewfinder will
      tell you if light is too dim or too
     bright for correct exposure.  If the
    meter needle is in the red area at
     the top of the scale, tbere is too
      little light, If the needle is in the
     red area at the bottom of the scale,
     there is too much light.
(3) If the meter needle is in anywhere
    between the red areas, focus on the
     subject and press the shutter re.                                                               1
      lease.                                                                                                                                                                     i
l5
View original page 16Page 18 · Read text
2. OPERATE THE CAMERA MANUALLY
For unusual conditions or special techniques, such as flash photography, you may
want to operate the camera manually. With this system you select the shutter
speed and the aperture yourself depending on the subject conditions and the effects
you want to achieve.
(1) To set the camera for manual op-    (2) Now you are in complete command     eration, push the AUTO release       of the camera and can set any
     button and turn the shutter speed         speed or aperture you wish.
     ring and diaphragm lever, so that
     the double AA marks are not align-
    ed with the pointers.


                                                                 www.butkus.us
View original page 18Page 19 · Read text
3. USE THE EXPOSURE METER SCALEwww.butkus.usAS A GUIDE

?    The exposure meter works even when the automatic system has been disengaged. i      It will guide you to perfect exposures when you are operating the camera manually.
    You may set either shutter speed or aperture first.
    (A)  If you set shutter speed first, look          the diaphragm lever, and you are
          through the viewfinder at the ex-         ready to take a perfect picture.
          posure meter scale. The indicator    (B)  If you set aperture first, set the           needle will point to a number. Set        number in the EV window turning            this number in the EV window lo.          the shutter speed ring.          cated on the lens barrel, turning
View original page 19Page 20 · Read text
NOTE:
(1) You can not use the R posi-
     tion on the shutter sPeed
    ring when using exposure
     value system.
(.21 The aperture may be set
    between the number shown
   on the diaphragrn ring.
    However, this c&n not be
    done on the shutter sPeed
      ring.


19
View original page 20Page 21 · Read text
www.butkus.us


Shutter speed:
The shutter speeds of this camera are I/30, 1/60, l/125, and l/250 second.
The B position, or bulb, enables you to keep the shutter open as long as the
shutter release button is pressed down. When using the camera in manual
operation or as a exposure value system  it is recommended that the slowest
shutter speed be l/60 sec. and for action photography a fast shutter speed
be used l/250 sec.
Aperture:
The aperture, as well as the shutter, determines the light volume which
will strike to thefilm. However, the aperture also affects focus (Seepage 21)'
The smaller the F value, the larger the aperture opening and vice versa.
Eaclr F stop higher increased the amount of exposure time necessary by 2.
The F stop of this camera ranges from 2.8 to 22.

                                       '8        11   16    22   F  No.             2.8       4       5.6

                                                                                                                    7/u                                                                                t/n                                                     r/z         t/4      t/e     Light Voiume  I                              Ys

                                                                                      20
View original page 21Page 22 · Read text
When a lens is accurately focussed
                                    on a subject there exists a certain
                                           depth considered to be in focus both
                                                          in the foreground and the background
                                              of the subject. This is called depth-
                                                     of-field. This becomes deeper as the
                                 ft-P    aperture opening is made smlller
                                                     (closing diaphragm), and smaller as
                                              the aperture opening is made larger
                                            (opening diaphragm). Thus, ap-
                                                       propriate aperture opening is necessa-
                                       ry in order to achieve depth in a
                                            photograph. The illustration shows
                                                    the relationship between the aperture
                                        opening and the depth-o1-field.
       F-
2l$-$
View original page 22Page 25 · Read text
www.butkus.us

Look through the viewfinder and put        If you want to check the actual dis-
your subject in the diamond shape in     tance after you have focused, look at
the center of the viewfinder. When the     the numbers of the distance scale in-
subject is out of focus you will see a     dicated in meter and feet on the bottoln
double image. Turn the focusing ring     of the lens barrel.
and the subject will dissolve into a
sharp single image. Now you know you
are in perfect focus and ready to shoot.


                 out of focus                                  in focus
                                                                                                   tn
View original page 25Page 26 · Read text
In the viewFnder you will see a bright frame surrounding the visual field. The
 area within this frame is what appears on the film. The frame, therefore, is a
 guide so that you cannot inadvertently chop off areas you want to appear on the
 photograph.

                                      Parallax Correction:
                                      Parallax is the difference between what the
                                       lens sees and what you see in the viewfinder.
                                  This difference occurs only when the subject
                                          is close, within 3 feet or I meter. In your
                                   Minolta Autopak 700 horizontal parallax is
                                      automatically corrected. As you focus on a
                                         close subject, you will notice the bright frame
                              moves horizontally in order to give you a
                                       correct field of vision. For vertical parallax
                                         correction the picture should be within the
                              arrow mark upper left side of the bright            www.butus.us
                                 frame in the viewfinder.
25
View original page 26Page 28 · Read text
UNTOADIl{G

\(  )'l'1.     [),,  I]r)l  ()l)('li  titt'   ir;r, k     l. After the last exposure (I2 or 20), operate the
               {.i;\r'l'illrlil   ;rll  1i11' 11'.1i1,'r      film advance lever until the leader paper disap-                                 pears in the film counter window, before you
             lr.rirr'r  lr.t'r,li'.r1,1)r'.lrt"J     open the back of the camera.
              ir           i iir'    l:it:r      , ,,tllll,   {     2. Open the back cover.
                11,;1rjr,\\                                3. Take out the cartridge by turning the camera                                over to allow the cartridge to fall into your
                                       palrn giving slight shakes to the camera.


 27
View original page 28Page 29 · Read text
www.butkus.us

                           Flash is recommended for night shots, or for
                                   shooting in shaded areas. Your Minolta Autopak
                              700 has its own cordless Minolta Flashcube Gun
                            or DUO-FIT flash gun which connects directly
                              with the camera and also accepts any other flash
                             guns or electronic flash guns. When using flash
                             6ulb set the shutter speed at 7/30 second (marked
                                      in red). To determine the correct aperture, refer
                            to the guide number of the bulb you are using
&                         andFor theelectronicinstructionsflashwhichit synchronizesaccompany thewithbulbs.any
llc*                               shutter speed.                       With the guide number known, the correct
tF$                               aperture can be determined by using the following
                                   formula:
                           Aperture:-   ^+-DistanceGuide Numberto Subject
                                                      (guide number) 80  :F8                                      Example:                                                 10 (feet)
                        Any standard flash gun will fit into the accessory
                             shoe provided on top of the camera. Be sure to
                                    insert the flash gun cord into the synchro terminal
                          on the camera. However your Minolta Autopak
                              700 camera has designed to operate with the new
                             Minolta Flashcube Gun or DUO-FIT flash gun
                           which features cordless operation.           Zg
View original page 29Page 30 · Read text
Minolta Lens Shade:
                        The lens shade prevents extraneous harmful light
                             from entering the lens, and is recommended for
                                      all out-door photography or flash photography.  AV                                Minolta Filters:
                                Filters are very useful  throughout the year to
                               capture color tones as  they are seen with the
                            naked eye. Filters are also useful for creating                                various effects. A UV and a Yellow fllter are
                                     available.
                                Minolta Mini 35 lI projector:
                                Small, light and compact, the Minolta Mini 35 1l
                                  projector comes with carrying case. This handy
                                            little projector provides amazing projection power.
                            Automatic slide changer, conversion lens and
                              blower are available as optional accessories.


29
View original page 30Page 31 · Read text
www.butkus.us
ffi.

                                     Minolta DUO-FIT Flash Gun:
                                      This compact and powerful flash gun can be easily
                                        attached onto the accessory shoe of the camera,
                               and no cord is needed. Not only for Minolta
                               Autopak 700 camera, this ffash gun can also be
                                     used for other cameras, since a cord is built in
                                       the flash gun.


                                       Minolta Flashcube Gun:
                                    This tiny gun is designed to use exclusively the
                                  flashcube. Simply attaching the gun onto the
                                      accessory shoe of the camera with cordless flash
                                           contact, such as Minolta Autopak 700 or Hi-matic
                                           9. you can take nice flash picture.


                                                                                           30 ff
View original page 31From the M. Butkus archive. Original publisher and archive notices are retained.
Check the model and edition against your equipment.
PDF verified 2026-10-10.