Film cameras
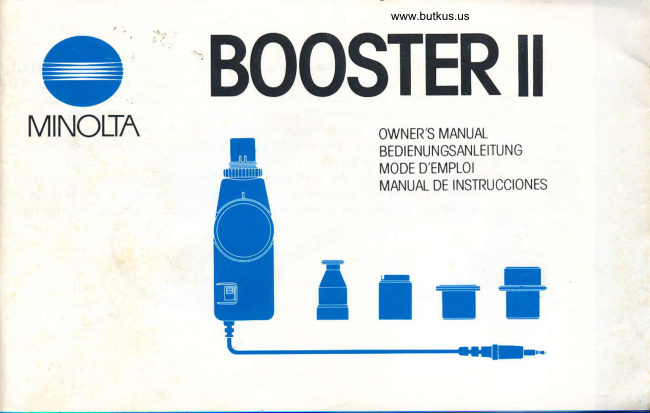
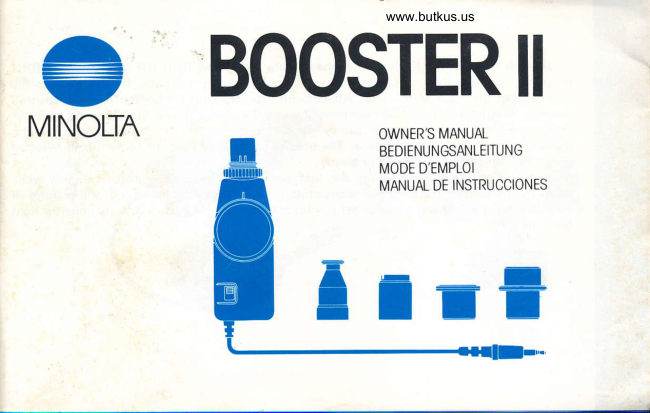
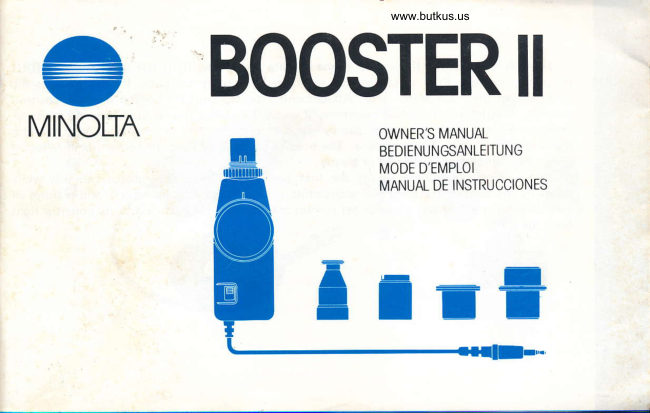
Minolta Booster II User manual
User manual for Minolta Booster II. 33 pages in German, French, Spanish. Read the original PDF, download or print a copy without registration.
33 pagesGerman, French, Spanish2.5 MB PDF
Loading your manual…Open PDF directly
Document details
- Brand
- Minolta
- Model / document
- Minolta Booster II
- Document type
- User manual
- Language
- German, French, Spanish
- Pages
- 33
- File size
- 2.5 MB
- Category
- Film cameras
- Document date
- Not specified in catalog
Search available document text
Find a term, then jump to its page in the original PDF. Image-only pages may not be searchable; check the PDF for exact wording and diagrams.
Page 2 · Read text
BOOSTER
               OWNER'SMANUAL
               BEDIENUNGSANLEITUNG
             MODED'EMPLOI
              MANUALDEINSTRUCCIONES


         Er-I
   =rEt
View original page 2Page 4 · Read text
Your Minolta Booster II connectsto the Minolta Auto Meter II/IIVIIIF  or Flash Meter II/III
to greatly increasetheir versatility for specialized metering functions.  lf also increasesthe
sensitivity of the Flash Meter IIIIII. Attachments included with the BoosterII enable positive,
accurate measurementof actual brightnessat an SLR eyepiece,on an SLR focusing screen or
view camera groundglass,through the eyepiece of a microscope or telescope,or at the film
plane of a full-frame 35mm camera. The booster can also be used for conventional reflected
light measurementsof 60 degreesor greater.
   Before using the Booster II  for the  first time, please read this manual carefully whil6
installing the battery, handling and acquainting yourself with the attachments and features of
your booster. In this way, you can get correct readingsand begin to realize its potential right
from the start.

                  *
View original page 4Page 6 · Read text
NAMES OF PARTS               POWER SWITCH

    Compensationscale                           The M inolta Booster II  is equ ipped with twoo
    F ilmp lane measurement setting                power switches to help prevent battery drain.
   Max im um-sensitivitysetting                     Power switch A  activates the booster when@o
@ Ord inary reflected-light setting                  pressed;ten seconds later the booster is automati-
    (no attachmentsused)                              cally turned off. This feature is particularly useful
   Power switch B                           when making on ly  one  or two measurements.o
    Battery-chambercover                    When using power switch  A, make sure powei
    Light receptor                                 switch B is set to "OFF"@o                                                                                                                                                            t.
    Attachment mou nti ng th read                many measurements, slide power  switch B  to@o Receptor hood                                   For continuous measurementor when making -
   Connectingplug                                    after use.@o Power switch A                               "ON". Be sure to slide the switch back to "OFF"
@ Spot-probe attachment
(D Eyepieceattachment                   NOTE
(E M icroscope attachm ent                      When using power switch A, be sure to pressit
(D Film plane attachment                               for about one second or the power may not turn
                                                   o n .
View original page 6Page 8 · Read text
METERING ON VIEW€AMERA GROUND.
                               GLASS OR SLR FOCUSINGSCREEN

   Flash Meter II                                When equipped with  the spot-probe attach-
      Set the measuring-modeselector of the meter    ment, the Booster II enables the user of a view
   so that "CORD"  appears in the mode indication    camera or  of an SLR camera with an accessible
   window. Pressthe meter'smeasuringbutton. lf the     focusing screen to make precise reflected light
   over-rangewarning lights or a number appears in     readings of electronic or bulb flash or of continu-
   the  f-number  readout window,  the  battery  is    ous illumination by measuringthe luminance oh
   serviceable;if the under-rangewarning comes on,     the focusing screen. Because the  light reading is_-
   replace the battery with a fresh one.                  taken at the film plane with view cameras,it is not-.
                                                  necessaryto make exposure correctionsfor bellows
   Flash Metor III                                     extension when taking close-upphotomacrographs.
      Slide the measuring-modeselector of the meter     (For  close-up readings with SLR  cameras see
   so that "CORD" or "AMBl" appearsin the display    "Metering through a bellows," p.17.1
   window. Pressthe meter's rneasuringbutton.  lf the        Calibration with any of the four meters must be
   over-range signal or an f-number appears in the    done  under  continuous-light conditions. Even
   display window, the battery is serviceable;if the    when you plan to measure electronic or bulb flash
   under-range warning appears, replace the battery     with  a flash meter, continuous-light calibration
   with a fresh one.                                must be completed fi rst.


f i i l . , .
View original page 8Page 9 · Read text
Calibrating for view cameras
1 . Auto Meter II:                                       Flash Meter II/III:
      Set  film  speed and move the  incident/          Note the measuring time and f-number in
       reflectedselectorto "lNC."                            the display window.
   AUIO MEtEr III:                                          6. Move the receptor hood back to  its recessed
      Set f i lm speed.                                     position and screw the spot-probe attachment
   Auto Meter IIIF:                                    onto the Booster II.
       Slide mode-selectorswitch to "AMBl"  and      7. With the camera attached securely to a tripod,
       set film speed.                                  focus at infinity and point the lens at the same
   Flash Meter II:                                       surface as in step 4.
      Set  f i lm speed and move the measuring-     8 . Set the lens aperture at t15.6, or  if the lens'
       -     mode selector so that "COR D" appears in      maximum aperture is smaller than f 15.6,set the
      the mode indication window.               m ax im u m aperture.
   Flash Meter III:                              9 . Using a focusingcloth or other suitablematerial
      Set the film speed and slide the measuring        to shield the groundglassfrom stray light, place
     mode selector so "AM B l" appears in the         the  tip  of  the  spot-probe attachment   f lat
      display window.                                  against the groundglass and push the meter's
2 . Plug the booster into the meter's accessory-      measuring button.
   receptor jack.
3 . Extend the booster's receptor hood as far as it
    will go and turn the compensationdial so that
   the index is opposite the "L".
4. Turn on the booster's power and point its light
   receptor toward an evenly illuminated surface
   (such as a wall or l8-percent gray card). Press
   the meter's measuringbutton.
5 . Auto Meter II/ilI/IIIF:
      Note  the exposure value or  the  shutter-
      speed/f-nu mber combi nation.
                            www.butkus.us
View original page 9Page 10 · Read text
Calibration for SLR cameras
10. Turn the compensation dial until the reading is   CAUTION
    the same as the one obtained in step 5.               perform the calibration BEFORE loading film
    Auto Meter II/III/IIIF:                                 into your SLR camera.
       Continue  pressing the measuring button
       while turning the compensationdial.              1. Auto Meter II:
    Flash Meter II/III:                                     Set  film  speed and move the  incident/
       Press the measuring button every time the            reflectedselectorto "lNC."
       compensation dial is moved to check each       Auto Meter III:
      new reading.                                      Set fi lm speed.                                          )
    Record the setting obtained on the booster's       Auto Meter IIIF:
    compensationdial.                                       Slide the mode-selectorswitch to "AMBI"
                                               speed'
 NorE                                               ,.":llr':llrm
  o   lf  the reading obtained in step 5 cannot be           Set film speed and move the measuring-
    matched even with the booster's compensation        mode selector so that "CORD"  appears in
     dial set at "H", pleaserefer to p.21 .                      the mode indicationwindow.
  o Becauselight transmissionthrough the ground-        Flash Meter III:
    glassmay not be uniform at different ooints on           Set the film speed and slide the measuring
      its surface, it  is best to  calibrate and .make        mode selector so "AMBI"  appears in the
    readings at the same point when using the           display window.
    booster with the spot-probe attachment.
View original page 10Page 11 · Read text
2. Plug the booster into the meter's accessory-   7 . Turn on  the booster's power and press the
   receptor jack.                                      meter's measuringbutton.
3 . Screw  the  film-plane attachment  onto  the       Auto Meter II/II/IIIF:
   booster and move the compensationdial so that          Note  the exposure value or  the shutter-
   the index is opposite the "C".                         speed/f-numbercombi nation.
4 . With the camera attached securely to a tripod,        Flash Meter II/III:
   focus on an evenly illuminated surface (such as         Note the measuring time and the f-number
   a wall or 18-percentgray card).                               in the displaywindow.
5 . Set the aperture ring of the lens to f/5.6 and     8. Remove the film-plane attachment from the
   the camera's shutter-speedselector to "bulb".        camera's film    f rame aperture. U nscrew the
   Open the shutter.                                 attachment counterclockwise from the booster.
   A  lockable cable re{ease, such as Minolta's       Close the shutter and the back cover of the
   Cable Release II,  can be used to  hold the      cam era.
   shutter open.                                   9 . Screw  the  spot-probe attachment  onto  the
6. Open the back cover of the camera. Fit the       booster. Using a focusingcloth or other suitable
   raisedframe guide of the film-plane attachment       material to  shield the focusing screen from
    into the camera's film-f rame aperture and press       stray  light, place the  tip  of  the spot-probe
    lightly to hold it in place.                          attachment flat on the focusing screen.


                             www.butkus.us
View original page 11Page 12 · Read text
1 0 . Set the aperture ring of the lens to f/5.6 and   NOTE
    use the stopdown  button or lever on the lens     o   lf  the reading obtained in step 7 cannot be
     or camera body  to close down  the lens dia-      matched even with the booster's compensation
    phragm. With the camera focused on the same        diaf set at "H"  , pleaserefer to p.21 .
    surface under the same illumination as that              lf the focusingscreenor lens used in calibrating
    measured in step 4, pressthe meter's measuring       the booster is changed, the booster must be
    button.                                              recalibrated using the applicable combinatiogt
1 1 . Turn the compensation dial until the reading is         to obtain proper exposure readings.
    the same as the one obtained in step 7.             Becauselight transmissionthrough the focusing'
    Auto Meter II/III/IIIF    :                             screen/groundglassor  lens in use may not be'
       Conti nue  pressing the measuring button        the same from  the center to the edges, spot-
       while turning the compensationdial.             probe readings should be made, if possible, at
    Flash Meter II/III:                                     the same point  at which  the  booster was
       Press the measuring button every time the        calibrated.
       compensation dial is moved to check each
      new reading.
    Record the setting obtained on the booster's
    compensationdial.


                                                                                                    "   i* *;^
View original page 12Page 13 · Read text
TMaering
   To measure the  light passing through a view-           Auto Meter II:
camera groundglass or an SLR focusing screen,              using the meter scales
proceed as follows:                                        Auto Meter III/IIIF:
1. With the camera attached securely to a tripod,               pressing the time increase/decreasebut-
   focus on the subject and compose the picture.              tons (with Auto Meter IIIF's mode-selec-
2. Set the lens aperture of the camera to f/5.6.  lf                  tor switch at "AMBl")
   the mdximum  lens aperture of  your  view-           Flash Meter II:
   camera lens  is smaller than  f/5.6,  set the              using the  indicated readings and  the
   maximum aperture.                                      aperture/speedconversion dial found on
3.  For view cameras,move the compensation dial               the back of the meter
   so that the index is opposite the setting found           Flash Meter III:
    in step 10 of the view-camera section. When              by changing the shutter speed with the
   using an SLR, move the dial to the setting             meter set to "AMBl" mode
   found in step 11 of the precedingsection.             For electronic/bulb flash measurements:
4. Plug the booster into the meter's accessory-         a. Set  the  proper  flash-sync speed on  the
   receptor jack and turn on its power.                    camera.
5. Using a focusing cloth or other suitable material          Auto Meter IIIF (electronicf lash only):
    to  shield the groundglass or focusing screen               Slide the meter's mode-selector switch to
   from  stray light, place the spot-probe attach-            "FLASH"  (either 1/60 or 1/125 sec.).
   ment flat on an image area of the groundglass          Flash Meter II/III:
    or focusing screen you wish to.reproduce as a              Set the flash-sync speed and applicable
   mid-tone. Press the meter's measuring button.           mode (cord, non cord, or multi) on the
6. For continuouslight:                                        meter.
     From the obtained meter reading, select a           b. Test  fire  the  flash and  set  the camera
      convenient shutter speed and aperture com-           according to the meter readout.
      bination.
                              www.butkus.us. l - : , r u , . *             r i  .        - , . ' - , - . . " . . . . - . 1 ' . . : ,'
View original page 13Page 14 · Read text
METERING THROUGH THE EYEPIECEOF SLR CAMERAS

    Fitted with the eyepieceattachment, the booster can make centered,circular, through-the-lensexposure
readings through the eyepiece of an SLR. This is especiallyuseful for SLR cameraswithout  built-in TTL
light-meteringsystems or when connected to the Auto Meter IIIF or Flash Meter II or III for TTL measure-
ments of electronic or bulb flash.

Cameras with manual stop4own  mechanism               1. Auto Meter II:
                                                        Set  film  speed and move the  incideni/
Calibration                                                   reflected selector to "lNC."                              /
   Calibration with any of the f ive meters must be       Auto Meter III:
done under continuous-lightconditions.Even when           Set f ilm speed.
you plan to measureelectronicor bulb flash with        Auto Meter IIIF  l
a flash meter, continuous-lightcalibration must be            Slide the mode-selectorswitch to "AMBl"
completed first.                                      and set f ilm speed.
                                                        Flash Meter II:
CAUTION                                               Set film speed and move the measuring-
   Perform the calibration BEFORE loading film         mode selector so that "CORD"  appears in
into your SLR camera.                                     the mode indicationwindow.
                                                      Flash Meter III:
                                                         Set the film speed and slide the measuring
                                              mode selector so "AMBI"  appears in the
                                                          displaywindow.
                                             2 . Plug the booster into the meter's accessory-
                                                        receptor jack.
                                             3 . Screw  the    f ilm-plane attachment onto  the
                                                      booster and turn the compensation dial so that
                                                         the index is opposite the "C".

                                                                                                                                                    ii**lin;-.      , ,
View original page 14Page 15 · Read text
4. With the camera attached securely to a tripod,     7 . Turn on  the booster's power and press the
   foius on an evenly illuminated surface (suchas       meter's measuringbutton.
   a wall or 18-percentgray card).                      Auto Meter II/ilI/IIIF:
5. Set the aperture ring of the lens to f/5.6 (or if          Note  the exposure value or  the  shutter-
   the  lens' maximum aperture is smaller than          speed/f-numbercombi nation.
   f15.6, set the maximum  aperture). Set the        Flash Meter II/III:
   camera'sshutter-speedselector to "bulb". open          Note the measuringtime and the f-number
   the shutter. A  lockable cable release,such as             in the display window.
   Minolta's Cable ReleaseII, can be used to hold        For cameraswith a lens that has a maximum
   the shutter open.                                  aperturesmallerthan f 15.6:
6. Open the back cover of the camera. Fit the        Auto Meter II:
   raisedframe guide of the film-planeattachment          Note the shutter speed opposite f/5.6.
   into the camera's film-frame aperture and press       Auto Meter III/IIIF;  Flash Meter II/III:
    lightly to hold it in place.                         Change the  shutter speed so  that   f 15.6
                                                                                                        -            "';":ii'.                        appears in the display window. Note that
                                                                                                           irult'
                                                                                                              ,i!                             \i;:.                          shutter speed.
                                             8 . Remove the film-plane attachment from  the
                                                   camera'sfilm aperture. Unscrew the attachment
                                                     counterclockwise from  the booster. Close the
                                                         shutter and back cover of the camera.


                              www.butkus.us
View original page 15Page 16 · Read text
9 . Screw  the  eyepiece attachment  onto  the    1 1 . Turn the compensationdial until the readingis
    booster and slide it over the camera's eyepiece       the sameas the one obtained in step 7.
        f rame.
1 0 . Set the aperture ring of the lens to f/5.6 (or to        For cameraswith a lens that has a maximum
    the maximum aperture if smaller than f/5.6)        aperture smallerthan t 15.6:
    and use the stop-down button or lever on the        Auto Meter II:
    lens or camera body  to close down  the lens          Turn the booster's compensation dial until
    diaphragm. With  the camera focused on the            the shutter speed noted in step 7 is oppositb
   same surface under the same illumination as           the lens'maximum aperture.                          /
    that measured  in  step 4, press the  meter's        Auto Meter III/IIIF;  Flash Meter II/IIIi                  .
    measuringbutton.                                     Set the shutter speed noted in step 7. Turn
                                                            the compensation dial until the f-number
                                                        equal  to  the  lens' maximum  aperture
                                                     appearsin the meter'sdisplay window.

                                                  Record the setting obtained on the booster's
                                                compensationdial.

                                        N O T E
                                                                                                    lf  the reading obtained in step 7 cannot be
                                              matched even with the booster'scompensation dial
                                                      set at "H", pleaserefer to p .21 .
View original page 16Page 17 · Read text
Metering
1. With the camera attached securely to a tripod,          Flash Meter II:
   focus on the subject and compose the picture.             using the  indicated readings and  the
2. Set  the  lens aperture to  115.6 (or  to  the             aperture/speedconversion dial found on
  maximum aperture if smaller than f/5.6). Use              the back of the meter
   the stop-down button or lever on the lens or           Flash Meter III:
   camera body to close down the lens diaphragm.            by changing the shutter speed with the
3. Screw  the  eyepiece attachment  onto  the             meter set to "AMBI" mode
   booster and slide it over the camera's eyepiece       For electronic/bulb flash measurements:
   frame.                                                       a. Set  the  proper  flash-sync speed on  the
4. Move the compensation dial so that the index is         camera.
   opposite the setting found  in step 11 of the          Auto Meter IIIF (electronicflash only):
   precedingsection.                                           Slide the meter's mode-selectorswitch to
5.  Plug the  booster  into  the meter's accessory-           "FLASH"  (either 1/60 or 1/250 sec.).
   receptor jack and turn on  its power. Push the           Flash Meter II/III:
   meter's measuring button.                                 Set the flash-sync speed and applicable
6. For continuouslight:                              mode (cord, non cord, or multi ) on the
     From the obtained meter reading, select a             meter.
      convenient shutter speed and aperture com-          b. Test  fire  the  flash and  set  the camera
      bination.                                           according to the meter readout.
      Auto Meter II:
         using the meter scales
      Auto Meter III/IIIF:
          pressing the time increase/decreasebut-
         tons (with Auto Meter IIIF's mode-selec-
           tor switch at "AMBl")
                             www.butkus.us
View original page 17Page 18 · Read text
Cameras without  manual stop-down mechanism

Calibration                                            Flash Meter III:
   Calibration with any of the five meters must be           Set the film speed and slide the measuring
done  under  continuous-light conditions. Even        mode selector so "AMBI"  appears in the
when you plan to measureelectronic or bulb flash          display window.
with  a flash meter, continuous-light calibration   2 . Plug the booster into the meter's accessory-
must be completed first.                                 receptor jack.
                                                    3. Extend the booster's receptor hood as far as lt
CAUTION                                                           will go and move the compensationdial so that
   Perform the calibration BEFORE loading film        the index is opposite the "L".
into your SLR camera.                              4. Point the booster's receptor toward an euenly'
                                                       illuminated surface (such as a  wall  or  18-
1. Auto Meter II:                                      percent gray card). Turn on the booster's power
      Set  film  speed and move the  incident/       and pressthe meter's measuringbutton.
        ref lected selector to "lNC."                     5. Auto Meter II/il/IIIF:
   Auto Moter III:                                     Note  the exposure value or  the  shutter-
      Set f ilm speed.                                 speed/f-number combi nation.
   Auto Meter IIIF:                                     Flash Meter II/III:
      Slide the mode-selectorswitch to "AMBl"           Note the measuringtime and the f-number
     and set film speed.                                          in the displaywindow.
   Flash Meter II:                               6 . Move the receptor hood back  to  its recessed
      Set film  speed and move the measuring-       position and screw the eyepiece attachment
     mode selector so the "CORD"  appears in        onto the booster.
      the mode indication window.
View original page 18Page 19 · Read text
7. With the camera securely attached to a tripod,
   focus on  the same surface under the same
   illumination as that measuredin step 4.
8. Slide the eyepieceattachment over the camera's
   eyepieceframe and pressthe meter's measuring
   button.
9. Turn the compensationdial until the readingis
   the same as the one obtained in step 5.
   Auto Meter II/ilI/IIIF:
      Continue pressing the measuring button
     wh ile tu rn ing the compensationd ia| .
   Flash Meter II/III:
      Press the measuring button every time the
      compensationdial is moved.
   Record the setting obtained on the booster's
   compensationdial.

NOTE
      lf  the lens used in calibrating the booster is
changed, the  booster must be  recalibrated to
obtain proper exposure readings.


                              www.butkus.us
View original page 19Page 20 · Read text
Metering
1. With the camera fastened securely to a tripod,           Flash Meter II:
   focus on the subject and compose the picture.             using the  indicated readings and  the
2. Screw  the  eyepiece attachment  onto  the             aperture/speedconversion dial found on
   booster and slide it over the camera's eyepiece             the back of the meter
      f rame.                                               Flash Meter III:
3. Move the compensationdial so that the index is             by changing the shutter speed with the
   opposite the  setting found  in step 9  of the             meter set to "AMBI" mode
   precedingcalibration section.                                                                                                                 )
4. Plug the booster into the meter's accessory-      For electronic/bulb f lash measurements:
   receptor jack and turn on  its power. Push the         a. Set the  proper flash-sync speed on  the
   meter's measuringbutton.                            camera.
5. For continuouslight:                                Auto Meter IIIF (electronicflash only):
     From the obtained meter reading, select a              Slide the meter's mode-selectorswitch to
      convenient shutter speed and aperture com-              "F LASH" (either 1/60 or 1/250 sec.).
       bination.                                           Flash Meter II/III:
      Auto Meter II:                                        Set the flash-sync speed and applicable
         using the meter scales                        mode (cord, non cord, or multi) on the
      Auto Meter III/IIIF:                                     meter.
          pressing the time increase/decreasebut-          b. Test  fire  the  flash and  set the camera
         tons  (with Auto  Meter   IIIF's mode-          according to the meter readout.
          selector switch at "AMBl")


                                                                                                                                                                                    ;e"L',..-    ..
View original page 20Page 21 · Read text
METERINGTHROUGH A BELLOWS    METERING THROUGH A MICROSCOPE
   For more  accurate metering when making
close-up photographs with  a bellows and SLR
camera, it  is best to calibrate the booster at each
centimeter graduation on the extensaon rail and
record the  result in graph form  to  follow  for
p reciseresults.


                              www.butkus.us
View original page 21Page 22 · Read text
With full-frame 35mm SLR and non-SLR cameras
                                             2 . Plug the booster into the meter's accessory-
Calibration                                             receptor jack.
   Calibration with any of the f ive meters must be    3 . Screw the  filmplane  attachment onto  the
done  under  continuous-light conditions. Even       booster and turn the compensationdial so that
when you plan to measureelectronic or bulb flash        the index is opposite the "C".
with  a flash meter, continuous-light calibration    4 . With  the  camera and  microscope adapter
must be completed f irst.                                securely attached to  the microscope, place a
                                                     piece of tracing paper or similar material on the
CAUTI ON                                                 slide stageand focus on it.
   Perform the calibration BEFOR E loading film     5 . Set  the  camera's shutter-speed selector  to r-
into your SLR camera.                                   "bulb" and open the shutter. A lockable cable /'
1 . Auto Meter II:                                       release,such as Minolta's Cable ReleaseII, can
      Set  film  speed and move the  incident/       be used to hold the shutter open.
       reflectedselectorto "lNC."                    6. Open the back cover of the camera. Fit the
   Auto Meter III:                                      raisedframe guide of the film-planeattachment
      Set f ilm speed.                                         into the camera's film-frame aperture and press
  AUIO MEtEr IIIF:                                            lightly to hold it in place.
       Slide the mode-selectorswitch to "AMBl"
     and set f ilm speed.
   Flash Meter II:
      Set film speed and move the measuring-
     mode selector so that "CORD"  appears in
      the mode indication window.
   Flash Meter III:
      Set the film speed and slide the measuring
     mode selector so "AMBI"  appears in the
      display window.
View original page 22Page 23 · Read text
7. Turn on  the booster's power and press the      9. When using an SLR-type camera, screw the
   meter's measuringbutton.                          eyepiece attachment onto the booster and slide
   Auto Meter II/IUIIIF:                                                            it  over  the camera's eyepiece frame. With
      Note  the exposure value or  the  shutter-      non-SLR cameras,screw the microscopeattach-
      speed/f-numbercombination .                   ment  onto  the  booster, remove the  micro-
   Flash Meter II/III:                                   scope's ocular, and insert the attachment into
      Note the measuringtime and the f-number        the microscope tube in place of  it.
        in the display window.


                                                             0. Pressthe meter's measuringbutton. Adjust the
                                                compensationdial until the indicated readingis
                                                         the same as the one obtained in step 7. Record
                                                         the setting obtained.

8. Remove the   f ilm-plane attachment f rom the   NOTE
   camera'sf ilm aperture. Unscrew the attachment               lf  the reading obtained in step 7 cannot be
   counterclockwise from  the booster. Close the    matched even with the booster's compensationdial
   shutter and back cover of the camera.              set at "H"  , pleaserefer to p .21 .

                              www.butkus.us
View original page 23Page 24 · Read text
Metering                                       F O R S T R O B E :
1. llluminatethe specimenand focus on it.            Reduce the  light output  by  placing tracing
2. Move the compensationdial so that the index is       paper or similar substanceover the flash guard
   opposite the calibration value found in step 10       window  or adjust the flash-to-subjectdistance
    in the precedingsection.                                  until f /5.6 is indicated.
3. When using an SLR-type camera, screw the
   eyepieceattachment onto the booster and slide   NOTE
      it  over the  camera's eyepiece f rame. When       Becausea reading of f/5.6  is below the Flash
   metering  for  non-SLR  cameras, screw the    Meter  ll's measuring range for film speed settingsz'
,  microscope attachment onto the booster. Then     of ASA 500 or over, the booster must be adjusted '
   remove the microscope's ocular and insert the     to yield an f-number within the meter's range when
   attachment into the microscope tube in place    using these film  speeds. To do  this, turn  the
    of it.                                        compensation dial to the setting indicated in the
4. Turn  on  the  booster's power and  press the     table for  the  film speed in use. Then turn the
   meter's measuringbutton.                      measuring-timeselectoruntil the f-number indicat-
   Auto Meter II:                                ed for this setting appears in the f-number readout
      Set the camera's shutter .speed to the speed    window.  Set the camera's shutter to  the speed
      opposite f/5.6 on the meter's dial.            shown in the measuring-timewindow.
   Auto Meter III/IIIF;  Flash Meter II/III:
      Adjust the measuring time  until  f/5.6  is
      indicated in the indication display window
      and set the camera's shutter to the speed
     shown in the measuring-timeindication.
View original page 24Related documents and language editions
From the M. Butkus archive. Original publisher and archive notices are retained.
Check the model and edition against your equipment.
PDF verified 2026-10-10.