Film cameras
Minolta Explorer Freedom Zoom EX Minolta 75W RIVA Zoom User manual
User manual for Minolta Explorer Freedom Zoom EX Minolta 75W RIVA Zoom. 26 pages in English. Read the original PDF, download or print a copy without registration.
26 pagesEnglish7.4 MB PDF
Loading your manual…Open PDF directly
Document details
- Brand
- Minolta
- Model / document
- Minolta Explorer Freedom Zoom EX Minolta 75W RIVA Zoom
- Document type
- User manual
- Language
- English
- Pages
- 26
- File size
- 7.4 MB
- Category
- Film cameras
- Document date
- Not specified in catalog
Search available document text
Find a term, then jump to its page in the original PDF. Image-only pages may not be searchable; check the PDF for exact wording and diagrams.
Page 1 · Read text
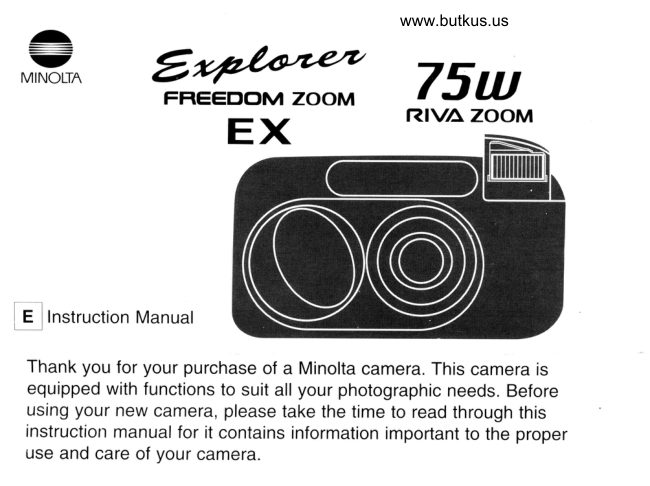
www.butkus.us a MINOLTN-  a@FI1EEDOM Z]OOM,            75u                                   Z:OOM       EX          RfV/a


I E llnstruction Manual

 Thank you for your purchase of a Minolta camera. This camera is
  equipped with functions to suit all your photographic needs. Before
  using your new camera, please take the time to read through this
  instruction manual for  it contains information important to the proper
 use and care of your camera.
View original page 1
Page 2 · Read text
I                                                                                             :i J". rXff;:SJ; o u r1u u d ro o .u                           l o r{} }e   0",,"n",  o,," r, o,11 Htll                                                       ""llffi H:[                                      ",
                                        (zo rg's) 6svz           :1q6;e6
                   ('q ,/e-t xglg-Z x Vrc-il wwVV x 9'99 x lzl
                                        s11or g1 'xorddy:ecueuro;red     (qseg             "/"Og lM 11oldxe y7)
       fueUeg ltuepeq Lunlqlll VgZLIC )oVqZLUC llo^-t ouo
   reldorp t- :('U Ol/Lue le lcehns) reldotg ituooz e6er.r.rr-;eeg         :JApUU/t/|Orn
 ('U S'Z -'ut 9l) ue'Z - ?'0:r,rlr.ugL'(U t'61-'ut 9L) ur6'9 - t'0
                                               - 9'6 'xordde :eu11 6ut;c{ceg:ur.ugz :(OOl OSt) e6ueg :'cos /
     1;orluoc firsuelur qlrM crleurqsell 'qsell u!-ll!nq 'olqelcerlou
                                   (qseI lnoLlltnn) euety'ces
        g'L :onrlp snonurluoc lolqtsscC pul/tl?r lc uels lenu"ul
      'burpeerql olne 'purnnor olne 'otuell lsrl ol ocuenpe olnv    :yodsuerl ul!J
     nf L ul OOZ'-.ZOSl Lulll popoc-X. ro;       ,,r"ffi
                                     :urr!g/ 'Ll'urpes- g'Znf :urulg7   :e6uer peeds Llrlll :/t - e'e nl
         :(OOL OSI) e6uer 6uue1ey1 lOuttelaur palq6tenn-raluoC         :ernsodx3
              Xe'?/L uorlecr;rubeur unurxefl :('U e'g - 'ul gL)
   0'L - txt'g:dn-eso;3'(--'u! 9L) -- ult'O:e$uet $ursncol
      1>1co; sncol rlllm r-ue1s{s snco}o}np parerlur onr}cp 'uleeq-e         :6ursnco3
                                                  sdnorO
                               r..lum suol urooz rennod 6'8-g'e/l wwgL-BZ     t ul sluotuolo t
                    sNo[vc rJ tcSds lvcl NH331
View original page 2Page 4 · Read text
Venmo @mike-butkus-camera  Ph. 2083
PayPal Name  Lynn@butkus.org      www.PayPal.me/lynnbutkus
View original page 4
Page 5 · Read text
@Mmm***Y**X*J*J

                                        13

1. Flash-mode indicator                    8. Film+ransport signals
2. Self-timer indicator                       9. Film-cartridge mark
3. Continuous-drive indicator              10. Landscape/Night View mode
4. Remote-control indicator                    indicator
5. Dateffime display (date model only)    11 . Night Portrait mode indicator
6. Low-battery symbol                    12. Close-up mode indicator
7. Frame counter                                       1 3. Subject-program pointer

    VIEWFINDER               1. Focus lamp (green)
                                      Glows: Focus confirmed
                                                 Blinks: Subject too close
                                      2. Flash lamp (orange)
    I()                                 Glows:Blinks quickly:Flash willFlashfire charging
                                                 Blinks slowly: Camera-shake warning
                                        3. Focus frame
                                        4. Close-framing guides
 ?
View original page 5Page 6 · Read text
www.butkus.us
Stepff
       ATTACHING THE STRAP
                        Attach the strap as shown.


                           'iitl
View original page 6Page 7 · Read text
Stepp
        INSERTING THE BATTERY

                              Your camera uses one 3-volt CR123A or DL123A lithium
                                    battery to supply power for all camera operations.
                   e Open the battery cover using a coin or
                               similar object.
      www.butkus.us

                @ Insert the battery according to the + and -
                        marks inside the battery chamber and snap
                            the cover closed.
                                        . Before removing an old battery, make sure the camera
                                              is off.

LOW BATTERY SYMBOL

                                                        lf the blinking low-battery symbol appears in the
                           data panel with the other indicators, you can still
                          use the camera, but the battery will have to be -,-)-Et1tj-                             replaced soon. L-r: O-!-:l

                                                    lf the blinking low-battery symbol appears alone
                             (date model: only the date/time display with the
                               blinking low-battery symbol), you cannot use the
                       camera until you replace the battery. The shutterr,FET=
                          cannot be released.
View original page 7Page 8 · Read text
Step;i                                            www.butkus.us       LOADING THE FILM

                        Use only 35mm, DX-coded film rated ISO 25 to
                            3200. ISO 400 or higher is recommended for taking
                     ?ou,. H,of"F,,,n,, DX      telephoto photographs or pictures in low light.
                                             . Do not use Polaroid instant 35mm film. Winding            136.*t
                      f:]-                        problems may occur.

                 O Slide the back-cover release down to open
                            the back cover and place the film cartridge
                                  into the film chamber.
                                                     . Always load and unload the film in subdued light.


                @ Extend the film tip to the "FILM TlP" mark,
                         making sure it lays flat.
          ffi-oooou


                @ Close the back cover.
                                           . The film automatically advances to the first frame and  j
                              appears in the data panel.
                                       .  lf the film has been loaded improperly, iJ will blink in the
                                data panel and the shutter will remain locked. Open the
                                back cover and repeat the loading procedure.
View original page 8Page 9 · Read text
rrcpf,tZT
        FULL AUTO OPERATION
                O Press the ON/OFF button to turn the
                       camera on.
                                          . The flash will pop up and the lens barrel will extend.
                                        . Press the ON/OFF button to turn the camera  off.
                                             . To conserve power, the camera automatically  turns off  if
                                                              it is not operated for more than eight minutes. The lens
                                       barrel and flash will retract.
                                        . Do not obstruct the lens while  it is retracting.
View original page 9Page 10 · Read text
FULL AUTO OPERATION  . CONTINUEDwww.butkus.us

               @ Look through the viewfinder and press the
             W side of the zoom control to move toward
                        wide angle or the T side to move toward
                              telephoto.
                                         . Do not hold the lens barrel; focus mav not be accurate.


               @ Align your subject within the focus frame
                      and press the shutter-release button
                          partway down.


                @ When the green focus lamp glows, gently
                           press the shutter-release button all the way
                      down to take the picture.
            i:-=lt        ffi                      . The flash will automatically fire in low light.   ^                                         . The film automaticallv advances to the next frame.
View original page 10Page 11 · Read text
CLOSE.FRAMING
                            Close-framing Guides
                   When your subject is closer than 1 .2m (4 ft.) at
                      75mm, first lock focus on your subject by pressing
                           the shutter-release button partway down, then
                        recompose your picture within the close-framing
                             guides.

                                        .  lf the green focus lamp blinks, your subject is closer
                              than the minimum focusing distance of 0.4m (16 in.) and
                                           will not be in focus. The shutter cannot be released.
                                        .  lf the subject is very close to the camera, the green
                               focus lamp will glow, but the picture will not be in focus.
View original page 11Page 12 · Read text
www.butkus.us
FOCUS LOCK
                   When your subject is located outside the focus
                          frame, you can first lock focus on your subject, then
                        recompose the picture as desired.
                O Align the subject within the focus frame and
                          press the shutter-release button partway
                     down until the green focus lamp glows.

                @ Without lifting your finger, recompose the
                              picture then press the shutter-release button
                                       all the way down to take the picture.
View original page 12Page 13 · Read text
Step$
        REWINDING THE FILM

                        The film will rewind automatically  after the last
                         frame has been exposed.
     :il   'lF-r-:g: lJ
                    When il appears and o blinks in the data panel,
                        open the back cover and remove the film.

www.butkus.us

  lf rewind stops before the film has been completely rewound and all indicators
 blink, DO NOT OPEN THE BACK COVER. Insert a fresh battery then press the
 rewind button.

MANUAL REWIND

                       To begin rewind before the end of the roll, turn the
                       camera on and gently press the rewind button
                             using a pen or similar object.
View original page 13Page 14 · Read text
www.butkus.us
      USING THE BUILT-IN FLASH
                           Autoflash mode (^,i" ), autoflash with red-eye
                            reduction (^;"'), manual fill-flash (t) or
                              flash cancel (€t) can be selected.                .b*   t€                        Press the flash-mode button until the desired
                             indicator appears in the data panel.              oo U @
                       The sequence  is as shown.
             ][r- I AUro                                                                                            I +[T@lI AUro         I     . When you turn the camera on, the built-in flash is set to
                                   autoflash or autoflash with red-eye reduction, whichever
                         mode was last used.E]-FIi
                         FLASH RANGE
         rso 100       rso 400    The range of the built-in flash depends
                                  on the film speed and focal length you
2Bmm      0.4-5.9m       0.4-11.8m    are using. To ensure proper exposure,        16 in - 19.4 ft.   16 in - 38.7  ft.                               make sure your subject is positioned
75mm      0.4-2.3m         0.4-4.6nr     within the flash range.
        16 in - 7.5 ft.   16 in - 15.1 ft.
View original page 14Page 15 · Read text
. Do not hold the flash down; the shutter may not
                   release.
                     . For vertically framed pictures, hold the camera so the
                   flash is on top.


         FLASH LAMP
              While pressing the shutter-release button partway down:
                        . The orange flash lamp will glow whenever the built-in             : ::  :,
  {t!}              ,i!!-+          flash is on.
ilry                   . When the orange flash lamp blinks slowly, your scene is
/fi*t-_A @        too dark for a sharp hand-held picture. Use flash or
                  place the camera on a tripod.
                       . When the orange flash lamp blinks rapidly, the flash is
                  charging. Wait until it glows steadily, then take the
                   picture. Flash recharge time is approximately 0.3 to 7
                 seconds.
View original page 15Page 16 · Read text
www.butkus.us
AUTOFLASH MODE                            ^fu
In autoflash mode, the flash will fire in low light.

RED.EYE REDUCTION MODE                                                   ^,'.P
                                   In this flash mode, the flash will fire a few short
                              bursts before the main flash burst to reduce the
                              "red-eye" effect which occurs when photographing
                           people in low light.


        +l                                                ';-r._i:    '    r-r:r{r:'"t *l    Press the flash-mode button until ^#"' appears        AUTO
                                       . Before taking the picture, warn your subjects that the  tb     C::=      in the data panel, then take the picture.
                                      flash will fire a few short bursts before the picture is
                                   taken.
                                         . The orange flash lamp will blink indicating preflash.   t
View original page 16Page 17 · Read text
MANUAL FILL-FLASH MODE +
                      The flash will fire with every shutter release
                             regardless of lighting. This can be used to reduce
                            harsh, unflattering shadows on your subject's face
                             or illuminate your subject when it is back-lit.


                                                        appears   L:                Press the flash-mode button until t
     so                in the data panel, then take the picture. %       C:::)
 T


FLASH CANCEL MODE ,g'
                         With flash-cancel, the flash will not fire. This mode
                          should be used when photographing  twilight
                        scenes or subjects that are beyond the flash
                             range.


                        Press the flash-mode button until €r appears    o                                           !'
                               in the data panel, then take the picture.
                                           . When the flash is cancelled, shutter speeds may be tbscW
                                   slow. Placing your camera on a tripod is recommended.
   f
View original page 17Page 18 · Read text
www.butkus.us

    SELF-TIMER
                     The self-timer delays release of the shutter for
                         approximately 10 seconds after the shutter-release
                          button is pressed.
               C Place the camera on a tripod and press the
                          self-timer/drive-mode button until €)
                       appears in the data panel.

              @ Align your subject within the focus frame,
                              press the shutter-release button.a  _:-\-z-l -7  --l-------r\/l    \ll          then /7=\:,           ,t: -\                 . The self-timer indicator in the data panel and the self-//   I      \\ /1.z=-r\\\            ((              \}lt{t   \                 t/\\\\     \                  \\,-1l)1 /il1//            timer lamp will blink slowly during the countdown and
                                  blink rapidly just before the shutter releases.\-iYz
                                       . Self-timer is automatically cancelled after the shutter is
                                 released.
                                         . To stop the selttimer, press the self-timer/drive-mode
                                   button. Cancel the self-timer operation by turning the
                           camera off or pressing the selttimer button until {r
                               disappears from the data panel.
View original page 18Page 19 · Read text
CONTINUOUS.DRIVE MODE

                                     In this mode, the camera continuously takes
                                 pictures and advances the film as long as the
                               shutter-release button is held down.

                 O Press the self-timer/drive-mode button until
                                 EI! appears in the data panel.

                @ Press the shutter-release button down and
                                  hold.
                                                 . Without flash, the shutter will release every 1.5
                                  seconds; with flash, the shutter will release when the
                                      flash is charged.
                                                 . Continuous-drive mode remains selected after you
                                         finish the series.
                                                    . The subject-program mode remains selected as long as
                                you are pressing the shutter-release button. When you
                                have finished a series, the subject-program  selection is
                                       reset to auto.
View original page 19Page 20 · Read text
www.butkus.us
MM
      SUBJECT-PROGRAM SELECTION
-                        camera'sSubject-Programfully automaticSelectionoperationallows youto suitto tailorthe  the
                              subject. lt provides optimal camera settings for    d?b @ffiffi
                            close-ups (Close-up ffi), portraits at night (Night
                                 Portrait ffi), and distant subjects or night scenes
                            (Landscape/Night View [).
                        Press the subject-program selector until the
                           pointer is above the desired indicator. @--b[M_]
                                                     . After taking a picture in one of the subject-program
                              modes, the camera will return to full-auto mode. r-llt+E-[Cl
View original page 20Page 21 · Read text
CLOSE-UP MODE M
                              This mode enables you to take pictures of subjects
                            as close as 40cm (16 in.).


                 O Press the subject program selector until the                                             ,ff               "i;*jv                                        ':J ,- # r*\d@6*                               pointer is above [ill.
                                                . The lens will automatically zoom to 75mm, but any
                                       focal length can be used in close-up mode.

www.butkus.us

                  @ Align your subject within the focus frame,
                            then press the shutter-release button
                            partway down until the green focus lamp
                              glows.


                  @ Without lifting your finger, recompose the
                                 picture so your subject is aligned within the
                             close-framing guides, then press the
                              shutter-release button all the way down to
                             take the picture.
View original page 21From the M. Butkus archive. Original publisher and archive notices are retained.
Check the model and edition against your equipment.
PDF verified 2026-10-10.