Film cameras
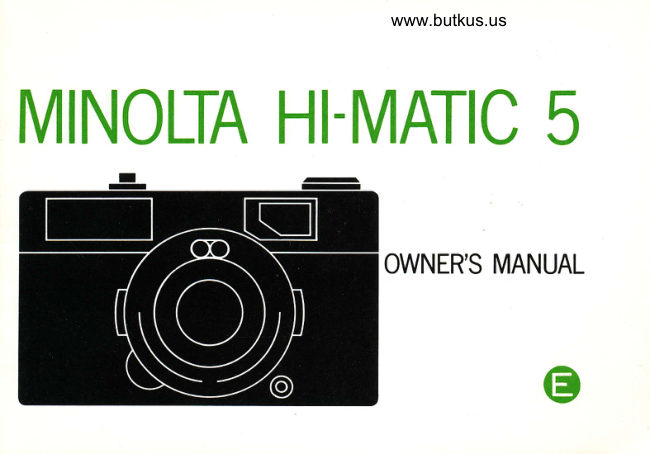
Minolta Hi-Matic 5 User manual
User manual for Minolta Hi-Matic 5. 24 pages in English. Read the original PDF, download or print a copy without registration.
24 pagesEnglish7.1 MB PDF
Loading your manual…Open PDF directly
Document details
- Brand
- Minolta
- Model / document
- Minolta Hi-Matic 5
- Document type
- User manual
- Language
- English
- Pages
- 24
- File size
- 7.1 MB
- Category
- Film cameras
- Document date
- Not specified in catalog
Search available document text
Find a term, then jump to its page in the original PDF. Image-only pages may not be searchable; check the PDF for exact wording and diagrams.
Page 3 · Read text
WELCOME TO THE MINOLTA FAMILY OF FINE CAMERAS

Your new Minolta Hi-matic 5 will give you maximum operating speed and outstanding ease of
operation. And your pictures will have the sharpness and  f idelity that you'd normally expect
only from cameras costing many times more.
You get high-quality,   f ull-f rame 35mm pictures with maximum camera compactness, thanks to
miniaturized body design that features a smart all-black finish.
The sensitive CdS electric-eye system sets exposure for you automatically. 4-symbol zone sys-
tem makes focusing simple.
Even flash pictures are automatic and effortless because your camera's easy-flash system sets
everything for you.
Please take a few minutes to read this instruction manual through carefully for longest service
life and best results with your new Hi-matic 5.
View original page 3
Page 5 · Read text
NAMES OF PARTS

   Film Rewind Crank/Back Cover
           Cordless Flash Contact
           Shutter Release Button
                Frame Counter
                         Viewf inder
                      Strap Hook
                   Distance Scale
Weather Symbols (Shutter Speeds)
            Zone-Focus Symbols
                     CdS Cell
            Guide Number Scale
         Rokkor 4omm F2.7 Lens
                       Index Ring
                  ASA Scale
                     DIN Scale
                  Sync. Terminal
View original page 5Page 7 · Read text
SPECIFICATIONS

         Type: Compact 35mm electric-eye camera
          Lens: Rokkor 4Omm F2.7,8 elements in 3 groups
                         Filter and lens shade mount: 49mm, screw-in type
         Shutter: SEIKO shutter with speeds of 7/25Osec. (atthe sun symbol )F  ) and 1/3O                      sec. (at the cloud symbol (o)
Easy-f lash system: X'synchronization at 1/3O sec.,aperture automatically controlled by focus-
                     ing after setting guide number
      EE system: Automatic diaphragm control by CdS exposure meter coupled to shutter
                  and  f ilm speed settings
                   Meas u r   i ng ra n ge: EV 7.9 (1 /3O sec. F2.7 )to EV L7 (L | 25O sec. F 22) atASA 1 OO
                                 Fif m speed range: ASA 25 to 4OO, DIN 15 to 27
                  Mercury battery: 1.35v button-shape, Mallory PX-675, Eveready EXP-675
                                        or equivalent
       Focusing: Easy focusing with four zone symbols or distance scale, down to O.9m
                         (3 ft.)
       Viewf inder: Bright-frame viewf inder with parallax-correction guide marks
                  F-number scale and over- and underexposure warning zone visible in  f inder
    Film advance: Lever type with single L4O' stroke
                Frame counter: Automatic resetting type showing number of exposed
                                                                                               f rames
                                 Fif m and frame size: Standard 35mm film; 12, 20,or 36 exposures, 36x
                           24mm
  Sizeand Weight: Height: 71mm (2%in.), Width: l22mm (4%in.), Depth: 55mm (2)6in.);
                 37Og (L3oz.)
View original page 7Page 8 · Read text
www.butkus.us

BEFORE TAKING PICTURES

Inserting Mercury Battery
 The automatic exposure system of  the
Minolta Hi-matic 5 is powered by a long-life
mercury battery which must be properly
seated in the battery chamber before the
camera will operate:
1. Turn the battery chamber lock clockwise
   until it stops. Then lift the battery holder
   out as shown.
2. Insert a mercury battery into the holder as
  shown. Make sure the plus (*) side is facing
   cut-out plus (*) mark in the holder. Then
  replace the holder and turn the  lock
   counterclockwise  until it stops.
CAUTION:
 . Be sure that the plus (+) and minus(-)sides
  of the battery a-re not reversed.
 . Be sure not to touch the battery terminals
  with the fingers. Before inserting, always
  use a rough, dry cloth to clean the battery
   terminals.
 r  lf the camera is not to be used for over a
  month, remove the battery and store  it in
  a cool, dry place.
o Use a 1.35v mercury battery, Mallory PX-
  675, Eveready EPX-675 or equivalent.
View original page 8
Page 9 · Read text
Loading Film

                                                2. Pulling out on the film rewind crank, place
1. Pull the film rewind crank out until the      the film cartridge into the film cartridge
   back cover pops open.                        chamber.
         t
View original page 9Page 10 · Read text
www.butkus.us


                                                4. Operate the film advance lever slowly,
                                            while pressing film gently against the
3. Insert the  f ilm leader about L cm (7/2in.)       sprocket, until the perforations on both
   into one of the slots in the take-up spool.      edges of the film are engaged with the
  Be sure that a film perforation is engaged       sprocket teeth. Then close the back cover.
   with the tooth of the slot.                                         It should lock with a click.
View original page 10Page 11 · Read text
5. The oointer in the frame counter window   CAUTION:
  should be pointing to thef irst large red dot       . Operate the film advance lever with one
  on the scale. Operate the film advance         full stroke.
   lever until it stops and press the shutter       . Do not release shutter unless the film
   release button. Repeat this action untilthe      advance lever is in its rest position most
  number "1" appears opposite the pointer.        nearly parallel with the camera back.
                                                                     . Be sure to load or unload the film in sub-
                                           dued light.
View original page 11Page 12 · Read text
www.butkus.us


Setting Film Speed (ASA/DlN Number)
 Move the film speed setting lever on front
of lens barrel to the appropriate film speed
value.
 ASA and DIN scales are indicated as follows:
 ASA 4o,0.2o,U^. 100.50. 25
 DrN  27 . 24.  21 . 18. 15
NOTE:
 r The dots (.) denote ASA 32O, 160,80 and 40;
   Df N 26, 23,20 and L7, respectively.
View original page 12
Page 13 · Read text
TAKING PICTURES

10      l. Automatic Photography
        l- Setting Shutter Speed
      The Minolta Hi-matic 5 is equipped with a
      highly accurate electric-eye system. Once the
      shutter speed is set by aligning the index with
     the appropriate symbol on the barrel, you
     need only focus and press the shutter release.
       1. For ordinary outdoor photography in good
        weather, it is recommended to align the
        index with the sun symbol (jF) to set a
         shutter speed of 1/25Osec.
      2. In dim light or rainy weather, use the cloud
        symbol (t)for  1/3Osec.
      After setting shutter speed, look through the        www.butkus.us
      viewfinder and press the shutter release part
     way down.  lf indicator needle remains in the
     upper warning zone, picture will be over- or
     underexposed, and exposure should be ad-
       justed.
     CAUTION:
      o When the shutter is set at the cloud symbol
         (-o) be sure to hold the camera steady and
        release the shutter with a slow, steady
        squeeze to avoid camera movement.
View original page 13Page 14 · Read text
www.butkus.us


      2. Focusing                                               This will generally yield a head-    t1
       Focusing your camera is very easy. Simply                 and-shoulders view of an adult
     turn the focusing ring to align the proper                   subject.
     zone focus symbol with the index.

 ilT  A  SymOot: Distant setting
                  This is for taking pictures of
                   general scenes and for tar-away
    1             views.
        fff Symbol: Medium distance
                Use this setting when you can
                    sight a fullstanding figure with
                 only a small, clear area at the
                top and bottom of the view-
                     finder,  i.e., at about 3m (1Oft.)
                 from your subject.
        Symbol:                     PortraitT'III
I               Your                       subject should be at a
il                distance of 1.5m (4 ft.) and
                  should  fill the viewfinder frame
llt.                from about the waist up.
                   Close-up       a^ Symbol:                  Use this symbol for closer views
                 with your subject about 1m
                    (3.3ft.)away.
View original page 14Page 15 · Read text
L2    3. Composing Your Picture
     When viewing your subject through the
     camera's viewfinder, you can see a "bright
     frame" in the visual field. Use the full rec-
     tangular frame for  distant and medium
      settings. The area within this frame is what
       will appear on the film.
      To correct for the slight difference in view-
     ing angle between the viewfinder and the
     camera's taking lens, frame pictures at the
      portrait and close-up settings within the two
     parallax-correction guide marks near the top
     corners of the bright  f rame.
View original page 15Page 16 · Read text
www.butkus.us


4. Holding the Camera                     be held with both hands. Press the camera    13
   It is very important to hold camera and re-    firmly to your face with your hands or arm
lease shutter properly.  lf  it is not held right    steadied against your body, then push the
and moves when the shutter is released, you    shutter release with a slow, gentle motion. lt
will not get clear pictures. The camera may   may be good idea to practice these basics be-
be held horizontally or vertically, but should    fore loading the camera.
View original page 16
Page 17 · Read text
1.4      ll. Flash Photography
       1. Attaching Flash Unit
      The Minolta Hi-matic 5 is equipped with a
      cordless  f lash contact which can also be used
     with standard guns having cords. When using
     the Minolta Duofit-S flashgun or other flash
      unit which has a cordless sync. connection,
       all you do is slide the unit into camera's ac'
      cessory shoe.
             lf you use a flash unit which has sync. cord,
     be sure to connect the plug of the flash cord
      with the sync. terminal of the camera.
     NOTE:
         . Be sure not to insert a bulb into the flash
        unit until it has been properly attached to
        the camera.
                                                              www.butkus.us
View original page 17Page 18 · Read text
www.butkus.us


2. Setting Guide Number                          3. Taking Flash Pictures                      15
  Set the index to the guide number by turn-     Even with flash, simply focus, compose, and
ing index ring. Use the guide number which     release the shutter. Proper aperture for flash
is shown on the  f lash bulb package,  f lash unit    photography  is automatically set bythe easy-
or its instructions.                                                                      f lash  (f lashmatic) system. The easy-f lash
NOTE:                                      working range for proper exposure is shown
o Shutter speed is 1/3Osec. for flash.         by the flash chart on the back cover of the
 . lntermediate guide numbers can be set be-   camera and below.
  tween click stops.
View original page 18
Page 19 · Read text
UNLOADING EXPOSED FILM

16   NOTE:
    When using the Minolta Duof it Flashgun or
      Minolta Electrof lash, select a guide number
     from the table of the flash unit.
    When using other flashguns, check their
      guide number table or instructions.
    The guide numbers shown on flash bulb       1. To unloadthef ilm, depress the film rewind
      packages are based on use of bulbs in high-         button on the bottom of the camera.
        ly polished reflectors. lf these guide num-
     bers are used with dull or satin-finish
      reflectors, exposure should be adjusted
      accordingly.
View original page 19Page 20 · Read text
www.butkus.us


2. Lift the film rewind crank and turn  it clock.
   wise. This will rewind the exposed film
  back into its cartridge. When the film  is
   nearly rewound, you will feel a slight re-
   sistance. This means that the film leader    3. When you are sure the  f ilm is completely
    is leaving the spool. Continue winding the      rewound, pull out on the rewind crank to
   crank a few more turns until all the film is      open the camera back and removethe film
  rewound.                                                  cartr idge.
View original page 20Page 21 · Read text
OPTIONAL ACCESSORIES

Minolta Filters                                   For All Film
For Black-and-White  Film                 ND X4: This neutral density  f ilter is used to
   UV: This filter absorbs excessive ultra-             ad just the amount of exposure.  lt  is
          violet rays when shooting mountain,              especially useful when there is a pos-
        snow, sea, and other distant scenes.                sibility of overexposure (for example,
            It may be kept attached to Protect         when shooting summer beach or
        the lens.                                             brilliant snow scenes, particularly
Yellow: This filter renders red and yellow           with  fast  f ilms).
        subjects lighter than the eye sees
        them.  lt is often used to darken blue    Minolta Lens Shade
         skies and emPhasize white clouds.      The lens shade prevents bright, direct side
For Color Fllm                                     light from striking the lens and is recom-
1A:  Use this filter to improve bluish rendi'   mended for all outdoor photography.
       tion of subjects in shade illuminated
       by blue sky, on overcast or rainy days,
      or obscured by atmospheric haze. lt
      can also be used to protect the taking
         lens.
8OB: This filter is used for shooting with
       daylight-type color film indoors with
         artificial light of 34OO"K color tempe'
         ratu re.
View original page 21Page 22 · Read text
www.butkus.us


Minolta Electrof lash-2                            Minolta Electrof lash                            19
  Designed with your Hi-matic 5 in mind, this     This electronic flash unit is equipped with
compact, efficient electronic flash unit fea-   Hl and LO neon lights to indicate precise
tu res:                                         guide numbers and provide perfect exposure.
 . Cordless, hot-shoe convenience                      It gives 37O flashes per set when used with
 . Pulsating "flash-ready" monitor lamp visi-    alkaline batteries. Unit also works with ordi-
   ble in Hi-matic 5 viewfinder                   nary penlight batteries or on AC current.
 r Consant light output throughout life of
   batteries
 This Electroflash-2 can also be used with
any camera having a cordless hot shoe, and
its flash-ready lamp can also be seen in view-
finders of the Minolta Hi-matic E and other


                                                          www.butkus.us
View original page 22Page 23 · Read text
20   Minolta Flashgun Deluxe  lll                       Minolta Duof it-S Flashgun
      This compact and powerful unit has a    This compact flashgun has a unigue design
      folding-type  ref lector and swivels to  f ive click-     for extremely efficient operation. When used
      stop positions.  lt takes regular base and AG-    with the Minolta Hi-matic 5,  it  operates
     type flashbulbs and can be used with or    without cord. lt is also equipped with a self-
      without a cord.                              store cord  for  use with  cord-terminal
                                                  cameras.
View original page 23Page 24 · Read text
www.butkus.us

CARE AND STORAGE

Your Minolta Hi-matic 5 is made for long, carefree service, but there are a few things that you   2l
should do. Never touch the camera lens with fingers. Should lens become dirty, clean it with a
blower lens brush or soft, lint-free cloth, using a gentle motion.
 f f you do not plan to use your camer a  f or a long period of time, it is best to remove the battery.
Store your camera in a cool, dry place away from dust or chemicals. An airtight container that
has a drying agent like silica gel in it would be ideal.
Camera should never be put or left in glove compartment or other place in motor vehicles or
elsewhere in which it may be subject to relatively high temperatures.
lf you have any questions, ask your Minolta dealer. He is knowledgeable in all aspects of photo-
graphy, and can help you with all your photographic needs.
Minolta Camera Co., Ltd.,30,2-Chome, Azuchi-Machi, Higashi-Ku, Osaka 541, Japan
Minofta Corporation, 101 Williams Drive, Ramsey, New Jersey 07446, U.S.A.
Minolta Camera Handelsgesellschaft m.b.H.,2 Hamburg 1. Spaldingstrasse 1, West Gerrtany
Minolta Hong Kong Limited, 49 Chatham Road, Kowloon, Hong Kong
Minolta Singapore (Pte) Ltd., Tong Fong Bldg.. 52-E, Chin Swee Road, Singapore 3
View original page 24
From the M. Butkus archive. Original publisher and archive notices are retained.
Check the model and edition against your equipment.
PDF verified 2026-10-10.