Film cameras
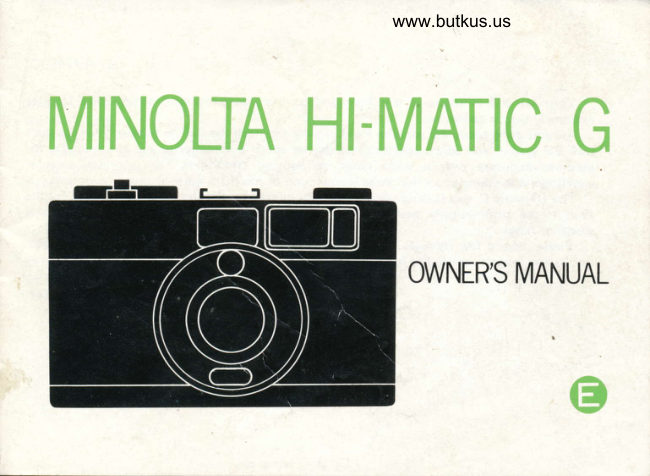
MINOLTA Hi Matic G User manual
User manual for MINOLTA Hi Matic G. 23 pages in English. Read the original PDF, download or print a copy without registration.
23 pagesEnglish3.7 MB PDF
Loading your manual…Open PDF directly
Document details
- Brand
- Minolta
- Model / document
- MINOLTA Hi Matic G
- Document type
- User manual
- Language
- English
- Pages
- 23
- File size
- 3.7 MB
- Category
- Film cameras
- Document date
- Not specified in catalog
Search available document text
Find a term, then jump to its page in the original PDF. Image-only pages may not be searchable; check the PDF for exact wording and diagrams.
Page 2 · Read text
Your Minolta Hi-matic G is a light and compact auto-exposure camera that features
extremely simple operation.
   All you do is focus the genuine Rokkor lens and push the shutter release; your camera's
CdS EE system will adjust aperture and shutter speed automatically and continuously for
accurate exposure over a wide range of lighting conditions. The information-center
viewfinder also warns you when there is too much or too little light for proper exposure.
  The Hi-matic G also features simplified flash operation: Setting the guide number for the
flash in use automatically switches your camera over for flash pictures within the usual
snapshot range.
    Please take a few minutes to read this instruction manual through carefully for best
results and longest service life from your new Hi-matic G.


                                                                                                        .,.i:,1i&$&.,^,
View original page 2Page 3 · Read text
www.butkus.us

    CONTENTS

    NAMES OF PARTS                         2
    BEFORE USE
        Battery                                4
       Loading and advancing  f ilm               6
        Setting film speed                       9
1   HOW TO TAKE PTCTURES
       Focusing and f raming                     10
      Automatic exposure control               12
        Flash pictures                           14
       Rewinding and unloading film             18
    SPECIFICATIONS  ..   ,                    19
    OPTIONAL ACCESSORIES   .  .            20
    CARE AND STORAGE                        21
View original page 3Page 5 · Read text
www.butkus.us


@ Pressure plate
@ Finder eyepiece
@ Take-up spool
@ Sprocket
@ Sync.-cord terminal
@ F ilm-cartridge chamber
@ R ewind-release button
@ Battery-chamber cover
@ Tripod socket
@ Focusing scale
View original page 5
Page 6 · Read text
BEFORE USE
4  B"ttety
  The automatic exposure system of this
   camera is powered by a 1.3-volt mercury
    battery. Use Eveready EPX-675, or equiva-
    lent.

            I nstal  I ing
    1. Remove battery chamber cover by using
    a coin or similar object to turn it
       cou nterclockwise.
   2. Insert battery with plus (+) side out and
      screw cover back on.
View original page 6Page 7 · Read text
www.butkus.us


To check battery                              Battery life
Remove the lens cap and frame a bright  A battery should last about one year under
subject in the viewfinder. lf the exposure-   usual conditions.  lt  is recommended that
indicating needle remains in the red area at   battery be replaced with a new one every
the bottom of the scale, battery is improp-   year and that a spare be carried on trips
erly installed or unserviceable.                 with the camera.

CAUTION:                            NOTE:
Do not touch battery terminals with fingers.   When there is no battery in the camera, the
Before inserting battery, clean terminals   shutter speed remains fixed at 1/30 sec.
with a clean dry cloth. Remove battery  if   Lens apertures can be set as indicated on
camera is not to be used for two weeks or   p. 16 for manual exposures without power
longer.                                               u nder appropriate conditions.
View original page 7
Page 9 · Read text
www.butkus.us


                                             4. Pressing film gently against the sprocket,
                                                actuate film advance lever slowlv until
3. lnsert film leader into one of the slots in      the perforations on both edges of the
   the take-up spool and engage the second       film are engaged with sprocket teeth. (lf
  or third perforation from the end with      advance locks during this, release shutter
   the tooth on the slot.                       and continue.)
                                                                       ,i'ss8siew*
           ___! Ir:-_i    "
View original page 9Page 10 · Read text
5. Close and latch the back cover.          CAUT ION:
6. Advance film and release shutter until     After each full stroke, the film-advance lever
   the  f igure "1" appears in the center clear     will snap back to its offset position and can
   area of the frame counter as shown.   be folded in flush with the top cover. Do
   Back-release knob and rewind crank    not attempt to move the lever back during
   should turn counterclockwise during the      its stroke, however, as this may damage the
   entire engaged stroke of the  f ilm-advance     mechanism.
   lever; if they do not, repeat the above   When the lever resists advancing movement
   steps to assure f ilm is aligned and advanc-     after the last exposure on a film, do not
    ing properly.                           attempt to move it  in either direction.
                                           (See p. 18  f or rewinding and unloading  in
                                                            structi ons.  )
-
View original page 10Page 11 · Read text
www.butkus.us


 Setting film speed
 Each f ilm on the market has an ASA or DIN
exposure-index number to indicate its sen-
sitivity to light. To obtain correct exposure
with the automatic exposure system of your
camera, you must set it for the film in use.
To do this, turn the film-speed dial so that
the ASA number of the  f ilm you are using
appears in the film-speed window. ASA-DlN
conversion  is as follows:


ASA        25    32    40    50    64    80  100 125 160  200 320 400
DIN    15  16  17  18    .t9    zv      21    22    23    24    26
Do f ot set the dial betwe.rr c1 ick slol)s.
View original page 11
Page 12 · Read text
HOW TO TAKE PICTURES

10   Focusing and framing                         For sharpest pictures at apertures f/5.6
    1. Under usual bright snapshot conditions,      through f12.8, the figure corresponding
       set focus by turning the focusing ring to      to the actual camera-to-subject distance
       align the symbol for your subject with       should be set to the index of the focusing
      the index at the top of the barrel. The        scale, which is calibrated in meters and
       table indicates corresponding camera-to-          fee t.
       subject distances and typical subjects for
       these svmbols.
            D istance  Subiect
                        Scenics about 5m or
                   (inf inity  ) 17 ft. or more from  A                        the camera
      iii  3m10 ft      smallMost snapshotsgroups   and
                        Head-to-h ips pictures
            aI    51.5mft.       closeof peopleobjectsand medium-
                        Head-a nd-sh ou lders          1m                          portraits and close-              3.3 ft.    !               range obiects
View original page 12Page 13 · Read text
www.butkus.us


2. Looking through the viewfinder, com-
  pose your subject within the yellow
   bright-frame, which indicates the picture
  area to appear on the film. Frame sub-
   jectsonly 1mor3.3ft. ( Q symbol) from
   the camera within the parallax correction
  mark at the upper left of the frame.
View original page 13
Page 14 · Read text
1z  Automatic exposure control
     1. Turn the function/guide-number  ring so    may proceed to take pictures.
      that AUTO clicks into alignment with         lf there is not enough light for proper
       the index at the top of the barrel.             exposure, the needle will fall within the
     The combination of shutter speed and      red area at the bottom of the scale. In
       aperture being set by the auto-exposure       this case, your picture will be under-
      system is indicated by a needle on the      exposed  if you do not change exposure
       scales at the right of the bright frame in       conditions so that the needle returns to
       the  f inder. As long as the needle  is within      the yellow area or use flash (see next
       the yellow area of the aperture scale, you       page).
                                                     .-;l

                                                                      zso   ..l:.lL


                          www.butkus.us                                   tr:a                       _$j
View original page 14Page 15 · Read text
www.butkus.us


      When the subject is so bright that the  NOTE:                                          13
        needle approaches the red area at the  No camera adjustments are necessary if
        upper end of the scale, use the Minolta  filters are used, since the CdS cell meters
      ND filter (available as an optional acces- only light that has passed through the filter.*-         tory) to avoid possible overexposure.
      2. To take the picture, hold the camera
        steady in a comfortable position and
         squeeze the shutter release smoothly  all
         the way down.
View original page 15Page 16 · Read text
Flash pictures                           For units with cords, slide the connecting
Though other units can be used, Minolta    bracket into the hot shoe, and then be sure
Electroflash units are particularly recom-    to insert the plug of the flash cord into the
mended for   f lash photography with this    sync. terminal of the camera.
camera.
Attaching flash unit
With cordless, direct-contact flash units such
as those recommended above, simply slide
the unit's connecting bracket into the cam-
era's hot shoe.


                                                                                                        *.,';
View original page 16Page 17 · Read text
www.butkus.us


Manual flash                                 100  f ilm, for example, set GN 45 and 14     I3
With    non-automatic   electronic-flash       as shown. This automatically sets a shut-
("strobe") units or only Class M or MF       ter speed of 1125 sec. and a proper fixed
bulbs in standard flashguns:                    aperture. Satisfactory exposures with
1. Rotate the function/guide-number  ring     most snapshot films can be obtained with
   so that the guide number for the flash      normal subjects between 2 and 5m or 7
   and  f ilm in use in aligned with the index     to 17 ft.   f rom the camera, though for
    at the top of the barrel.With the Electro-      best results with reversal color films,  it  is
   flash unit which has a GN of 14 at ASA     recommended that the subject be near
                                                the middle of this range.
                                                             2. Focus,  f rame, and release the shutter as
                                                     indicated on previous pages.
View original page 17Page 18 · Read text
Automatic flash
With automatic electronic   f lash units:            For example, if the aperture called for is
1. Rotate the function/guide-number  ring       f/5.6 with Auto Electrof lash unit and the
   to set the aperture required by the flash      film in use, you. should turn the ring
   unit. The GN settings on this camera      to aiign GN's 60 and 20 with the index.
   produce actual apertures as follows:           Flash range with autoflash is as specified
                                               with the  f lash unit.

     m    40   2B    20   14    10
 GN
             ft.   130   90    60   45    32
  Aperture    F11   FB   F5.6  F4   F2.B
View original page 18Page 19 · Read text
www.butkus.us


2. Focus, frame, and release shutter as
   indicated on previous pages.

NOTE:
The needle in the viewfinder may move on
the scale even when camera is set for flash
exposures, but this has no effect on the
aperture set and should be disregarded.
View original page 19
Page 20 · Read text
Rewinding and unloading film
1. Deoress the rewind-release button on the
   bottom of the camera.
2. Fold out the rewind crank and turn  it
   clockwise.
3. When you are sure the film is completely
   rewound and the crank turns freely, pull
   the back-release knob to oDen the cover
  and remove the  f ilm cartridge.
View original page 20
Page 21 · Read text
www.butkus.us

SPECIFICATIONS
          Type: Compact 35mm camera with automatic exposure control
            Lens: Rokkor 3Bmm  f 12.8,4 elerhents in 3 groups,61" angle of view; filter and 19
                   lens-shade mount: 46mm screw-in type
Aperture-shutter: Mechanical type programmed to vary continuously from f12.8 at 1l3O
                     sec. through Il14 at 1 /650 sec.
 Exposure meter: CdS type, coupled for automatic exposure control from EV 8 to EV 17
              with a film speed of ASA 100; film-speed range: ASA 25 to 400;
                automatic compensation when  f ilters used; powered by one 1 .3v mercury
                       cell: Eveready EPX-675, or equivalent
           Flash: Circuit for X synchronization; setting camera GN scale automatically
                     fixes shutter speed at 1125 sec. and adjusts lens aperture for subjects from
                approx. 2 to 5m (7 to 17ft.) with manual flash or as required for auto-
                   flash units; both cordless "hot-shoe" and standard PC terminal contacts
                  provided
       Focusing: Distance-scale type 1m (3.3 ft.) to infinity, with click-stop zone-symbol
                         setti ngs
     Viewf inder: Bright-frame type with parallax correction mark; combination of shutter
                 speed and f-number being set and under/overexposure warning indicated
               on scale by needle
   Film advance: Lever type with single 130o stroke after 3Oo unengaged play; automatic
                    resetting frame counter shows number of frames exposed.
     Frame size: 24mm x 36mm  f or 12,20, or 36 exposures on standard 35mm  f ilm
             S ize:  1'16 x 71 x 53mm (4-9116 x 2-13116 in.l
         Weight: 3759 (13-3116 oz.)
View original page 21Page 22 · Read text
OPTIONAL ACCESSORIES

20 Minolta f ilters                                      contrast somewhat and is of ten
      UV: This filter absorbs excessive ultra-           used to darken blue skies and em-
            violet rays when shooting moun-             phasize white clouds.
           tain, snow, and other distant  ND X4: Used to adjust light volume from a
           scenes. Exposure is the same as            scene or subject, this neutral densi-
           without a  f ilter, and it may be kept            ty filter can be employed to avoid
            attached to protect the lens.                 overexposure (as when shooting
       1A: Use this  f ilter to improve bluish          beach or brilliant snow scenes, es-
            rendition of subjects in shade, illu-            pecially with fast films).  lt  is also
           minated by blue sky, on overcast or                usef ul for depth-of  -f ield control
            rainy days, or obscured by atmos-          under certain conditions to em-
            pheric haze. lt requires no increase            phasize a subject against an out-of-
             in exposure and is often used with            focus background.
           color or monochromatic  materials
             to protect the lens.                    Minolta lens shade
    Yellow: Red and yellow subjects are render-   The lens shade prevents extraneous harmful
          ed lighter than the eye sees them by     light from entering the lens, and is recom-
  .           this  f ilter used with black-and-white    mended for all outdoor potography.
            film. lt tends to increase over-all
View original page 22Page 23 · Read text
www.butkus.us

CARE AND STORAGE

                                                                                                             21Your Minolta Hi-matic G is made for long, carefree service. But there are a few things that
you should do.
Never touch the camera lens or CdS "eye" with fingers. Should these become dirty, clean
them with a blower lens brush and a soft, lint-free cloth, using a gentle motion.
 lf you do not plan to use your camera for two weeks or more, it is best to remove the
batteries.
Store your camera in a cool, dry place away from dust or chemicals. An airtight container
that has a drying agent like silica gel in it would be ideal.
The shutter should not be left cocked when your camera is not in use. lf camera is to be
stored for a long period, it is advisable to operate the  f ilm advance and release the shutter
once or twice  f rom time to time.
Camera should never be put or left in glove compartment or other places in motor vehicles
orelsewhere  in which it may be subject to relatively high temperatures.
 lf you have any questions, ask your Minolta dealer. He is knowledgeable in all aspects of
photography, and can help you with all your photographic needs.
Supecifications subject to change without notice
Minolta Camera Co.. Ltd., 30, 2-Chome, Azuchi-Machi, Higashi-Ku, Osaka 541, Japan
Minolta Corporation, 101 Williams Drive. Ramsey, New Jersey 07446, U.S.A.
Minolta Camera Handelsgesellschaft nr.b.H., Kurt-Fischer-strasse  50, D-2070 Ahrensburg, West Germany
Minolta France S.A., Tour Albert 1er 65, Avenue de Colmar, 92508 Rueil-Malmaison,  France
Minolta Hong Kong Limited, 49 Chatham Road, Kowloon. Hong Kong
Minolta Singapore (Pte) Ltd., Tong Fong Bldg.,52-E, Chin Swee Road, Singapore 3
View original page 23From the M. Butkus archive. Original publisher and archive notices are retained.
Check the model and edition against your equipment.
PDF verified 2026-10-10.