Film cameras
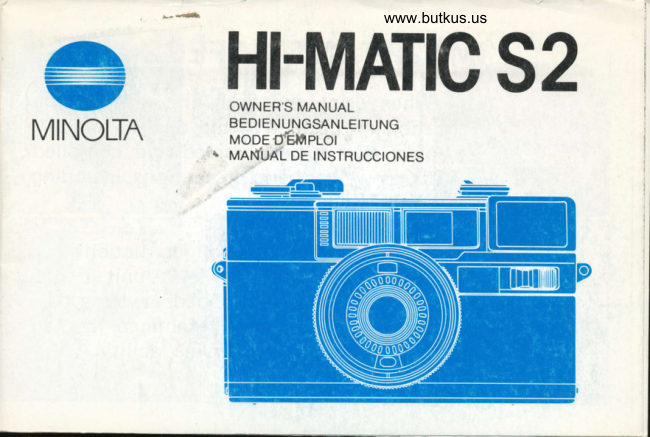
Minolta Hi-Matic S2 User manual
User manual for Minolta Hi-Matic S2. 62 pages in German, French, Spanish. Read the original PDF, download or print a copy without registration.
62 pagesGerman, French, Spanish4.0 MB PDF
Loading your manual…Open PDF directly
Document details
- Brand
- Minolta
- Model / document
- Minolta Hi-Matic S2
- Document type
- User manual
- Language
- German, French, Spanish
- Pages
- 62
- File size
- 4.0 MB
- Category
- Film cameras
- Document date
- Not specified in catalog
Search available document text
Find a term, then jump to its page in the original PDF. Image-only pages may not be searchable; check the PDF for exact wording and diagrams.
Page 1 · Read text
www.butkus.us
      HI.MATIC52                       OWNER'S MANUAL
MINOLTA          BEDIENUNGSANLEITUNGMoDEdEMPLoI
                               I  MAI.fU{L DE INSTRUCCIONES
View original page 1Page 6 · Read text
www.butkus.us
ENGLISH (pp.2-15)
   Your light, compact Hi-matic 52 with its programmed electronic shutter, built-in flash, and
 electronic audible and visual warning signals is one of the most convenient and easiest-to-use cameras
 available. lts CdS AE system provides perfect automatic exposure in conditions where flash is not
 needed. When flash is necessary, simply popping up the built-in flash automatically switches on the
 flashmatic system that couples aperture, focus, and shutter speed for accurate exposure adjustment
 over a wide range. An illuminated distance scale also turns on to aid setting the focus in low-light
 situations.
   The information-center  viewfinder tells you when there is enough light for normal hand-held
exposure without flash, warns you with audible and LED signals when flash or tripod is needed, if
 focus setting is out of flash range, and when the flash is ready to fire.
    Please take a few minutes to read this manual carefully for best results and longest service life from
your new Minolta Hi-matic 52. Then keep it for later reference as needed.
   Throughout the text you will find a series of numbers and letters. Each of these refers to a picture
on the fold-out pages.
View original page 6Page 8 · Read text
www.butkus.us
NAMES OF PARTS
(A-1) Film-advancelever                          (A-25) Battery-chamber cover
(A-2) Shutter-release button                        (4-26) Rewind-release button
{A-31 Frame counter                                    (A-27l. Tripod socket
(A4)  Viewfinder window
(A€)  Piezoelectric oscillator (Rudible warning)
(4-6)  llluminated distance-scale window
(A-7) Strap lug
(A-8) Focusing ring
(A-9) Film-speed window
(A-10) Minolta f/2.8 38mm lens
(A-11) Film-speed dial
lA-121 CdS cell
(A-13) Film-rewind crank
(A-14) Back-cover release knob
(A-15) Built-in flash
(A-16) Flash tube and reflector with guard window
(A-171 Flash-release lock
(A-181 Safe Load Signal window
(A-19) Flash monitor lamp
(A-20) Finder eyepiece
(A-21) Pressure plate
lA-221 Film sprocket
(A-23) Film-cartridge chamber
lA-241 Take-up spool
View original page 8Page 9 · Read text
BEFORE TAKING PICTURES

        Installing batteries
        The automatic-exposure,  flash, and electronic-indication systems of your Minolta Hi-Matic 52 are
      powered by two AA  size-(penlight) alkaline-maganese (Eveready E91 or equivalent), sealed
        carbon-zinc, or rechargeable nickel-cadmium (Ni-Cd ) batteries.
      To properly install batteries, proceed as follows:
      1. Open the battery-chamber cover by sliding it in the direction of the arrow and lifting  it as shown
            (B-1).
     2. After wiping the terminals with a clean, dry cloth, insert two batteries with their plus (+) and
         minus (-) ends positioned as indicated by the diagram inside the chamber (C).
      3. Then close the cover by holding  it down and sliding it in the direction of the arrow. Then let it
         snap back in the opposite direction (B-2r.

     CAUTIONS
       r  Mixing of battery types, or using an exhausted battery with a fresh one could cause battery leakage
         or bursting.
    o  lf the batteries are reversed the camera wi ll not operate, and battery leakage or bursting could
           resu lt.

     NOTES
    o Ni-Cd cells should only be charged in their designated chargers.
       r Ni-Cd cells perform better at low temperatures than either carbon-zinc or alkaline-manganese
           batteries. Therefore, Ni-Cd cells are recommended for use in cold weather.
j
View original page 9Page 10 · Read text
www.butkus.us
Checking batteri6s
   The camera's batteries should be checked immediately after being installed and from time to time
thereafter, especially before starting on trips or taking important pictures.
   To check battery strength for the camera's exposure system, proceed as follows:
1. lf the camera is loaded with film, operate the film-advance lever (A-1lso that the shutter is cocked.
     lf the camera is not loaded, either open the back cover (see p. 7) or operate the filmadvance lever
    several times until  it locks.
2. Cover the CdS cell with your hand (D-1) and look through the viewfinder. Depress the
    shutter-release button slightly lD-2l.. lf the steady audible- warning signal, and low-light warning
   lamp (M-4) at the bottom of the viewfinder come on, the batteries are serviceable. lf they do not
   come on, or go off after a few seconds, the batteries should be replaced with fresh ones.
   To check battery strength for the camera's flash system, pop up the built-in flash (O) and time how
long it takes for the monitor lamp (A-19,M-5) to light. lf the monitor lamp comes on within 30
seconds when using alkaline-manganese or carbon-zinc cells, and 10 seconds with Ni-Cd cells, the
batteries are serviceable. When recycle times become longer than this, batteries should be replaced
with fresh ones. To conserve power, be sure to push the flash all the way back into the camera after
checking the batteries.
  To positively prevent unsatisfactory operation, a special device built into your camera locks the
shutter so that pictures can not be taken  if batteries are too weak or if there are none in the camera.
Thus if you can not release the shutter, you should install or change batteries.
View original page 10Page 11 · Read text
Loading and advancing film
   Your Minolta Hi-matic camera can use any standard 3Smm film cartridge. To properly load your
 camera, proceed as follows:
 1. Pull out the back-cover release knob until the back cover springs open (E).
 2. Leaving the knob pulled out, place a film cartridge into the chamber as shown (F-l) and push the
    knob all the way in, rotating  it slightly  if necessary (F-2!..
3. Slowly operate the film-advance lever until one of the light gray film retainers on the spool is fully
   open (G)' At this point one of the small square openings on the base of the take-up spool will face
    out and its white indicator signal will disappear.
4. Insert the end of the film leader all the way in and under the light gray film retainer (H), and
    slowly operate the advance lever until the perforations on the top and bottom of the film are
   engaged with the sprocket's teeth (l).
5. Close the back cover, pushing in on it until  it snaps shut.
6. Operate the film-advance lever repeatedly without pressing the shutter release, until the lever locks
   and the figure "1" appears in the center of the frame-counter window (J). lf the film is loaded
    correctly, an orange signal will appear in the right side of the Safe Load Signal window (K). lf it
   does not appear, open the camera back and repeat the above loading procedure. As you take
    pictures, the edge of the orange signal will move to the left to indicate that the film is advancing
    properly.

CAUTIONS
o Do not use the film-rewind crank to confirm film transport, as turning  it before all exposures have
   been made could cause improper spacing between frames.
o Load and unload film in subdued light, never in direct sunlight.
o When the film-advance lever stops at the end of a film, never force  it to advance further. Rewind
   and unload the film as described on page 12.
View original page 11Page 12 · Read text
www.butkus.us
Setting film speed
   Each film on the market has an exposure-index number to indicate its sensitivity to light. To
obtain correct exposure with the automatic exposure system of your camera, you must set it forthe
film in use. To set this, turn the film-speed dial until ASA/tSO number indication of the film you are
using is aligned with the index in the film-speed window (L).
The  f ilm-speed scale is:
25.  . 50. . 100'  . 200.  . 400
Dots denote ASA/ISO speeds of 32, 40,64, BO, 125, 160, 250, and 320 respectively, from left to
right.
DIN system equivalents for this scale are:
ASA 25. .50.. 100 -'200. .400
DIN 15.. 18 " 21 .. 21 .. 27

HOW TO TAKE PICTURES
Viarfinder
   As you look through the viewfinder (M) of your Minolta Hi-matic 52 you will see the following
items:
1 . Distance symbols (M-11
2. Normal-framing guides (M-2)
3. Close-framing guides (M-3)
4. Low-light warning lamp (M-4)                                                                                                                                                                                                                                                                                                                            1
5. Flash-monitor lamp (M-5) (at left side of finder eyepiece)
6. Flashdistance warning signal (M-6)
View original page 12
Page 13 · Read text
For full operating details, see the following sections on focusing and framing, automatic exposure
 control, and flash photography.

 Focusing and  f raming
       Symbol                 Distance                  Subject  ( Horizontal framing)

                                         Infin ity         Scenics about 5m or 17tt. or more  f rom the camera.       I
                                         (10ft.)       Most snapshots and small groups.     0           3m
                        1.5m (Sft.)       Head-to-hips pictures of people and medium-close       I                                     objects.
                   1m (3.3ft.)       Head-and-shou lders portraits.       I
           a            0.8m (2.6ft.)      Close-range objects.
1. Under usual bright snapshot conditions, set the focus by turning the focusing ring (A€) to align
   the distance symbol that corresponds to the camera-to-subject Jirtan", of your subject with the
   index on the lens barrel (N). Numbers in the distance-scale window (4-6) opposite the symbols
  show focus settings in feet and meters. while the focusing ring has click stops at the 1m (3.3 ft.),
  1'5m (5 ft.),and 3m (10 ft.)settings, the ring can be set at any point on the focusing scale. Distance
  symbols (M-1) in the viewfinder correspond to those on the lens barrel, so you can also set and
   confirm focus in the viewfinder.
View original page 13Page 14 · Read text
www.butkus.us
2. Look through the viewfinder and compose your subject within the yellow normal-framing guides
    (M-2). This indicates the picture area that will appear on the film. To correct for the slight
   difference in viewing angle between the viewfinder and the camera's lens, frame subjects about
   1.2m (4 ft.) or closer within the short curved line in the upper left corner and the short frame line
    in the upper right corner (M-3).

Automatic exposure control
1. After setting the focus and framing your subject, determine the light level and picture taking mode
  by pushing the shutter-release button down slightly.  lf the steady audible warning and low-light
   warning lamp (M4) at the bottom of the viewfinder do not come on, light is adequate for norma,
   hand-held exposure without flash, and you can proceed to take pictures.
2. To take the picture, hold the camera steady in a comfortable position and push the shutter release
   smoothly all the way down.

NOTE
  No camera adjustments are necessary if filters are used, as the CdS cell will meter the light that
 passes through the filter.

Automatic  f lash photography
  When the low-light warning lamp and steady audible signal come on when the shutter-release
button is slightly pressed, you should use flash  if suitable for your subject, or if you do not wish to use
a tripod.
To take flash pictures, proceed as follows:
1. Slide the flash-release lock in the direction of the arrow towards the lens (O). The built-in flash will
  pop up and start charging if serviceable batteries have been installed. When the flash pops up, the
   distancescale window (4-6)will light up to aid you in setting the focus in low-light situations.
View original page 14Page 15 · Read text
2. Set the focusing ring for camera-to-subjbct distance.
        3. When the flash-monitor lamp (A-19, M-5) comes on, look through the viewfinder and slightly
            depress the shutter-release button. lf a beeping audible signal and the flash-distance warning signal
            (M-6) at the bottom of the distance symbols come on, the focus setting  is out of  f lash range-. M-ove
            closer to your subject and reset the focus so that the warning signals do not come on when the
           shutter release is depressed slightly. lf the warning signals do not come on, proceed to the next             steP.
       4' compose your subject in the viewfinder. lf you frame the subject vertically, hold the camera so            that the flash is positioned upward.
       5' Hold the camera steady and press the shutter-release button all the way down to make the flash           exposu re.
       6' when you are finished taking flash pictures, push the flash all the way back into the camera to
          conserve the batteries and return the camera to normal automatic-exposure  operation.
             I   CAUTIONS
       f.  o Do not push the flash part way into the camera or obstruct the guard window with your  f ingers or
      Ip      camera strap while taking flash pictures, as this could cause under-exposed or uneven resutts.    I  o Taking flash pictures several times in rapid succession, immediately after the monitor lamp lights in
       I      temperatures higher than 40"C (104" F), may damage the flash circuit.
    o The flash will not charge or recycle  if the shutter-release button is held down.
     NOTES
       r  Firing the camera before the monitor lamp comes on generally results in under-exposed pictures.
    o Recycle time for the flash will be longer in cold weather, so it is recommended to carry spare
           batteries, keep the c8mera inside your coat or pocket, and to use Ni-Cd batteries in temperatures         below O'C.j
View original page 15Page 16 · Read text
www.butkus.us
Daylight flash exposure
   Though primarily intended for use as the sole or main light source in flash pictures, the built-in
flash in your Hi-matic 52 can be used to balance or fill in shadows with such bright light sources as
daylight. lt is particularly usefr.rl where the subject is considerably darker than the area surrounding it
(e.9., indoors against a backlighted window, in shade, etc.). Procedures for making daylight flash
exposures are the same as above except that the flash range for transparency (slide) films is 1 to 2m
(3-1l3 to 6-213 ft.) and the range for negative films is 1.5 to 5m (5 to 16 ft.). The degree of flash fill
willvary with the lighting conditions and focused distance of the lens.

NOTE
   The flash will have no effect in bright daylight situations such as beach or snow scenes.
Unloading exposed film
   To remove film from the camera, proceed as follows:
1. Depress the film rewind-release button on the buttom of the camera (P).
2. Unfold the film-rewind crank and turn it in the direction of the arrow (O).This rewinds thefilm
    into the cartridge. When all but the  fi lm leader is rewound and off the take-up spool, the orange
   signal in the Safe Load Signal window will disappear. When the film is completely off the spool
   you will feel less resistance as you turn the crank. A few more turns rewinds the film completely
    into the cartridge.
3. When you are sure the film is fully rewound, pull out the back-cover release knob (El to open the
   back and remove the film.

NOTES
 r  Film should be handled and unloading done in subdued light, never in direct sunlight.
o Never open the back cover as long as the orange signal is visible in the Safe Load Signal window, as
    this could ruin exposed film.
View original page 16Page 17 · Read text
SPECIFICATIONS
                     Type:  Compact 35mm camera with automatic exposure control and built-in
                                electronic  f lash, plus two types of piezoelectric-oscillator audible warnings
                                            a nd electrolu m   i nescent d istance-scale wi ndow
                         Lens:  Minofta 38mm  f 12.8, 4 elements in 3 groups, 59" angle of view; filter and
                                lens-shade mount: 46mm screw-in type
                      Sh utter   :  Electronic type programmed for automatic exposure from EV 6 (1/8 sec.
                                   atf 12.81to EV 17 (11430 sec. at f/l7) X-sync.at 1/40 sec. and higher
          Exposure system: CdS type, coupled AE range EV 6 to EY 17; film-speed range ASA/lSO 25
                               to 400; automatic compensation when  f ilters used
                   Focusing:   Distance-scale type 0.8m (2.6 ft.) to infinity, with click-stop zone-symbol
                                   settings; distance-scale window illuminated after popping up  f lash
                Viewf inder:  Bright-frame type with parallax-correction marks and focus settings visible
                            while viewing, plus low-light warning lamp and constant audible signal that
                      come on at EV 8.4 (114O sec. at  f 12.81 or less; flash-monitor lamp that
                                   lights when the flash has recycled; flash-distance warning signal blinks and
                            beeping audible signal comes on to alert that flash-to-subject  distance set is
                         beyond flash range
                    Power: Two 1.5v AA-size (penlight) alkaline, sealed carbon-zinc, or nickel-
                      cadmium cells for AE system, indicator lamps, piezoelectric warning
                                   oscillator, and  f lash operation
                Flash system:   Built-in, pop-up  f lash automatically turns on and engages flashmatic system
                         which sets shutter for X-sync. exposures at 1/40 sec. and faster when in
                               position; aperture coupled to focusing ring providing automatic-exposure
                            adjustment throughout the  f lash range


I
View original page 17Page 18 · Read text
www.butkus.us
             Flash range:            ASA/ISO                         Flash range
                                      25              0.8-25m(2.6-  8ft.)
                                      64                    0.8 - 4.0m (2.6 - 13 ft.)
                                     100                    0.8 - 5.0m (2.6 - t6 ft.)                                     400               1.5-9.5m ( 5-31 ft.)
    Number of flashes
     per set of batteries*:  Up to 250 with alkaline cells; up to 110 with Ni-Cd cells; up to 60 with
                            sealed carbon-zinc  cel ls
 Minimum recycle time*:  Approx. 5 sec. with fresh alkaline or Ni-Cd cells, approx. 7 sec. with sealed
                           carbon-zinc* As determinedcells  by Minolta's standard testing method. Actual perform-
                        ance will depend on type, brand, manufacturer's lot, age of batteries, and
                        ambient temperature.
      Color temperature:  Balanced for daylight-type color  f ilm
           Film advance:  Lever type with single 14O" stroke after 30" unengaged movement,
                         advancing-type frame counter and Safe Load Signal that indicates film
                          loaded and advancing condition
            Frame size: 24mm x 36mm
             Dimensions:  53.5 x 76 x 129mm Q-1 18x 3 x 5-1/16 in.)
                 Weight:  3109 (1 0-15116 oz.l without batteries
                  Other:  Minolta Easy-Load film system with special take-up spool and advance
                          lever that does not lock until "1" appears in frame-counter window;
                            shutter automatically locks when battery power insufficient
              Accessories:   Filters (L39, Y52, ND4X, 812(8OB)), lens shade, Ni-Cd Charger NC2 with
                              batteries, Eyepiece Corrector Vn, Mini tripod TR-l

Specifications subject to change without notice
View original page 18Page 19 · Read text
CARE AND STORAGE
   Your Minolta Hi-matic 52 is made for long, carefree service. But there are a few things that you
   should do:
o Never touch the camera lens or CdS "eye" with fingers. Should these become dirty, clean them
   with a blower lens brush and a soft, lint-free cloth, using a gentle motion.
o  lf you do not plan to use your camera for two weeks or more, it is best to remove the batteries.
.  Store your camera in a cool, dry place away from dust or chemicals. An airtight container that has
   a drying agent like silica gel in it would be ideal.
I The camera should never be put or left in glove compartment or other places in motor vehicles or
   elsewhere in which it may be subject to relatively high temperatures.
o lf you have any questions, ask your Minolta dealer. He is knowledgeable in all aspects of
  photography, and can help you with all your photographic needs.
View original page 19
Page 20 · Read text
www.butkus.us
                    291DEUTSCH (ss. 16 -
   Die leichte und kompakte Minolta Hi-matic 52 mit ihrem programmierten elektronischen
VerschluB, dem eingebauten Elektronenbl  itzgeriit sowie dem ,,audiovisuel len Warnsystem" macht die
Kleinbildfotografie einfacher, sicherer und bequemer als je zuvor. Mit der CdS-Belichtungsautomatik
gelingen unter vorhandenem Licht immer perfekt belichtete Aufnahmen. Wenn Blitzlicht benotigt
wird, laBt man einfach das eingebaute Blitzgerdt herausspringen. Es schaltet die Kamera auf
Blitz-Blenden-Automatik um     Entfernungseinstellung und Blende sind so gekuppelt, daB
Blitzaufnahmen ijber einen weiten Bereich perfekt belichtet werden. Um die Scharfeinstellung bei
schlechtem Licht zu erleichtern, ist die Entfernungsskala bei Blitzbetrieb beleuchtet.
   Der Informationssucher gibt auch Auskunft dartjber, ob es hell genug frir Freihandaufnahmen ohne
Blitzlicht  ist. Die Kamera signalisiert akustisch und mit Leuchtdioden, wenn die Belichtungszeiten zu
lang ftir Freihandaufnahmen ohne Blitzlicht oder Stativ wdren, wenn sich das Objekt auBerhalb des
Blitzbereichs befindet und wann das Blitzgerdt aufgeladen und blitzbereit  ist.

                                                                                                                                                                                                                                                                                                                                                                                                                                                                                                                                                              I    Bitte nehmen Sie sich etwas Zeit und lesen Sie diese Bedienungsanleitung sorgfSltig durch, damit
Sie mit lhrer neuen Minolta Hi-matic 52 beste Ergebnisse erzielen und lange Zeit viel Freude mit ihr
haben werden. Bewahren Sie die Bedienungsanleitung auf, falls Sie spdter etwas nachsehen mochten.
   In den Texten  fi nden Sie Buchstaben und Nummern, die auf die Abbildungen auf den
ausklappbaren Seiten hinweisen.
                                                                                                                                                                                                                                                                                                  r'{
                                                                                                                                                                                                                                                                                                            1j

                                                                                                      {
View original page 20Page 22 · Read text
www.butkus.us
BEZEICHNUNGEN DE R TEILE
(A-1)    F ilmtransporthebel                                (A-25) Batteriekammerdeckel
(A-2l.   Ausloseknopf                                    {A-26) R [.ickspulentsperrknopf
(A-3)   Bildzdh lwerk                                           lA-27l. Stativgewinde
(A-4)   Sucherausblick
(A-5)   Piezoelektrischer  Oszillator (akustische Signale)
(A-6)   Beleuchtete E ntfern u ngsanzeige
(A-7)   R iemenose
(A-81   E ntf ern ungseinstel  I ring
(A-e)    F  i lmempf   i nd   I ich keitsanzeige
(A-101  Minolta-Objektiv 2,8/38 mm
(A-11)  F ilmempf indlich keitseinstellu ng
(A-121  CdS-MeBzelle
 A-13t  Filmruckspulkurbel
 A-14)  R iic kwandentsperrknopf
 A-15)  E  i ngebautes Bl itzgerat
 A-16)  Blitzrohre und Ref lektor mit Schutzscheibe
 A-17l  Ausrastsch ieber  f iir Bl itzgerat
 A-18)  F ilmladekontrolle
 A-19)  B  I  i tzbereitsch aftsanzeige
 A-20t  Sucherei nbl ick (Okular)
 A-21l  F ilmandruckplatte
lA-221 Transportwa lze
(A-23)  Filmpatronenkammer
lA-241 Aufwickelspule
View original page 22Page 23 · Read text
VOR DER ERSTEN AUFNAHME
 Einsetzen der Batterien
   Die Belichtungsautomatik, das Elektronenblitzgerdt und die elektronischen Warnsvsteme  der
 Minolta Hi-matic 52 werden durch zwei Mignonbatterien 1,5 Volt (Alkali-Mangan-Batterien oder
 auslaufsichere Kohle-Zink-Batterien) oder auf ladbare NC-Akkus mit Strom versorqr.
So werden die Batterien richtig eingelegt:
 1. Offnen Sie den Batteriekammerdeckel, indem Sie ihn in Pfeilrichtung schieben und anheben, wie
    gezeigt (B-1).
2. Nachdem Sie die Kontakte mit einem weichen, trockenen Tuch gereinigt haben, legen Sie zwei der
   vorher genannten Batterien mit den Plus- und Minus-Seiten gemdB den Zeichnungen in der
   Batteriekammer ein (C).
3. SchlieBen Sie den Batteriekammerdeckel durch Andriicken und leichtes Zuriickziehen in
    Pfeilrichtung, damit er einrasten kann (B-2)

ACHTUNG
o Beide Batterien miissen immer gleichzeitig ausgetauscht werden. Kommen eine alte und eine frische
   Batterie oder Batterien verschiedener Art zusammen, besteht die Gefahr, daB die Batterien
   auslaufen oder sogar aufplatzen.
o Wurden die Batterien falsch herum eingelegt, funktioniert die Kamera nicht und es besteht
   A usl au fgefahr.

ANMERKUNGEN
r  NC-Akkus sollten nur in den dazugehorigen Ladegerdten aufgeladen werden.
o Bei niedrigen Temperaturen sind NC-Akkus leistungsfdhiger als Trockenbatterien jeder Art. Fiir
   einen Kdltebetrieb empfehlen wir deshalb NC-Akkus.
View original page 23Page 24 · Read text
www.butkus.us
Batteriekontrolle
   Die Batterien sollten sofort nach dem Einsetzen und spbter von Zeit zu Zeit (vor allem vor
wichtigen Aufnahmen, Reisen, etc.) iiberprijft werden.
  Um die Tauglichkeit der Batterien fijr das Belichtungssystem der Kamera zu iiberpriifen, verfahren
Sie folgendermaBen:
1 . Bef indet sich ein Film in der Kamera, betatigen Sie den Filmtransporthebel  (A-11 bis zum
   Anschlag, damit der VerschluB gespannt ist. lst die Kamera ohne Film, offnen Sie entweder die
   Ruckwand  (s. Seite 211 oder ziehen den Filmtransporthebel einigemal durch, bis er gesperrt ist.
2. Decken Sie die CdS-MeBzelle mit der Hand ab (D-1) und blicken Sie durch den Sucher. Dri.icken Sie
   den Ausloser leicht ein (D-2). Ertont das Dauer-Warnsignal (PlllllEP) und leuchtet die Warnlampe
   fur lange Belichtungszeiten (M-4) am unteren Sucherrand, sind die Batterien betriebsbereit.
  Kommen diese Signale nicht oder verschwi nden sie wieder nach einigen Sekunden. sollten die
    Batterien ausgewechselt werden.
  Um zu priifen, ob die Batterien fUr das Blitzsystem der Kamera noch ausreichen, lassen Sie das
eingebaute Blitzgerdt herausspringen {Ol. Leuchtet die Blitzbereitschaftsanzeige (A'19, M'5) bei
Verwendung von Alkali-Mangan-Batterien oder Kohle-Zink-Batterien innerhalb von 30 Sekunden und
mit NC-Akkus innerhalb von 10 Sekunden auf, ist die Batterieleistung noch ausreichend. Sind die
Blitzfolgezeiten ldnger als vorstehend angegeben, miissen die Batterien ausgewechselt werden. Achten
Sie darauf, daB nach der Batteriepriifung das Blitzgerat wieder ganz eingeschoben wi rd, damit nicht
unnotig Batteriestrom verbraucht wi rd.
   In die Hi-matic 52 ist eine spezielle Schaltung eingebaut, die die Auslosung sperrt, wenn die
Batterien zu schwach sind oder wenn sich keine Batterien in der Kamera befinden. Wenn die
Auslosung der Kamera nicht reagiert, miissen Sie die Batterien auswechseln oder einsetzen.
                                                                                                                                                                                   #*
                                                                                                          fl
View original page 24Page 25 · Read text
Filmeinlegen und Filmtransport
    In der Minolta Hi-matic 52 konnen alle Kleinbildfilme (Patrone Typ 135) belichtet werden. Der Film wird folgendermaBen eingelegt:
 1. Riickwandentsperrknopf hochziehen, bis die Rrickwand aufspringt (E).
 2' Filmpatrone in die Filmkammer einlegen wie im Bild (F-l)gezeigt. Rtickwandentsperrknopf  wieder
    ganz eindriicken -  falls notig, unter leichtem Drehen (F-2).
 3. Filmtransporthebel langsam betatigen. bis einer der hellgrauen Filmhalter sich voll nach hinten
    tiffnet (G). In dieser Stellung steht eines der kleinen Ausschnitte im Rdndel der Aufwickelspule
   genau nach hinten (oben) und das weiBe signal darin verschwi ndet.
4. Den Filmanfang ganz unter den hellgrauen Filmhalter schieben (H) und den Filmtransporthebel
    vorsichtig betdtigen, bis die Perforation an beiden Seiten sicher von den Zdhnen der Transportwalze    erfaBt wird  (t).
5. Riickwand schlieBen und bis zum Einrasten andrticken.
6. Filmtransporthebel mehrmals bet6tigen (ohne zwischendurch den Ausloser zu drijcken), bis der
   Hebel gesperrt ist und die zahl ,,1" in der Mitte des Bildz6hlwerks steht (J). lst der Film korrekt
    eingelegt, erscheint rechts im Fenster der Filmladekontrolle  ein orangefarbenes Signal (K). Sollte
   dieses Signal nicht zu sehen sein, offnen Sie die Kamera-Riickwand wieder und wiederholen am
   besten den Einlegevorgang' Mit jedem Filmtransport wandert das orangefarbene Signal der
   Filmladekontrolle langsam nach links und zeigt damit den einwandfreien Filmtransport an.
ACHTUNG
o Drehen Sie nicht an der Filmriickspulkurbel,  bevor der Film zu Ende ist. Die Bildabstiinde und
   Zwischenrdume zwischen den Bildern konnten sonst ungleichmdBig ausfallen.
o Das Einlegen und Herausnehmen des Films sollte immer bei geddmpftem Licht erfolgen   oder   zumindest im eigenen Korperschatten.                                                       -
o Stoppt der Transporthebel am Filmende vor seinem Anschlag, so versuchen Sie niemals, mit Gewalt
   weiterzutransportieren oder den Hebel in die Ausgangsstellung zuri.]ckzudri.icken. Spulen Sie den
   Film zurr.ick, wie auf Seite 26 beschrieben.
View original page 25Page 26 · Read text
www.butkus.us
Fi lmempf indlichkeit einstellen
   Jeder Film hat eine bestimmte Lichtempfindlichkeit,  die in DIN oder ASA angegeben wird. Um
den verwendeten Film richtig zu belichten, muB man die Belichtungsautomatik auf den betreffenden
Filmempfindlichkeitswert  einstellen. Hierzu wird die Filmempfindlichkeitseinstellung so gedreht, da8
der gewiinschte ASA-Wert im Anzeigefenster steht (L).
Die Filmempfindlichkeitsskala der Kamera sieht so aus:                                                   q
25 . . 50 . . 100'  . 200.  . 400 (ASA)
Die Punkte zwischen den Werten bedeuten ASA 32, 40,64, BO, 125,160, 250 und 320 (von links
nach rechts).
H ier eine ASA/D   I N-Vergleichstabel  le:
ASA 25.'50..  100..200..400
DrN',ts'.',t8..  21 .. 24'.  27

FOTOGRAFIEREN MIT DER MINOLTA HI-IVIATIC 52

Sucher
   Beim Blick durch den Sucher (Ml der Minolta Hi-matic 52 sehen Sie folgendes:
 1 . Entfernungssymbole  (M-11
2. Normale Bildbegrenzungsrahmen (M-2)
3. Bildbegrenzung  fiir Nahauf nahmen (M-3)                                                            {34. Warnlampe  fi.ir lange Belichtungszeiten  (M-4)                                                                                                                                                                            l:i
5. Blitzbereitschaftsanzeige  (M-5) links vom Suchereinblick.                                                                                                                                                          "*gl
6. Blitzbereichs-Warnlampe  (M-6)                                                                                                                                    lr
                                                                                                                                          fsI
View original page 26From the M. Butkus archive. Original publisher and archive notices are retained.
Check the model and edition against your equipment.
PDF verified 2026-10-10.