Film cameras
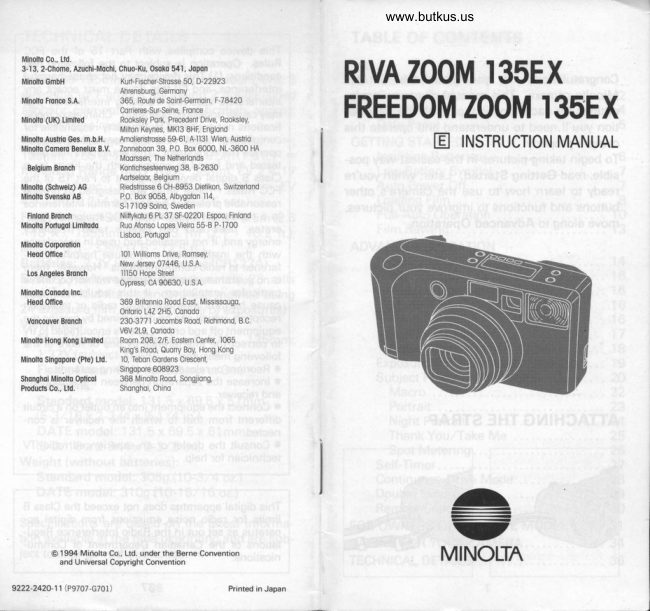
Minolta RIVA Zoom 135EX Minolta Freedom Zoom 135EX User manual
User manual for Minolta RIVA Zoom 135EX Minolta Freedom Zoom 135EX. 21 pages in English. Read the original PDF, download or print a copy without registration.
21 pagesEnglish8.5 MB PDF
Loading your manual…Open PDF directly
Document details
- Brand
- Minolta
- Model / document
- Minolta RIVA Zoom 135EX Minolta Freedom Zoom 135EX
- Document type
- User manual
- Language
- English
- Pages
- 21
- File size
- 8.5 MB
- Category
- Film cameras
- Document date
- Not specified in catalog
Search available document text
Find a term, then jump to its page in the original PDF. Image-only pages may not be searchable; check the PDF for exact wording and diagrams.
Page 4 · Read text
Venmo @mike-butkus-camera  Ph. 2083
PayPal Name  Lynn@butkus.org      www.PayPal.me/lynnbutkus
View original page 4
Page 6 · Read text
www.butkus.usGETTING STARTED
INSERTING BATTERIES

Your camera uses two 3-volt lithium batteries        Low-Battery Symbol
(CR-123A)                   power                                  camera           that supply                              for all                                                          :-a                                               (optional).operations except                 the Remote                               Control                                                                      t      atr                                                         nuroQ_!={
                                                                                               v
                                                                                                                    a                                      s
                                                                                                           lf the blinking low-battery symbol appears in the
                                                    data panel along with the other indicators, you
                                               can still use the camera, but the batteries will
                                                     have to be replaced soon.

                                                                                            -)a


                                                                                                                    a
  Open the battery cover by sliding the bat-I
tery-cover lock in the direction indicated.                               lf the blinking low battery symbol appeari alone,
p lnsen the batteries as shown on the inside         you cannot use the camera until you replace the
of the battery cover and snap the cover closed.            batteries.

                                          Auto Power Off
                                                 To save power, your camera automatically turns
  Battery Cautions                                              off if it is not operated for more than three min-
 o Read and follow all warnings and instruc-             utes.
  tions supplied with the batteries.
 o Keep batteries away from children.
 o Do not attempt to disassemble, recharge,
 short out, or subject batteries to high tem-
  peratures or fire.
 o Do not mix batteries of different ages or
  brands.

                        6
View original page 6Page 7 · Read text
LOADING FILM

You should only use DX-coded, 35mm film with
ISO ratings from 25 to 32OO. We recommend
ISO 4OO or higher for telephoto photographs or
pictures taken in low light.


                                                                  WRONG
                   ry=ruF                                            (gr*--V tgr---\J
                                                   El L"y the film flat between the guide rails and
                                                   extend to the "FILM TlP" mark.
I Turn the camera on and make sure O is                     lf the film extends too far, gently push the excess
displayed in the data panel.                          back into the cartridge.
                                                Snap the back cover closed.p Open the back cover by sliding the back-     @
cover release down and place the film car-       The film automatically advances to the first
tridge into the film chamber, bottom first as         frame and 1 appears in the data panel.
shown.
                                                                                                          *l
                                                         *r:r*@_-  |

                                                                                                                    a


 Always load your film in the shade or away                   lf O blinks in the data panel, the film was
 from direct sunlight.                                       incorrectly loaded. Open the back cover
  Polaroid instant 35mm films cannot be used.           and re-load the film.
View original page 7Page 8 · Read text
www.butkus.us
@  FULL-AUTo opERATroN
           ffi"Wm.,  vo                        A\lo        rl
           W'(
   Press the OnlOff button to turn the cameraI                             E fo zoom the lens toward wide (38mm),
on.                                       move the zoom control to the left. To zoom
The camera will be set to Full-Auto which is the        toward telephoto (135mm) move the control
camera's standard "point and shoot" mode. The          to the right. The focal length is indicated on theflash will fire whenever necessary (see          lens barrel.
"FLASH" section on page 16).
pl nolO the camera steady and make sure your
fingers are not covering the flash.  lf you are
taking a vertically-framed picture, turn the
camera so the flash is on top as shown.
 When your subject is closer
 than 1.8m (5.9 ft.) at 50-
 135mm, compose your pic-
 ture within the close-framing
 guides using focus hold  if
 necessary (see page 14).              @ Center the focus frame on your subject.

                                              Between 38mm and SOmm, the lens barrel
 Caution: Do not hold the lens barrel while               will be visible in the lower-right corner of the
 you photograph, otherwise focus may not be             viewfinder, but will not appear in the photo-
 accurate.                                                graph.
View original page 8Page 9 · Read text
6uEt continued                      FILM REWIND

                                              Automatic                                                    Rewind
                          lilill-[Fi,-]                                                                                 h;qr-"r-.tuqrJ                                                         ffi
                                                         After you take the last picture on the roll, the
                                           camera automatically begins rewind and the
                                                 frame counter counts down to O.
                                       When O appears in the data paneland the film-
                                                          cartridge mark blinks, open the back cover and
@ Press the shutter-release button partway        remove the film.
down so that the green focus lamp glows then                                            Manual Rewindall-the-way down to take the picture.
o In low-light conditions, the lamp on the front                                     I  Gently press the
of the camera lights automatically.                                       manual-rewind but-
o Always press the shutter-release button with                          ton using a pen or
a slow, steady squeeze--never a quick jab.                                            similar object.
o The film will automatically advance to the next
frame.

 The green focus lamp blinks quickly and the
 shutter locks when you are too close to the
                 you subject.       Make               sure                                  0.65m                       are                                  least                           at                                                       pl Wtren O and the blinking film-cartridge                                (2.6        13Smm                   O.8m                and  (2.1 tt.l at                                                   ft.)                           38mm                                        at                                             mark appear in the data panel, open the back from your subject.
  For close-up photography, see "MACRO" sec-         and remove the film.
 tion on page 22.                              CAUTION  o lf you are closer than 0.35m (1 ft.), the green                                                                                                       lf 0 doesn't appear in the data panel after the focus lamp will blink slowly and the picture will                                                      motor stops running, check the display for the not be in focus.                                                              low-battery symbol.  lf it appears by itself, re- The green focus lamp blinks slowly when the
 subject contrast is low. The shutter can be re-             place the battery and press the manual-rewind
  leased, but focus will be set to 3.1m (10.2 ft.)           button. lf all the indicators blink and rewind
 with flash and infinity without flash. See               stops, press the manual-rewind button. lf rewind
 "FOCUS HOLD" on page 14for other focusing           does not resume, contact an authorized Minolta
 techniques.                                              Service Facility.
View original page 9Page 14 · Read text
www.butkus.us
M MAcRo                          ,! ronrRArr

                                 \Vith Macro mode, you can                                                        ln Poftrait mode, the lens
                              take pictures of small objeds                                              automatically zooms to
                         such as flowers or models as                                         provide suitable ftaming for
                            close as 50cm (19-11/16  in.)                                                 poftraits when you press the
                        At this distance, the camera                                            shutterrelease button
                                will automatically provide                                          partway down.
a sublect magnification of 1/4 lifesize
                                     z            A

                               @
                               @


                                                                                     ll  Press the subject program selector until the
                                                                                            icon.I  Press the subject program selector until the          pointer is above the S                             icon.                p elace your subject inside the focus framepointer is above the M
p elace the subject within the focus frame        and press the shutter-release partway down.
and press the shutter-release button all-the-      p Wait for the lens to zoom and press the
way down.                                             shutter-release button all-the-way down.
o Two seconds after you select Macro mode, the        o The main subject must be centered before
lens will automatically zoom to 1O5mm and lock.         pressing the shutter-release button partway
o Auto-switchover flash is initially set, but any        down.
other flash mode including exposure compensa-       o lf you manually zoom the lens after selecting
tion can be selected.                                           Portrait mode, autozoom will not function again.
o When your subject is closer than 1.4m (4.5 ft.)        o Auto-switchover flash is initially set, but any
compose your picture within the close-framing          other flash mode including exposure compensa-
guides.                                                       tion can be selected.
o When the green focus lamp blinks slowly,
focus will be set to O.5m (1.6 ft.)

                       22                                                    23
View original page 14Page 16 · Read text
www.butkus.us
El sPor METERTNc        S srlF-rfMER

                                  ln Spot-metering mode, the
                        camera sets exposure based
                      on the center of the picture.
                        Use this mode to photograph
                              strongly back-lit or spot-lit
                              sublects.

             ?
                            E Set up the picture. Press the drive,/operat-
                                              ing-mode button until the self-timer indicator
                                                           blinks in the data panel.
                                                       pl Wtren you are ready to take the picture,
                                                   press the shutter-release button all-the-way
                                               down.
I  Press the subject program selector until the        o The indicator will blink for two seconds before
pointer is above the fll  icon                         the self-timer is selected.
pl elace your subject inside the spot-metering        o The self-timer indicator in the data panel and
circle and press the shutter-release partway        the lamp on front of the camera blink to show
down.                                                   that self-timer is operating. There is a 1O sec.
p Wtren the green focus lamp glows, press         delay before the picture is taken.
the shutter-release button all-the-way down.        o Self-timer mode is canceled after the picture
o Flash is initially canceled, but any other flash             is taken. To stop self-timer operation before the
mode including exposure compensation can be          picture is taken, turn off the camera or move the
selected.                                       zoom control.
View original page 16Page 17 · Read text
trt coNTrNUous-DRrvE MoDE     iE DouBLE ExposuRE

 Continuous-drive mode is recommended for
 taking sequence shots of moving subjects.

                                                                         ,K                  -d:mt                               6 hq"-"EErJ Vo
 ilE
                                              Press the drive/operating-mode button-o                                                             fl    [%"'5"16                                        until the double-exposure indicator blinks in  qhffig                                                      the data panel.
              ta_________-6,?_!-                                   The indicator will blink for two seconds before
                                                     double-exposure mode is selected.
                                                         Press the shutter-release button all-the-way -\                                                 plI  Press the drive/operating-mode button      down to take the first picture.
until the continuous-drive indicator blinks in      The double-exposure indicator and the film-
the data panel.                                         transport mark blink to show that one picture of
I  Wtren you're ready to take pictures, press       the double exposure has been taken. lf the
the shutter-release button all-the-way down       camera is turned off after the first picture is
and hold.                                              taken, these will continue blinking when it is
o The indicator will blink for two seconds before        turned on again.
continuous-drive mode is selected.            p Recompose your picture and press the
o The shutter will continue to release as long as         shutter-release button all-the-way down again
the shutter-release button is held down. When         to take the second picture.
taking flash pictures, the shutter will release      o Double-exposure mode is canceled after the
after the flash has charged.                         second picture has been taken.
o To cancel continuous-drive mode, press the      o  lf you have the DATE model, please select the
drive / operati ng  - mode button u nti I the    i nd icators       "No imprinting" mode (see page 33).
disappear from the data panel or turn off the
camera.                                                         For best results, use a dark background.
                    28
View original page 17Page 19 · Read text
Data lmprinting                                     Battery Replacement
Press the MODE button to select the desired        The quartz data back uses a 3V lithium battery
data type, then take the picture.                      (CR122O)to maintain memory while the camera
Following exposure, the print indicator blinks in          batteries are being changed. Replace the quartz
the data panel for approximately two seconds to                                                   data back battery  if the display changes or be-confirm imprinting.                                          comes dim while the camera batteries are re-o The imprinted data may be difficult to read if                                                    moved.
the subject area over which  it is superimposed  is
bright or non-uniform.
Setting Data


                                                                       www.butkus.us

                                                                   I  Open the camera back. Remove the screw  MODEJ-SELECT ADJUST                             from the battery cover using a small Phillips
                                                           screwdriver.
I  Use the SELECT button to move between dif-         pl Insert the new battery (+ side up). Replaceferent parts of the displayed data.                                                      the battery cover and attach with the screw.With the date displayed, pressing the SELECT                                                     After battery replacement, follow the instruc-button successively causes the settings for year,                                                           tions under Setting Data to reset day and time.
month, and then day to blink.
In time mode, pressing the SELECT button suc-
cessively causes the hour, minute, and then the
colon to blink.
pl Press the ADJUST button to change the
blinking display.
In time mode, pressing the ADJUST button
while the colon is blinking synchronizes the sec-
onds counter to OO.
                     32                                                    33
View original page 19Page 20 · Read text
www.butkus.us
CARING FOR YOUH CAMERA

Cleaning                                  o Using the camera at very low temperatures
o  lf the lens becomes dirty, clean  it gently with a         impairs its performance.  In cold weather, carry
lens brush.  lf necessary, moisten a sheet of lens         the camera inside your coat to keep  it warm. Do
                                                not transfer the camera directly from an ex-tissue with one drop of lens-cleaning fluid and
gently wipe the lens. Never put the lens-clean-         tremely cold to a warm area, since condensation                                            may form inside and prevent normal operation.ing fluid directly on the lens. Never touch thb
lens surface with your fingers.                      Storage
o Never use alcohol or chemical solvents on the         . When not in use, keep the camera in a cool,
camera body. lf it is dirty, wipe it gently with a        dry place away from dust and chemicals. For
soft, clean, dry cloth.                                 extended storage we recommend that you place
                                                         the camera in an airtight container with a drying
Precautions                                         agent such as silica gel.
o Use extra care when taking pictures at the      o Do not store your camera in the glove com-
beach. Do not let the camera get wet and do not       partment or other places in motor vehicles
let sand or other grit get into the camera. This       where  it may be subjected to high temperatures.
could result in costly or irreparable damage to                                               Ouestions and Service
the camera.                                o lf you have questions about your camera,
o This camera is designed for use between -10o         contact your local camera dealer. For more in-
and 40oc (14o to 1@.F).                              formation write to the Minolta distributor or sub-
. Never subject the camera to shock, high heat,          sidiary in your area (addresses listed at the back
or humidity.                                                  of this manual).
o Never push or pull on the lens barrel    this       o To assure prompt service, please contact an                                    -could result in damage.                                authorized Minolta Service Center before ship-
o This camera contains high-voltage circuits. Do         ping your camera for repairs.
not attempt to disassemble or repair it yourself.       o  lf all indicators blink in the data panel, remove
                                                   the batteries and insert them again. lf normal
                                                     operation does not resume, contact an author-
                                                             ized Minolta Service Facility.
View original page 20Page 21 · Read text
TECHNICAL DETAILS
                                                          This device complies with Part 15 of the FCC
                                                          Rules. Operation is subject to the following two
Lens: 38-135mm t/3.5-9.2 power zoom lens; 8             conditions: (1) This device may not cause harmful
elements in 7 groups (including 2 double-sided             interference, and (2) this device must accept any                                                                  interference received, including interference that
aspheric elements); max. magnification: approx.          may cause undesired operation. Changes or modi-
                                 1 05mm)                                 fications not approved by the party responsible for 1 / 4X(Macro mode, f =
                                                                 oo;          compliance could void the user's authority toFocusing Range: 38mm: 0.8m (2.6 ft.) -
                                                                       - *            operate the equipment. This equipment has been135mm: 0.65 (2.1 ft.) - -; Macro: O.Sm (1.6 ft.)                                                                                                                          aMetering Range (lSO 1OO): 38mm: EV 2.4-17            tested and found to comply with the limits for                                                              Class B digital device, pursuant to Part 15 of the
lI/3.5, 2.4 sec. - l/16, 1 /5@ sec.); 135mm: EV         FCC Rules. These limits are designed to provide
4.4-17 (I/9.2,4 sec. -  f /20,1,2315 sec.)                    reasonable protection aga   i nst harmf u I   i nterference
Flash Range (lSO 1OO): 38mm: 0.8 - 5.5m (2.6              in a residential installation. This equipment gen-
- 18 ft.); 135mm: 0.65 - 3.1m (2.1 - 1O.2tt.l;            erates, uses and can radiate radio frequency                                                             energy and, if not installed and used in accordanceMacro: 0.5 - 3.8m (1.6 - 12.51t.1                                                          with the instructions, may cause harmful inter-
Batteries: 2 3V lithium batteries (CR123A)                  ference to radio communications. However, there
Battery Performance: Approximately 23 rolls                  is no guarantee that interference will not occur in a
(based on Minolta's standard test method using             particular installation.  lf this equipment does
24 exposure film with flash 5Oo/o oI exposures)            cause harmful interference to radio or television                                                                       reception, which can be determined by turning theViewfinder:                                                            equipment  off and on, the user is encouraged to try   Magnification: 38mm: 0.40X; 135mm:             to correct the interference by one or more of the
   1.32X (subject at 4m)                                        following measures:
    Fiefd of view: 84o/o (lor subject at 3m)                e Reorient or relocate the receiving antenna.
                                              o Inciease the separation between the equipmentDimensions:
                                                        and receiver.
   Standard model: 131.5 x 69.5 x 57mm                      . Connect the equipment  into an outlet on a circuit
   (5-3/16 x2-3/4 x2-1/4 in.l                                  different from that to which the receiver is con-
  DATE model: 131.5 x 69.5 x 61mm                        nected.
   (5-3/16 x2-3/4 x 2-3/8 in.l                                     . Consult the dealer or an experienced radio/-lY
Weight (without batteries)  :                                  technician for help.
   Standard model: 3O5g (10-3/4 oz.l
  DATE model: 31Og (10-15/16 oz.l
                                                                 This digital apparatus does not exceed the Class B
Specifications are based on the latest informa-              limits for radio noise emissions from digital ap-                                                                 paratus as set out in the Radio Interference Regu-tion available at the time of printing and are sub-                                                                      lations of the Canadian Department of Commu-
ject to change without notice.                                     nications.

                    36
View original page 21From the M. Butkus archive. Original publisher and archive notices are retained.
Check the model and edition against your equipment.
PDF verified 2026-10-10.