Film cameras
MINOLTA RIVA ZOOM 140EX / FREEDOM ZOOM 140EX User manual
User manual for MINOLTA RIVA ZOOM 140EX / FREEDOM ZOOM 140EX. 21 pages in English. Read the original PDF, download or print a copy without registration.
21 pagesEnglish8.4 MB PDF
Loading your manual…Open PDF directly
Document details
- Brand
- Minolta
- Model / document
- MINOLTA RIVA ZOOM 140EX / FREEDOM ZOOM 140EX
- Document type
- User manual
- Language
- English
- Pages
- 21
- File size
- 8.4 MB
- Category
- Film cameras
- Document date
- Not specified in catalog
Search available document text
Find a term, then jump to its page in the original PDF. Image-only pages may not be searchable; check the PDF for exact wording and diagrams.
Page 1 · Read text
www.butkus.us


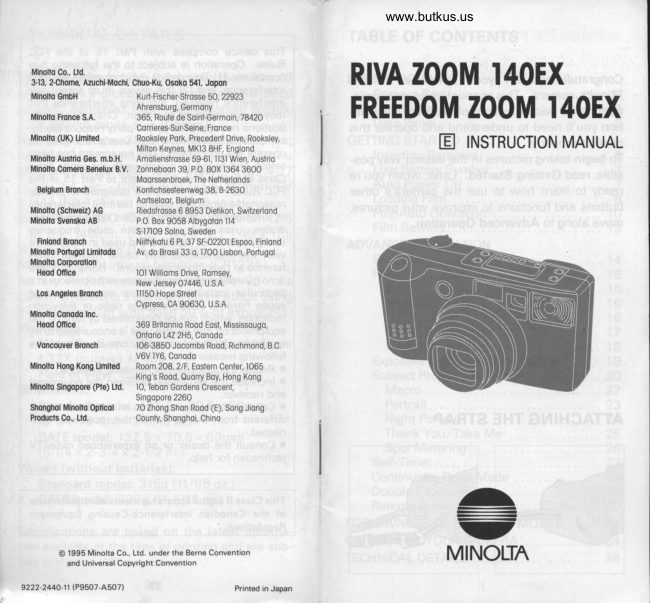
   Minolto Co.. Ltd.   3-13, 2-Chomg AzuchFMochi, Chuo-Ku, 0s0ko 541. J0p0n         RrvA z00M r40Ex
   Minolto GmbH                 Ku rf-Fischer-Strosse 50, 22923
                                Ahrensburg, Germony   Minollo Fronce S.A.           365, Route de Soint-Germoin,78420      FREEDOM ZOOM I4OEX
                               Co rrieres-Su r-Seine, Fro nce
   Mlnollo (UK) Umited          Rooksley                                            Pork,                                              Precedent                                                                 Drive,                                                                Rooksley,                                                      INSTRUcTION MANUAL                                    Milton Keynes,                                       MK13                                                      Englond                                                     8HF,                                                tr
   Minollo Austrio Ge$. m.b.H.     Amolienstrosse  59-61, ll3l Wien, Austrio
   Minollo Comero Benelux B.V.  Zonneboon 39, P,0, BoX 1364 3600
                               Moorssenbroek, The Nelherlonds
     Belgium Bronch              Kontichsesteenweg  38, B-2630
                                    Aortseloor, Belgium
   Minollo (Schweiz) AG          Riedstrosse 6 8953 Dietikon, Swiizerlond
   Minolto Svensko AB            P,0, Box 9058 Albygoton ll4
                            SJ7109 Solno, Sweden
     Finlond Bronch                  Niiftykotu 6 PL 37 SF-02201 Espoo, Finlond
   Mlnollo Porfugol Limitodo       Av. do Brosil 33 o, UOo Lisbon, Portugol
   Minolto Corporotion
    Heod ofiice                   l0l Willioms  Drive, Romsey,
                        New Jersey 07446, U.S,A.
     los Angeles Bronch          lll50 Hope Street
                                Cypress, CA 90630, U.S.A.
   Minolfo Conodo lnc.
    Heod office              369 Britonnio Rood Eost, Mississougo,
                                 ontorio L4Z 2H5, Conodo
    Voncouver Bronch         l06-3850 Jocombs Rood, Richmond, B.C,
                         V6V lY6, Conodo
   Minolto Hong Kong Umiled    Room 208,2/F, Eoslern Center,1065
                                   King's Rood, Quorry Boy, Hong Kong
   Mlnolto Singopore (Pte) ttd.      'l0, Tebon Gordens Cresceni,
                               Singopore 2260
   Shonghoi  Minolto Optlcol 70 Zhong Shon Rood (E), Song Jiong
   Ploducts C0., Ltd.          County, Shonghoi, Chino
         +
      @ 1995 Minolta Co., Ltd. under the Berne Convention           and Universal Copyright Convention                      MINOLTA
                                                            -
9222-2440-1\ (P9507.A507)                                  Printed in Japan
View original page 1Page 3 · Read text
www.butkus.us
NAMES OF PARTS
       2 3 4                         1617 18 19 20


                                            Mike Butkus  Digitally                                                                                                                                                                                                                                          DN:ou=butkus.org,Date:cn=Mike2024.03.09signedButkus,email=mike@butkus.org,by00:40:40Mikeo=ButkusButkus-05'00'camera manuals,c=US


           13    12  11  10

  1 . Shutter-release button                               15. Viewfinder*
 2. Zoom control                                      16. Focus lamp (green)
 3. Drive,/Operating-mode button                      17. Flash lamp (orange)
 4. Subject-program selector                          18. Rewind button
 5. Data panel                                          19. On/Off button
 6. Flash-mode button                               20. Film window
 7. Red-eye-reduction button                          21. Strap eyelet
 8. Flash                                          22. Battery cover
 9. Back-cover release                                23. Tripod socket
10. Viewfinder window*                             24. Backcover
1 1. Autofocus window*
1 2. Lens*                                           * Do not touch
13. AF illuminator, Red-eye reduction lamp,
    Self-timer indicator, Delayed-release indi-
    cator
1 4. Remote-control window
View original page 3Page 4 · Read text
Venmo @mike-butkus-camera  Ph. 2083
PayPal Name  Lynn@butkus.org      www.PayPal.me/lynnbutkus
View original page 4
Page 6 · Read text
www.butkus.usGETTING STARTED
INSERTING BATTERIES

Your camera uses two 3-volt lithium batteries        Low-Battery Symbol
(CR-123A) that supply power for all camera
operations except the Remote Control (optional).                                                           l:.I   t          ,':     7i----r --                                                                         I xn*ffi                                                                                                                                                                                               l -c                                                                                                                      tvLt*
                                           lcrrrg{?fElHq
                                                                                                                 lf the blinking low-battery symbol appears in the
                                                    data panel along with the other indicators, you
           \-'?,/z                              can still use the camera. but the batteries will                                                    have to be replaced soon.
   rfi (


                                                                                                                                   I    ,\Y inJ,/
                                                                    orto g ut q-eA f-I Open the battery cover by sliding the bat-
tery-cover lock in the direction indicated.                              lf the blinking low battery symbol appears alone,
p Insert the batteries as shown on the inside        you cannot use the camera until you replace the
of the battery cover and snap the cover closed.           batteries.

                                          Auto Power Off
                                                To save power, your camera automatically turns
  Battery Cautions                                             off if it is not operated for more than three min-
 o Read and follow all warnings and instruc-            utes.
  tions supplied with the batteries.
 o Keep batteries away from children.
 o Do not attempt to disassemble, recharge,
  short out, or subject batteries to high tem-
  peratures or fire.
 o Do not mix batteries of different ages or
  brands.

                        6
View original page 6Page 7 · Read text
LOADING FILM

You should only use DX-coded, 35mm film with                                                           IISO ratings from 25 to 3200. We recommend
ISO 400 or higher for telephoto photographs or
pictures taken in low light.


                                                                   www.butkus.us


                            E UV the film flat between the guide rails and
                                                  extend to the "FILM TlP" mark.
                                                            is                   lf the film extends too far, gently push the excessI turn the camera on and make sure Odisplayed in the data panel.                          back into the cartridge.
E Open the back cover by sliding the back-    @ Snap the back cover closed.                                                                                                                                          firstcover release down and place the film car-       The film automatically advances to the
tridge into the film chamber, bottom first as        frame and 1 appears in the data panel.
shown.                              +.                                                     nuroQ                                             __!
                       @{zNmMs


 Always load your film in the shade or away                 lf O blinks in the data panel, the film was
 from direct sunlight.                                      incorrectly loaded. Open the back cover
  Polaroid instant 35mm films cannot be used.          and re-load the film.
                            I                                                         9
View original page 7Page 8 · Read text
www.butkus.us
      FULL-AUTo oPERATIoN@
         z                           g                   /'rA
                           trffi#-                                                                                                                                 t
                                                                                                                                                                                                               \.          (]tw,m)
                       [4',l
I  Press the OnlOff button to turn the camera      E fo zoom the lens toward wide (38mm),on.                                        move the zoom control to the left. To zoom
The camera will be set to Full-Auto which is the         toward telephoto (140mm) move the control
camera's standard "point and shoot" mode. The            to the right. The focal length is indicated on the
flash will fire whenever necessary (see           lens barrel.
"FLASH" section on page 16).
I  Hota the camera steady and make sure your
fingers are not covering the flash.  lf you are
taking a vertically-framed picture, turn the
camera so the flash is on top as shown.
 When your subject is closer 1-_-----=1 than 1.8m (5.9 ft.) at 50  'M                                     | 14Omm, compose your pic-  '/%;tl                                     |  ture within the close-framing -VV77V7%,
 guides using focus hold  if
  necessary (see page 14).               @ Center the focus frame on your subject.

                                               Between 38mm and 7Omm, the lens barrel
  Caution: Do not hold the lens barrel while                 will be visible in the lower-right corner of the
 you photograph, otherwise focus may not be              viewfinder, but will not appear in the photo-
  accurate.                                                 graph.

                                                                                                         11
View original page 8Page 9 · Read text
@   continued                        FILM REWIND

                                                Automatic Rewind


                                                          After you take the last picture on the roll, the
                                            camera automatically begins rewind and the
                                                   frame counter counts down to O.
                                        When O appears in the data panel and the film-
                                                            cartridge ryark blinks, open the back cover and
P Press the shutter-release button partway          remove the film.
down so that the green focus lamp glows then                                             Manual Rewindall-the-way down to take the picture.
o In low-light conditions, the lamp on the front                                            I  Gentty press the
of the camera lights automatically.                                        manual-rewind but-
o Always press the shutter-release button with                            ton using a pen or
a slow, steady squeeze--never a quick jab.                                              similar object.
o The film will automatically advance to the next
frame.

 The green focus lamp blinks quickly and the
  shutter locks when you are too close to the
  subject. Make sure yoL,t are at least 0.65m       p Wtren O and the blinking film-cartridge
  (2.1 'tt.l at 14Omm and O.8m (2.6 ft.) at 38mm          mark appear in the data panel, open the back from your subject.                                               and remove the film.  For close-up photography, see "MACRO" sec-
  tion on page 22.                               CAUTION
  o lf you are closer than 0.35m (1 ft.), the green                         lf O doesn't appear in the data panel after the
 focus lamp will blink slowly and the picture will             motor stops running, check the display for the
 not be in focus.                                              low-battery symbol. lf it appears by itself, re-
 The green focus lamp blinks slowly when the               place the battery and press the manual-rewind  subject contrast is low. The shutter can be re-                                                          button.  lf all the indicators blink and rewind  leased, but focus will be set to 2.Om (6.6 ft.)
 with  f lash and inf inity without   f lash. See                 stops, press the manual-rewind button. lf rewind
 "FOCUS HOLD" on page 14for other focusing             does not resume, contact an authorized Minolta
  techniques.                                                Service Facility.

                                                                                    13
View original page 9Page 11 · Read text
FLASH                                    RED-EYE REDUcnoN           @

SE LECTING THE F LASH MODE                 Reduce red-eye in flash pictures of people by
                       Press the flash mode         using red-eye reduction.t                      I
              I                   button until the indi-
               =l-l  cator of the mode you                          Press the red-eye-                                                                        reduction button so          O    I want appears in the                                                                            appears in thelrt                        @                               panel.11(         O   -l  data                                                                                          panel.                                                                           data                                     remain                      -l  Flash modes
                         selected after you takel-t;I                         :l

I                                 picture.i                       I  the                                                            www.butkus.us
 - t   Auto-Switchover Flash  AUT9 When you turn the camera on, auto-                                              Warn the  people
   1  switchover flash is initially set. ln this                      whom you are photo-
      I  mode, the camera automatically fires                          graphing that  the         the flash whenever necessary.  +                                                           lamp on the front of
    t  Manual Fill-Flash                                                the camera will blink      Use manual fill-flash to fill-in harsh                          three times before     ;
     I  shadows on your subject's face. For                                 the flash fires.                                           be     I  example, manual fill-flash should
                                               a     I  used when your subject is wearing         hat under bright sunlight.                When you press the shutter-release button all-  +                                          the-way down, the lamp on the front of the
  r9t Flash Cancel                            camera and the flash lamp blink three times,
  Y' When you're photographing twilight        then the main flash fires with the shutter re-
     I  scenes or distant subjects that are be-           lease.
     I  yonO the flash range, or you want to         Red-eye-reduction mode remains selected until
     I   capture the ambience of existing light,        you cancel it. To cancel, press the red-eye-re-     I   select flash cancel.                             duction button so that the indicator disappears   Y
       Exposure Compensation  rQt                                           from the data panel.  '\b'  See oaoe 19.
  +1 5
                       16                                                        17
View original page 11Page 13 · Read text
gJl51r SUBJECTSELECTIONPROGRAM

Subject Program Selection allows you to tailor                    Full-Auto: Camera's standard point-
                                                       mode which is suited forthe camera's fully automatic operation to suit   '@   and-shoot
the subject. lt provides optimal camera settings                 general photography. Full-Auto is
for close-ups, portraits, portraits at night, pic-                    automatically set when you turn the
tures of you taken by someone else with your                camera on and after you take a pic-
camera, and back-lit or spot-lit subjects.                 I    ture in one of the subject programs.
                                 $  Macro: Optimizes camera settings for                                                             close-upphotography.
                                                                   ,
                                                                                                                        I
                                              Y
                                                              ffi  Portrait:  Provides suitable framing,                                                             camera settings for portrait

Press the subject program selector until the                                      l:r,:;,nipointer is above the icon of the subject you are          [El wigtrt Portrait: Synchronizes flashphotographing.                                                 -i   with a slow-shutter speed to provide a
o After you take the picture, the camera will                 I  balanced exposure between the sub-
return to Full-Auto automatically and the flash                 I  l""t and the background.will return to the mode which was set before           Y
you used a subject program.                                      ffi  Thank You,/Take Me: Sets the camera
                             T   to you can ask someone to photograph
                                                                   I  vo, and your family or friends.
                                                                                         It
                                                                 I   Snot Metering: Sets exposure based                                                        on the area in the spot metering circle.


                    20                                                             21
View original page 13Page 14 · Read text
www.butkus.us
{!A MAcRo              N ro*rRArr

                                         \X/ith Macro mode, you can                                                      ln Portrait mode, the lens
                              take pictures of small objects                                             automatically zooms to
                         such as flowers or models as                                        provide suitable framing for
                            close as 50cm 09-11/16 in).                                               poftraits when you press the
                      At this distance, the camera                                                   sh utter-  re.   I ease b utto n
                              wi   I I automati cally provi de                                        partway down.
a sublect magnrfication of 1/4 lifesize
                                        a            a


                                                                  I  Press the subject program selector until the
I  Press the subject program selector until the        pointer is above the S  icon.pointer is above the $   icon.               p etace your subject inside the focus frame
I  elace the subject within the focus frame       and press the shutter-release partway down.
                                                                                    press theand press the shutter-release button all-the-           fl Wait for the lens to zoom and
way down.                                            shutter-release button all-the-way down.
o Two seconds after you select Macro mode, the       o The main subject must be centered before
lens will automatically zoom to 1O5mm and lock.        pressing the shutter-release button partway
. Auto-switchover flash is initially set, but any       down.
other flash mode including exposure compensa-      o lf you manually zoom the lens after selecting
tion can be selected.                                          Portrait mode, autozoom will not function again.
o When your subject is closer than 1.4m (4.5 ft.)       o Auto-switchover flash is initially set, but any
compose your picture within the close-framing         other flash mode including exposure compensa-
guides.                                                      tion can be selected.
o When the green focus lamp blinks slowly,
focus will be set to O.5m (1.6 ft.)

                     22
View original page 14Page 15 · Read text
poRTRArrtr NrGHr                               THANK Y'U/TAKE ME                                 I M

                              ln Night-portrait mode, the                        Wen you ask someone vvho
                        camera will balance flash and                                                     is unfamiliar with the camera
                               existing light so you can take                                            to take your pidure, select
                              beautiful pictures of people                                             Tha nk-you /Take- m e m od e.
                                at sunset or at night.                                             The camera automati cal lv
                                                                         zooms the lens to 38mm for
                                                             a wide view and limits the focusing range to ensure that you
                                                                                    will be in focus.n)                                                                                     I  Press the subject
                                                                   program selector until
                                                                                   above  0              CI                                                the pointer is
                                                                                              icon.                          o [,'*1j--l o     the ffi
                                                el:oqenil"-lo
 ru

   Press the subject program selector until the!l                             p Frame the subject in the viewfinder andpointer is above ttre E  icon.                                                  press the shutter-release button all-the-wayp etace the subject within the focus frame
and press the shutter-release button all-the-      down.
way down.                                                                                  Effective Focusing Range     o lf the subject is
o The flash is set to manual fill-flash and cannot            Clear day     2.5-12n(8.2-39.6    ft.)     not within this range,
                                                                                                                                                    isbe changed. Red-eye reduction is recommend-            Cloudy day    3-7m (9.8-23  ft.)     Full-auto mode
ed because low light presents optimum con_                                recommended.
                                            o Two seconds after you select this mode, theditions for red-eye to occur.
o The maximum shutter speed in Night-portrait        lens will automatically zoom to 38mm and lock.
                                            o Auto-switchover flash is initially set, but anymode is one second. Since the shutter speed                                              other flash mode including exposure com-will most likely be slow, a tripod or other camera
support is highly recommended.                       pensation can be selected.
                                            o When the green focus lamp blinks slowly,
                                                   focus will be set to 2.Om (6.6 ft.) with flash and
                                           4.2m (13.8 ft.)without flash.

                     24                                                  25
View original page 15Page 16 · Read text
El sPor METERTNG                           www.butkus.us                 S srlF-nMER

                                  ln Spot-metering mode, the
                        camera sets exposure based
                      on the center of the picture
                      Use this mode to photograph
                            strongly back-lit or spot-lit
                              sublects.


                                                          www.butkus.us            z

                                                                 I  Set up the picture. Press the drive,/operat-
                                            ing-mode button until the self-timer indicator
                                                  appears in the data panel.
                                 p Wtren you are ready to take the pacture,
                                                  press the shutter-release button all-the-way
                                             down.
   Press the subject program selector until the       r The self-timer indicator in the data panel andI
pointer is above the El icon                      the lamp on front of the camera blink to'showp RIace your subject inside the spot-metering        that self-timer is operating. There is a 1O sec.
circle and press the shutter-release partway       delay before the piclure is taken.
down.                                   o Self-timer mode is canceled after the picture
p Wnen the green focus lamp glows, press           is taken. To stop self-timer operation before the
the shutter-release button all-the-way down.          picture is taken, turn off the camera or move the
e Flash is initially canceled, but any other flash      zoom control.
mode including exposure compensation can be
selected.


                     26                                                   27
View original page 16Page 17 · Read text
E coNTrNuous-DRrvE MoDE        ill DouBLE ExPosuRE
  Continuous-drive mode is recommended for
  taking sequence shots of moving subjects.
                          o  a::. '!:,r''h ) 6                                             CI l@@EmE-l CI


                                                                   I  Press the drive,/operating-mode  button
                                                                until the double-exposure indicator appears in &ffi9                                 the data panel.
                                                                   I  Press the shutter-release button all-the-way
                                       down to take the first Picture.
                                       The double-exposure indicator and the film-
 I  Press the drive/operating-mode button         transport mark blink to show that one picture of until the continuous-drive indicator appears in                                              the double exposure has been taken' lf the the data panel.                                          camera is turned off after the first picture isp Wtren you're ready to take pictures, press                                                       taken, these will continue blinking when it is
the shutter-release button all-the_way down        turned on again.and     hold.                                                                            press                                                                                           the                                                      your picture                                                         and                                          Recompose                                                                                    llo The       shutter will continue to release as long as                                                                                              again                                                                down                                                                                all-the-way                                                                 button                                                        shutter-release
the shutter-release button is held down. When         to take the second picture.
taking flash pictures, the shutter will release      o Double-exposure mode is canceled after theafter the flash has charged.                                                 second picture has been taken.
o To cancel continuous-drive mode, press the      o  lf you have the DATE model, please select the
drive / operat    i ng- mode button u nti I the    i nd icators       "No imprinting" mode (see Page 31)'
disappear from the data panel or turn off the
camera.
                                                          For best results, use a dark background'


                     28
View original page 17Page 19 · Read text
Data lmprinting                                     Battery Replacement
 Press the MODE button to select the desired       The quartz data back uses a 3V lithium battery
 data type, then take the picture.                      (CR122O)to maintain memory while the camera
 Following exposure, the print indicator blinks in          batteries are being changed. Replace the quartz
 the data panel for approximately two seconds to        data back battery if the display changes or be-
 confirm imprinting.                                           comes dim while the camera batteries are re-
 o The imprinted data may be difficult to read if        moved.
 the subject area over which  it is superimposed  is
 bright or non-uniform.
 Setting Data


                                                                    I Open the camera back. Remove the'screw
                                             from the battery cover using a small Phillips
                                                            screwdriver.
                                                                                            ReplaceI   Use tHe SELECT button to move between dif-           I  Insert the new battery (+ side up).ferent parts of the displayed data.                                                      the battery cover and attach with the screw.
With the date displayed, pressing the SELECT         After battery replacement, follow the instruc-
button successively causes the settings for year,          tions under Setting Data to reset day and time.
month, and then day to blink.
In time mode, pressing the SELECT button suc-
cessively causes the hour, minute, and then the
colon to blink.
I  Press the ADJUST button to change the
blinking display.
In time mode, pressing the ADJUST button
while the colon is blinking synchronizes the sec-
onds counter to 00.
                     32
View original page 19Page 20 · Read text
www.butkus.us
CARING FOR YOUR CAMERA

 Cleaning                                  o Using the camera at very low temperatures
o  lf the lens becomes dirty, clean  it gently with a         impairs its performance.  In cold weather, carry
 lens brush.  lf necessary, moisten a sheet of lens         the camera inside your coat to keep  it warm. Do
 tissue with one drop of lens-cleaning fluid and        not transfer the camera directly from an ex-
 gently wipe the lens. Never put the lens-clean-         tremely cold to a warm area, since condensation
 ing fluid directly on the lens. Never touch the       may form inside and prevent normal operation.
 lens surface with your fingers.                                                Storage
o Never use alcohol or chemical solvents on the       o When not in use, keep the camera in a cool,
camera body. lf it is dirty, wipe it gently with a                                                    dry place away from dust and chemicals. For
soft, clean, dry cloth.                                                    extended storage we recommend that you place
                                                      the camera in an airtight container with a drying
Precautions                                          agent such as silica gel.
. Use extra care when taking pictures at the       o Do not store your camera in the glove com-
beach. Do not let the camera get wet and do not        partment or other places in motor vehicles
let sand or other grit get into the camera. This        where  it may be subjected to high temperatures.
could result in costly or irreparable damage to                                                Ouestions and Servicethe camera.                                         o lf you have questions about your camera,o This camera is designed for use between -1Oo                                                          contact your local camera dealer. For more in-and 4O'C(14o to 104"F).                                                       formation write to the Minolta distributor or sub-o Never subject the camera to shock, high heat,                                                             sidiary in your area (addresses listed at the backor humidity.                                                                of this manual).
o Never push or pull on the lens barrel    this        o To assure prompt service, please contact ancould result in damage.                -
r This camera contains high-voltage circuits. Do         authorizedping your cameraMinoltaforServicerepairs.Center before ship-
not attempt to disassemble or repair it yourself.        o  lf all indicators blink in the data panel, remove
                                                 the batteries and insert them again. lf normal
                                                       operation does not resume, contact an author-
                                                              ized Minolta Service Facility.
View original page 20Page 21 · Read text
TECHNICAT DETAILS
                                                         This device complies with Part 15 of the FCC
                                                          Rules. Operation is subject to the following two
Lens: 38-14Omm 113.5-9.4 power zoom lens; 8            conditions: (1) This device may not cause harmful
elements in 7 groups (including 2 double-sided            interference, and (2) this device must accept any
                                                                  interference received, including interference thataspheric elements); max. magnification: approx.                                                    may cause undesired operation. Changes or modi- 114X (Macro mode, f = 105mm)                              fications not approved by the party responsible for
Focusing Range: 38mm: O.8m (2.6 ft.) - €;         compliance could void the user's authority to
14omm: 0.65 (2.1 ft.)- €; Macro: O.5m (1.6ft.)- o           operate the equipment. This equipment has been
                                                                                                                aMetering Range (lSO 1O0): 38mm: EV 2.4-17           tested and found to comply with the limits for                                                             Class B digital device, pursuant to Part 15 of the
(113.5, 2.4 sec. - f 116, 1/50O sec.); 140mm: EV        FCC Rules. These limits are designed to provide
4.5-17 (f 19.4, 4 sec. -  f l20, 1/315 sec.)                     reasonable protection against harmful interference
Flash Range (lSO 100): 38mm: O.8 - 5.5m (2.6            in a residential installation. This eqdipment gen-
- 18 ft.); 14Omm: 0.65 - 3.1m (2.1 - 1O.2 tt.l,           erates, uses and can radiate radio frequency                                                            energy and,  if not installed and used in accordance
Macro: 0.5 - 3.8m (1.6 - 12.5 ft.)                         with the instructions, may cause harmful inter-
Batteries: 2 3V lithium batteries (CRl23A)                 ference to radio communications. However. there
Battery Performance: Approximately 23 rolls                is no guarantee that interference will not occur in a
                                                                                                does(based on Minolta's standard test method using            particular installation.  lf this equipment                                                      cause harmful interference to radio or television24 exposure  f ilm with flash 5Oo/o of exposures)                                                                      reception, which can be determined by turning the
Viewfinder:                                                equipment  off and on, the user is encouraged to try
   Magnification: 38mm: O.4OX; 14Omm:            to correct the interference by one or more of the
   1.32X (subject at 4m)                                     following measures:                                                                               . Reorient or relocate the receiving antenna.    Field of view: 85o/o (for subject at 3m)                                              o Increase the separation between the equipment
Dimensions:                                            and receiver.
   Standard model: 132.5 x 7O.5 x 59mm                    . Connect the equipment into an outlet on a circuit
   $-114x 2-314 x 2-5116 in.)                                  different from that to which the receiver is con-
   DATE model: 132.5 x 70.5 x 63mm                       nected.                                                                               . Consult the dealer or an experienced radio/-lY
    $-114 x 2-314 x 2-112 in.l                                technician for help.
Weight {without batteries):
   Standard model: 315g (11-118 oz.l
   DATE model: 3209 (11-5/16 oz.)                           This Class B digital apparatus meets all requirements
                                                       of the Canadian lnterference-Causing  Equipment
Specifications are based on the latest informa-             Regulations.
tion available at the time of printing and are sub-
ject to change without notice.
                    36                                                 37                     /
View original page 21Related documents and language editions
From the M. Butkus archive. Original publisher and archive notices are retained.
Check the model and edition against your equipment.
PDF verified 2026-10-10.