Film cameras
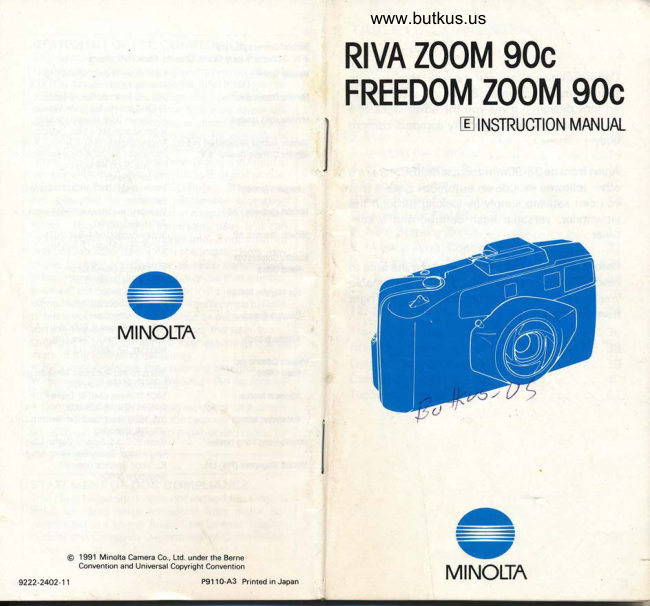
Minolta Riva Zoom 90c Minolta Freedom Zoom 90c User manual
User manual for Minolta Riva Zoom 90c Minolta Freedom Zoom 90c. 24 pages in English. Read the original PDF, download or print a copy without registration.
24 pagesEnglish3.2 MB PDF
Loading your manual…Open PDF directly
Document details
- Brand
- Minolta
- Model / document
- Minolta Riva Zoom 90c Minolta Freedom Zoom 90c
- Document type
- User manual
- Language
- English
- Pages
- 24
- File size
- 3.2 MB
- Category
- Film cameras
- Document date
- Not specified in catalog
Search available document text
Find a term, then jump to its page in the original PDF. Image-only pages may not be searchable; check the PDF for exact wording and diagrams.
Page 5 · Read text
VIEWFINDER                     DATA PANEL


   @    o    @                  tl                              @r,    @                                             ffi          dd

                                          cen-            tl) Remote-control indicator: displayed whenO Focus frame: for focusing, should be
tered on your main subject                               remote-control operation  is set (separately avail-
O Close-framing guides: should be used for         able remote control required)
framing subjects nearer than 1.4 meters (4.6ft.)    O Self-timer indicator: displayed when self-
from the camera when the zoom is set to tele         timer operation  is set
position                    @ Low-battery indicator: displayed when
@ Focus lamp (green): glows to indicate focus,/          battery power is low
exposure lock when the shutter-release button is    @ Flash-setting indicator: displays current
pressed partway down; if the detected subject          flash setting
distance is less than the minimum focus dis-    O ASZ indicator: displayed when ASZ is set
tance, blinks when the shutter-release button is    @ Film-cartridge mark: displayed when film is
pressed partway down                                     loaded; blinks when rewind is complete
@ Flash lamp (orange): operates when the view-    O Film-transport signals: displayed while film
finder is brought to eye level according to the             is extended from the film cartridge
flash settings and lighting conditions; in auto-        €) Frame counter: displays the current frame
flash and manual-fill flash modes glows (pre-        number
flash off) or blinks at varying intervals (pre-flash
onlto indicate that a flash exposure will be made;
blinks 8 times per second (8 Hz) to indicate flash
charging in progress; when flash-off is selected,
blinks twice per second (2Hzl to recommend use
of flash
View original page 5Page 6 · Read text
GETTING STARTED                                       www.butkus.us
 1. POWER

Your Freedom Zoom 9Oc,/Riva Zoom 9Oc uses a
 six-volt 2CR5 lithium battery that supplies power
for all camera operations.

Battery Installation                            Main Switch

                                        n,                                                                                                                          out'o                           @   U


    StiOe the battery-cover release in the directionI                                                The camera is switched on and off by sliding the
shown to open the battery cover.
p Insert the battery as shown, then snap the        main switch in the direction shown; when you                                                         release the switch,  it returns to its rest position.
battery cover closed.
                                      When the camera is switched on, the lens cover
                                              opens automatically and various indicators are
                                                         displayed in the data panel; similarly, switching
                                               the camera off automatically closes the lens
                                                          cover and the data panel display disappears. The
                                                    shutter remains locked when the camera is
                                                    switched off.


    lf necessary, wipe the battery terminals with a
  dry cloth to ensure proper contact.
View original page 6Page 7 · Read text
Low-Battery Indicator                         Auto Power Off
The battery level is automatically checked when       To conserve power, the camqra automatically
the camera is switched on and, subsequently,          shuts itself off  if not operated for more than three
when any of its controls are operated.  lf power is         minutes. To restore the data panel display and
low, the battery condition will be reflected in the        resume operation, simply slide the main switch.
data panel as follows:
          _{-z                                            Battery Cautions       _,+?                             o Read and follow all warnings and instruc- caQ--l   orio
                                                             tions supplied by the battery manufacturer.
Blinking low-battery symbol appears with other        o Keep batteries away from children.
indicators: Camera can be operated, but the bat-            . Do not attempt to disassemble, recharge, or
tery will need to be changed soon.                        short out the battery, or subject it to high
                                                        temperatures or fire. The battery may explode
                                                 and cause burns.
     7-f

Blinking low-battery symbol alone is displayed:
Power is too low for normal operation, and the
shutter remains locked-replace the battery.

lf the data panel remains completely blank when
the camera is switched on, replace the battery.

 o lf you take many flash pictures in succes-
  sion, blinking low-battery symbol may appear
 even with a fresh battery. In this case, waitfor
 a moment; the low-battery symbol will disap-
  pear from the display, and you can resume op-
  eration.
View original page 7Page 8 · Read text
www.butkus.us


Automatic Film Speed Setting                   Loading Film
Only 35mm film can be used in this camera. We
recommend using only DX-coded (DX is printed
on the film cartridge) ISO 25 to 3200 films, for
which the correct ISO speed will be automatically
set.


                                                               StiOe the main switch to turn the camera on.                                                                           ll
                                                pl Use the back-cover release to open the back
                                                          cover, as shown.


                                                              . Before open    i ng the back cover, check that O
                                                                                      is displayed in the frame counter;  if not, film is
                                                          already loaded and the camera should not be
                                                  opened. The type of film loaded can be veri- o Film-cartridges without DX coding. 72-ex-                                                            fied by checking the film window. (Refer to posure cartridges, and Polaroid instant 35mm                                                     p.18 for instructions on rewinding an unfin-  films cannot be used.
  .  lf you insert the battery after loading film,            ished roll of film.)                                                              . Load film in subdued light, or at least shad- the film will not advance. Make sure to load                                                    ed from direct sunlight. the battery prior to loading film.
View original page 8Page 9 · Read text
@' 0                                                                                    ^rL
                                                           I
                                              @o--i.                                                                                                            ^,1"
p Place the film cartridge into the film chamber     p Ctose the back cover.
as shown.
E L"y the film flat between the guide rails and       The film will advance automatically to the first
e)ftend the tip of the film over the take-up drum to       frame. When 1 appears in the frame counter.
the film mark.                                         the camera is ready for taking pictures.


  . Make sure the tip of the film is shaped cor-
  rectly; otherwise, the film may not wind prop-
                                                                                    lf the film is incorrectlv loaded, the frame  erly.
 o lf the film extends too far, gently push the           counter will remain at O and blink. Open the
                                                       back cover and repeat steps 2 through 5.  excess back into the cartridge.
View original page 9Page 10 · Read text
www.butkus.us
 3. HOLDING THE CAMERA                 4. SHUTTER-RELEASE BUTTON


To obtain sharp, blur-free photos, hold the cam-           In describing camera operation, this manual re-
                                                             fers to two shutter-release-button operating po-era as still as possible and steady  it against your
                                                                 sitions: a pre-release "partway-down" positionface or body. To take pictures, press the shutter-
                                                             that can be used to memorize current focus andrelease button gently with a slow steady squeeze
   never a quick jab.                                  exposure settings (see Focus Hold, p.241, and an-                                                       "all-the-way" down position that triggers the
                                                         shutter-release sequence. Both operating posi-Two recommended ways of holding the camera
are shown here. For vertically framed pictures,           tions, as well as the rest position, are illustrated
make sure to hold the camera so that the flash is          above.
on lop.

             When taking pictures, be
                  sure to keep your fingers
                      clear of the flash.
View original page 10Page 11 · Read text
5. TAKING A PICTURE

                   @
                  o

This section provides a basic description of cam-     p Press the shutter-release button partwayera operation. enough to get you started taking                                          down so that the focus lamp glows, then all-the-pictures. A more complete explanation, as well                                             way down to take the picture.
as information on optionalfeatures, can be found
in Operation in Detail.                                                           After you take a picture the film is automatically
                                                 advanced and the frame counter increases bV
   StlOe the main switch to turn the camera ON.I                                                          one.
p Looking through the viewfinder, center the
focus frame on your subject.
                                                             . The camera's minimum focus distance is
                                                  O.75 meters (2.5 feet) when the lens is set to
  . When you look through the viewfinder the                  its wide position (38mm), and 0.9 meters (3.0
  lens zooms automatically, based on your sub-              feet) when set to its tele position (9Omm). Be
  ject's distance from the camera. Refer to p.19           sure to check that your subject is not closer
  for details on ASZ operation.                        than the applicable minimum focusing dis-
  .  l{ ambient lighting conditions require the           tance. Referto p.26 for additional information
  use of flash, the orange flash lamp will glow          on taking closeup pictures.
 when the camera is brought to eye level, and         o When done taking pictures, be sure to
  flash willf ire when the picture  is taken. Refer           switch tlre camera off to conserve battery
  to p.28 for details on flash operation.                   power.
View original page 11Page 12 · Read text
OPERATION IN DETAIL                                      www.butkus.us
 6. FILM REWIND                          7. AUTO STANDBY ZOOM (ASZ)

Automatic Film Rewind                      When you switch the power on and look through
                                                      the viewfinder, the camera automatically meas-
                                                          ures the distance to your subject and sets a zoom                 , +>                                 position based on that distance. ASZ is the sys-@o-lE          -)o30             tem that integrates these functions.
After the last frame on the roll is exposed, the       Eye Start Operation
camera automatically starts rewinding the film.        Automatic zoom control is activated by an
While rewind is in progress, the frame counter        eyepiece sensor located just above the view-
counts down to 0.                                       finder eyepiece. Whenever the sensor detects
                                                an object closer than approximately 6 to 8 cm (2-
Completion of film rewind is indicated in the data       3/8 to 3-1 /8 in.l, automatic zoom control  is
panel: O will be displayed by the frame counter.         switched on.
and the film-cartridge mark blinks. Open the
back cover and remove the film. The shutter re-            . When detection by the eyepiece sensor is
mains locked  if a rewound film cartridoe  is left in           interrupted following an exposure, the zoom
the film chamber.                                          position is automatically reset to 38mm; ASZ
                                                           operation will resume immediately when the
                                                 camera is brought to eye level.                  Manual Start of Film            .  lf you rest the camera following ASZ op-                  Rewind                                                           eration without taking a picture, the current                  You can also rewind a
                            roll of film before the           lens oosition remains set.
                             last picture is taken. To
                             start film rewind manu-
                                ally, use a ball-point pen
                           or similar object to press
                       the rewind button locat-
                    ed on the bottom of the
                      camera.

                                                      ASZ's automatic zoom control is switched on by an
                                                                 eyepiece sensor that detects when you look through the
                                                                 viewfinder.
View original page 12Page 13 · Read text
Automatic Zoom Control                         ASZ's working range is approximately 0.75-8m
 By automatically adjusting the zoom position            (2.5-26tt.l; for subjects within this range, a dis-
 when you look through the viewfinder, ASZ         tance-based zoom position will be automatically
 saves time in setting up a picture. The zoom po-         set when you frame the subject in the view-
 sition set is based on subject distance, which is         finder. When the camera-subject distance is
 rapidly calculated by the AF system when the          greater than 8m (26ft.), the lens focal length will
 camera isbroughttoeye  level. In manycasesthe         be set to the tele position (90mm).
 ASZ zoom setting will be just right for your
 subject, and all that remains is to press the shut-
 ter-release button down to take the picture.         ASZ Working Range
 At other times, you may want to use a zoom
 position other than that set by ASZ, and for these
 cases manual zoom control, described in the
 following section, should be used.
                                                          Out of range ASZ control Zoom set to 9Omm


 ASZ's zoom control is based on subject distance.

20
View original page 13Page 14 · Read text
www.butkus.us
  8. MANUAL ZOOM CONTROL

 Should you want to control the zoom setting       One shot override of ASZ lasts only as long as
 yourself, two options for power-assisted manual          detection by the eyepiece sensor is not inter-
 zoom control are available: one-shot override,           rupted; once the camera is rested so that detec-
 convenient if you want to override ASZ just oc-           tion by the eyepiece sensor is interrupted, ASZ is
 casionally, and fixed override, which cancels ASZ    I     reset and automatic zoom control resumes when
 for the duration of the current operating cycle-        you next look through the viewfinder.
  i.e., until the camera is switched off.                      )

 One-Shot Override                                 Fixed Override

                                              o-r-{.                                                       ftl     ,                    ^"1                @@_!-q{                                                        Fixed override, which provides you with open-
                                                 ended manual zoom control, is set first pressing
                                                           the release-mode button and then, while keeping
                                                                                    it held in. moving the zoom lever in either di- Operating manual zoom control is easy. Press                                                           rection. When you do so, the ASZ indicator dis- the zoom lever to the left to zoom the lens                                                  appears from the data panel, indicating that towards its wide position (38mm), or to the right                                               manual zoom control is set. (The self-timer in- to zoom towards the tele end (9Omm). When the                                                               dicator will be displayed initially, but disappears scene is framed as you like, press the shutter-                                           when the procedure is completed.) release button down to take the picture as you
 would otherwise.                                                           l    With manual control set, the lens can be zoomed
                                                                                                    rr I,   r'                                 by pressing the zoom lever in either direction, as  t,l  'r  :rrr:r::irl,  r,t,..r,rrl.t "r .     :'j.':r,:,  i,r,t                                                       )    described above for one-shot mode, the differ-
                                                  ence being that the zoom position you select will
                                                remain set from frame to frame unless you
                                                           decide to change it. Once selected,  f ixed override hft-ffiil
                                                   remains set until the camera is switched  off;
                                           when you turn the camera on again, ASZ opera-
             38mm              90mm           tion resumes.22ffiffi                                                                             23   ffi
View original page 14Page 15 · Read text
9. FOCUS HOLD

Focus hold enables you to adapt autofocus for sit-        Focusing in Special Situations
uations where your main subject is positioned         Focus hold should also be used whenever your
outside the center of the viewfinder frame.  lt is          subject falls into any of the following categories:
also useful for photographing certain types of
subjects, described below, that cannot be auto-          . Bright light sources such as the sun or neon
focused directly.                                                  lights
                                         o Highly reflective surfaces such as water, mir-
                                                                   rors, etc. (A)
                                                             . Flame, fireworks, etc.
                                                             . Dark objects and surfaces with low reflectance
                                         o Objects behind glass, bars, or other suoh par-
                                                                    titions (B)
                                         o Objects significantly smaller than the focus
Off-Center Subjects                              frame as seen through the viewfinder
   Center the focus frame on your subject, thenI                                                             In such cases, use focus hold to set the focuspress the shutter-release button partway down
                                                         distance on another object at the same distanceso that the focus lamp glows.
                                                        camera as your subject.p Keeping the shutter-release button held part-        from the
way down so that the focus lamp continues to
glow, recompose the frame as desired and then
press all-the-way down to take the picture.

 o While the focus lamp glows, current focus
 and exposure settings are fixed.
                                                                                                                                             (B)  . Focus hold is easily canceled by removing
 your finger from the shutter-release button.
                                                                                                                                                                              ll ,'   ll flsll
                                                                                                                                                                                                L dJ@l
View original page 15Page 16 · Read text
www.butkus.us
  1.'O,r

Your Minolta Freedom Zoom 9Oc,/Riva Zoom 9Oc         C: This region indicates the camera's operating
lets you take pictures of subjects as near as          range, extending from infinity down to the near
0.75m (2.5ft.)from the camera when the zoom is         focusing distance, within which the camera can
set to wide, or O.9m (3.Oft.) at the tele position.           give you sharply focused pictures. In the dia-
                                                  gram, applicable for focal lengths greater than
Closeup operation is illustrated in the two dia-       56mm, this region is further subdivided into
grams below, one for wide to normal zoom set-          regions Cr and Cz. Within region Cz, operation  is
tings, and the other for normal to tele.              as usual; for subjects within region Cr, You
                                                    should compose your subject in the viewfinder
               less than                                        using the close-framing guides.Wide    O.4m      0.75m ffi        (1.3ft.)    (2.5ft.)            6
                                c     A   rBrhrj            tl
               less than
Tele     0.4m         O.9m         1.4m
                  (3ort)     (4.6ft.)   €
                                    cr      Bfuo"tn'               Ic'
                                                                Close-framing guides
A: Although ASZ operates and the shutter can be
released, pictures taken in this range will not be
in focus.
B: This region is just below the camera's near
focusing distance; whenever the camera detects
at subject within this range, the focus lamp blinks
and the shutter remains locked. You will be ableto resume operation by increasing the camera-   $'v
subject distance so that  it falls within region C.
View original page 16Page 17 · Read text
Depending on your choice of  f lash mode and pre-
                                                         flash settings, five different flash-control posi-
                                                            tions are possible:
                                                                  ,                                              AUro Autof lash
                                                          ,,                                               auro Autoflash with ore-flash
                                                                        ,     Manual-fill flash
                                                                                          ll    fuanu"t+ill flash with pre-flash
The flash-mode and pre-flash buttons enable you                  @  rlasrr-onto tailor flash operation to suit a variety of photo-
graphic situations.                                      Autoflash is the flash-mode default position, set
                                                  each time the camera is switched on; pre-flash
The flash-mode button allows you to select be-            will be set to on or off according to the position set
                                                                                                                                                                                                                                                  f irsttween autoflash, manual-fill flash, and flash-off             at the time the camera was switched off (the
modes, and the pre-flash button enables you to          time you switch the camera on, or after loading a
switch the camera's red-eye-reduction control on       new battery, pre-flash off will be set). At any
and off as desired.                                           point in the course of operation. the current flash
                                                                setting can be confirmed by referring to the data
By pressing the flash-mode button successively,           panel's  f lash-setti ng indicator.
the flash mode changes as shown

             y Autoflash ^                                         \     Flash-off  e        Manual-fill flash

Pressing the pre-flash button enables you to turn
the camera's pre-flash function on and off
        Pre-flash-on    e        Pre-flash-ofl
                -+
View original page 17Page 18 · Read text
www.butkus.us

Flash Mode                                           Flash-Off ( 0   )
Autoflash  (^",t"         )                                             In certain situations non-flash photography may
ln autoflash mode.^:1"   the flash fires whenever         be preferred- for instance, whdn photographing
needed. When you look through the vieMinder,          twilight scenes, or if taking pictures inside a
the metering system evaluates the ambient        museum.
lighting. In cases where  it determines that flash
is needed,  it will be fired automatically when the      When flash-off mode is selected, the flash re-
picture is taken.                                  mains off regardless of the ambient lighting.  In
                                                   cases where. the metering system judges that
                                                                  used, however, the flash lampManual-Fill Flash ( t  tt  )                               flash should be
The autoflash mode described above provides           blinks twice per second (2Hz)when you framethe
dependable operation for general photographic          subject in the viewfinder.
situations, including firing the flash under bright
conditions to fill in subject shadows when suf-      When flash-off mode is selected, shutter
ficiently strong backlight  is detected.                   speed will be slower; use of tripod is recom-
                                                 mended.
ln certain cases, however, selecting manual-fill
flash mode, where the flash fires each time a pic-
ture is taken regardless of ambient lighting con-        Pre-Flash (^ll" tt  )
ditions, may give improved results. One example       When pre-flash  is selected, a low level flash burst
might be cases where a subject's features are              is fired just before each flash picture. By causing
obscured by small or light shadows not sufficient         the diameter of your subject's pupils to narrow
to activate auto fill-flash. Another would be sit-          before the actual exposure, pre-flash reduces the
uations where your subject is illuminated by a        appearance of red eye in the picture.
fluorescent light source that might otherwise
produce a greenish picture cast.
View original page 18Page 19 · Read text
Flash Lamp                                         Flash Range
Unlike the focus lamp, which operates onlywhen         Flash range will vary with both the lens zoom
pressure is applied to the shutter-release button,           setting and the speed of the  f ilm in use. The table
the flash lamp operates automatically when you        below shows the flash range for ISO 100, 200,
lookthrough theviewfinder. Depending on light-        and 400 soeed films with the lens at wide and
ing conditions, flash settings, and charge status,           tele positions.
the flash lamp remains dark. glows, or blinks.
Operation of theflash lamp issummarized below.
                                                          rso 100    rso 200    rso 400
                                                              0.75-6.0m  O.75-8.5m  O.75-12m                                      38mm                          Charging complete                          2.5-20ft.    2.5-28t1.    2.5-3gft.
                During
                                                               O.9-3.0m   0.9-4.2m   0.9-6.0m                cnarge    Without   with           9Omm
                                                                                   3.0-9.8ft.    3.0-14ft.    3.0-2Oft.                             preflash   preflash
 Autoflash                                           Flash Range (lSO 1OO film)
 (when flash    Blinks at                Blinks at
 fires) or      8 times    Glows     varying
 Manual-fill    per second              intervals
 flash
 Autoflash
 (when flash          Remains dark                    Out of range     Correctexposure Underexposure
 doesn't fire)
                Blinks twice per second when         9Omm Flash-off                                                         O.9m      3m
              use of flash is recommended                                  (3 Oft.)          (9.Bft.)
                                                            Out of range Correct  Underexposure
                                                                              exposure

                                        When taking flash pictures, be sure to check
                                                              that your subject is within range of the flash.
                                                                                                    a?
View original page 19Page 20 · Read text
www.butkus.us


                                         o Selecting self-timer operatien sets a tempo-
                                                       rary cancellation of ASZ, indicated by the
                                                     disappearance of the ASZ indicator from the
                                                      data panel. Once self-timer operation is set,                    8-ii  ^,,1            use the zoom lever to frame the scene as de-
                                                          sired. After the picture is taken, ASZ is auto-
                                                             matically restored.
                                                            . To cancel the self-timer priorto pressing the
                                                        shutter-release button, press the release-
To set a ten-second delay in shutter release,      mode button a second time. To cancel the
press the release-mode button so that the self-          self-timer once the shutter-release button has
                                                                pressed, but before the picture has beentimer indicator ( U ) is displayed in the data       been
panel. Frame your subject in the viewfinder as         taken, switch the camera off.
desired, then press the shutter-release button
down in the usual way to take the picture. Both
the self-timer lamp on the front of the camera and
the data panel indicator will begin blinking to
indicate operation, and the picture will be taken
about ten seconds later.
View original page 20Page 21 · Read text
TROUBLE SHOOTING                                                                                                                                                       lm


       Problem                    Cause                                      Solution                    Page
 Entire picture blurred  @ Camera Movement        @ Hold camera steady and release shutter gently     14
 Subiect out of focus   O Autofocus windows obstructed  @ Keep hands, camera strap, and other objects       14
                                                             awav.
            @ Subject too close to camera    @ Check that the subject is beyond the minimum     26
                                                                     focusing distance.
            @ Focus frame not on main subject' @ Use focus hold.                              24
            @ Special focusing situation    @ Use focus hold on another subject that is an       25
                                                                  equal distance away.
 Picture foggy or has   @ Dirty Lens           @ Clean lens as explained  in Care and Storage       40
 blurry areas                                                            section.
 Picture too dark, or   @ Lens or flash obstructed     @ Keep hands, camera strap, and other objects        14
 partial picture                                                awav.
           @ Subject beyond flash range    @ In low light, make sure subject  is within flash      55
                                                                    range.
 Shutter cannot be   @ Camera switched off       O Switch camera on.                             7
 released       @ Battery  is exhausted       @ Replace battery.                              6,8
           @ Flash charging          @ Wait a moment for the flash to charge.           32
           @ Subject too close to camera    @ Check that the subject  is beyond the minimum     26
                                                                     focusing distance.
           @ Rewind is complete but film   @ Remove film.                                  18
                                cartridge remains in the camera
           @ Circuit fault          @ Remove and reinstall the battery.                 6
                                                              Cancel operation as needed.                    35 ASZ does not function  o self-timer or remote control    o
                              operation set
           @ Override set           @ Restore ASZ as exolained in section 8            23
 Frame counter blinks  @ Winding malfunction      @ Rewind the film by pressing the rewind button.     18
 during operation and
 the shutter cannot be
 released
View original page 21Page 22 · Read text
www.butkus.usATTACHING THE NECKSTRAP         OPTIONAL ACCESSORIES


Attach the supplied neckstrap to the camera's                                                lR Remote Control RC-1strap eyelet as illustrated above.                                A convenient wireless infrared remote control.
                                                    designed exclusively for the Freedom Zoom9Oc/
                                                     Riva Zoom 9Oc, is available as an optional ac-
                                                   cessory. The remote control features single-
                                            frame and double-frame release modes, and
                                                works at distances of up to 6m (2Oft.) from the
                                                   camera.

                                                            For operating information, refer to the instruction
                                              manual orovided with the remote control.
                                                          *-dJ-Ua1x
                                                                       HB
View original page 22Page 23 · Read text
CARE AND STORAGE

.  lf the lens becomes dirty, clean  it gently with a        o When not in use, keep the camera in a cool, dry
lens brush.  lf necessary, moisten a sheel of lens         place away from dust and chemicals. For ex-
tissue with one drop of lens-cleaning fluid and         tended storage we recommend that you place the
gently wipe the lens. Never touch the lens sur-        camera in an airtight container with a drying
face with your fingers.                                 agent such as silica gel.
o Never use alcohol or chemical solvents on the       o This camera contains high-voltage circuits. Do
camera body. lf it is dirty, wipe it gently with a          not attempt to disassemble or repair  it yourself.
soft, clean, dry cloth.                          o  lf you have questions about your camera, con-
o Never subject the camera to shock, high heat,           tact your local camera dealer. For more informa-
or humidity. Be particularly careful not to leave  it          tion write to the Minolta distributor or subsidiary
in the glove compartment or other places in           in your area (addresses listed at the back of this
motor vehicles where  it may be subjected to high         manual).
temperatures.                                              . To assure prompt service, please contact an
o Entry of sand, salt, or other grit may cause         authorized Minolta Service Center before ship-
costly or irreparable damage to the camera. Use         ping your camera for repairs.
extra care when taking pictures at the beach.
. This camera is designed for use between -10
and40"c/14 to 1040F.
o Using the camera at very lowtemperatures im-
pairs its performance.  In cold weather, carry the
camera inside your coat to keep  it warm. Do not
transfer the camera directly from an extremely
cold to warm area, since condensation may form
inside and prevent normal operation.
o Do not let the caarera get wet. Water seepage
could result in costly or irreparable damage to
internal parts.
View original page 23
Page 24 · Read text
www.butkus.us TECHNICAL DETAILS

  Type: 35mm autofocus lens-shutter camera           Controls: Main switch; zoom lever for powered
  Lens: 38-90mmt/3.5-7.7 power zoom lens           manual zoom; flash-mode butlon; pre-flash but-
  Autofocus System: 3-beam infrared type with          I     ton; release-mode button; manual rewind button;
  cancelable focus hold; range: O.75m/2.5tt.         focus and exposure settings fixed when shutter-
  (wide), O.9m.23.ffi.  (tele) to infinity                       release button is held partway down
 Zoom Control: Sensor-activated Auto Standby         Film Transport: Automatic threading, auto ad-
 Zoom (ASZ)sets a zoom position based on subject        vance to first frame, auto winding, auto rewind
  distance; zoom lever for manual override              and auto rewind stop; rewind button for manual
  Metering System: External, two-segment           start of rewind
  silicon photocell for separate illuminance read-       Data Panel: LCD with indications for ASZ, re-
  ings of center and background picture areas             mote-control, self-timer, battery condition, flash
 Autoexposure: Programmed autoexposure;         mode, frame number, film transport, film loaded
  range (lSO 100): EV 6 ro EV 17 (1/4 sec ar f,/3.5         Self-Timer: 10-sec. shutter-releasedelay; oper-
  to 1 ,/350 sec at f,219) at 38mm serting, EV 8 to EV          ation indicated by blinking LED on front of camera
  17 l1/4 sec. at  f /7.7 to 1/250 sec. f/22], at        and data panel self-timer indicator
 90mm setting                                   Power: 6V lithium battery pack (2CR5) powers
  Flash System: Built-in flash with auto, manual,        camera operation; data-panel indicator showS
 and flash-off modes selectable; autoflash: flash          battery condition; shutter remains locked when
  fires automatically when required; manual-fill          battery is exhausted
  flash: flash fires on each exposure; range (lSO         Battery Performance: Approximately 25 rolls
                                                         (based on Minolta's standard test method, using  1OO): O.15-6.Om/2.5-20tt. at 38mm, 0.9-
  3.0m,23.0-9.8ft. at 9Omm; with pre-flash control        24-exposure film with flash on 5Oo/o of the ex-
  selected, a low-power pre-exposure flash burst is         posures)
  given approximately O.75 secs. before each flash        Dimensions: 147.5(W) X 73.S(H) X b9.5(D)mm
  exposure; recycling time: 3.5 sec                                               (5-1 3/ 1 6 X 2-7 /8 X 2-S / 1 6 in.l
  Film Speed: Automatic setting for DX-coded        Weight (without battery): 3209 (11-S/16 oz.l
  ISO 25-320O film                                      Optional Accessories: lR Remote Control RC-1
 Viewfinder: Real-image type with focus frame,
  close-framing guides; magnification: 0.45X at         Specifications and accessories are based on the
 38mm, O.95X at 90mm; image area: 85%           latest information available at the time of printing
  coverage; eyepiece LED lamps show focus and        and are subject to change without notice.
  flash status
42
View original page 24From the M. Butkus archive. Original publisher and archive notices are retained.
Check the model and edition against your equipment.
PDF verified 2026-10-10.